As an Amazon Associate I earn from qualifying purchases.
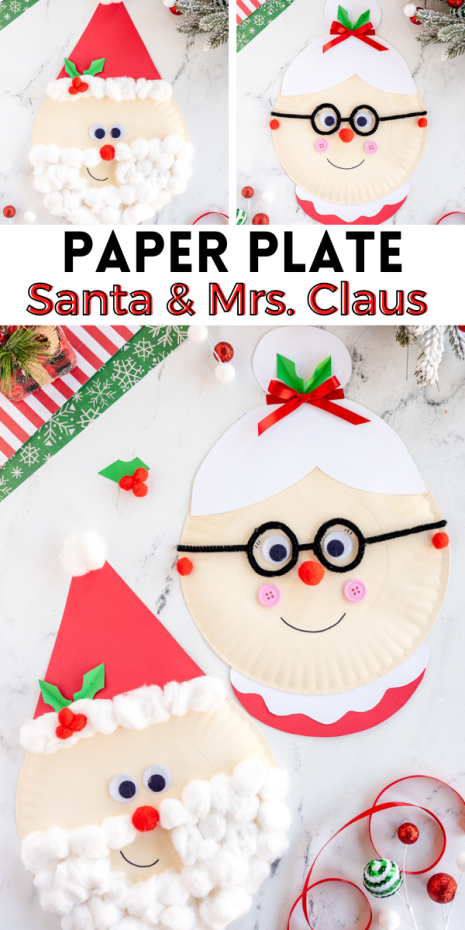

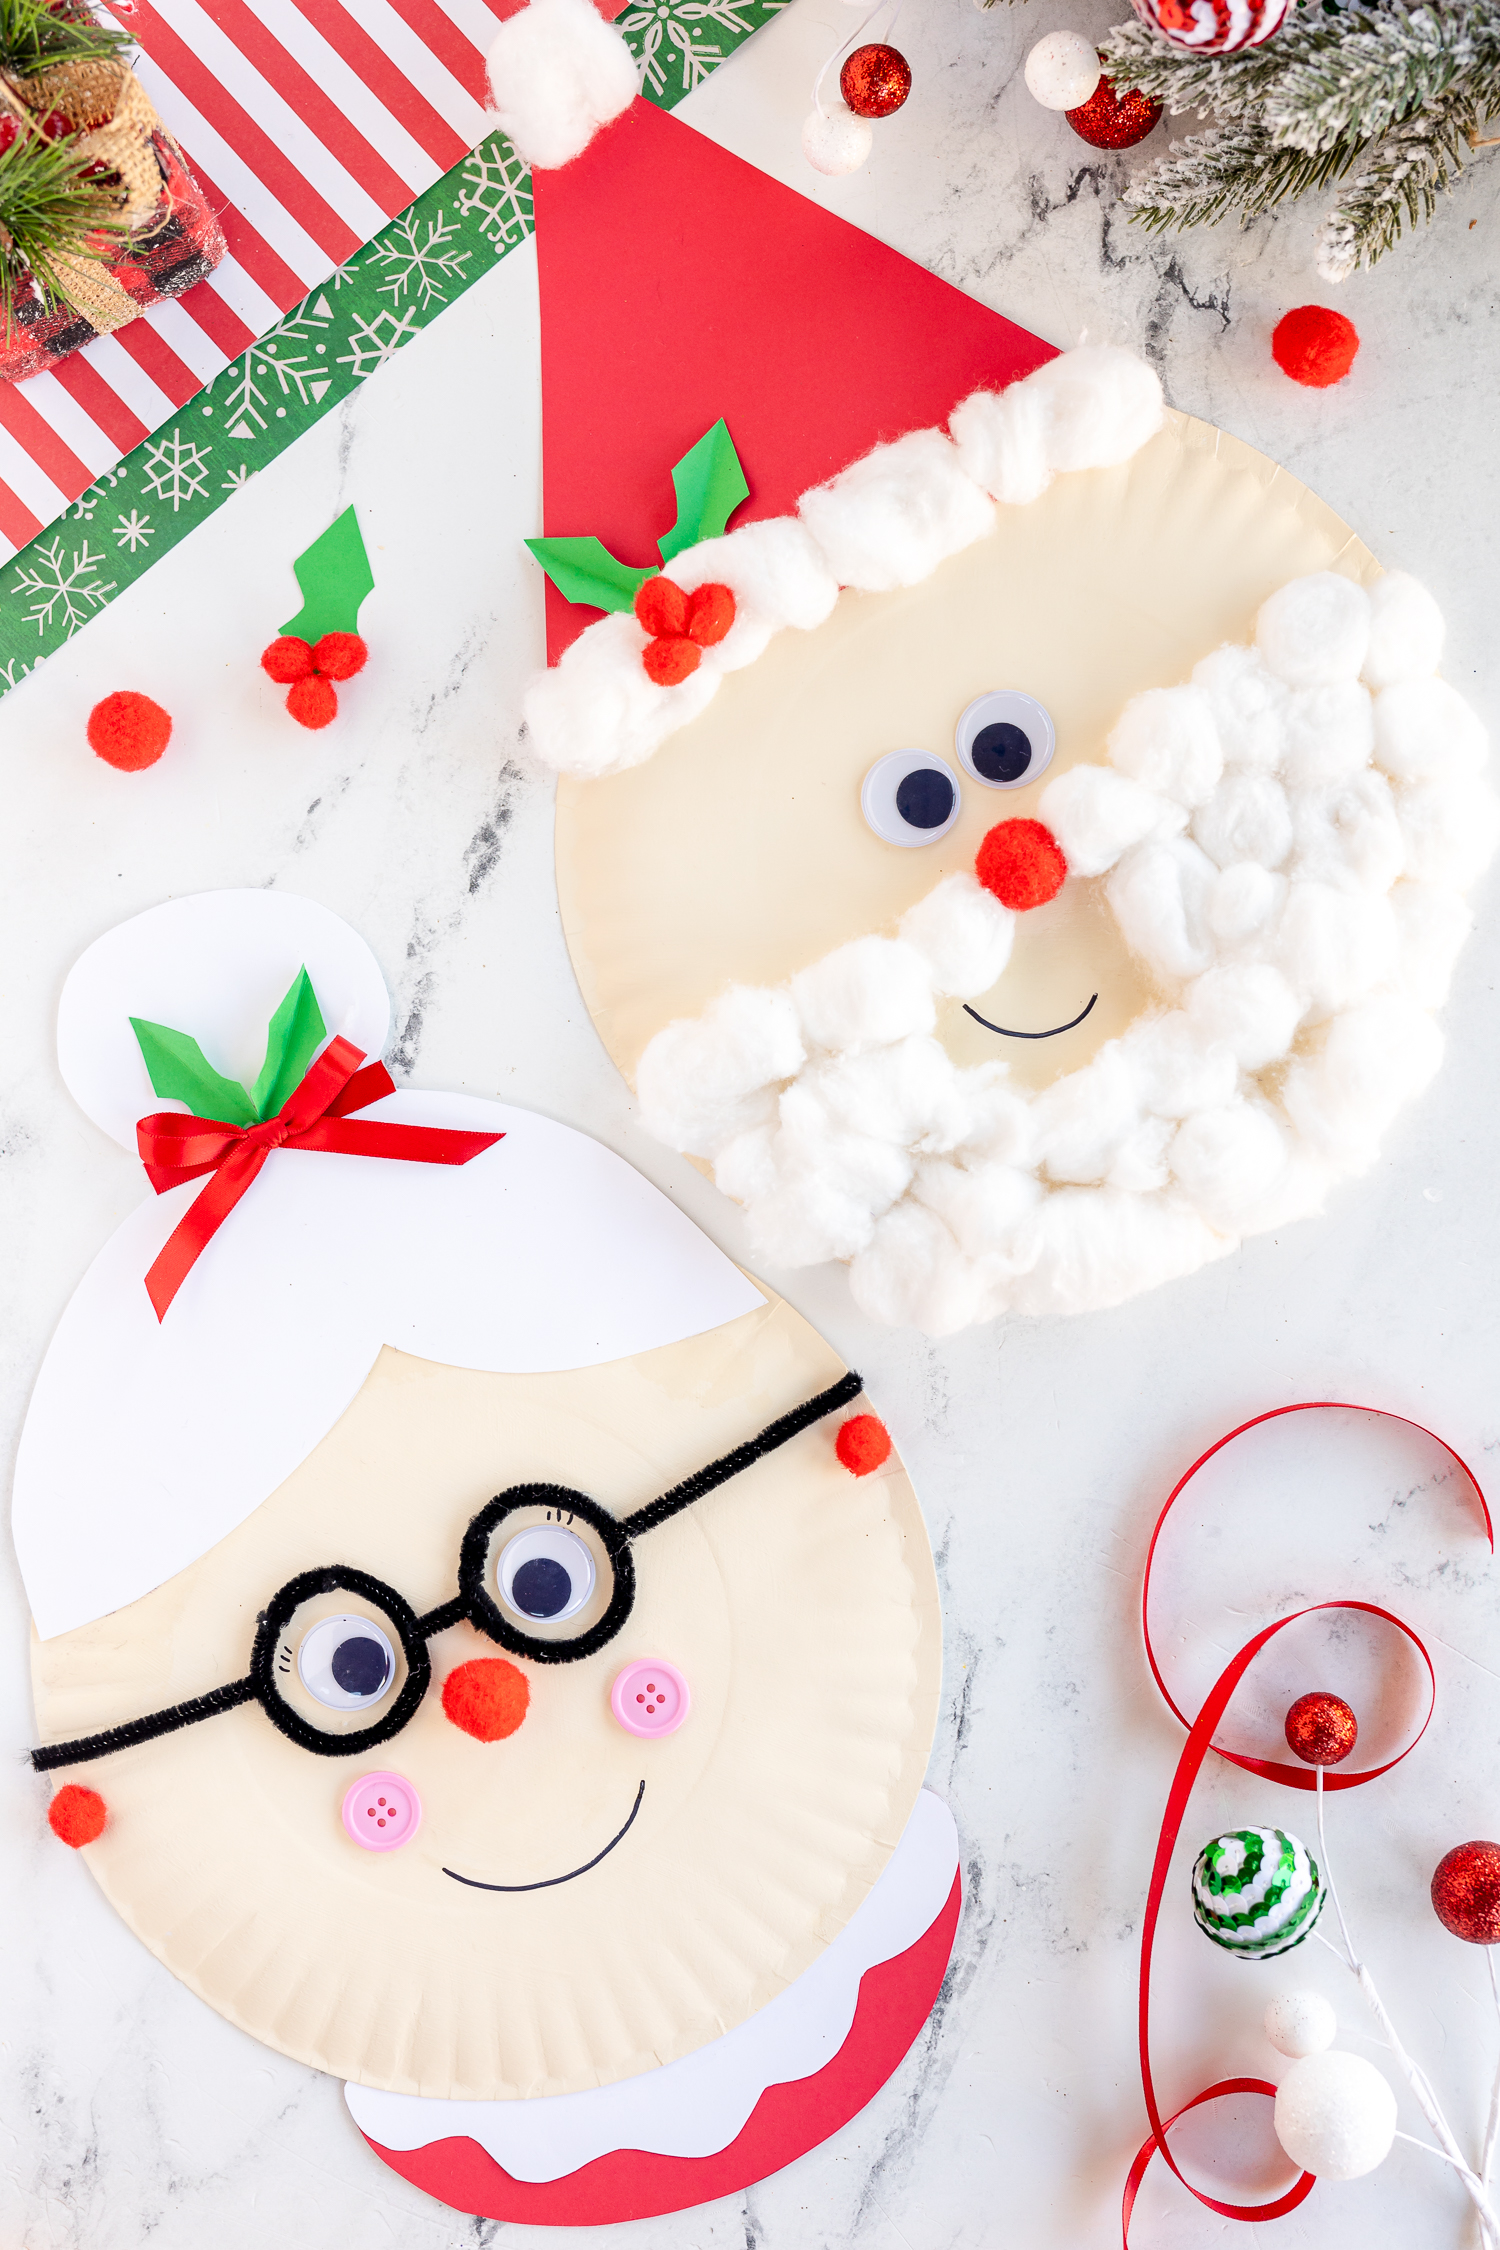
Make your own paper plate Santa and Mrs. Claus for the holidays this December. Kids will love making their favorite Christmas characters.
Are you ready for the holidays? I sure am! We do tons of crafts this time of year. They are perfect for gifts, just for fun, or to decorate the house. We make new crafts and do fun activities together throughout the holiday season. It helps get us into the Christmas spirit and keeps the kids busy when we can’t go outside. I’m adding these Santa and Mrs. Claus activities to my paper plate crafts collection, and I’m so excited to share them with you. Continue reading to see how simple and adorable they are.
HOW TO VIDEO:
Materials Needed to Make Paper Plate Santa and Mrs. Claus
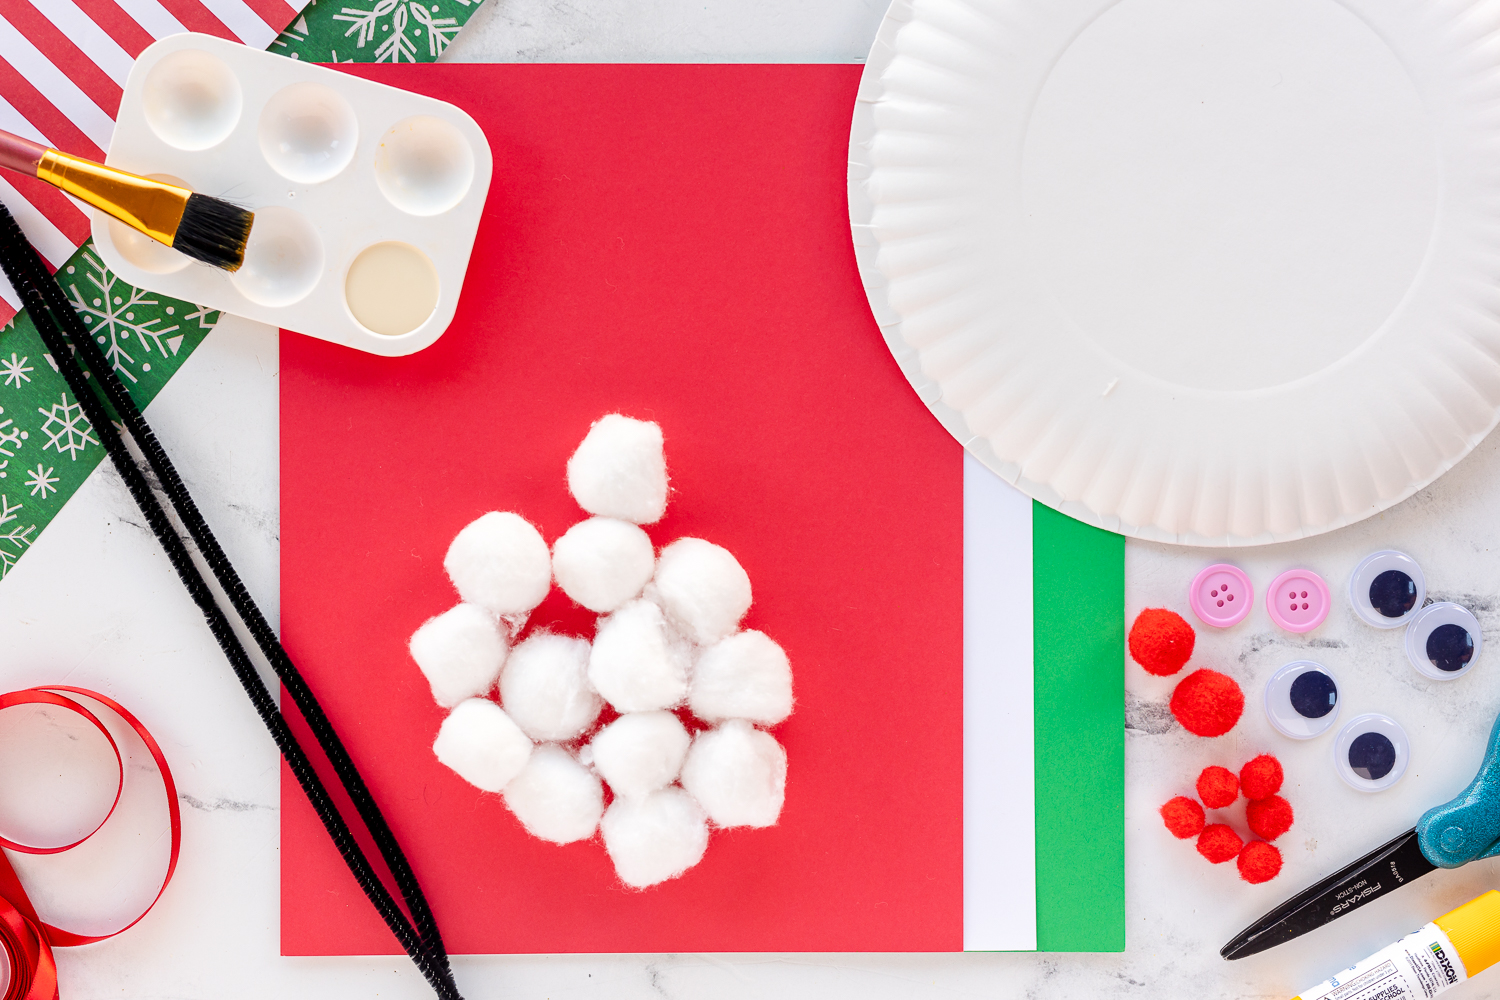
Listed here are the materials you need to make BOTH crafts. Find all of these materials at the craft store or your local supercenter. I love shopping for craft supplies at Walmart; they have really upped their craft supplies in the recent years. The Dollar Store may also have these materials on hand.
- Regular-Sized Paper Plates
- white, red, and green cardstock
- red pom poms
- light pink medium size buttons
- red ribbon
- Flesh-colored paint – I used Antique White in Apple Barrel Brand but you can match your families skin tone!
- Black Pipe Cleaners
- cotton balls
- FREE Santa & Mrs. Claus TEMPLATE
If you don’t want to make Santa, leave out the cotton balls and red card stock. If you don’t want to make Mrs. Claus, leave out the ribbon, pink buttons, white card stock, and pipe cleaners. Most of these materials come together, so you will have items needed for both crafts. This cute Santa and Mrs. Claus are super simple to make each year. Be sure to put names on the back, so you know who they belong to and which year they were made. It’s an easy peasy keepsake for kids.
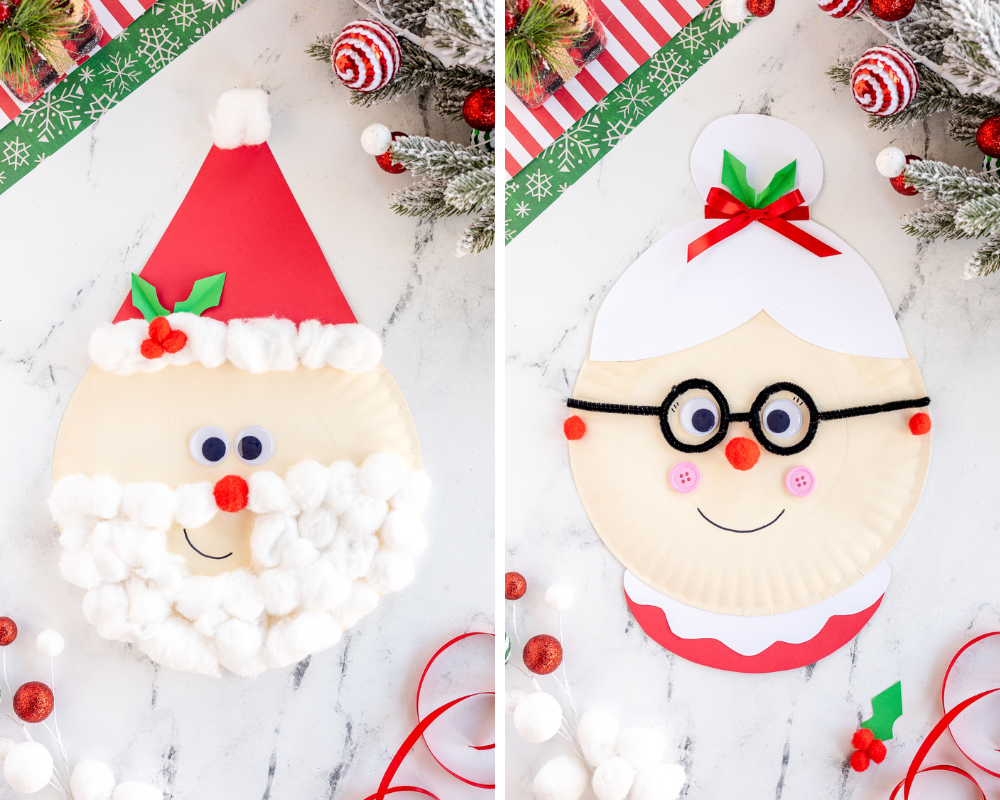
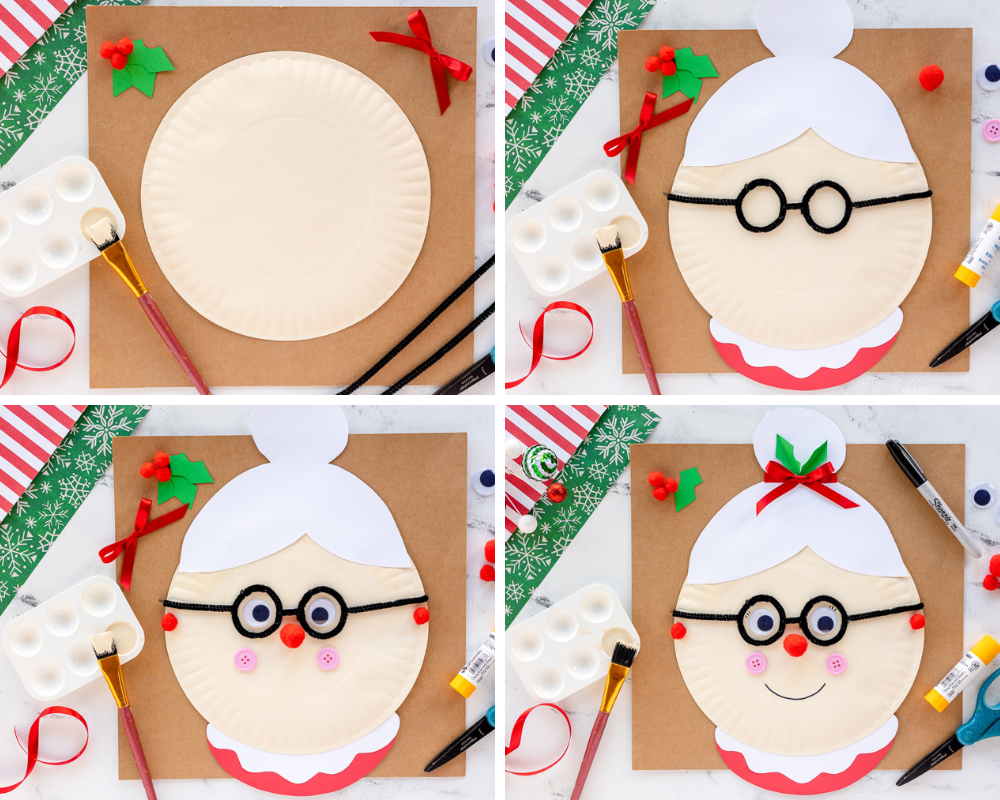
How to Make Paper Plate Mrs. Claus
Here are the step-by-step instructions to make Mrs. Claus using the above mentioned materials.
- Paint your paper plate with skin-colored paint and let it dry.
- Cut out your hair template and accessories.
- Glue them to the head and bottom of the plate for part of her “dress.”
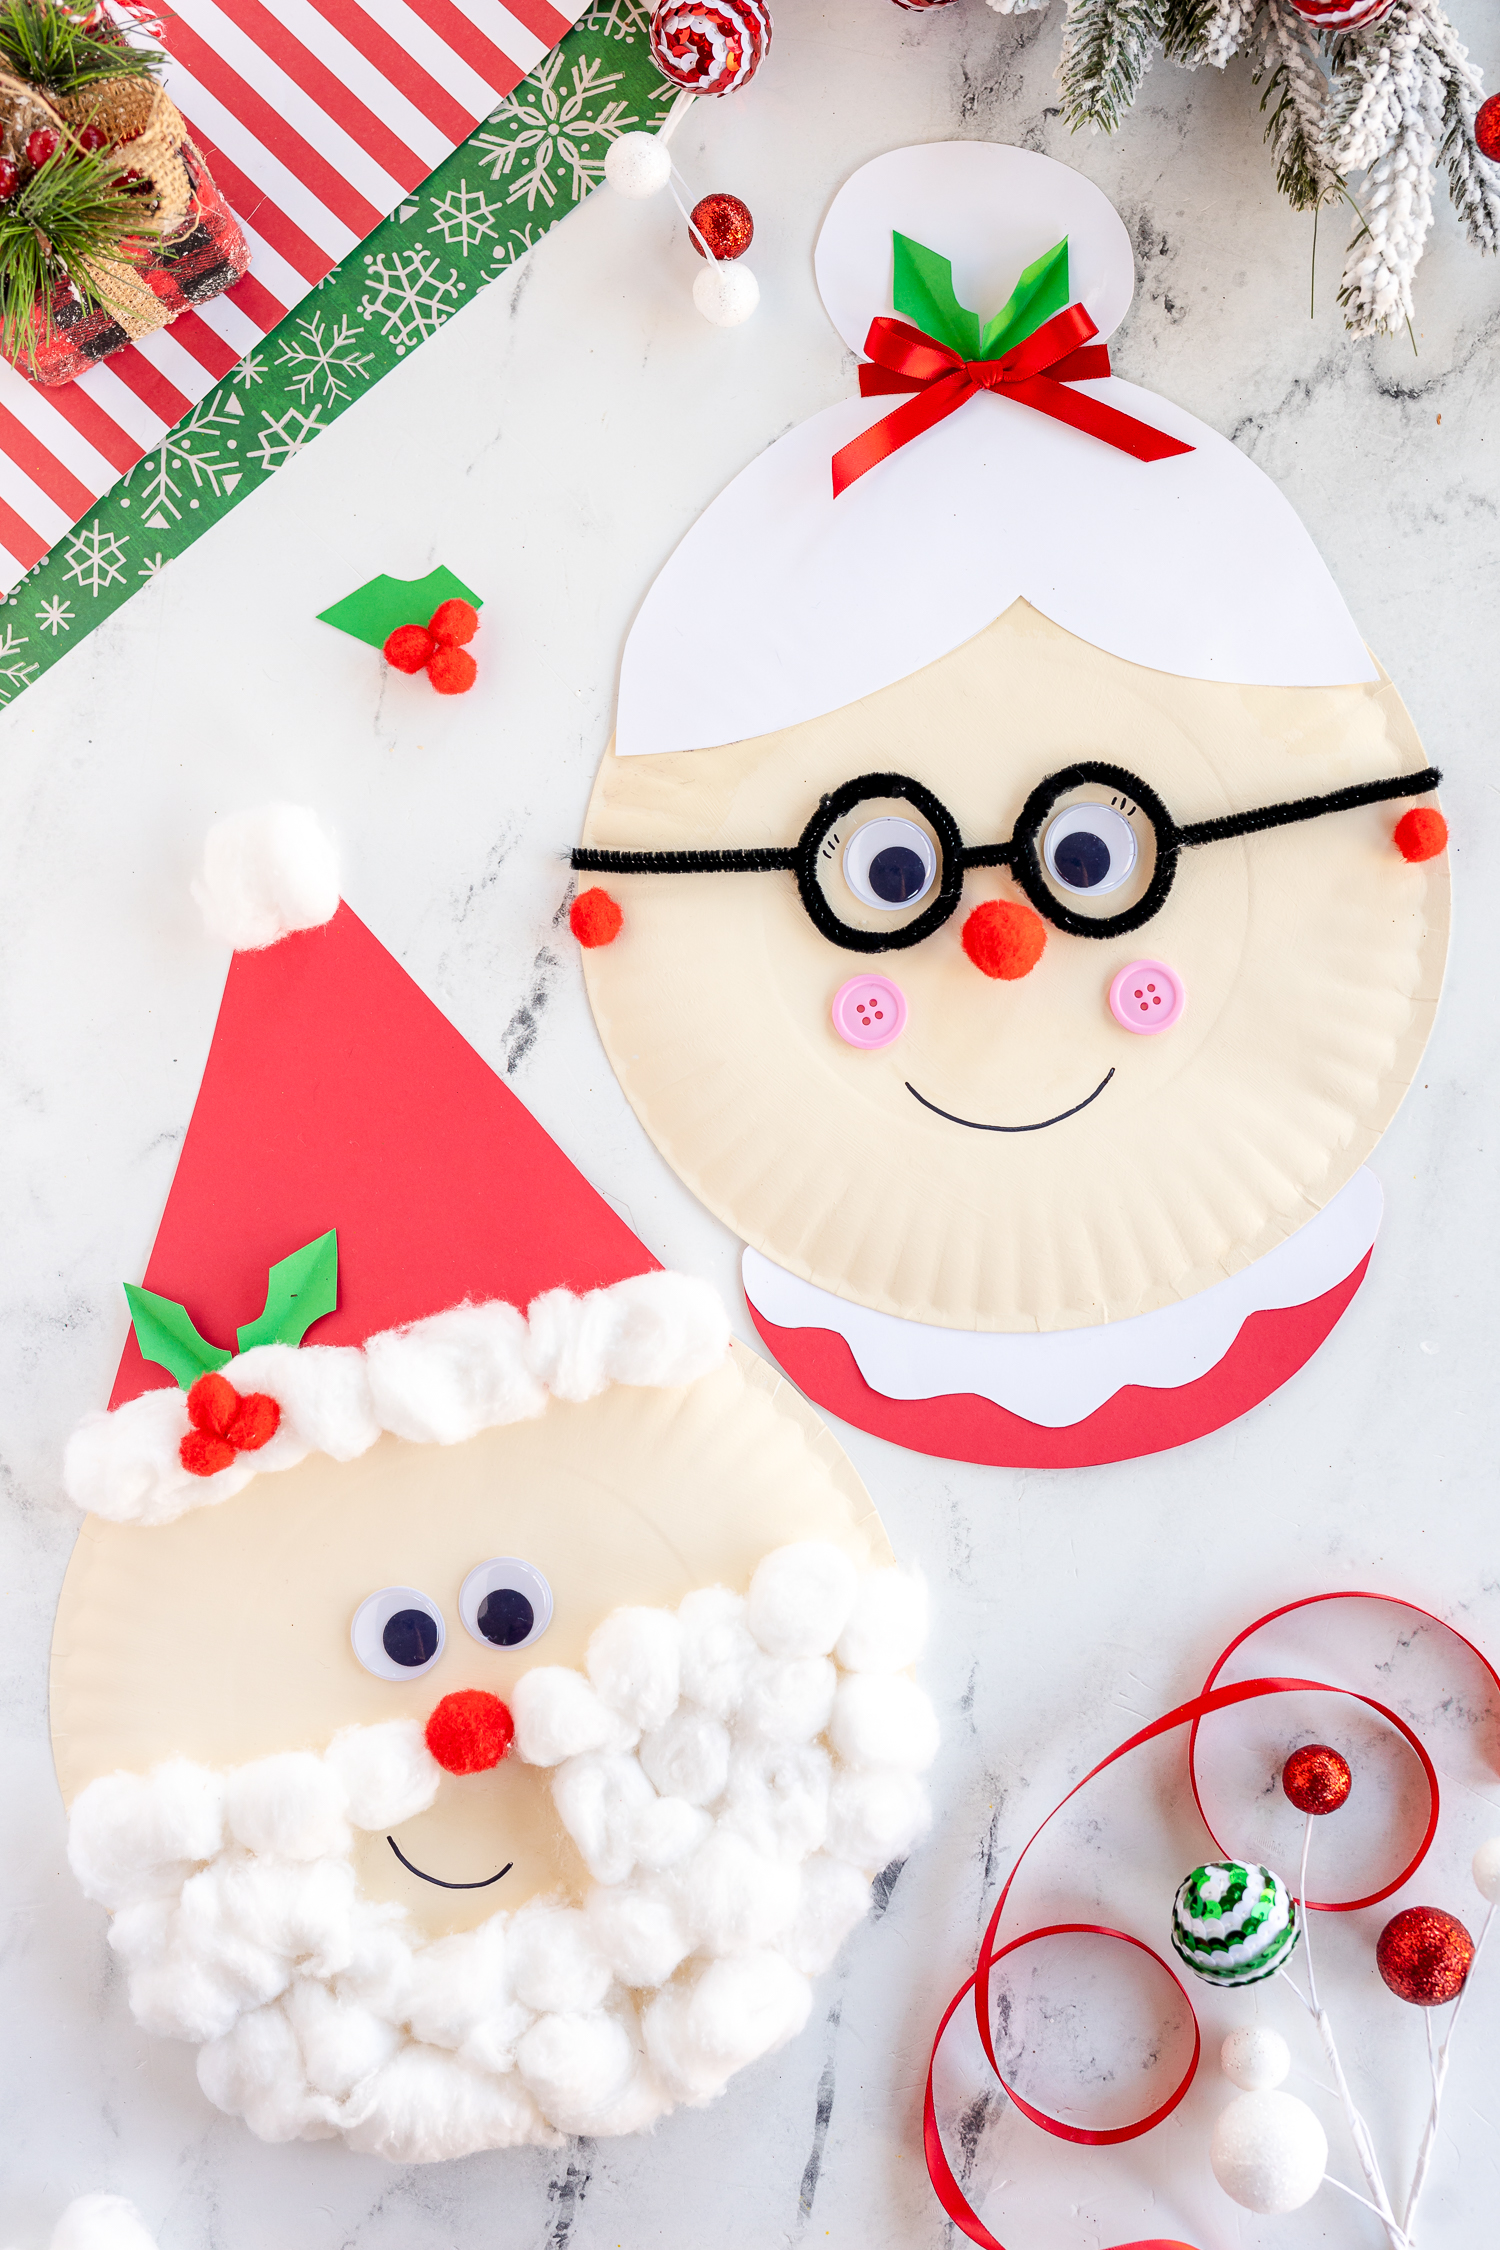
- To make glasses, put 1 black pipe cleaner in half and form each piece into a circle. Glue them to the paper plate with a small space between them. Glue a small black piece in between to go over the nose and some to the sides to connect to her ears.
- Add a red pom pom to either side of her head as earrings directly below the glasses.
- Glue on googly eyes in the glasses and add small eyelashes.
- Add a red nose, pink button cheeks, and a smile.
- Then, add holly leaves and ribbon near the bun of her hair.
Use this craft to work on those fine motor skills and to work with older kids on following directions. The end result is an adorable and fun way to display Christmas decor for December.
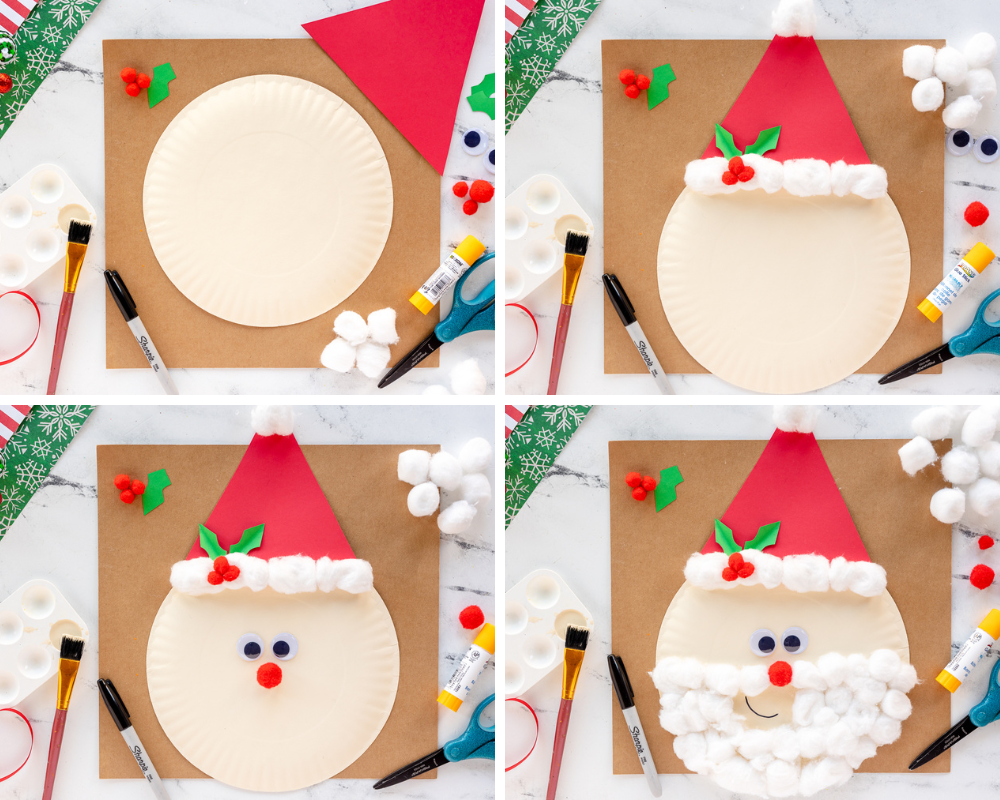
How to Make Paper Plate Santa Craft
Here are the step-by-step instructions to make Santa using the above mentioned materials. Ho Ho Ho!
- Paint your paper plate with skin-colored paint and let it dry.
- Add a large red hat with a cotton ball brim around the edge. Glue a cotton ball to the top as well. Use a piece of red construction paper to create the hat. Just cut a simple triangle from the paper.
- Glue holly berry leaves and red pom poms beneath to look like holly berries.
- Add googly eyes and a red nose.
- Draw on a smirk and then glue on pom poms around the bottom half of his face. These will be Santa’s beard.
Note: I lightly pulled on the cotton balls to make them bigger, so I didn’t have to use as many but feel free to use as many as you want. I cut out the holly leaves, folded them in half, and then opened them up to make a crease and give them more dimension.
Add these simple crafts to your December calendar, or complete them on Christmas Eve for extra fun before the big man comes. 😉
Decorate for the Christmas Season
Use these adorable Santa and Mrs. Claus paper crafts to decorate your home or classroom this holiday season. Young children will love making their own after reading a fun story about Santa and the holidays. Hang them in windows or around the Christmas tree to bring a little joy into your space. You’ll have your own little North Pole, and they are so much fun to make. Happy Crafting!
If you are looking for more Christmas crafts for your kids, check these out:
- Santa Cookies – These are perfect for little hands
- Mini Santa Hat Cupcakes – Kids will enjoy making these sweet treats
- Christmas Dinosaur Crafts – Your messy little monster will enjoy making these
- Paper Plate Grinch – Who doesn’t love the Grinch?


Can’t find the Mrs. Claus template. It goes to a page that can’t be found
Where do you get the printable for Mr and Mrs claus
Hi Amanda! I’m sorry about that! You should be able to find it in the supply list and in the printable craft card now! ENJOY 🙂