As an Amazon Associate I earn from qualifying purchases.
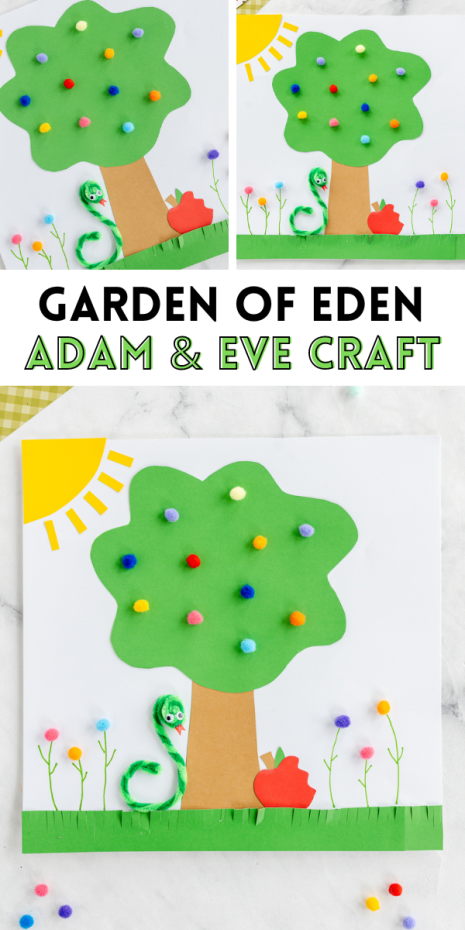
This Garden of Eden paper craft is a great Bible craft activity to go along with an Adam and Eve Bible lesson.
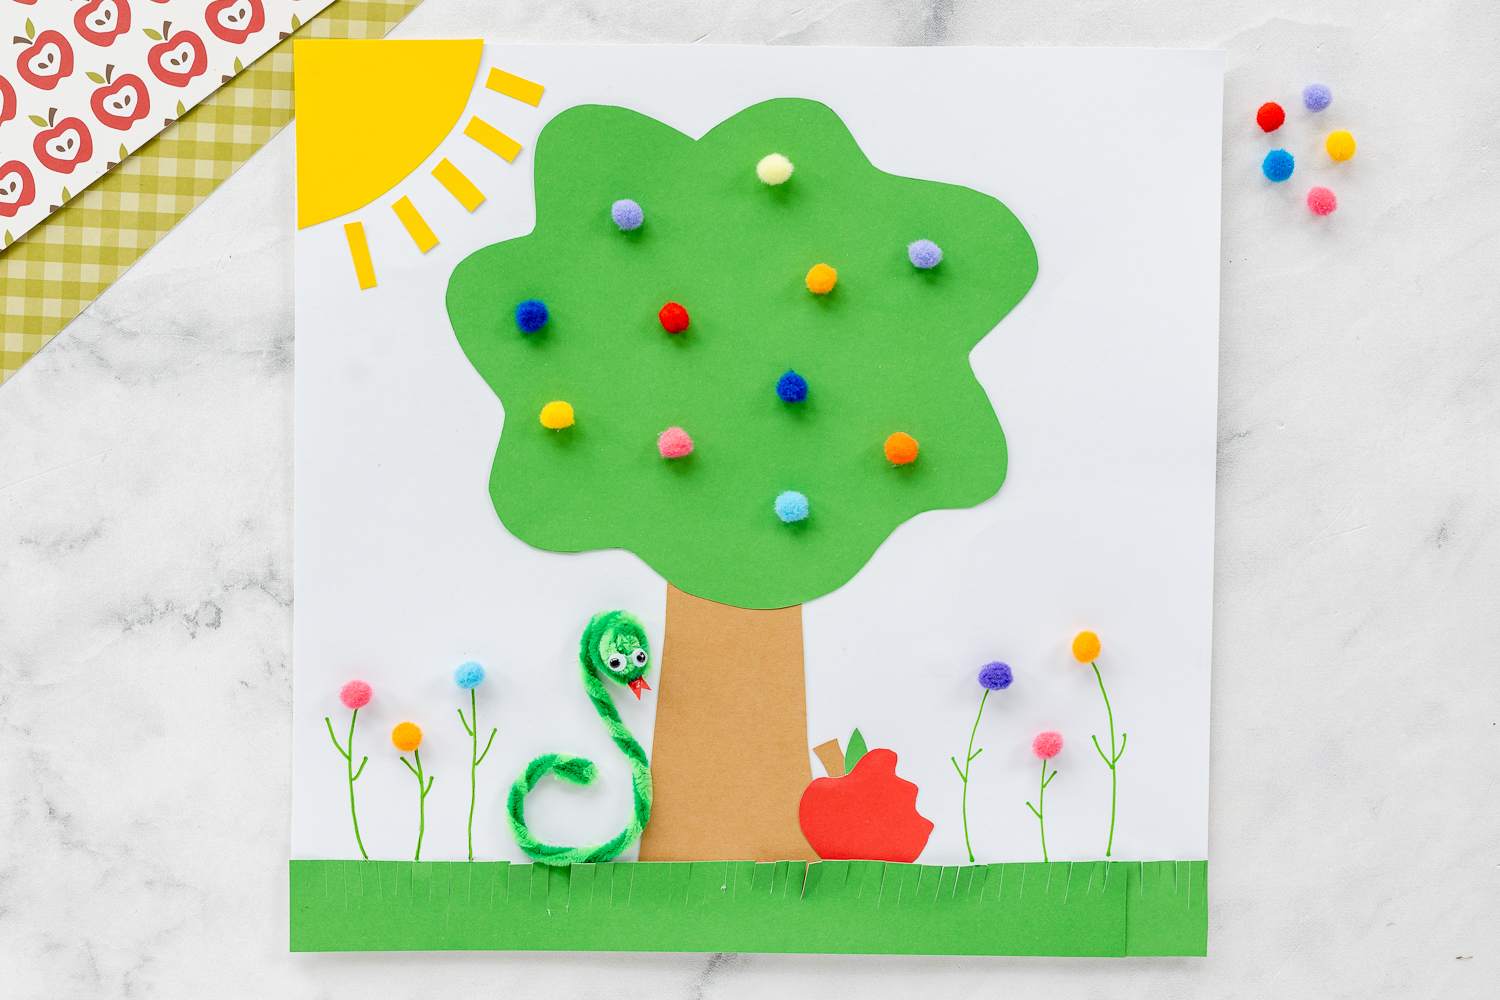
The story of this beautiful garden is one of the first Bible stories kids learn about, after the days of creation. This Adam and Eve craft is a simple activity to help teach the story of Adam and Eve and their time in the Garden of Eden. At the Garden of Eden they spent time walking and talking with God before sin entered the world through the trickery of Satan, who came to earth as a snake. Satan tricked Eve into eating a forbidden truth and at that moment sin entered the world.
While we don’t know exactly what kind of fruit was forbidden, an example of an “apple” is an easy option for kids to understand and visualize. The Bible actually never tells us exactly what type of fruit was on the tree of knowledge of good and evil.

Adam & Eve Craft HOW-TO Video:
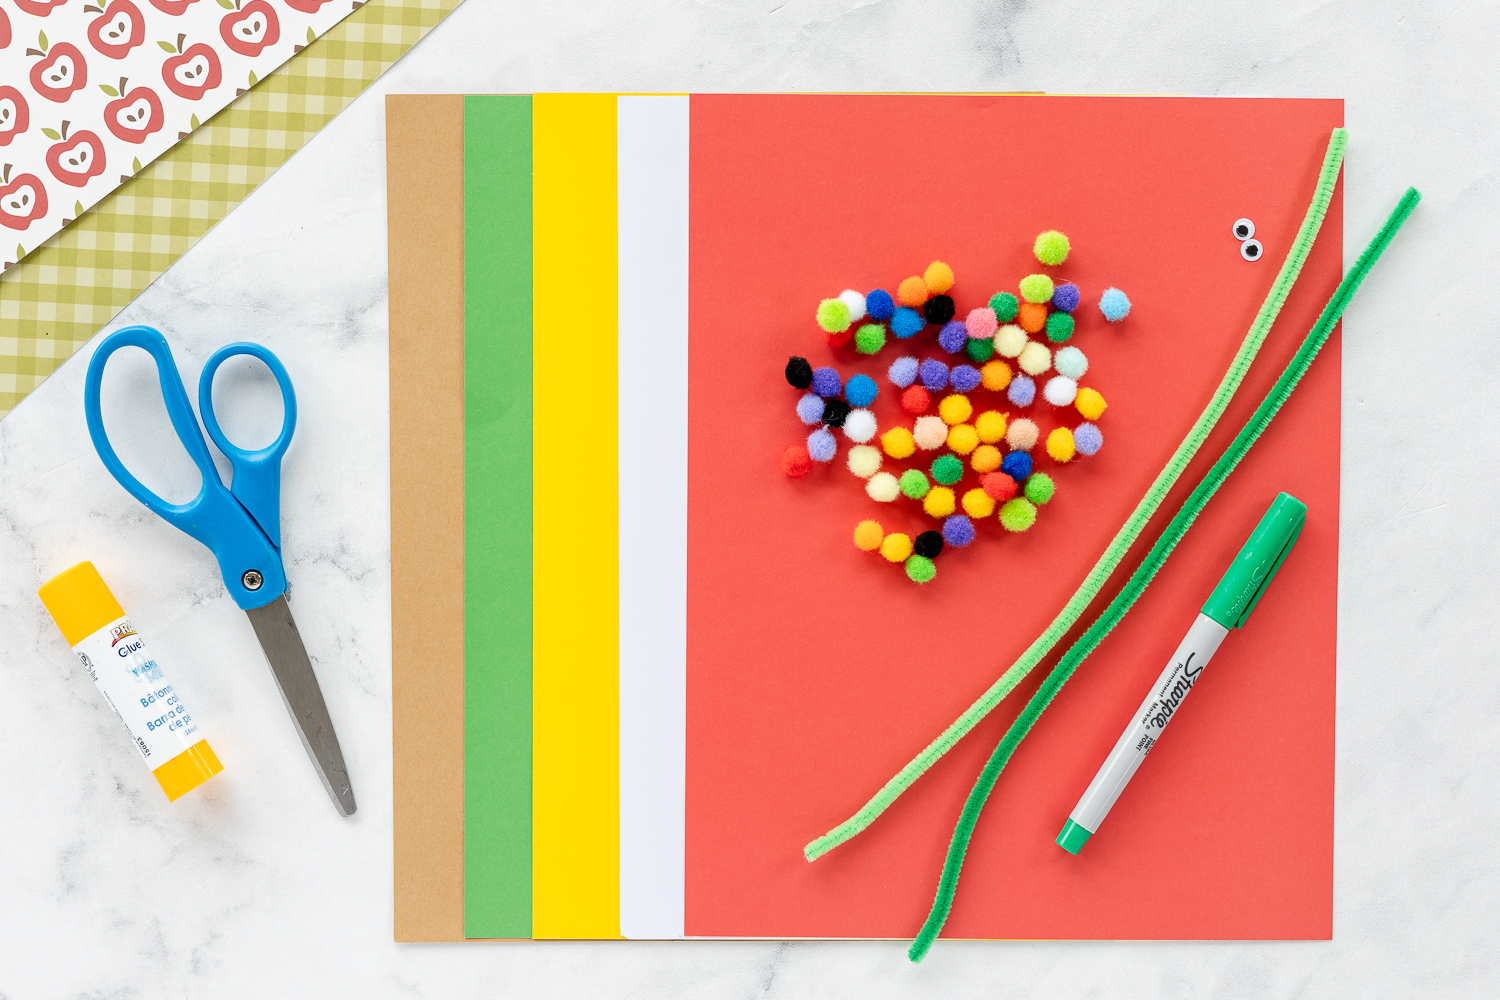
Supplies Needed to Make a Adam & Eve Craft
- Cardstock – green, yellow, brown, red
- Mini Poms Poms in various colors
- Green Sharpie
- Green Pipe Cleaner (2 shades)
- Tiny Googly Eyes
- FREE Garden of Eden Template
How to Make A Garden of Eden Craft
Here’s how to make this simple Bible craft.
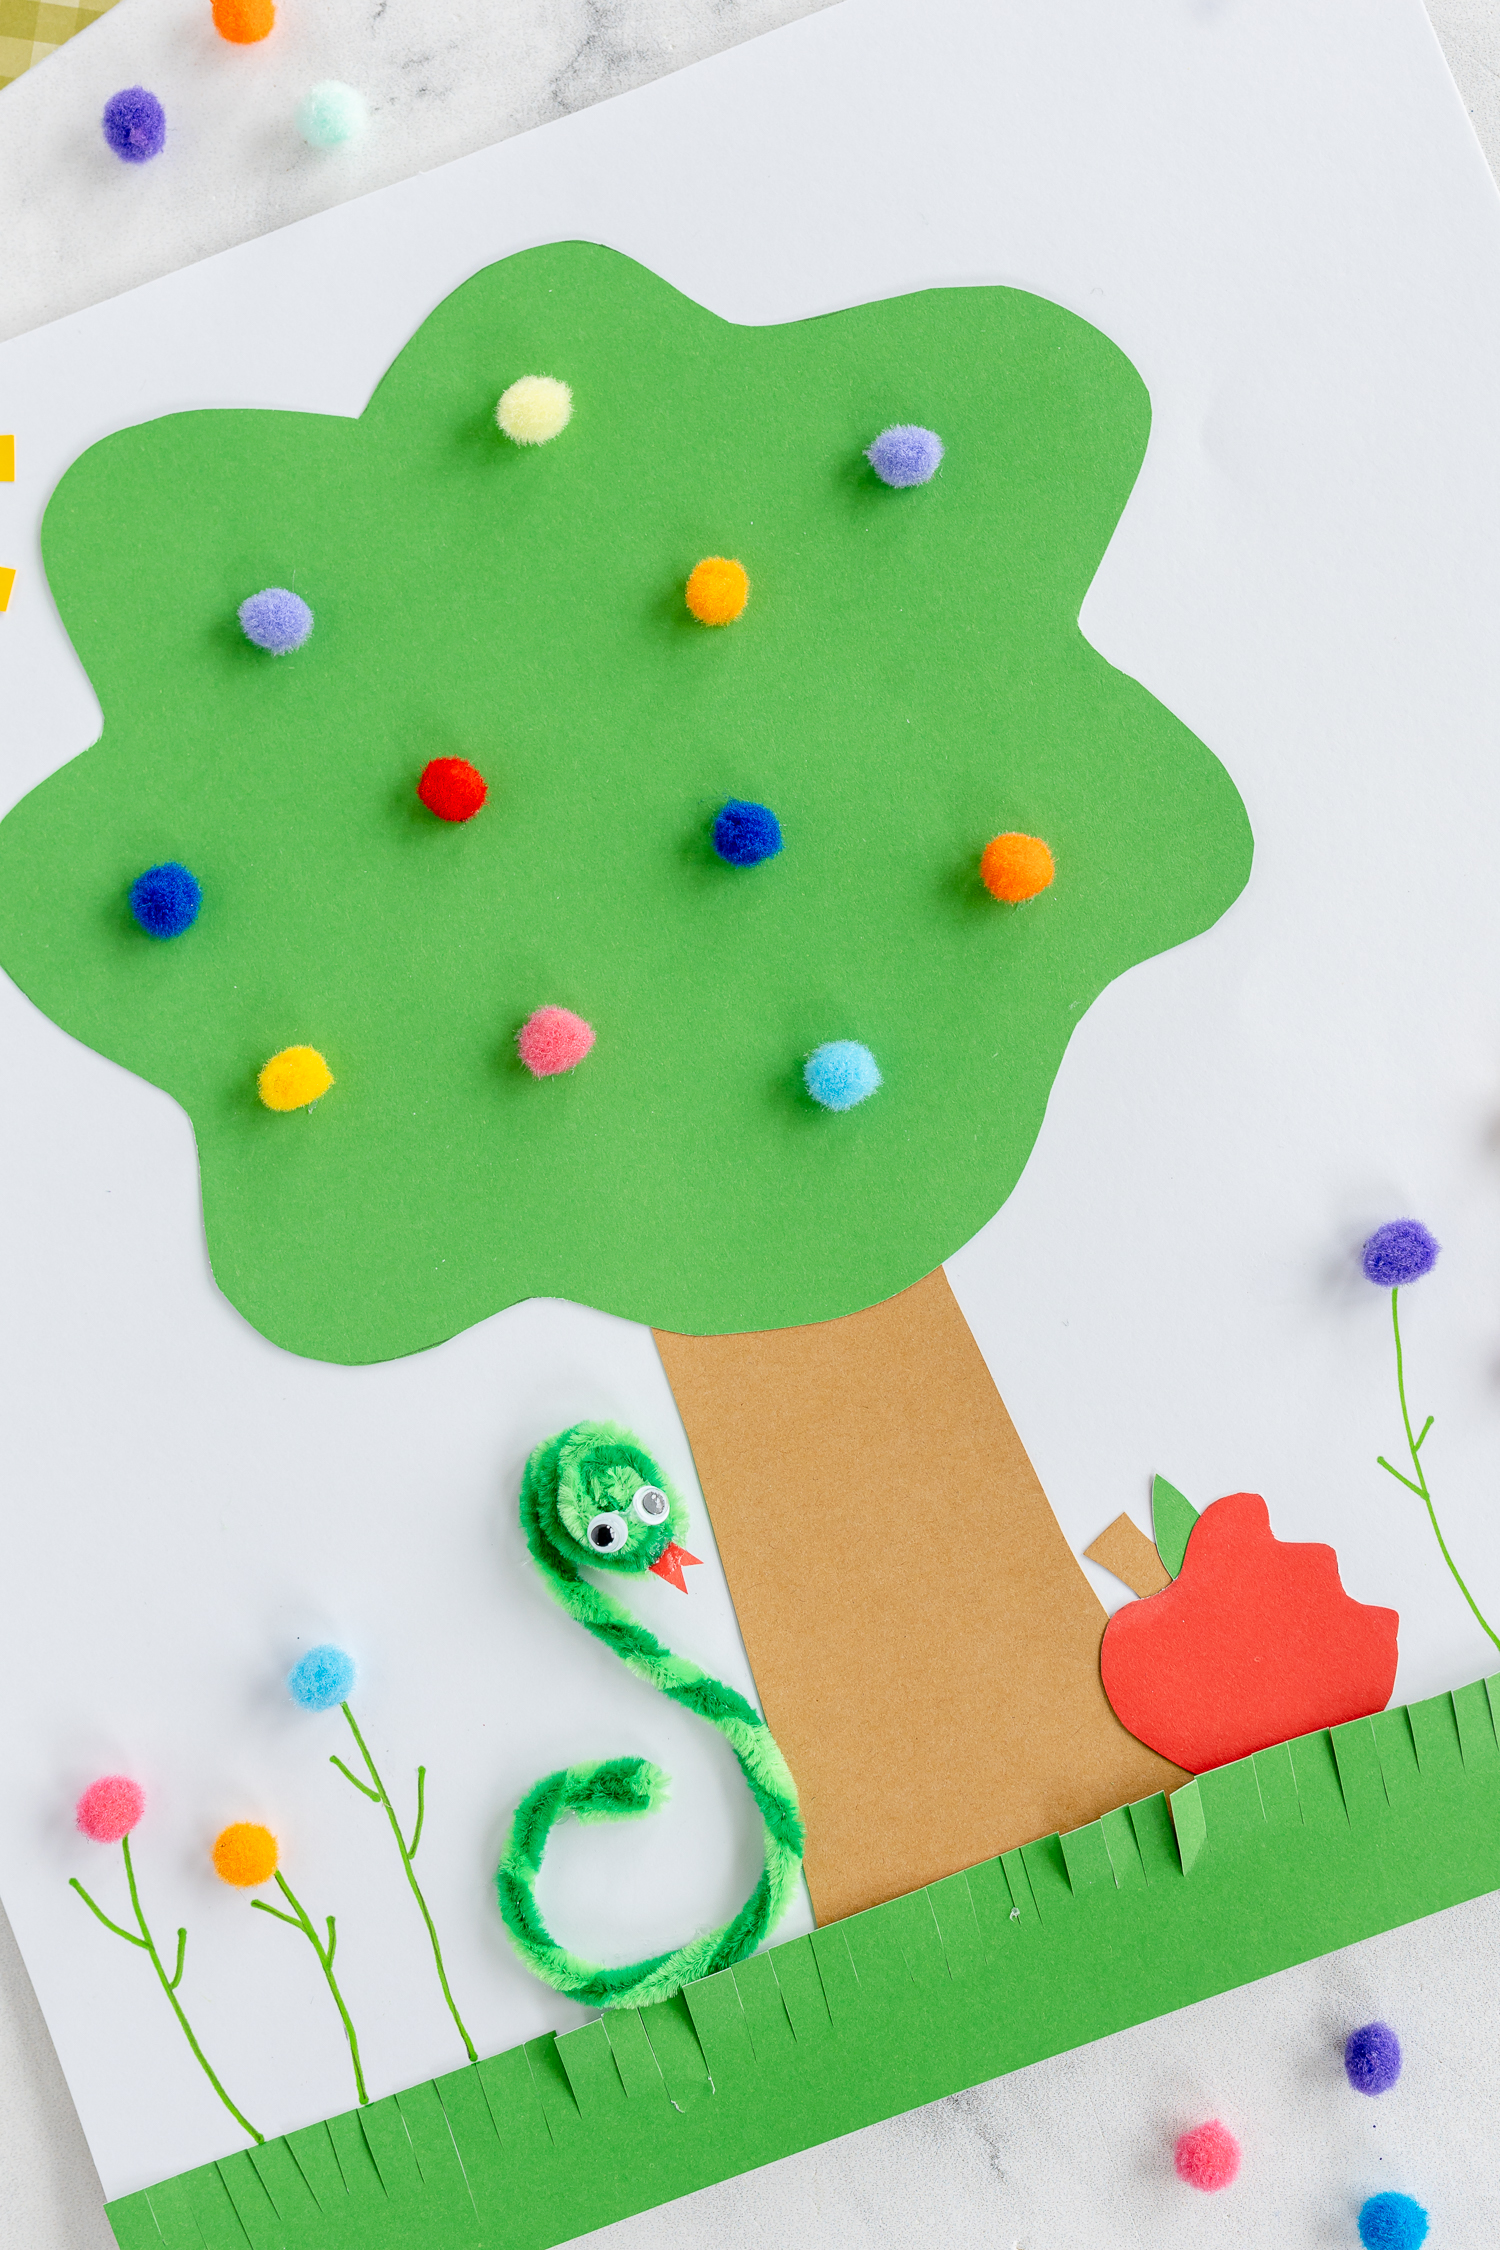
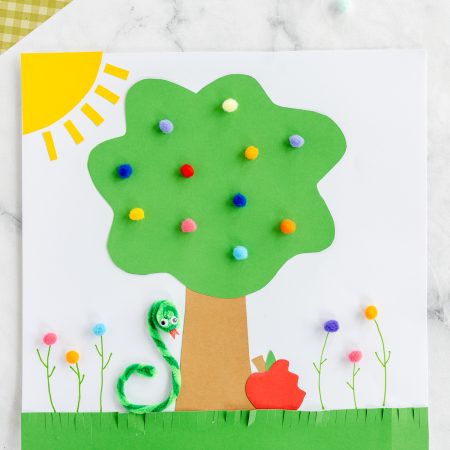
- Start by twisting two pipe cleaners together to make the snake. I wrapped one piece of light green and one piece of dark green together.
- Roll one end of the pipe cleaner into a head shape.
- Then, add eyes and a red tongue (made out of construction paper).
- Cut out your free template pieces. Next, glue your paper tree to the center of the page and add pom poms as fruit or blossoms.
- Draw flower stems with a green Sharpie or marker. Add pom poms to the tops for flowers.
- Cut out an apple shape from red construction paper and place it at the base of the tree. I tilted mine to look like it had fallen or was dropped.
- Then, cut a strip of green construction paper to cover the bottom of the page. Cut slits in the top and bend some pieces to make your grass.
- Add a yellow sun in the corner, and you’re done.
This craft is super simple to do with kids of all ages! I love setting my model out and letting kids add their own creative touches. You get to see how they decide to create a snake or how they like to lay out their flowers. It makes all of the crafts look a little different and unique!
Books for Kids about the Garden of Eden
While the Bible (Genesis Chapters 1-3) is the best place to find the story of creation and the life of Adam and Even, it can be helpful to use children’s books to simplify meanings. Use some of these lovely read-alouds to help kids understand the story. They will love the illustrations and appreciate the story that much more.
- God’s Very Colorful Creation – best for toddler ages
- The Beginner’s Bible: Timeless Children’s Stories– great beginner Bible for toddler to Preschool age
- The Jesus Storybook Bible – another great Preschool Bible.
- The Garden, The Curtain and the Cross – great for kids of all ages but best for lower Elementary
Read the stories to kids before they complete their craft or as they work. They will enjoy hearing the story written in a few different ways. Kids always process things in unique ways, so provide them with multiple ways to learn the story.
I hope you enjoy this fun craft as much as I did making it! I would love to hear how it goes.
For more fun crafts, check out my Paper Plate Crafts, and be sure to keep your eyes peeled for more religious crafts. I am adding them to my to-do list, and you’ll see them popping up more and more on my blog!
Garden of Eden Craft
Supplies
- Cardstock – green, yellow, brown, red=
- Mini Poms Poms in various colors
- Green Sharpie
- Green Pipe Cleaner (2 shades)
- Tiny Googly Eyes
- Template
Instructions
- Start by twisting two pipe cleaners together to make the snake. I wrapped one piece of light green and one piece of dark green together.
- Roll one end of the pipe cleaner into a head shape.
- Then, add eyes and a red tongue (made out of construction paper).
- Next, glue your paper tree to the center of the page and add pom poms as apples or blossoms.
- Draw flower stems with a green Sharpie or marker. Add pom poms to the tops for flowers.
- Cut out an apple shape from red construction paper and place it at the base of the tree. I tilted mine to look like it had fallen or was dropped.
- Then, cut a strip of green construction paper to cover the bottom of the page. Cut slits in the top and bend some pieces to make your grass.
- Add a yellow sun in the corner, and you’re done.