As an Amazon Associate I earn from qualifying purchases.
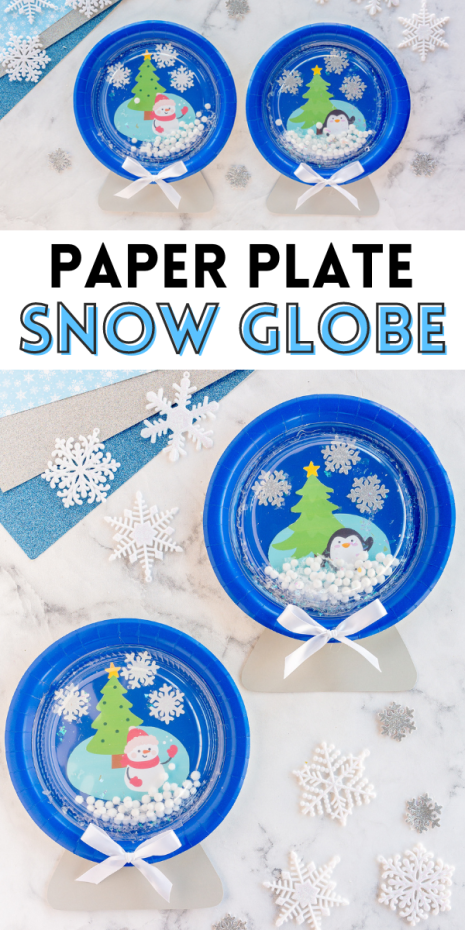
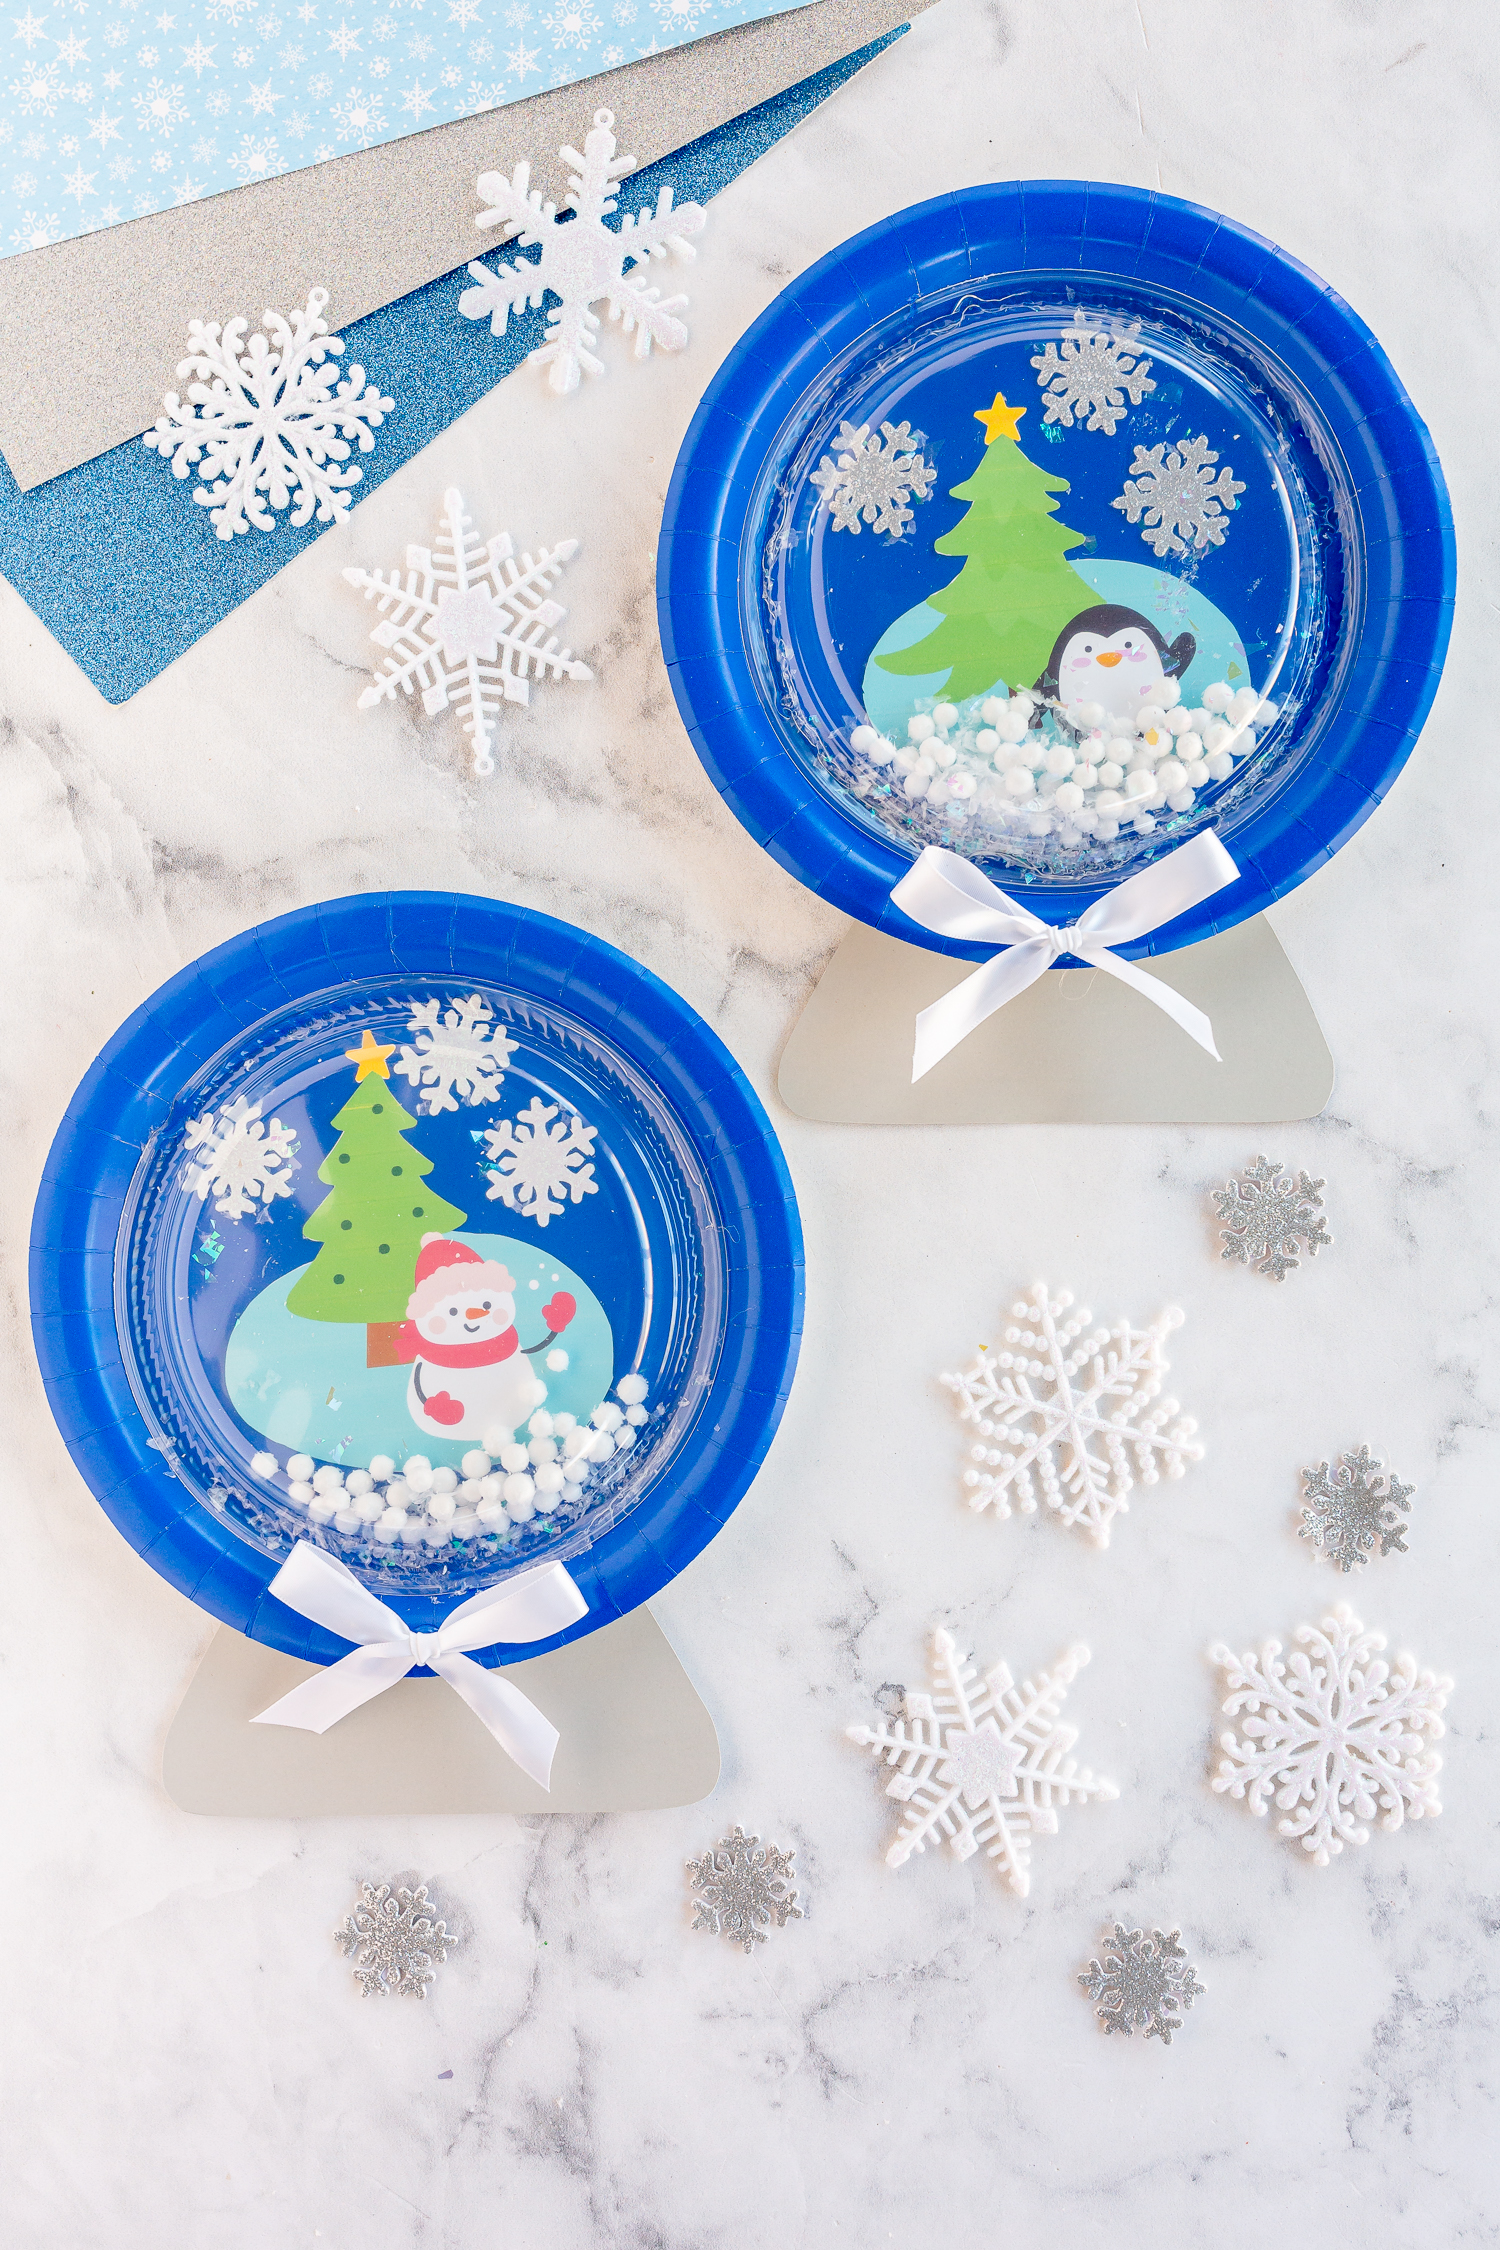
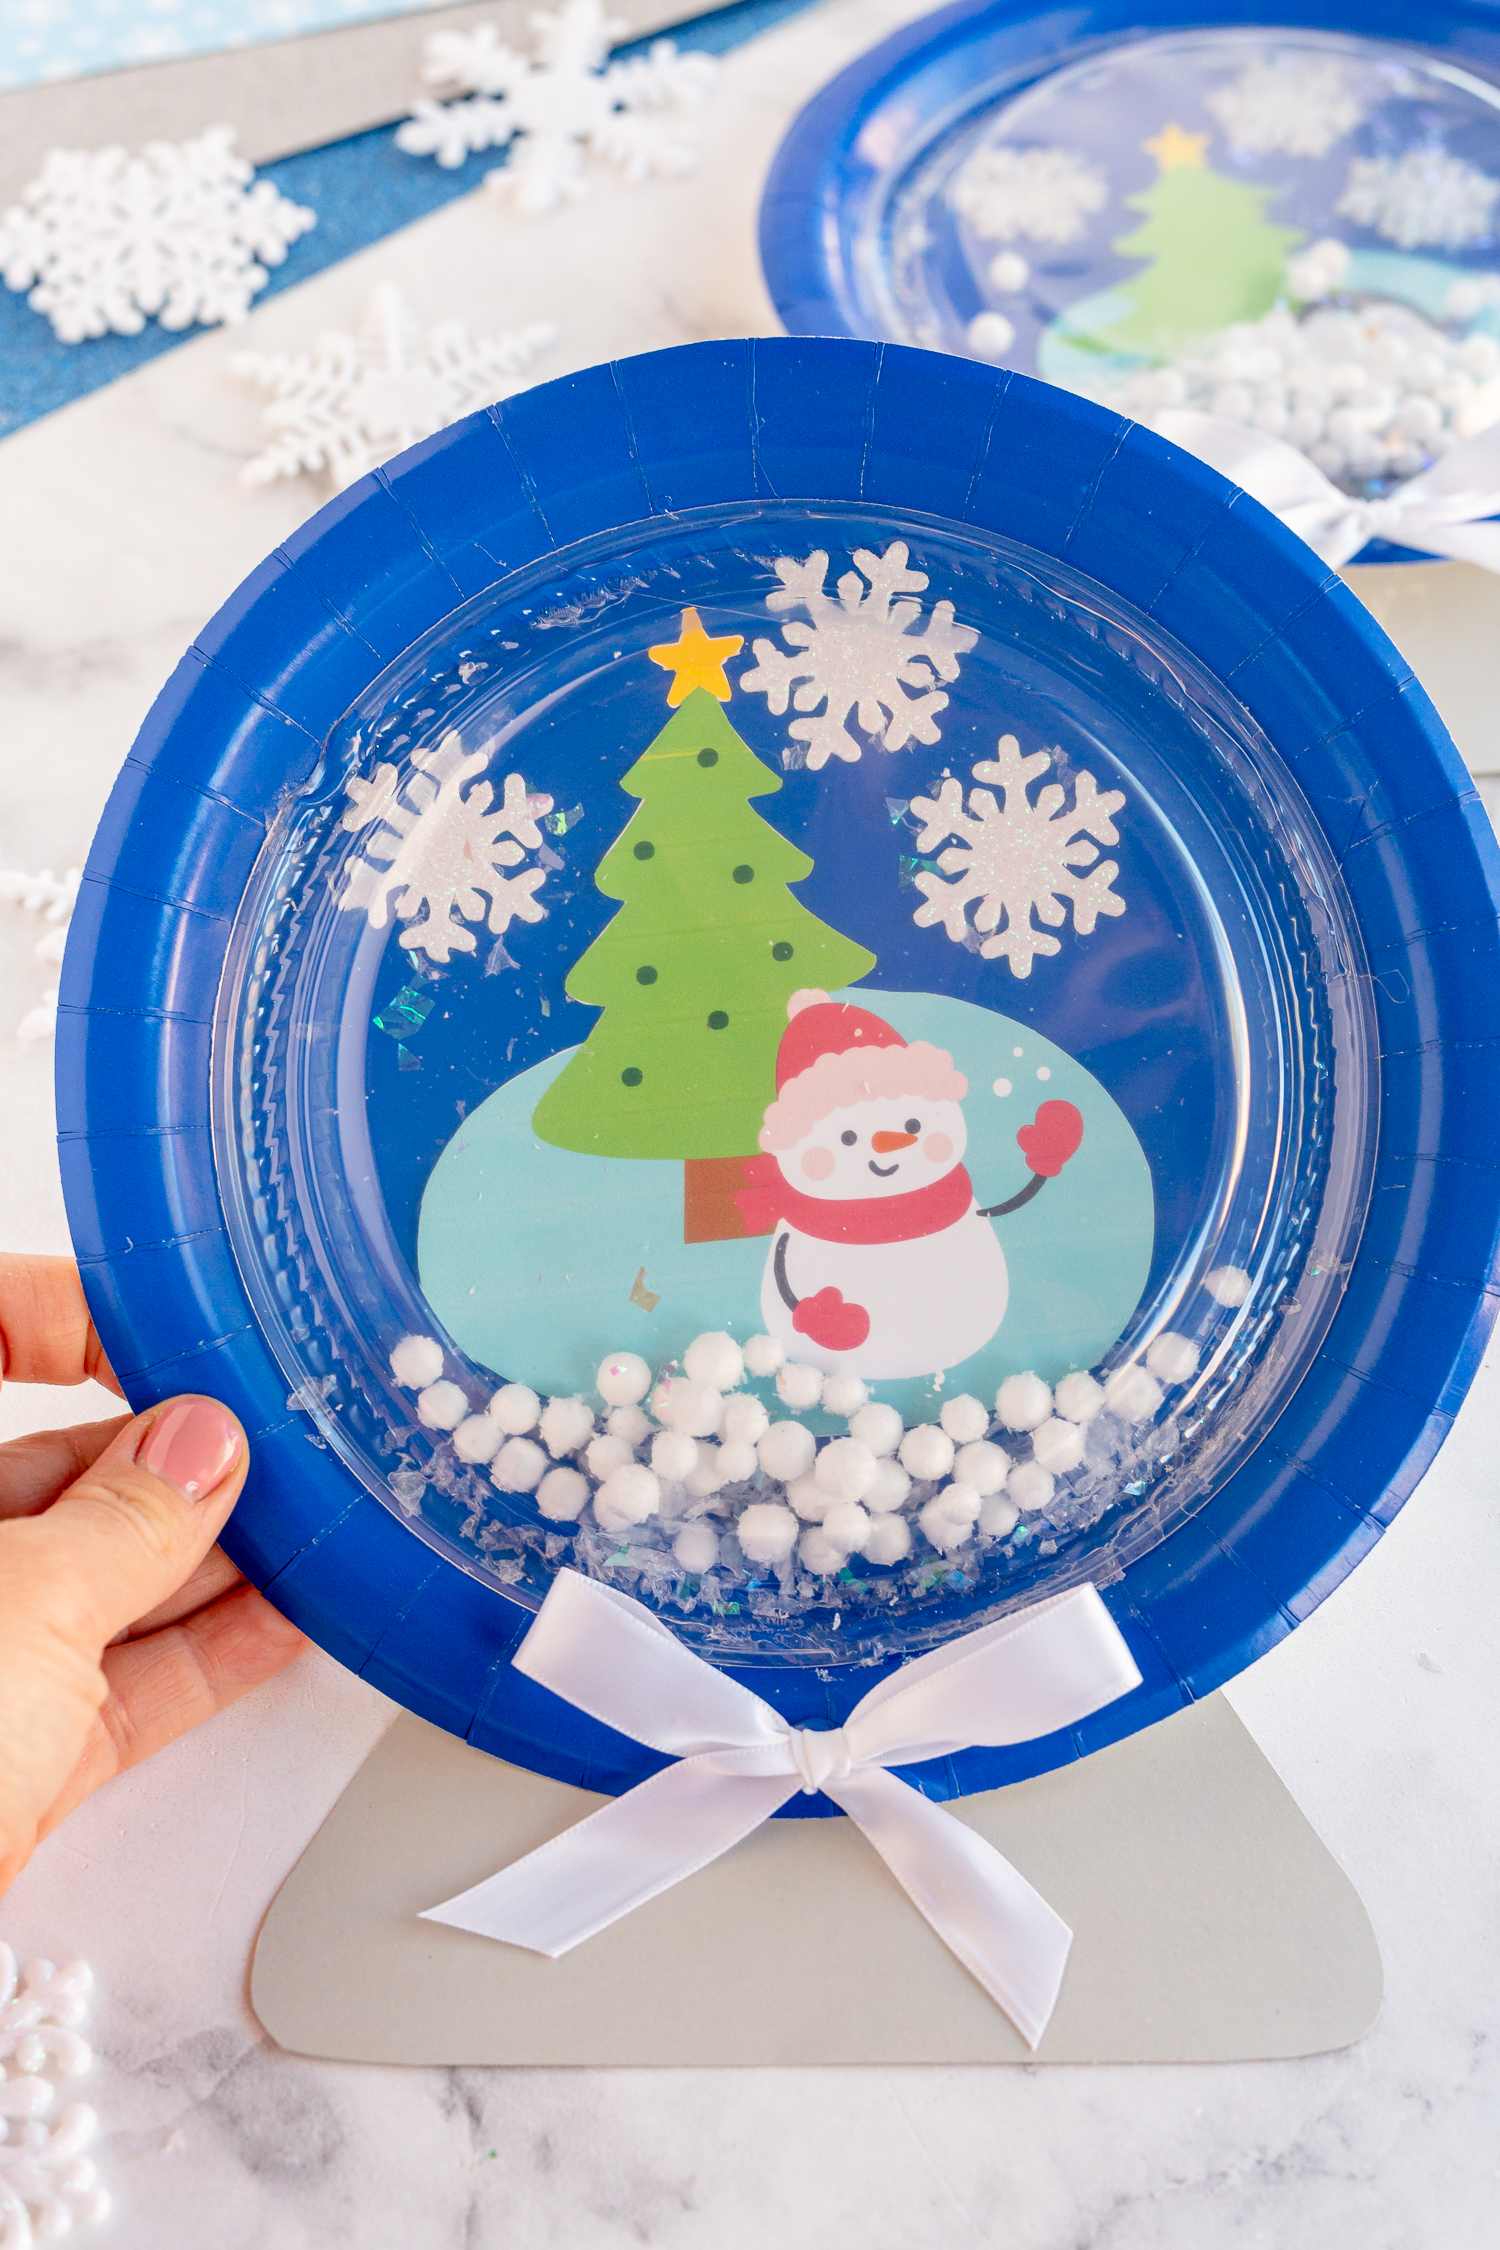
A simple Paper Plate Snow Globe craft for kids and adults to enjoy together. Makes a lovely keepsake for kids of all ages.
DIY Snow Globe
Making a Christmas craft with my kids is one of my favorite things to do this time of year. We love decorating the Christmas tree and making a gingerbread house, but fun winter crafts are our favorite. Plus, they make adorable keepsakes and give us special quality time together. Use this cute paper plate snow globe craft to bring some fake snow and joy into your home for the holidays. Both younger and older kids will love completing this easy paper plate craft.
HOW TO VIDEO:
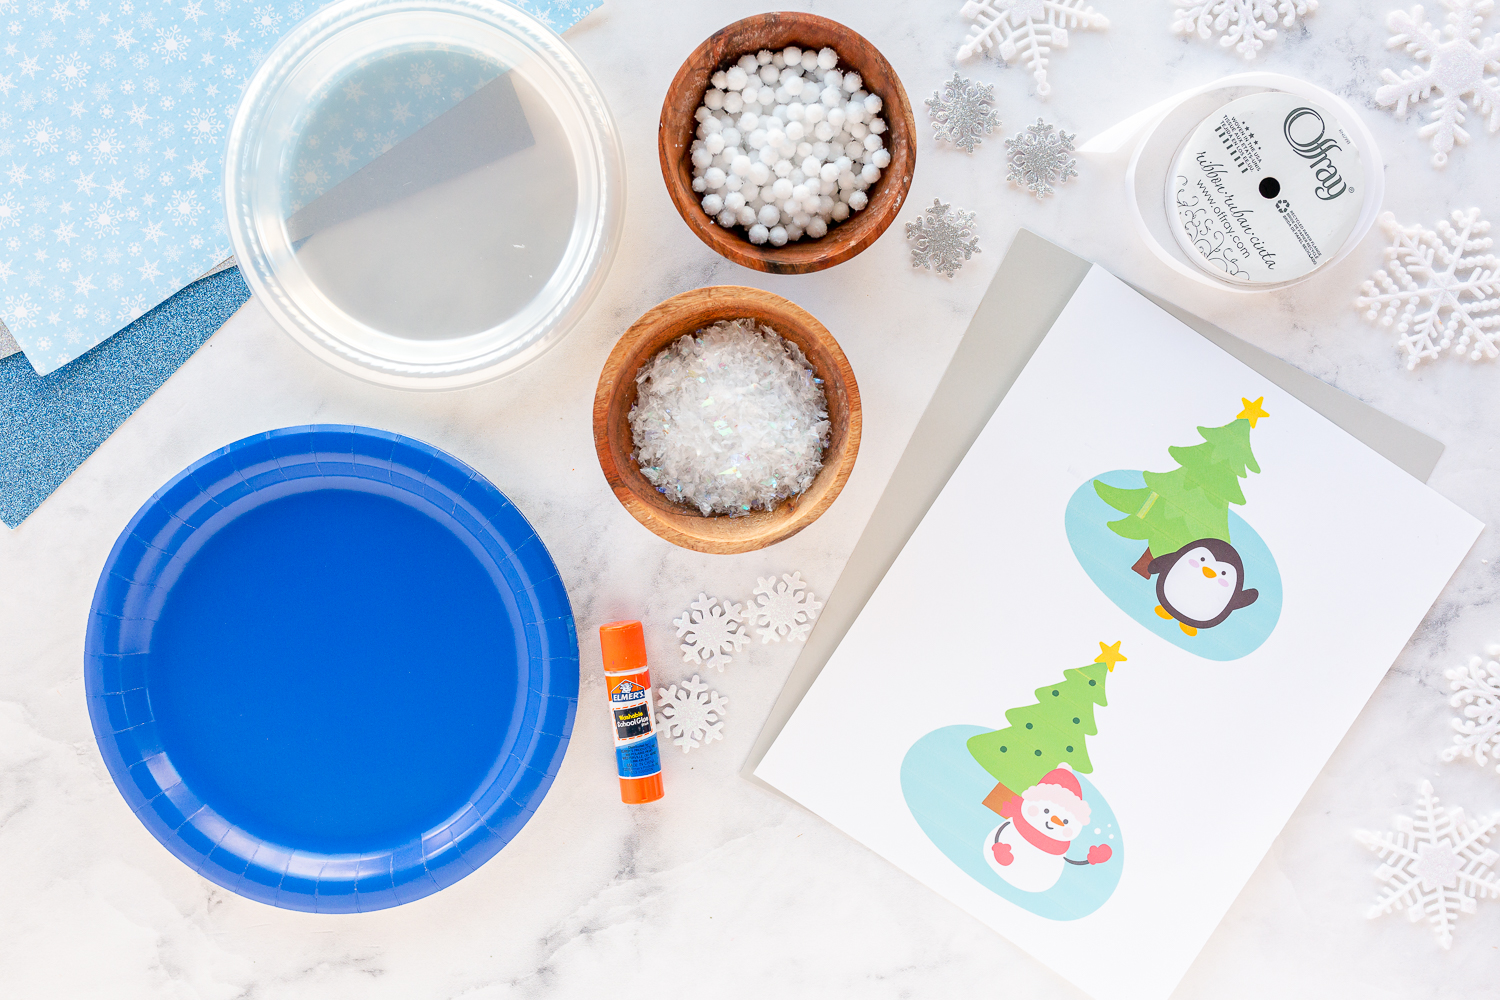
Supplies Needed for a Paper Plate Snow Globe
I found most of my supplies at Hobby Lobby (because I’m a huge fan) but you can find these almost anywhere. Just make sure the clear plates fit inside the blue paper plates and don’t have any funky writing or anything on the bottom that will distract from the craft. Be sure to check local dollar stores for materials, I’m always surprised by the fantastic things they have.
- Blue paper plates
- Clear plastic plates – that can fit inside the blue plates
- Foam snowflakes
- FREE Printable Snow Globe Graphic Template
- White ribbon
- Faux snowballs or tiny white pom poms
- Faux glitter snow
- Light/medium gray cardstock
- Hot glue gun
- Scissors
If you can’t find blue paper plates, you can add a circle of blue construction paper to a white paper plate to make it look like the sky. Get creative with your snow globe craft, and remember to have fun.
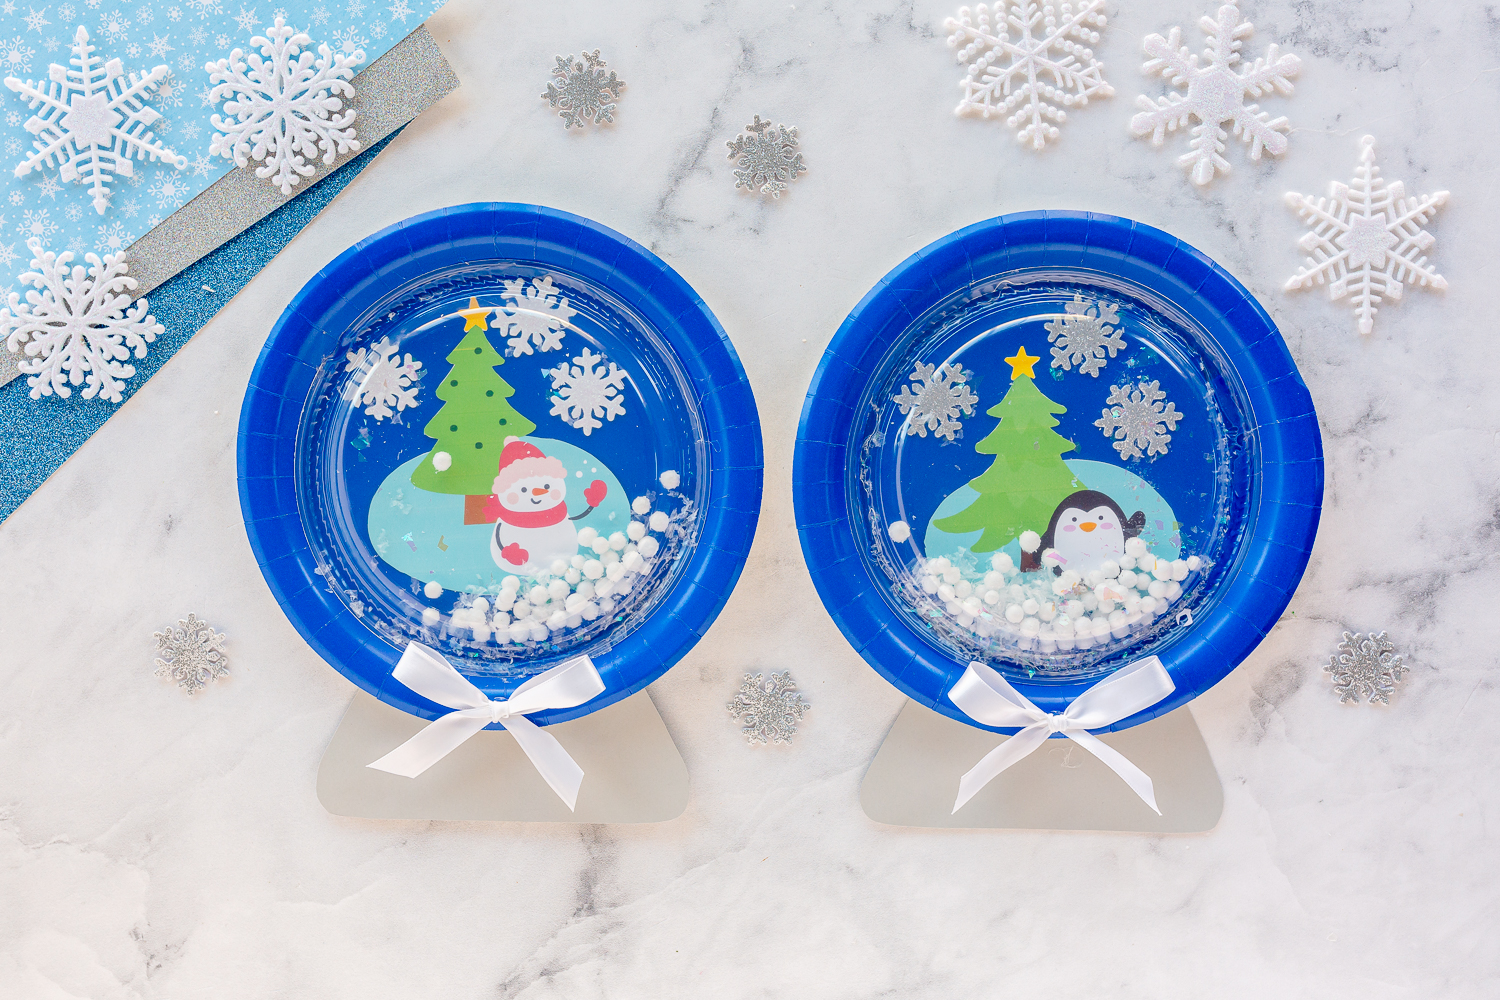
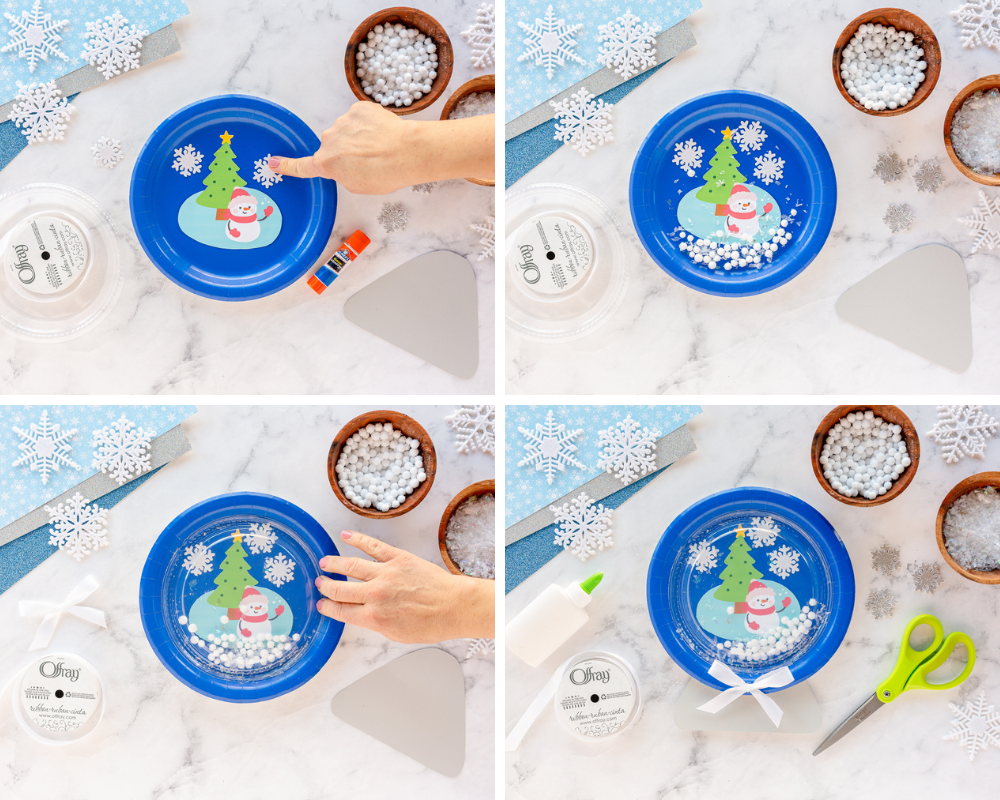
How to Make Your Paper Plate Snow Globes
Before starting your snow globe, ensure your clear plastic plate will fit into the blue plate when turned upside down. This craft is a fun way to make a snow globe and include your kids in the process.
- Print and cut out the graphics you want to be in the background. You can also use your favorite Christmas stickers!
- Glue the graphics to your blue paper plate. Make sure to position them a little higher than the center so the snowballs don’t cover the images.
- Add your foam snowflakes in the “sky”.
- In the center of the snow globe, add a small number of fake snowballs and a small amount of glitter snow.
- Add a line of glue around the rim of the clear plate. Make sure it covers all edges, so the glitter doesn’t escape later.
- Keeping the faux snow and glitter in the center, place the transparent plate on top of the blue plate upside down and press it into place.
- Allow the craft to fully dry and then attach the snow globe base by gluing it behind the blue plate.
- Glue a ribbon to the bottom of the plate, and you’re done!
When choosing images to put in the background of your winter scene, consider snowmen, evergreen trees, snowflakes, forest animals, Santa and a sleigh, and so much more.
Do it Yourself Picture Snow Globes
If you don’t want to do a wintery scene on your snow globe, print off pictures of your kids to place on the plate! Make them look like they are playing in the snow. Using their picture also makes a fantastic gift for loved ones or special keepsakes to hang on the fridge. Don’t forget to write your child’s name on the back of the paper plate to remember who made it and when!
When to Make the Snow Globe Craft
As the holidays approach, you may have days where your kids are home from school or you are stuck inside because of snow and rain. Keep this craft on hand to do to occupy the time. The craft is also great for:
- Holiday parties
- Classroom celebrations
- Homeschool activities
- Family get-togethers
- Quality time with your kids
- Christmas Eve crafts
Once the craft is done, hang it on your fridge, tape it to the wall, or pin it up on the bulletin board. There are many different ideas for displaying children’s creativity online depending on your space. The easiest way to display your snow globe is to tape a string or ribbon to the back of the snow globe so you can hang it anywhere. A magnet is also a great idea stuck to the center of the plate.
I hope you and your little ones enjoy this fun paper plate snow globe craft. I know it will look amazing to decorate your home during the holidays. Thanks for reading and Happy Holidays!
For more snow globe and holiday craft ideas, try some of these:
- DIY Snow Globe – Make a plastic snow globe using materials from the craft store.
- Christmas Coloring Pages – Print these cute scenes and let kids color them on cold, snowy days.
- Handprint Christmas Crafts – Trace your child’s hand and turn it into a reindeer, tree, or Santa!
- Christmas Sprinkle Cookies – Bake together in the kitchen with this simple and delicious recipe.