As an Amazon Associate I earn from qualifying purchases.
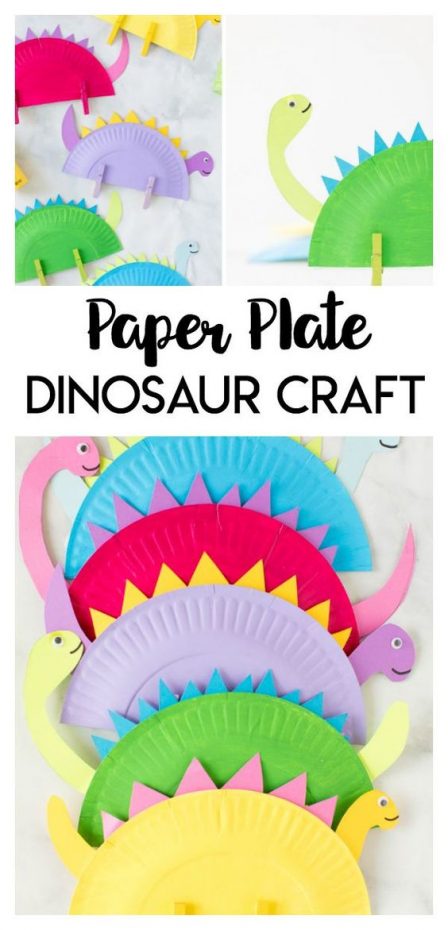

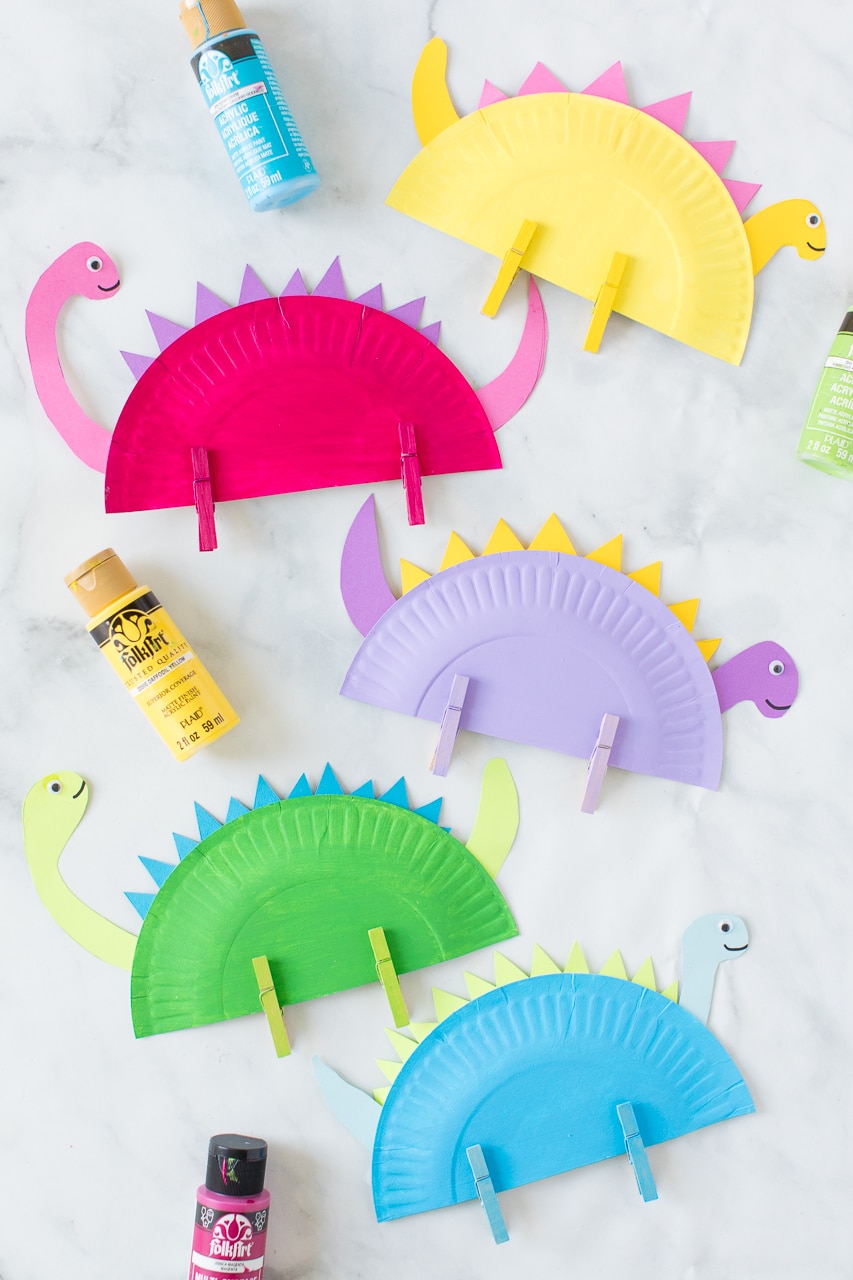
This Paper Plate Dinosaur is a great craft for dinosaur loving kids! Grab a few supplies around the house to make your favorite prehistoric friends.
Paper Plate Dinosaur Craft
We are big dino fan’s over here, my middle son Carter, has loved dinosaurs for a few years now and his little sister loves them almost just as much. Anytime we can fit in some dino fun into our day we do. This kid friendly dinosaur craft is so simple to put together and you probably already have everything you need at home. I love when we can use some household items to create something fun, it saves money on pricer craft supplies and can often be a last minute project for a snow day or summer afternoon.
Supplies Needed for Paper Plate Dinosaurs
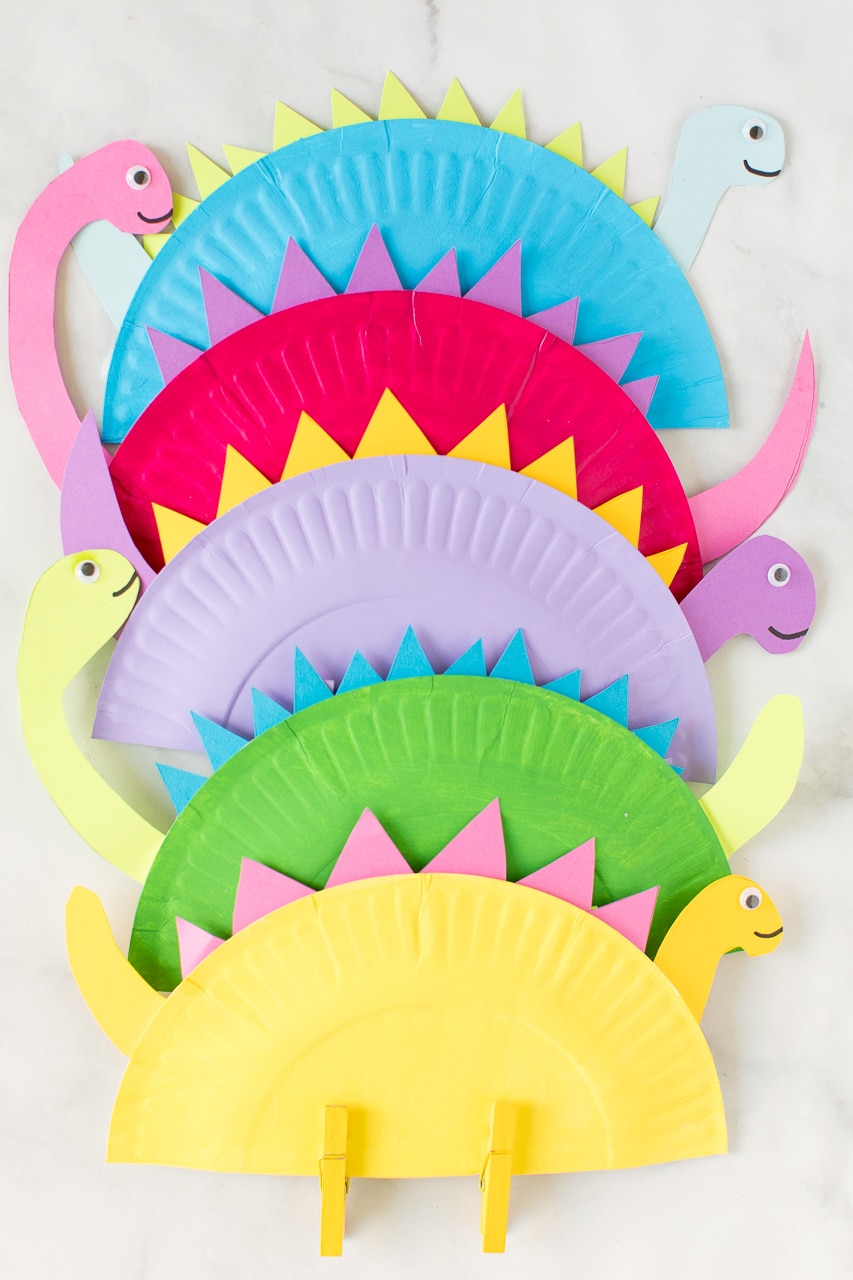
- Paper Plates: for this craft I used DESSERT size paper plates because I wanted my finished dinosaurs to be a tad smaller, but feel free to use whatever size paper plates you have on hand.
- Paint– I love using FolkArt Paint that you can find in most any craft store. This type of paint is not washable (it’s non toxic and comes off of skin no problem…clothes not so much) so if you are fearful of clothes getting ruined be sure to purchase a washable kids paint.
- Clothespins – You can use either the mini clothespins or the larger clothespins. If you make a regular size paper plate dinosaur I would use the larger clothespins as they are a bit sturdier. Before painting your clothespins make sure they can stand well on their own. Sometimes clothespins are warped.
- Paper: I prefer to use colored cardstock when working with kids and especially for a project that “stands up.” Cardstock paper is heavier and not as flimsy. You can usually find a lot more variety of colors and shades in cardstock than construction paper.
- Googly Eyes: I think my kids favorite part of most projects is adding googly eyes. They add so much life to a project. If you don’t have googly eyes you can just draw some on 🙂
Let’s Make a Friendly Dino!
The steps to making these dinosaurs are so simple and in under 30 minutes you will have a couple friendly dinosaurs. You can read the directions below or watch out quick video for the How-To!
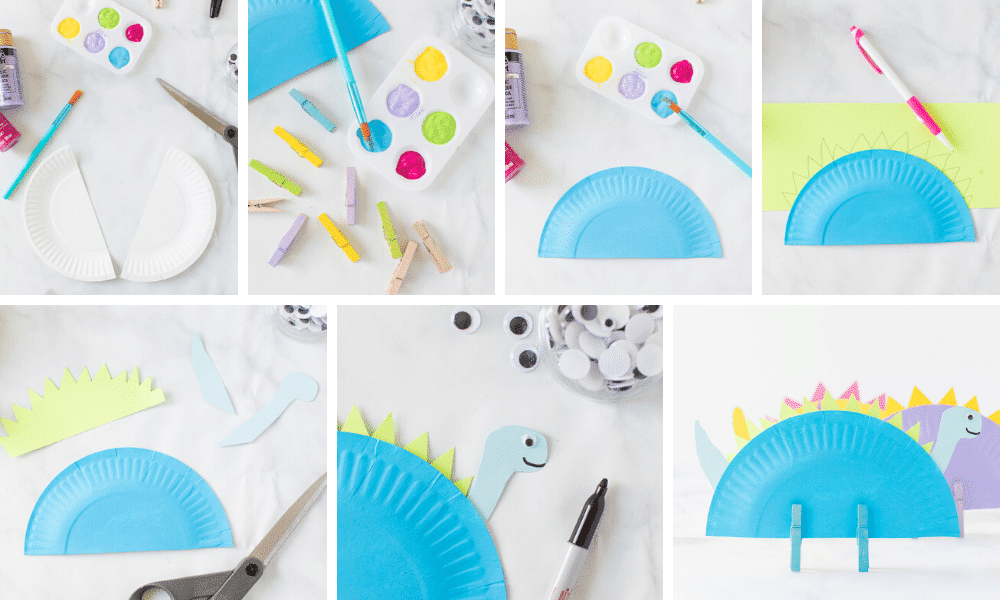
- Start by cutting your paper plate in half.
- Decide what color body you want your dinosaur to have and paint one of the 1/2 plate pieces. Paint two corresponding clothespins for each dinosaur you want to make.
- Once your dino body is dry, use it as a template for drawing your dinosaurs spikes, head, and tail. You decided if you want a long neck, short neck, small tail or long tail! This is where the kids can get really creative!
- Glue your head, tail, and spikes to the back side of the paper plate. Elmers glue works great but if you have kids that are a little impatient, parents can use a hot glue gun for sturdier and faster dino making 🙂
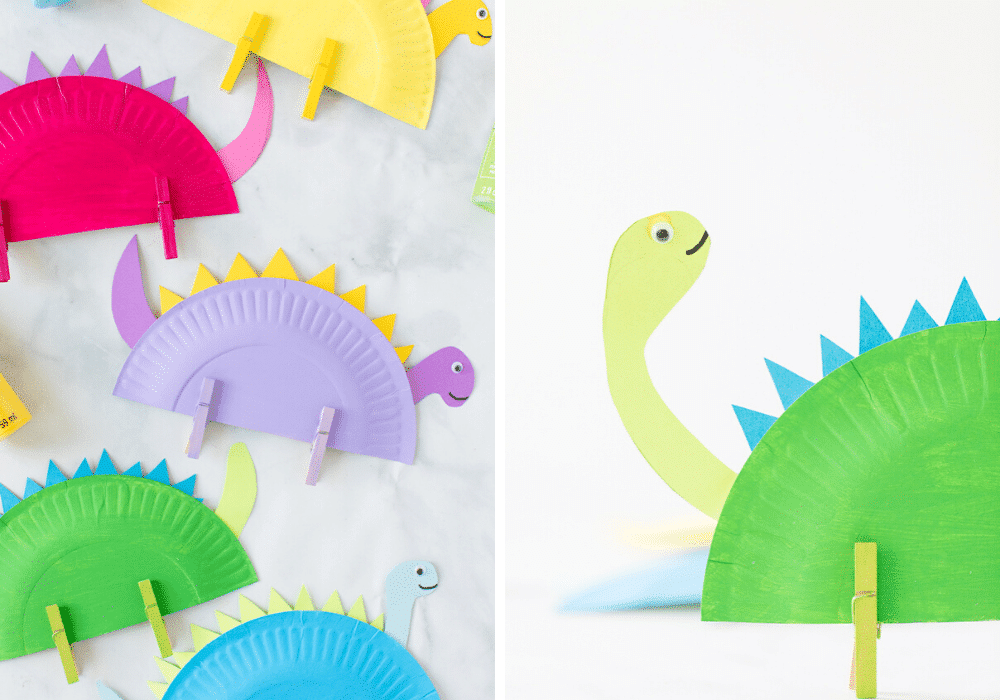
- Add a little smile and googly eye to your dino head.
- Attach clothespins and you are done!
For more dinosaur ideas try these:


Do you have a template for the Dino head and tail?
This looks like such a fun and cute craft, and I think I have everything I need for it! I’ll be doing this activity with my after school program next month 🙂
Love this… Looking for ideas for a 4 year old who was sick and is recovering,, Who loves dinosaurs.