As an Amazon Associate I earn from qualifying purchases.
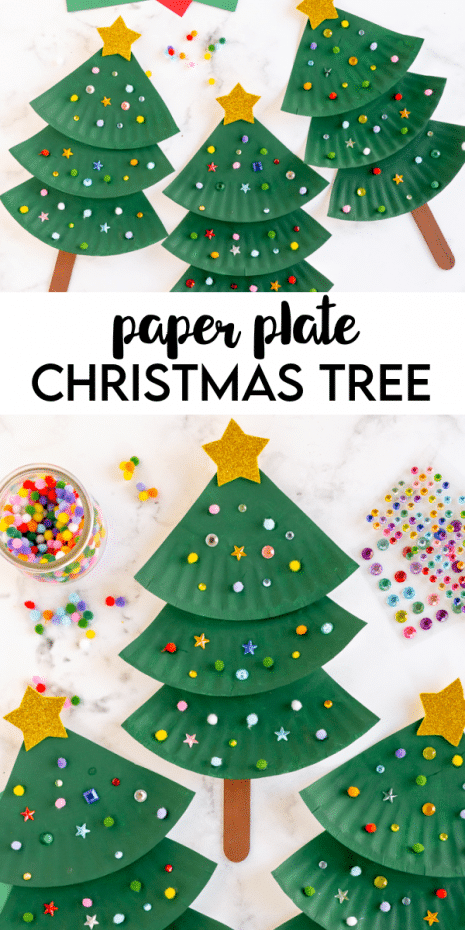
This Paper Plate Christmas Tree is a festive and colorful paper plate Christmas craft the kids can enjoy making in 30 minutes and with minimal supplies!

PAPER PLATE CHRISTMAS TREE
One of the things I love best about the holidays is being able to make Christmas crafts with my kids. This paper plate Christmas tree craft is a fun way to kick off the holiday season. The combination of mini pom poms and mini sequins makes this a colorful Christmas craft that can be made in about 30 minutes with minimal supplies, great for last minute crafting or an activity to keep the kids busy for a bit.
Ways to Display Your Paper Plate Christmas Tree
Once your Christmas tree craft is complete, try one of these fun display ideas:
🎄 Add a background: Glue your finished tree to a piece of construction paper and let kids draw a scene around it — snowflakes, presents, or a snowy sky.
🎄 Turn it into fridge art: Add a magnet to the back for an instant holiday decoration everyone can admire.
🎄 Classroom display: Staple the trees to a classroom or hallway bulletin board to create a cheerful Christmas forest.
🎄 Home display: Stand it up on a shelf, mantle, or entryway table to add a touch of kid-made Christmas charm.
Perfect for Preschoolers
This craft is perfect for kids of all ages — especially preschoolers! It’s a wonderful way to build fine motor skills as little hands carefully place tiny gemstones, pom poms, and other decorations on their tree. Plus, kids will love the sparkle and creativity that comes with making it their own.
Materials Needed To Make Paper Plate Christmas Tree
- Paper plates (the super cheap ones are fine)
- Gemstones
- Mini Pom Poms
- Gold Glitter Paper
- Green Paint
- Brown Paint
- Jumbo Popsicle Sticks
- Hot glue gun and a clear glue stick
- Scissors

HOW TO VIDEO:
CAN I USE DIFFERENT DECORATIONS ON THE TREE?
You can absolutely use anything you or your kids want to decorate your paper plate Christmas tree. I enjoy the pom-poms and gemstones but feel free to let your kids customize their tree with other decorative items like:
- Stickers
- Glitter
- Jewels
- Sequins
- Ribbon
- Old Buttons
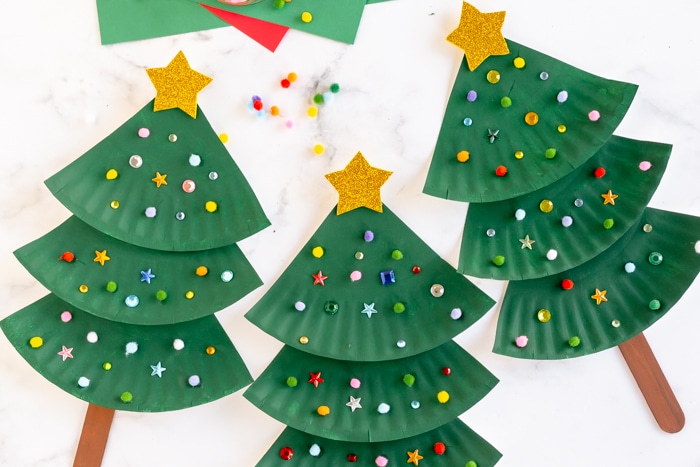
How To Make a Paper Plate Christmas Tree
- Paint the entire front of the paper plate green. Then, let it dry.
- Once the paper plate has dried, cut it into quarters so you have four triangles.
- Glue three of the triangles together as shown in the photo above.
- Paint a jumbo popsicle stick brown. Then, hot glue it to the back of the Christmas tree you formed with the three triangles.
- Decorate your tree with adhesive gemstones and mini pom-poms.
- Add a glitter star to the top of the tree! We love to use a mini star cookie cutter for to trace a perfect star shape.

TIPS & FAQ’S FOR THE BEST PAPER PLATE TREE
- Why cut the plate into four parts and only use three?
Cutting the plate into fourths provides a nice size for the Christmas tree without it being too big or bulky. It also allows you to use just three plates to make four of the trees. - What if I don’t have a popsicle stick?
If you don’t have large popsicle sticks to use for this craft, you can use brown construction paper.
For more Christmas Tree Crafts Try These: