As an Amazon Associate I earn from qualifying purchases.
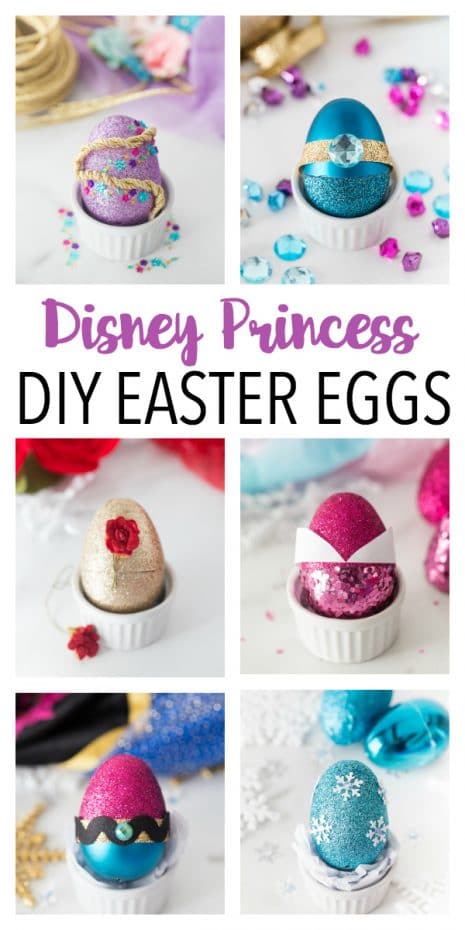
These kid friendly DIY Easter egg ideas are Disney Princess inspired and created around a few of our favorites. Glitter eggs, embellishments, and a little bit of time is all you need to bring your favorite Princess to your Easter table. Great to add as gifts or to use as decorations.
Disney Princess Easter Eggs
My preschool daughter has now seen (by her own choice) all the classic Disney Princess movies from Snow White to Sleeping Beauty to The Princess and the Frog and the newest Frozen 2 adventure. This Disney loving Momma couldn’t be prouder. 🙂 Along with her love of Disney she also loves to craft alongside me during the day. We have had fun making Aladdin, Belle, and Little Mermaid cupcakes and even made some watercolor princess silhouettes.
While shopping the other day we found all these different glitter eggs in the Easter section, most of the eggs were all in one package so we didn’t have to buy many and I knew right away they needed to be transformed into some of her favorite princesses. We grabbed some fun embellishments and spent a Saturday afternoon creating our favorites. Each princess was rather simple and you only need a few simple supplies to create each egg! We have each Princess broken down below for you 🙂
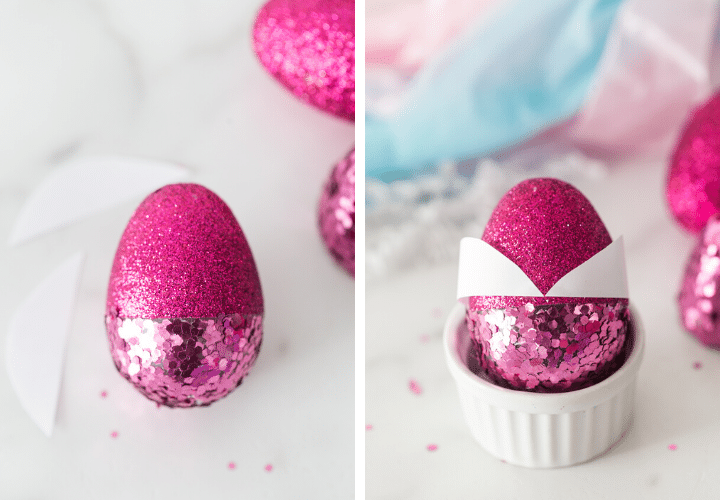
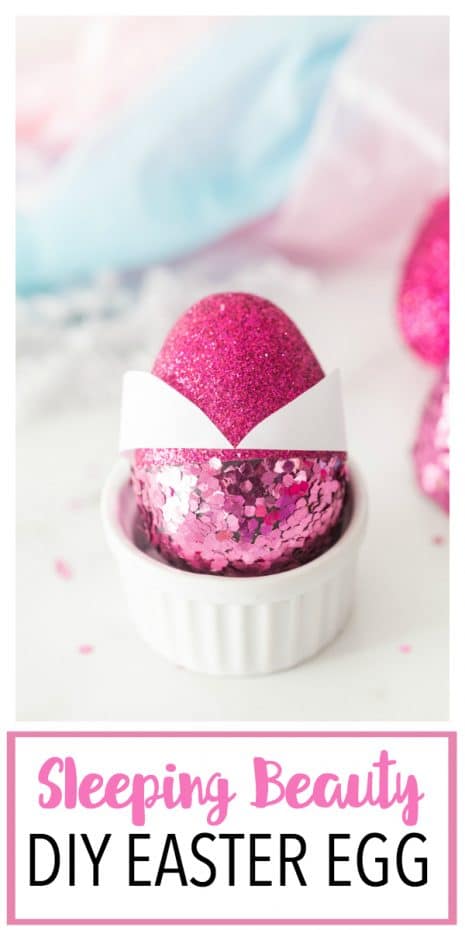
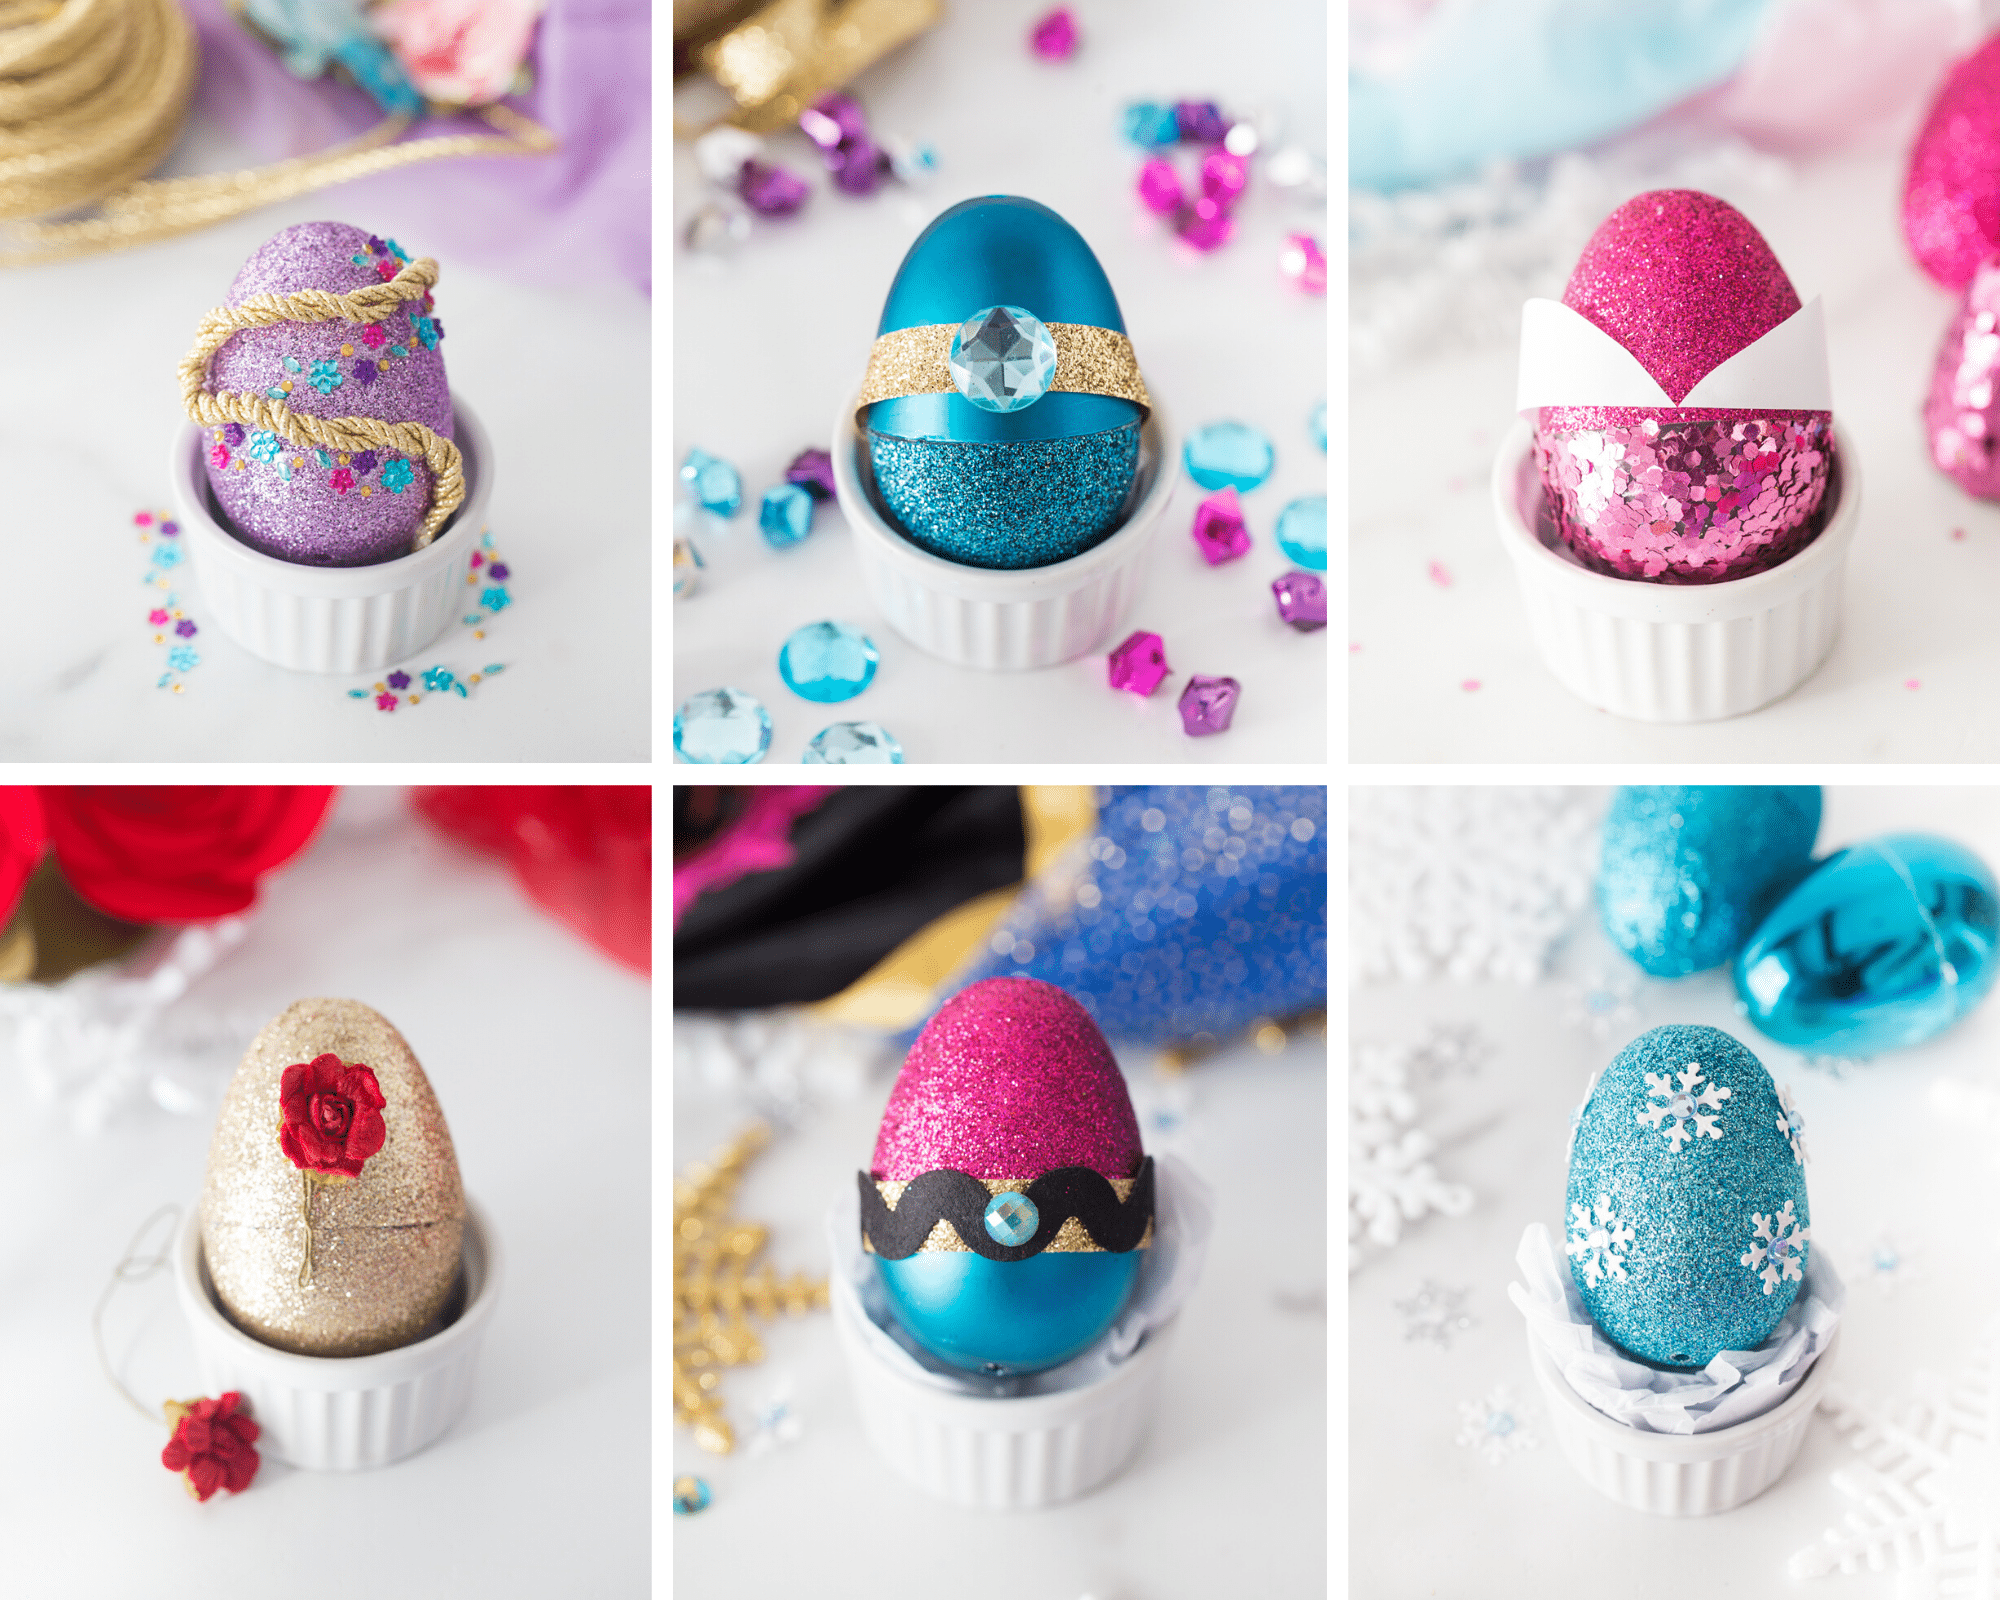
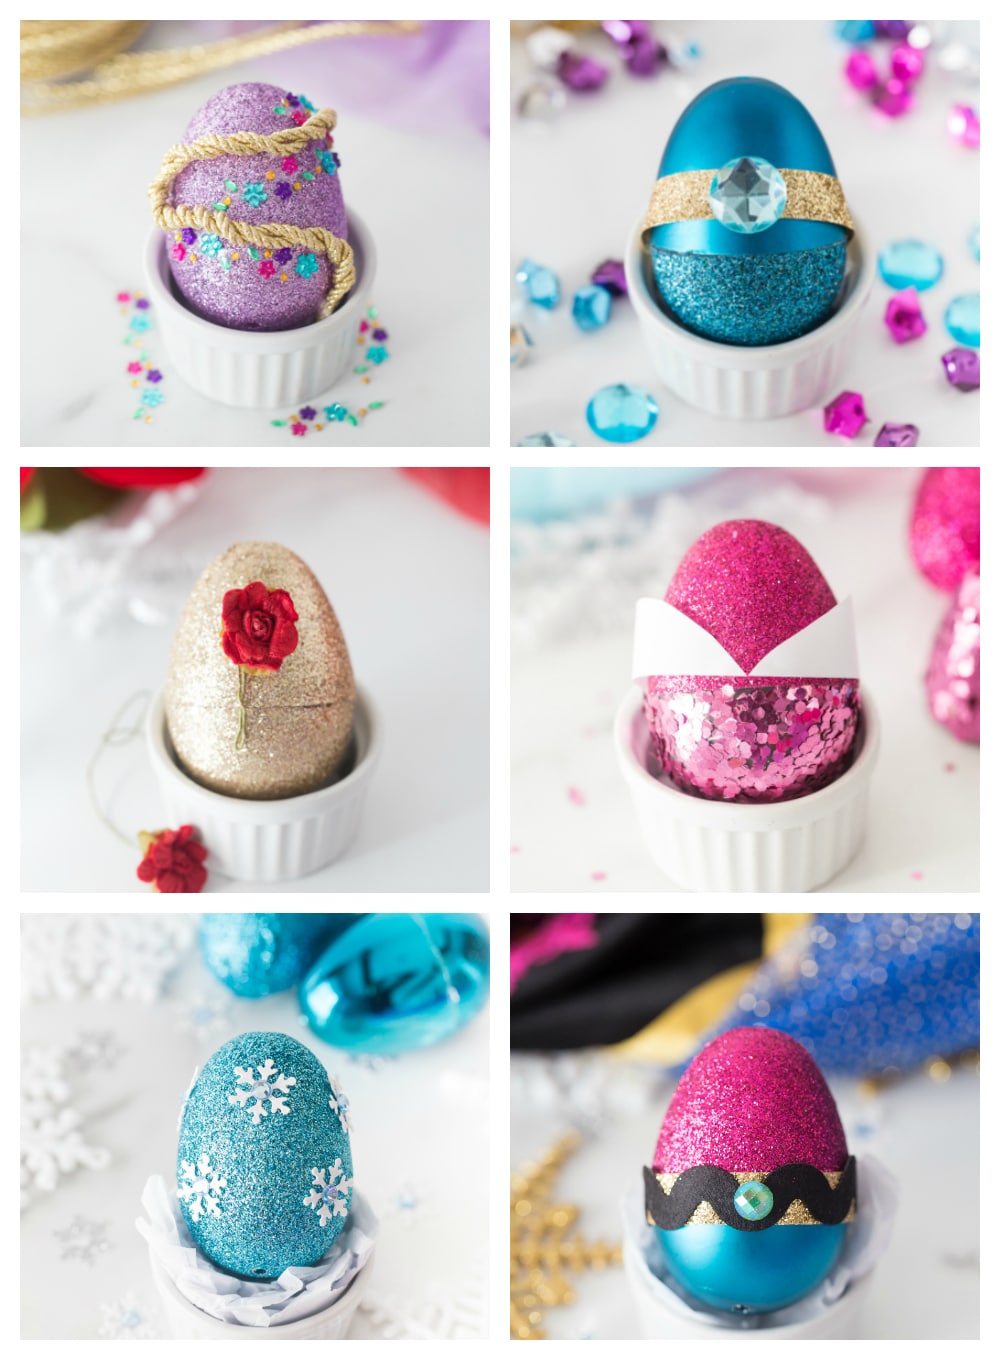
Princess Aurora/Sleeping Beauty Easter Egg
MATERIALS:
- Hot pink Plastic Egg – we chose to use the top of one egg and the bottom of another egg for some dimension but it’s not necessary.
- White construction paper
- Hot glue – works best when working with glitter covered eggs. Adults Only.
DIRECTIONS:
- If using two different eggs as shown above, find the best top and bottom egg pieces that fit together before gluing on your embellishment.
- Using scissors, cut out a long oval shape from your white paper. I just eye balled the size. Cut oval in half. Placing the cut side towards the middle of the egg, glue the pointed ends to the Easter egg to make Auroras classic dress look. I personally used a tiny amount of hot glue when adding my embellishments. Regular glue doesn’t adhere to the glitter. Make sure if you are having tiny fingers help you and adult does the glueing.
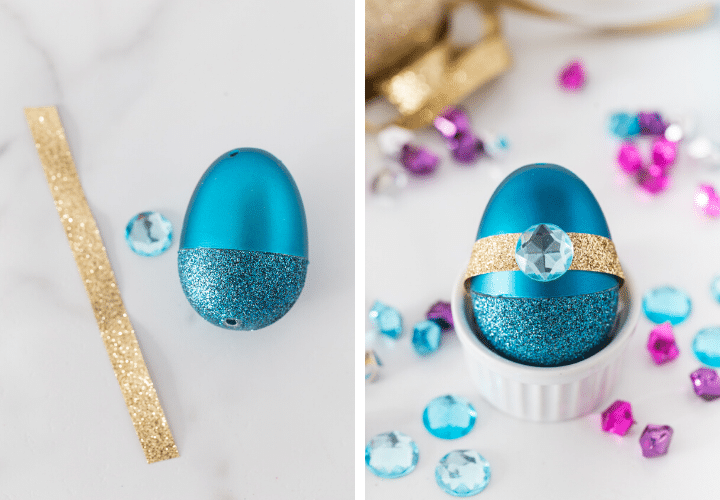
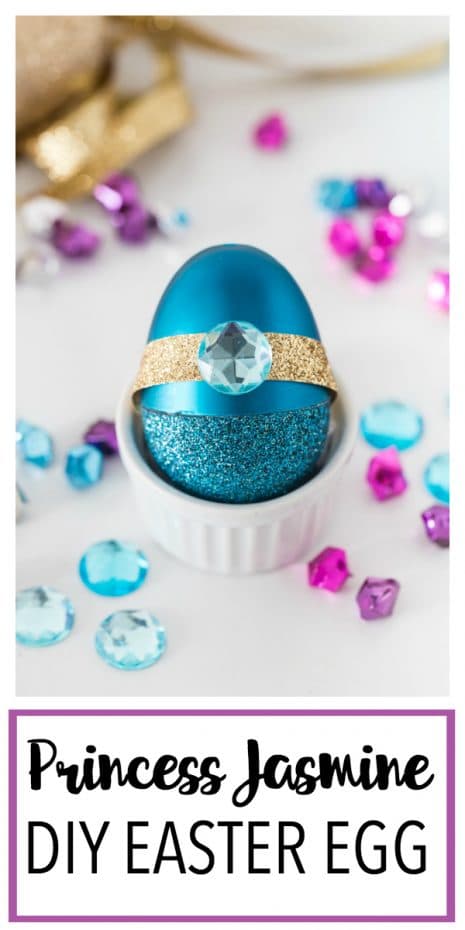
Princess Jasmine/Aladdin Easter Egg
MATERIALS:
- Jewel Toned Blue Plastic Egg – we chose to use the top of one egg and the bottom of another egg for some dimension but it’s not necessary.
- Blue Jewel Stickers, we used something similar to these.
- Gold Glitter Ribbon
- Hot glue – works best when working with glitter covered eggs. Adults Only.
DIRECTIONS:
- If using two different eggs as shown above, find the best top and bottom egg pieces that fit together before gluing on your embellishment.
- Cut a piece of Gold Ribbon that is long enough to go around the top part of the egg. Using your hot glue, glue on the ribbon.
- Attach a blue gem to the center front of the egg.
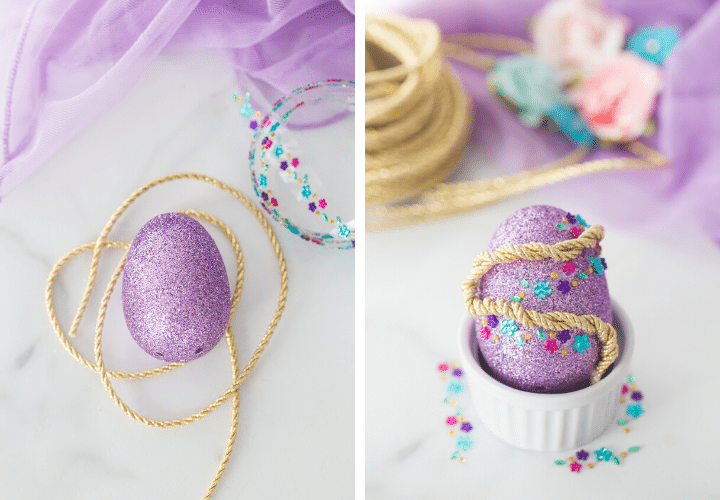
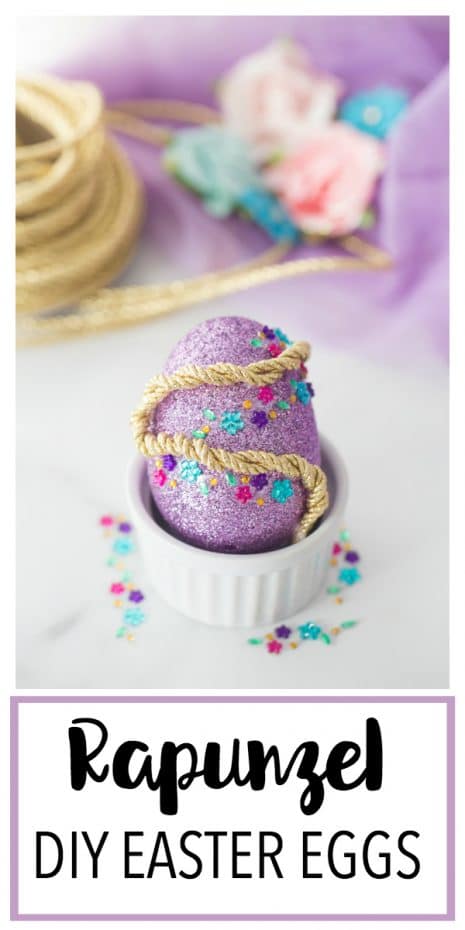
Princess Rapunzel/Tangled Easter Egg
MATERIALS:
- Purple glitter plastic Easter egg. We chose a lighter purple for our Rapunzel
- Gold cord
- Flower Stickers, we found this beautiful “bling on a roll” and it works perfectly! I love how we didn’t have to place each individucal flower on but that it comes with a clear backing. We have plenty to use for other craft projects now too.
DIRECTIONS:
- Cut a long pieces of your gold cord. * PRO TIP– many times cording will start to come unraveled once cut. To prevent this, add a dab of hot glue to the end of your cut piece to keep it from fraying. Take both ends of your cut cord and bring them together, essentially folding it in half. Twist your cord so it gives it a “braided look.” While twisted, hot glue the “hair” to the plastic Easter Egg in a wavy type fashion.
- Add your flower stickers.
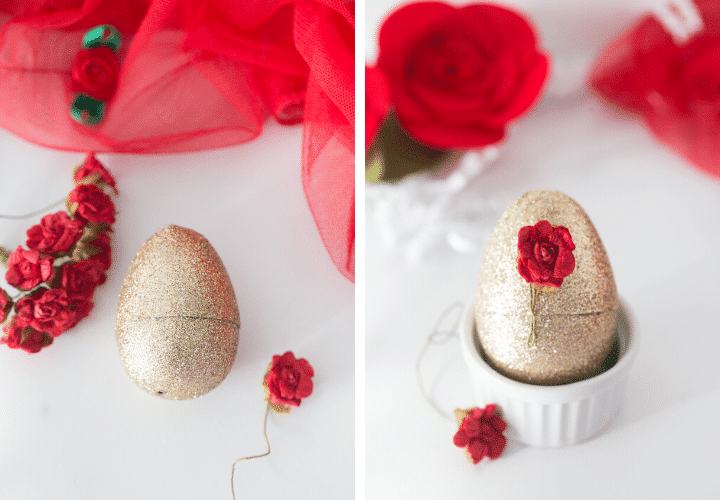
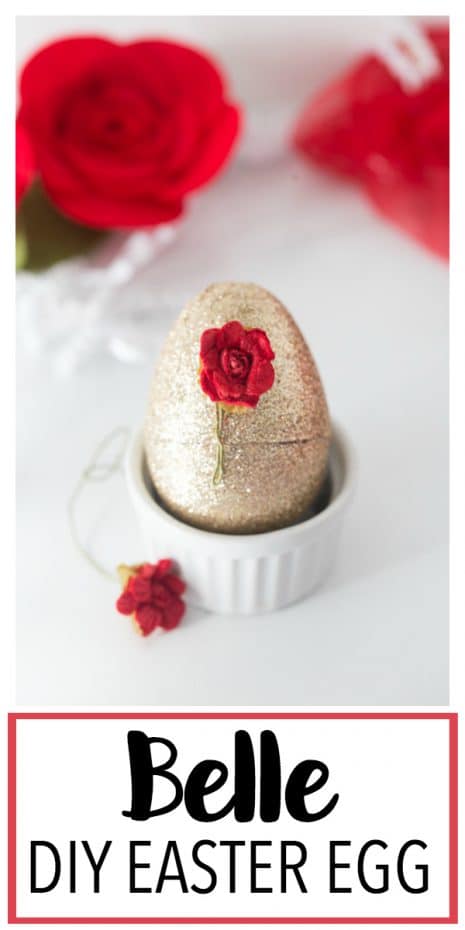
Belle/Beauty and the Beast
MATERIALS:
- Gold plastic Easter Egg
- Mini Roses, we used these paper roses but a sticker could work as well.
DIRECTIONS:
- Using a dab of hot glue, add your paper rose to the center of your gold Easter Egg. Easy Peasy!
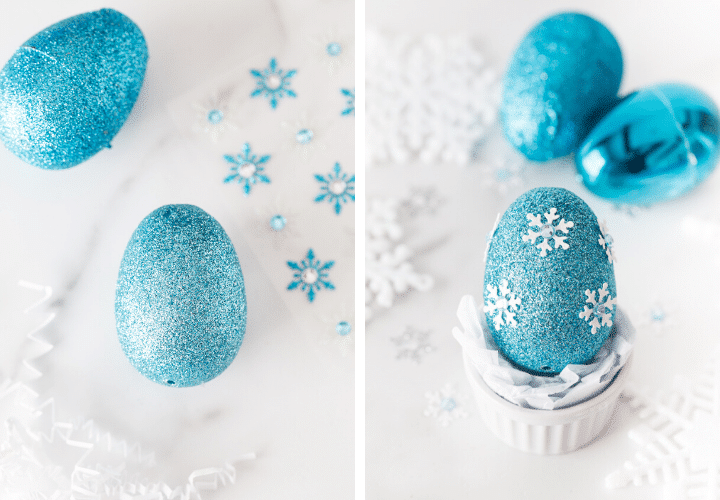
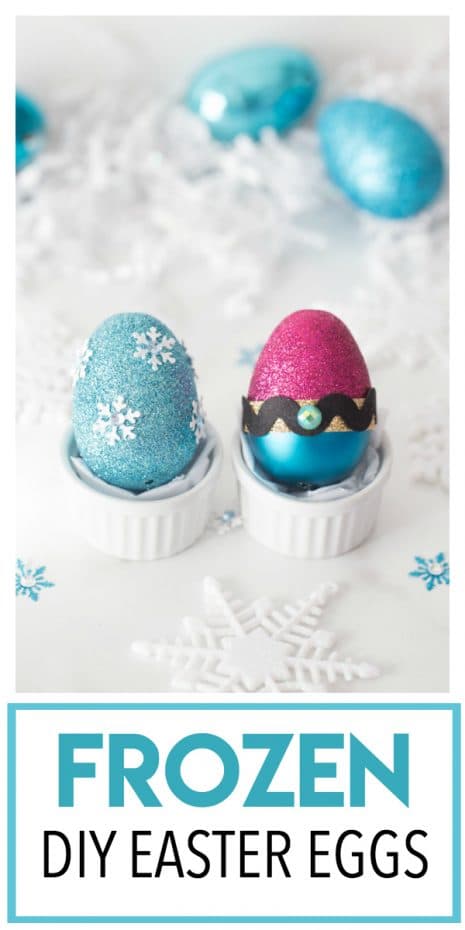
Elsa/Frozen Easter Egg
MATERIALS:
- Blue plastic Easter egg
- Snowflake stickers, we used these
DIRECTIONS:
Add your snowflake stickers to your plastic Easter egg, if the stickers will not adhere because of the glitter, use a small amount of hot glue. Adults only should use the hot glue gun.

Anna/ Frozen Easter Egg
MATERIALS:
- Pink plastic Easter Egg
- Blue plastic Easter Egg
- Gold Ribbon
- Black Rick Rack
- Jewel/Gem Sticker
DIRECTIONS:
- Start by finding a top and bottom plastic egg that fit well together.
- Take your cut piece of gold ribbon and glue it around the center of the egg, covering the seam.
- Glue your black rick rack on top of the gold ribbon.
- Lastly, add a small gem sticker.
These DIY Disney Princess Eggs were so fun to put together! I hope you have as much fun as we did working with your little princesses! If you make any of these versions we would love to see them! Just tag us @madetobeamomma or use the hashtag #madetobeamomma on all social medias 🙂


These are so adorable! I like the Belle egg, but my daughter saw the Frozen egg and fell in love – she can’t wait to make these for Easter!
These are so awesome and super easy to make! Perfect for Easter!
These are adorable! cutest idea ever!