As an Amazon Associate I earn from qualifying purchases.
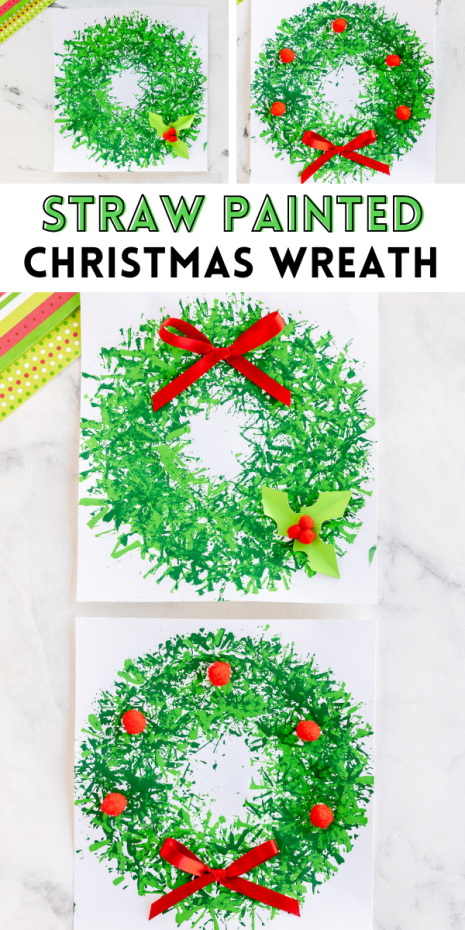
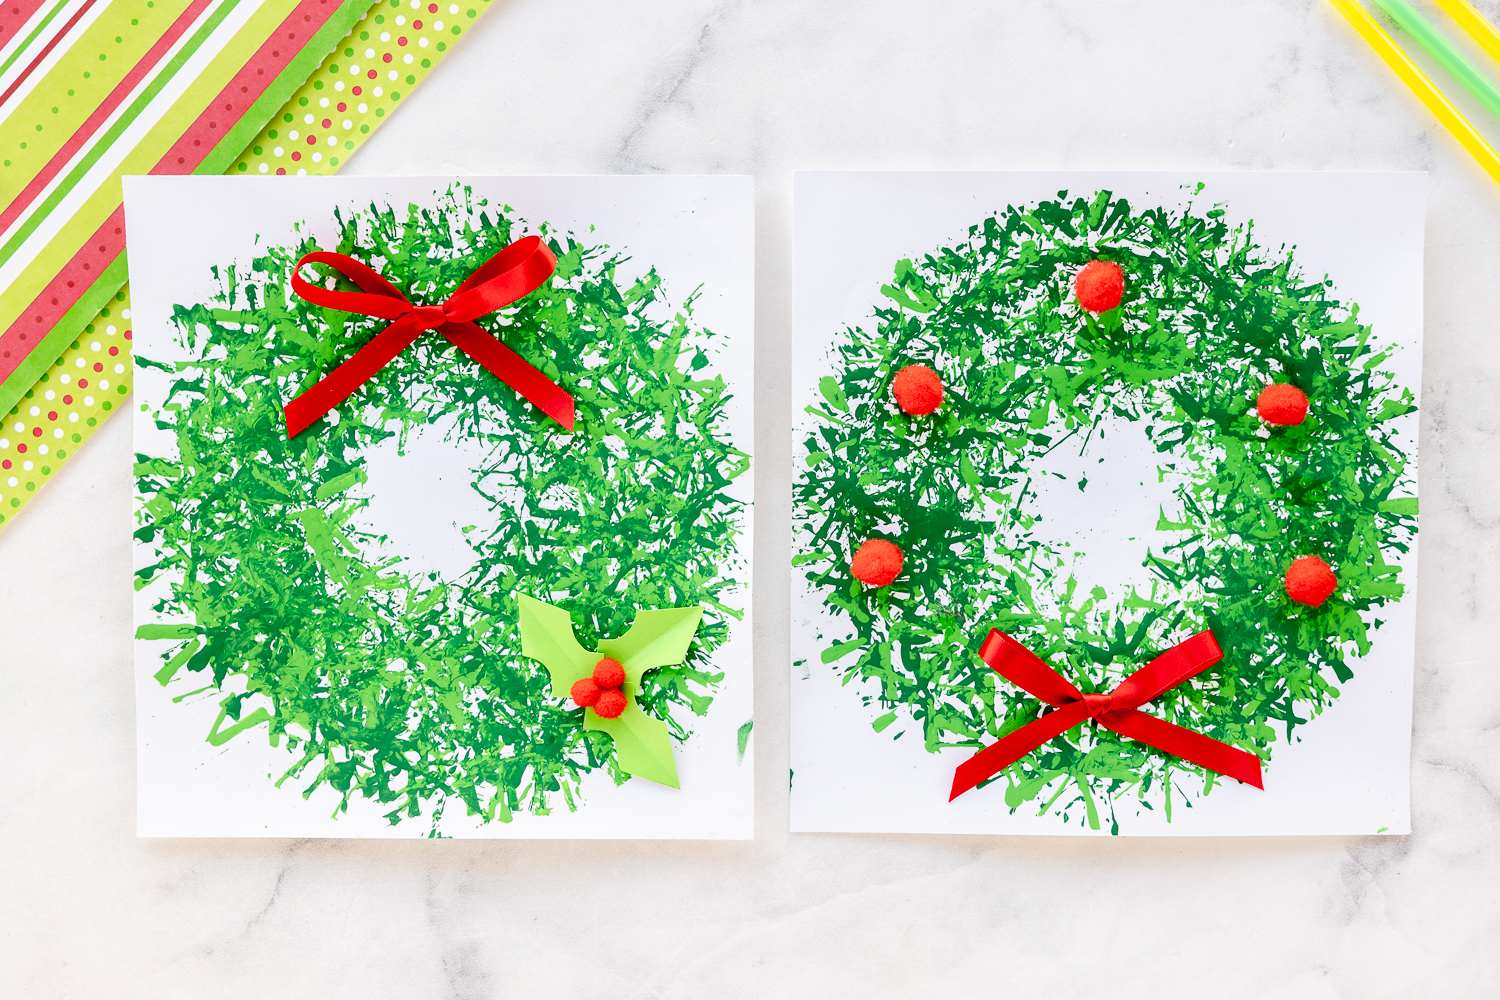
This Straw Painted Christmas Wreath craft is such a fun activity to make this holiday season. Paper, paint and a plastic straw is all you need to get started on this fun holiday wreath perfect for Christmas!
Christmas Wreath Craft
As a crafting Momma nothing get me in the holiday spirit more than spending time with my kids creating fun Christmas crafts that we then get to share with you! This paper straw wreath is such a fun Christmas craft for kids of all ages but especially fun for younger kids! It’s so fun to watch kids use an ordinary everyday item – like a straw- and create a special piece of art they will be excited to show off and share with their family. With just a little bit of prep work, you can work on this project with your little ones in less than 30 minutes. This shorter activity is perfect for an already busy time of year.
My family and I love to drive to some local parks and into neighborhoods everyday holiday season to check out their Christmas displays and Christmas lights. Houses are adorned with lights, Christmas blow up characters, wrapped in garlands, and front door decorated with Christmas wreaths of all sizes and colors. We made this Christmas wreath while thinking of the beautiful homes we drive by.
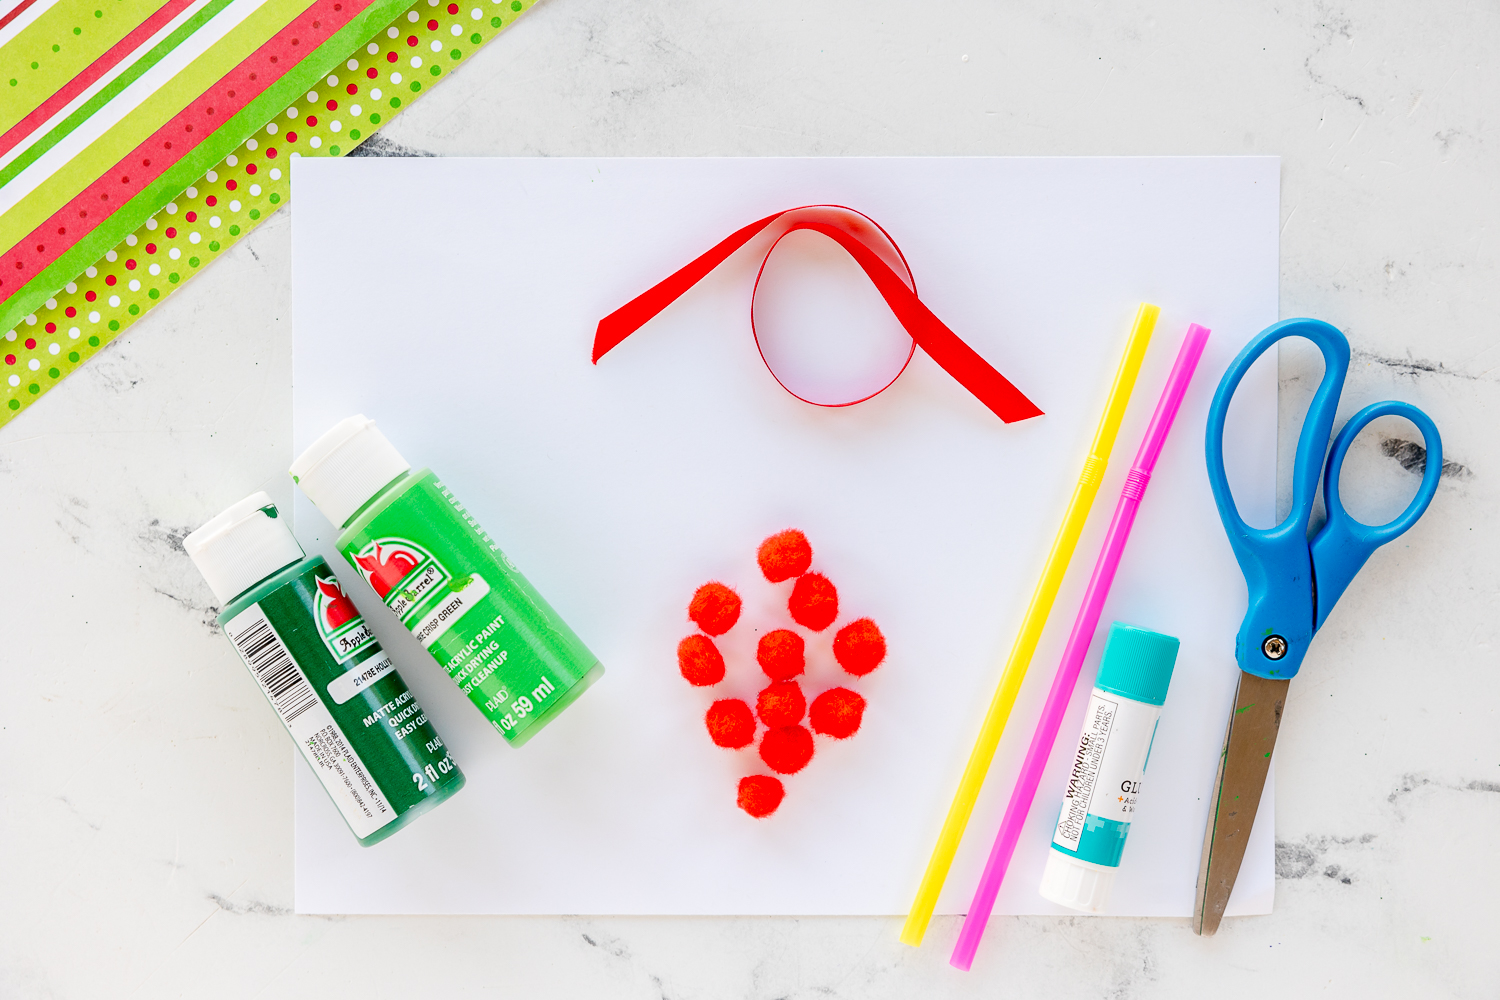
Supplies Needed for Kids Christmas Wreath:
- Plastic Straw
- Green Acrylic Paint, I used two different shades
- Pom Poms
- Green Cardstock or construction paper
- Red Ribbon
- School glue or hot glue gun (but only meant for adults)
How to make DIY Christmas Wreath
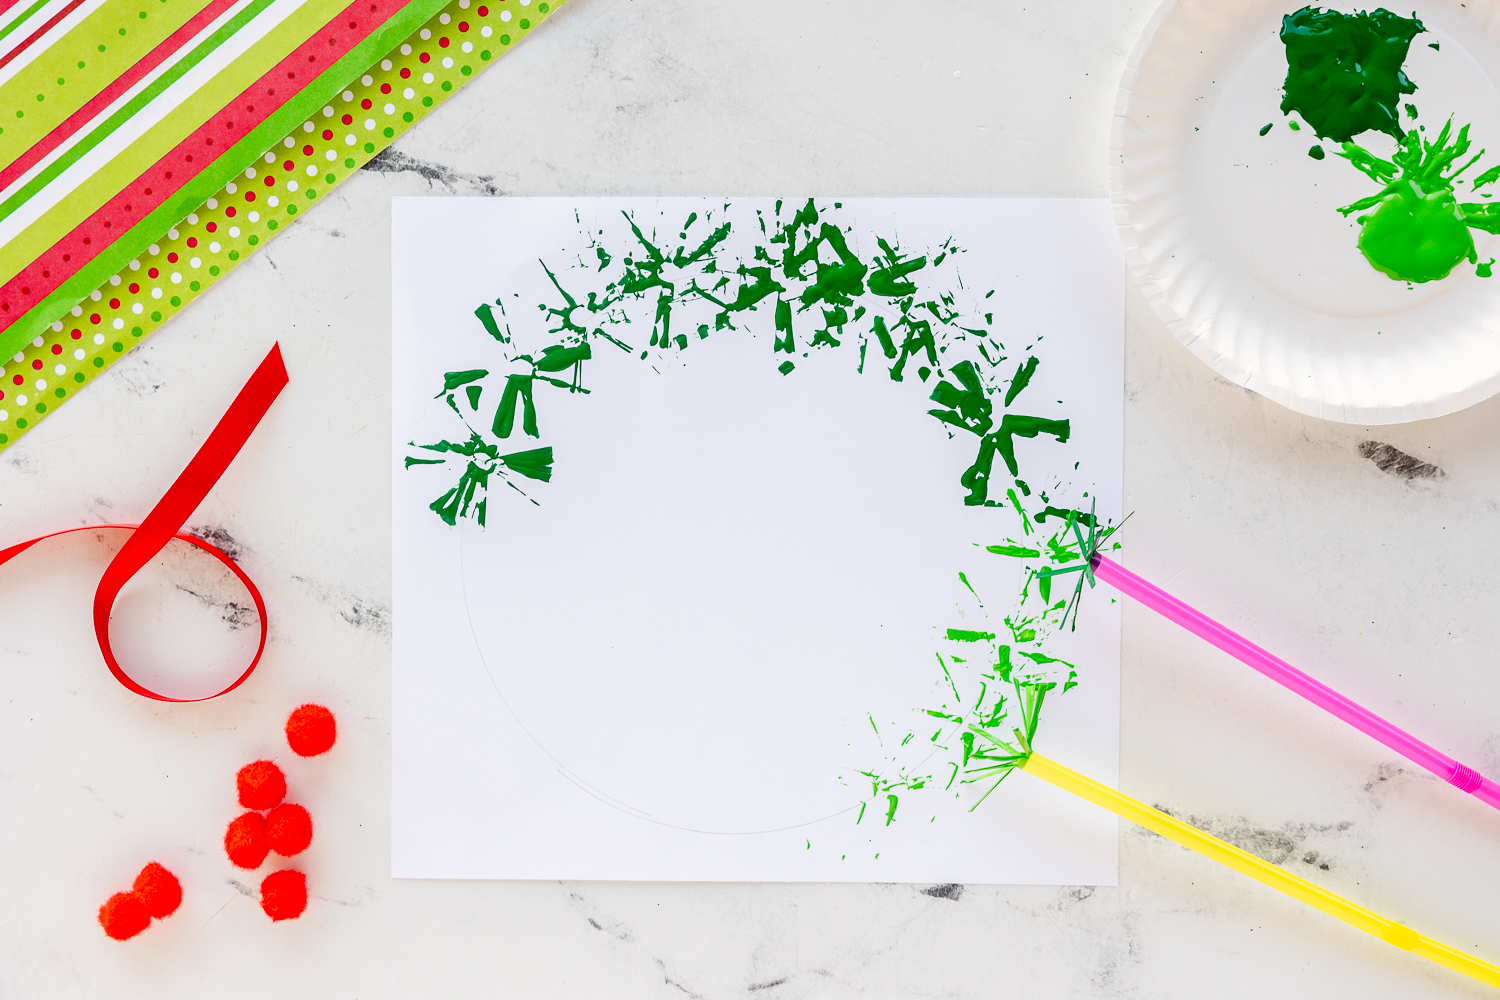
- Begin by adding small slits at the end of your plastic straw. (Parents Only should do this part) I made my slits about 1/2 inch to 1 inch long. Use your fingers to push the slits out flat.
- Using a small or large dinner plate depending on how big you want your wreath, trace around the plate with a pencil. You can also just freehand a circle shape.
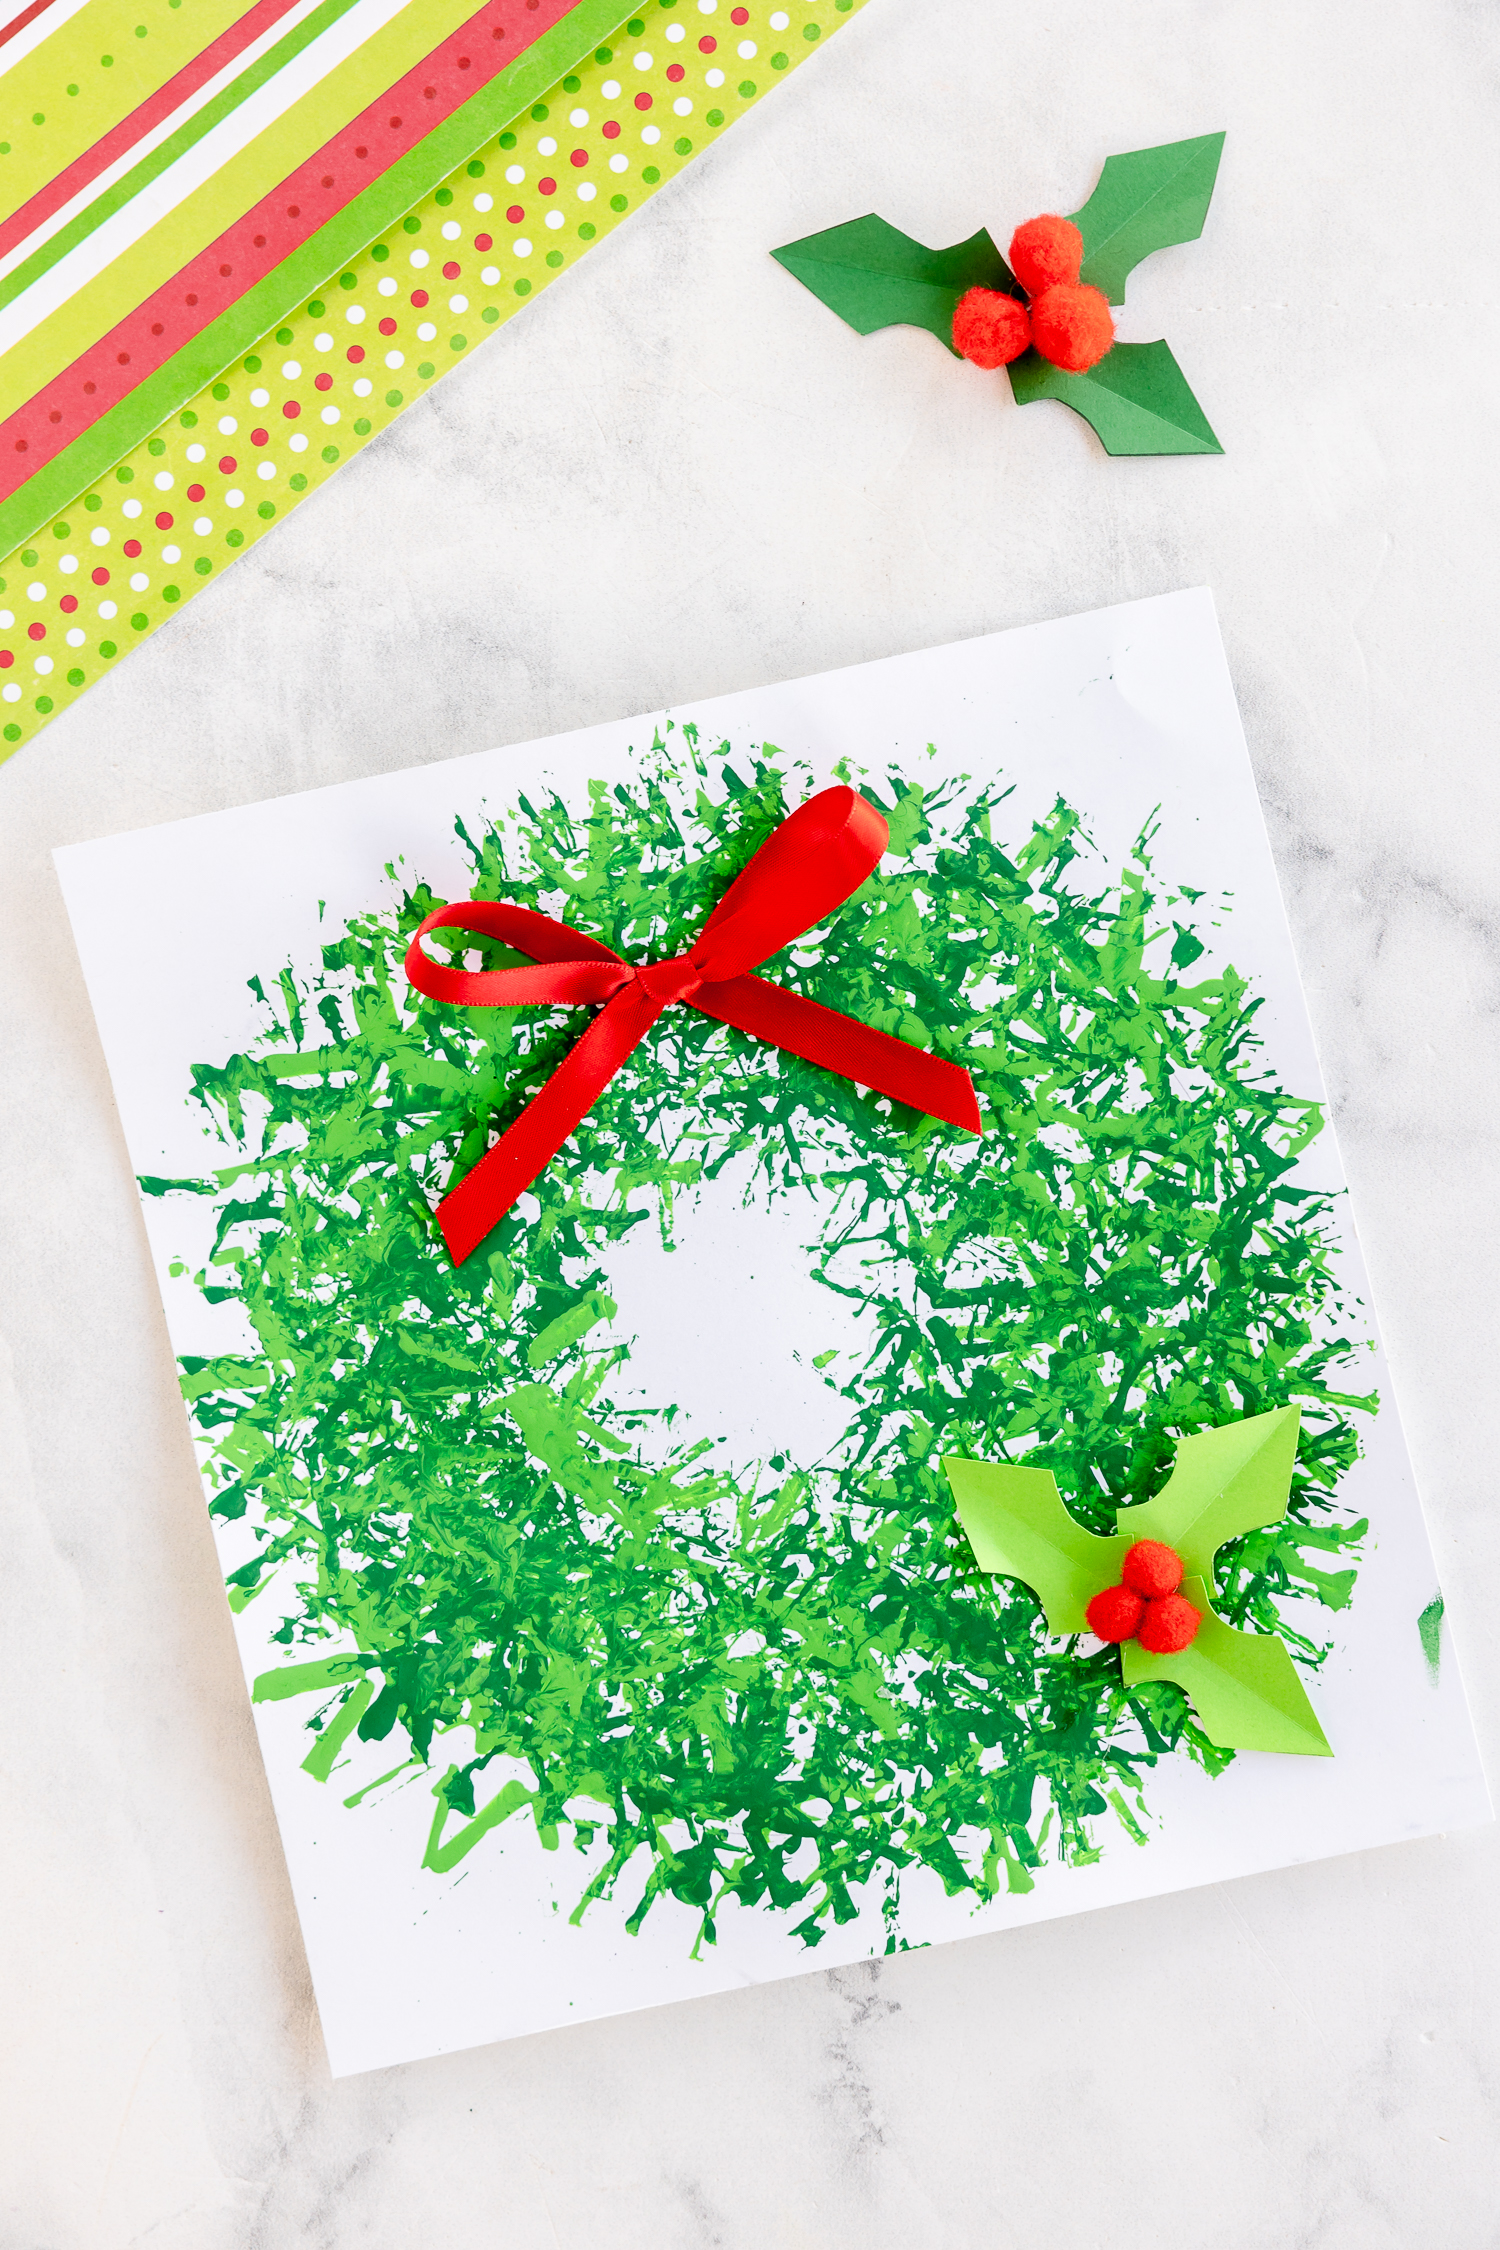
- Dip your straw in green paint and stamp onto paper in a circle shape following your traced line be sure to not paint in the center of the wreath. Repeat stamping your paint onto your paper until the wreath shape is complete. Add a second layer with a lighter green color.
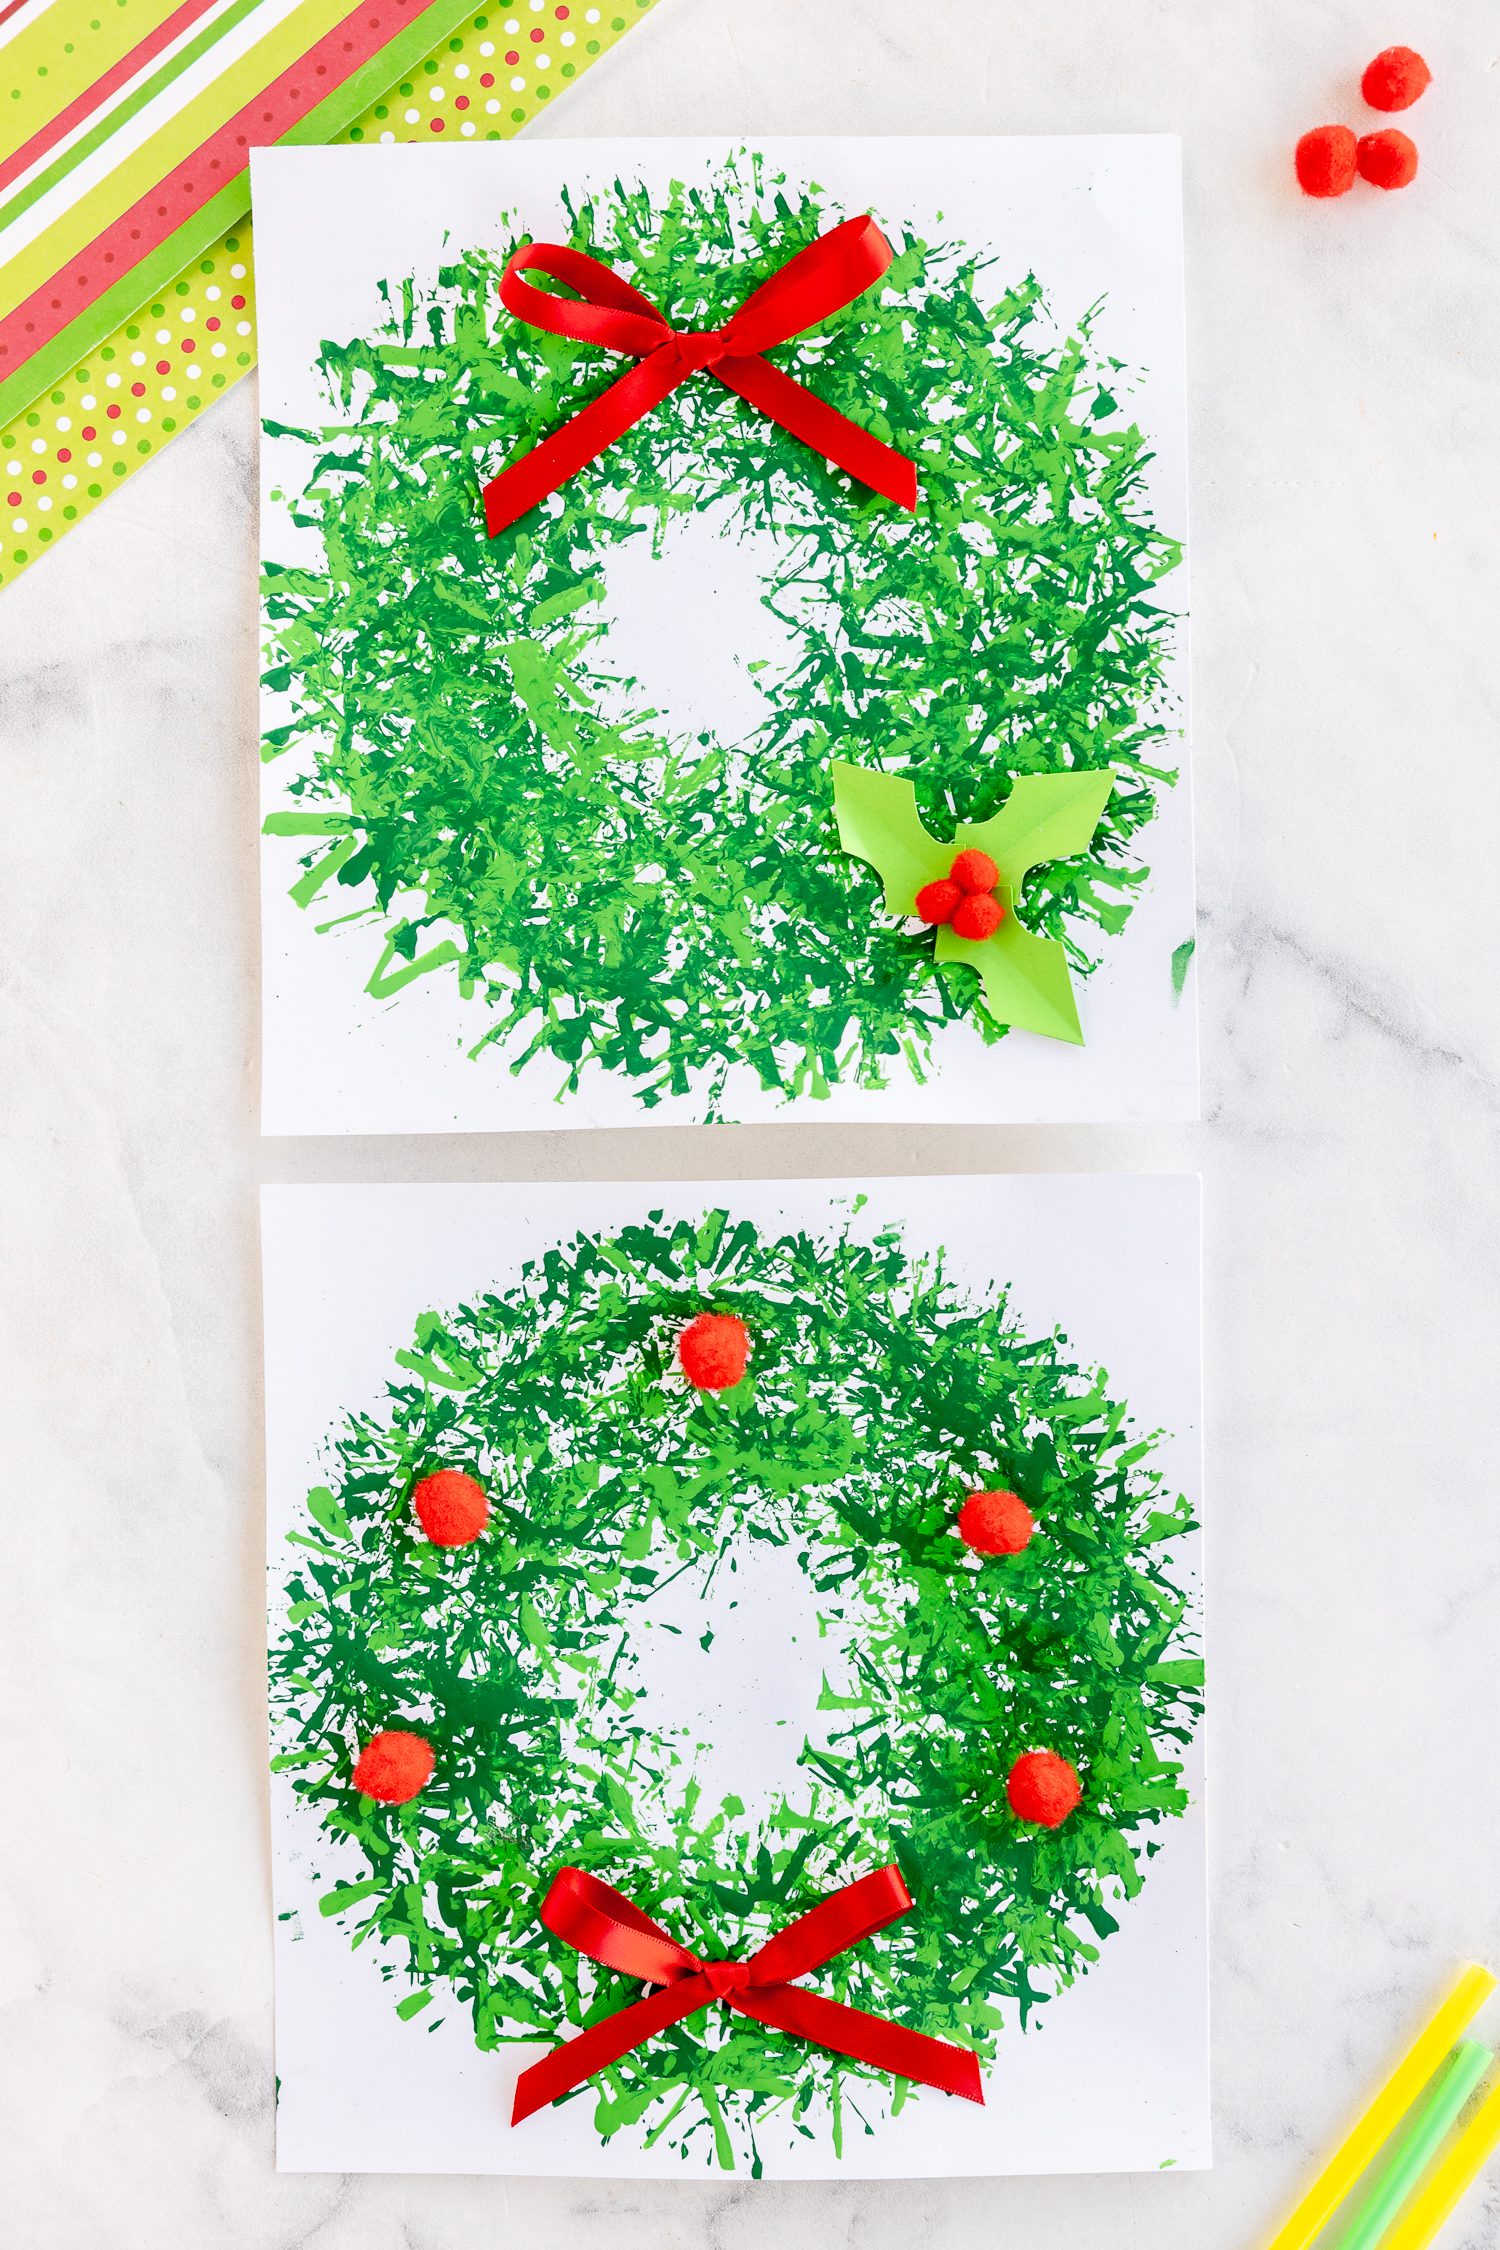
4. Add a red ribbon to the top of your completed wreath base and add red pom pom wreath ornaments around the wreath form.
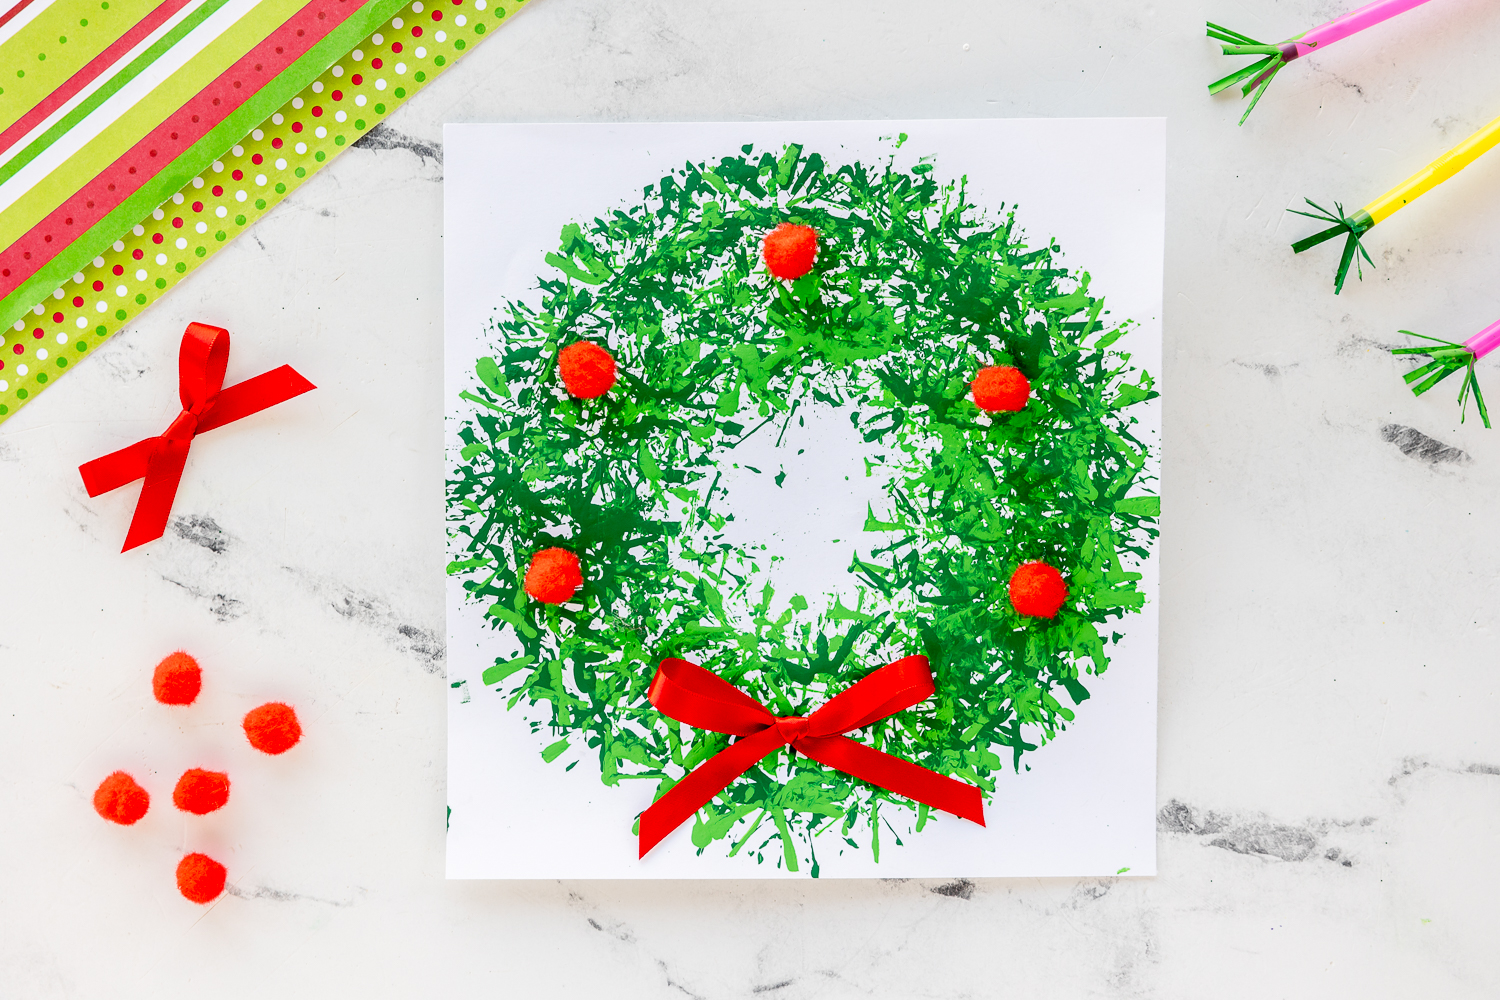
5. If desired, you can add some holly and red berries. Use three red pom poms and two leaf shapes and glue to your finished wreath.

Christmas Wreath Ideas for this Finished Craft
- Sticker cut around your wreath and cut out the middle of the wreath. Add a small piece of ribbon to the back of the wreath and use a command strips to hold it up.
- Fold a piece of paper in half, trace your circle on one side, and finished your Christmas wreath. Now you have a start on your homemade Christmas cards! 🙂
- Find a picture frame from your local Walmart or Dollar Tree that will fit your finished wreath for some pretty kid friendly diy Christmas decorations.