As an Amazon Associate I earn from qualifying purchases.

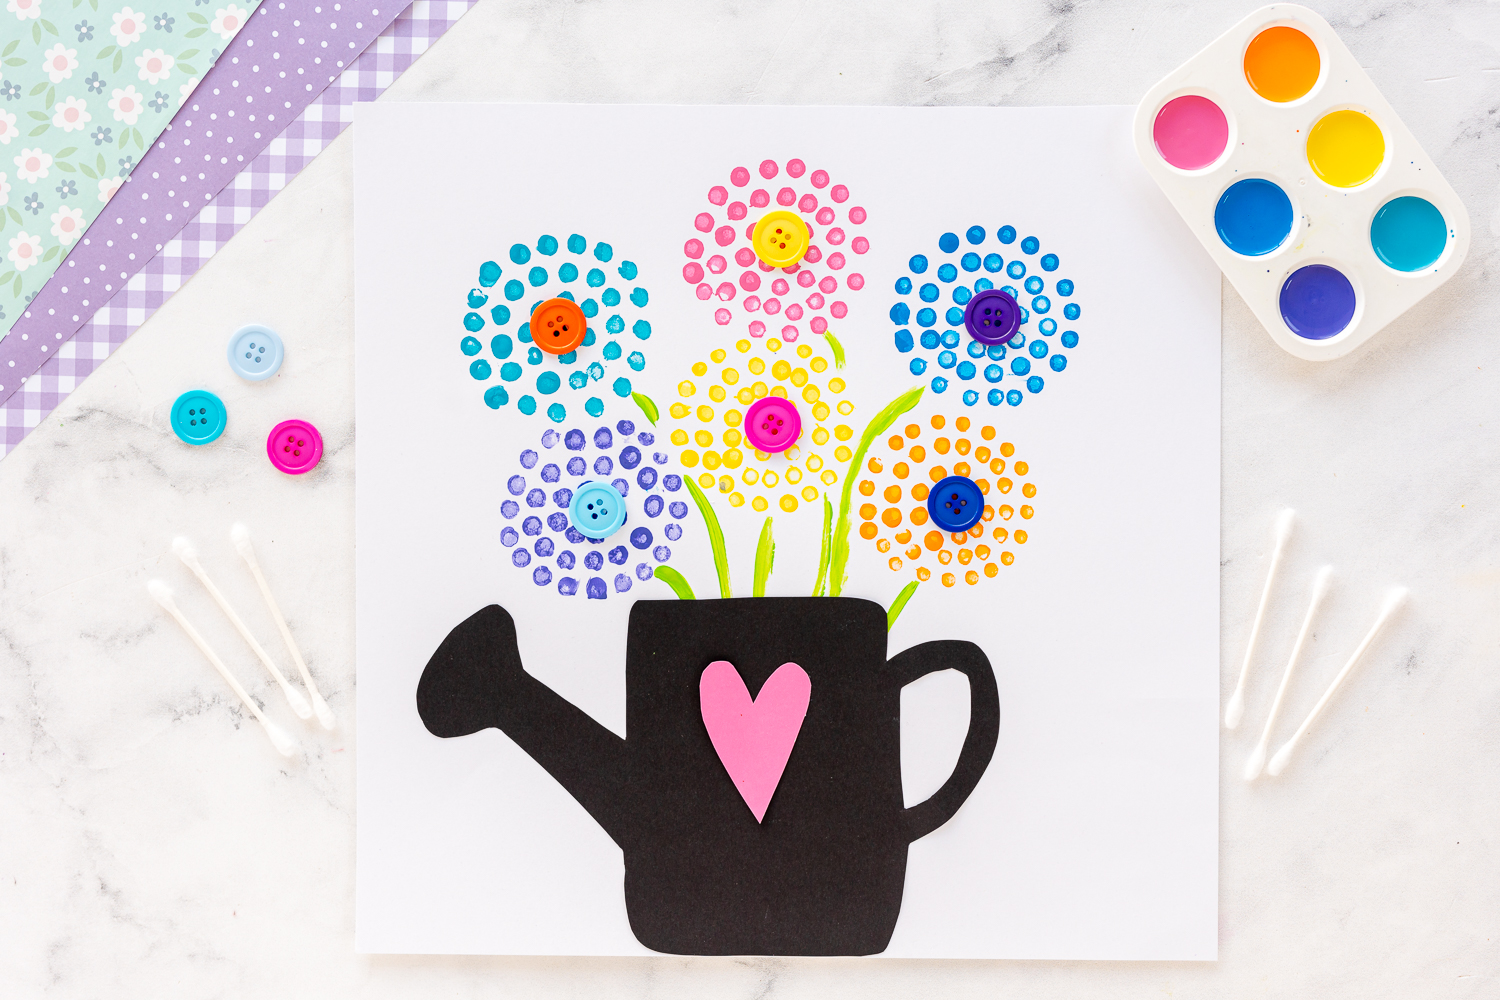
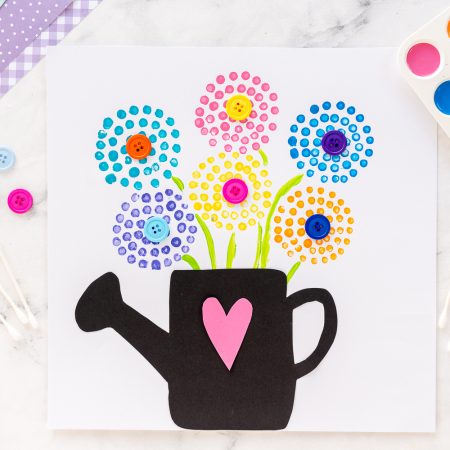
Create these simple Q-Tip Flowers this spring and summer season using fun materials like buttons, q-tips, paint and paper!
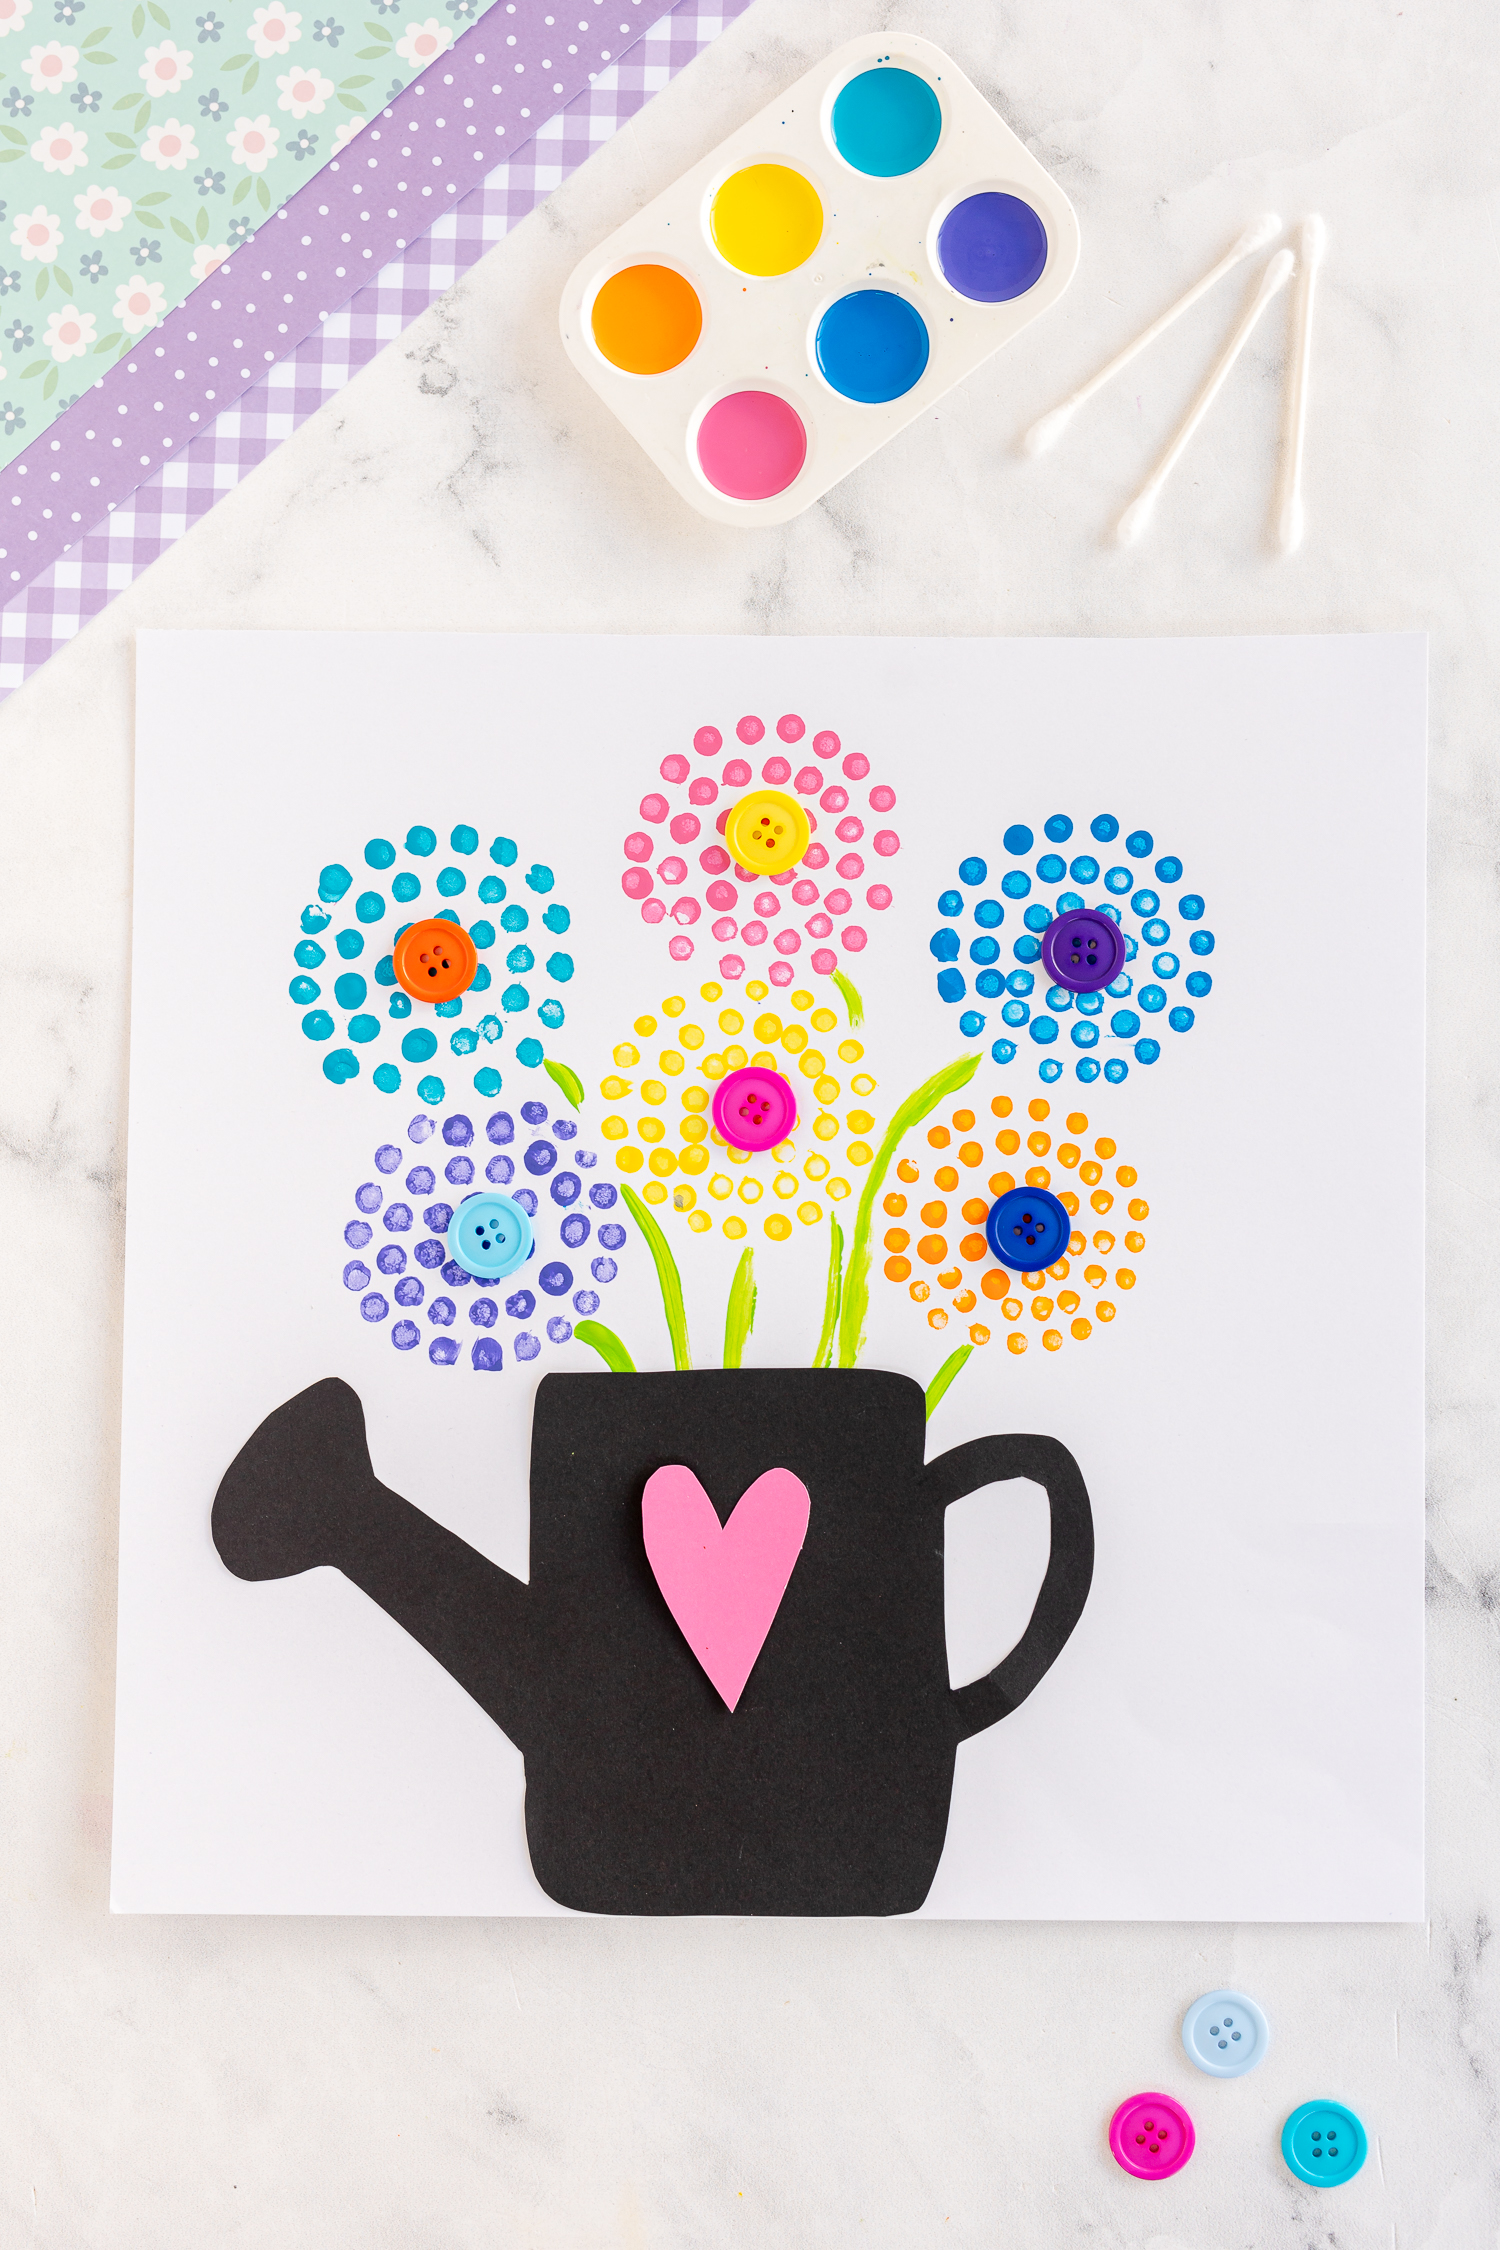
Crafting with materials other than a paintbrush and paint is a super fun way to get creative with your kids. A simple flower craft is also a fun way to spend some quality time together while you make lovely q-tip paintings. Put these two things together, and you get q-tip flowers! These beautiful flowers make adorable cards and artwork for the fridge. Check out how simple they are to make and how much kids enjoy them.
HOW TO VIDEO:
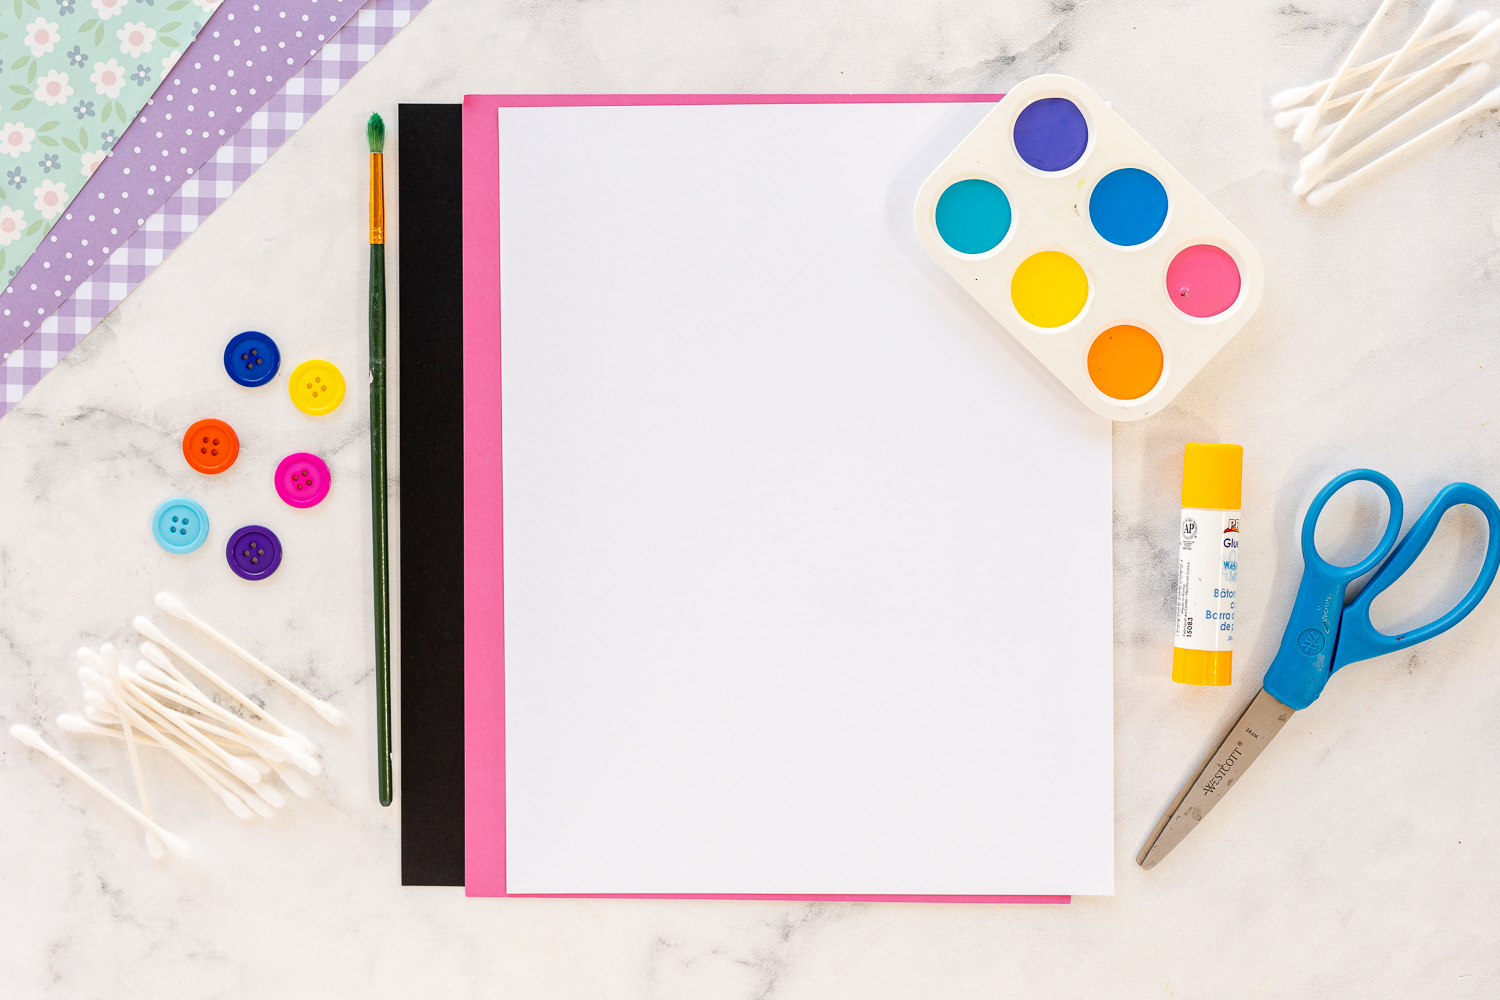
Craft Supplies Needed to Make Q-Tip Flowers
Seriously everything you need for this craft is probably already in your home. Just grab your stash of q-tips and paint, and get to work. If you need to run to the store, you can find everything you need at the Dollar Store or at your local supercenter.
- pink, turquoise, orange, yellow, green, purple, and light blue paint *
- white, pink, and black cardstock – I used 12 x 12 size
- Q-tips
- Buttons (¾ inch in size)
- Watering Can Template
- Glue stick
The colors listed above do not have to be used. These are just the colors I chose but feel free to use different shades and varieties of colors for your flowers. Kids will love using a rainbow of colors to create their bouquets while painting!
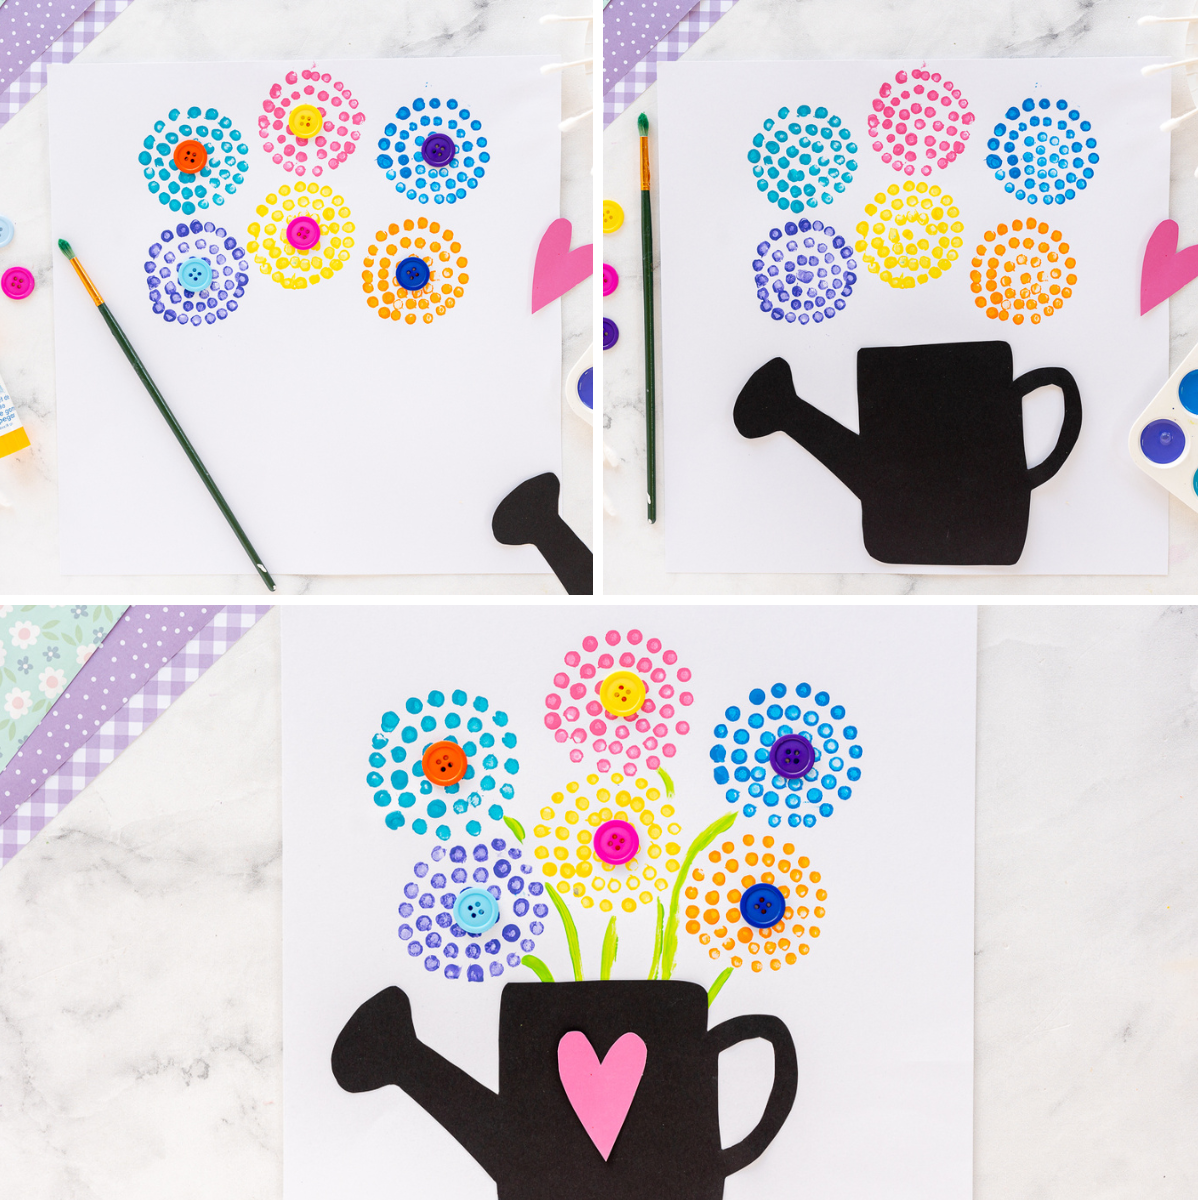
How to Make Q-Tip Flower Crafts
Making these adorable flowers just requires some acrylic paint or craft paint and a simple bathroom supply! Read these step-by-step instructions to see how simple it is to make the craft for all sorts of purposes.
- Start by using your q-tips to make circular flower shapes. Do this by dipping the q-tip in paint and dotting it onto the paper.
- Once the paint is dry, add buttons to the center of each flower. Make them colorful to vary colors or match the same colors.
- Paint on the flower stems using green paint.
- Add the black watering can below the flowers and a cute pink heart on top of that.
If your child is having trouble painting the dots in a circle, place something circular in the center for them to paint around or draw pencil dots for them to mark over. Older kids will be able to tackle this pretty easily, but younger kids may need a bit of guidance before getting started.
How to Use this Craft
Crafting doesn’t have to have a purpose. Sometimes it’s just fun to enjoy the creation process. If you are looking for a craft for the spring or summer season, though, this adorable craft is perfect.
- Use this craft to create unique flowers on a card for a mom or a loved one. Use a variety of different colors to make a whole bouquet for her to enjoy.
- Create this craft while learning about how flowers grow. Make the stem of your flower a different length than the others on the page to show them growing over time.
- Grab your craft supplies and let kids get creative with the flowers they make. Sometimes we lay out construction paper and other materials, just to clear things out of the house. Then, we buy new materials for spring crafts and more.
FAQs
Are cotton swabs the same as q tips?
Yes! They are the same thing. Not to be confused with cotton balls though.
Can I turn the q-tips into petals?
Instead of dotting paint with the q-tips, you can glue the q-tips down as petals themselves. Use a button or a lump of clay to create the center of the flower, and use the q-tips as delicate daisy petals. That’s the fun part about crafting, you can get as creative as you would like.
What type of paint should I use?
We often use acrylic paints, but we used to use washable paints when the kids were younger. It completely depends on your needs. Watercolor paints also work well, but they may not show up as vibrant when using q-tips. The q-tips will likely soak up most of the color. I recommend using craft or acrylic paint to get bright colors and to make sure your flower design shows up on the paper.

More Flower Craft Ideas
If you enjoy painting flowers with your kids, try some of these simple crafts for spring. They’re simple and so much fun to complete at home or in the classroom. Use them for spring, Mother’s day, to learn about flowers, or just for fun.
Thank you, as always, for reading, and be sure to check out all of my other crafts and activities for kids! There’s a little of something for everyone.
Q-Tip Flowers
Supplies
- pink, turquoise, orange, yellow, green, purple, and light blue paint
- white, pink, and black cardstock – I used 12 x 12 size
- Q-tips
- Buttons (¾ inch in size)
- Watering Can Template FOUND HERE!
- Glue Stick
Instructions
- Start by using your q-tips to make circular flower shapes. Do this by dipping the q-tip in paint and dotting it onto the paper.
- Once the paint is dry, add buttons to the center of each flower. Make them colorful to vary colors or match the same colors.
- Paint on the flower stems using green paint.
- Add the black watering can below the flowers and a cute pink heart on top of that.