As an Amazon Associate I earn from qualifying purchases.
Let the kids help decorate the house for autumn with these adorable Pumpkin Suncatchers! This simple fall craft is super easy and tons of fun!
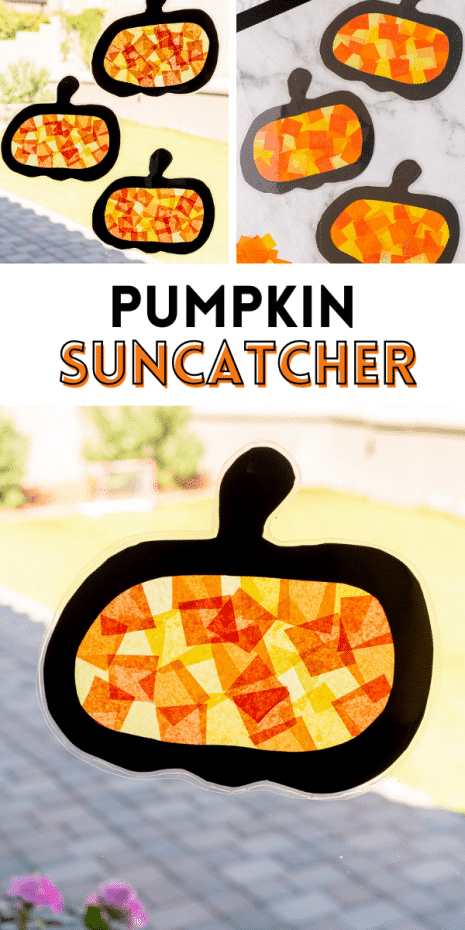
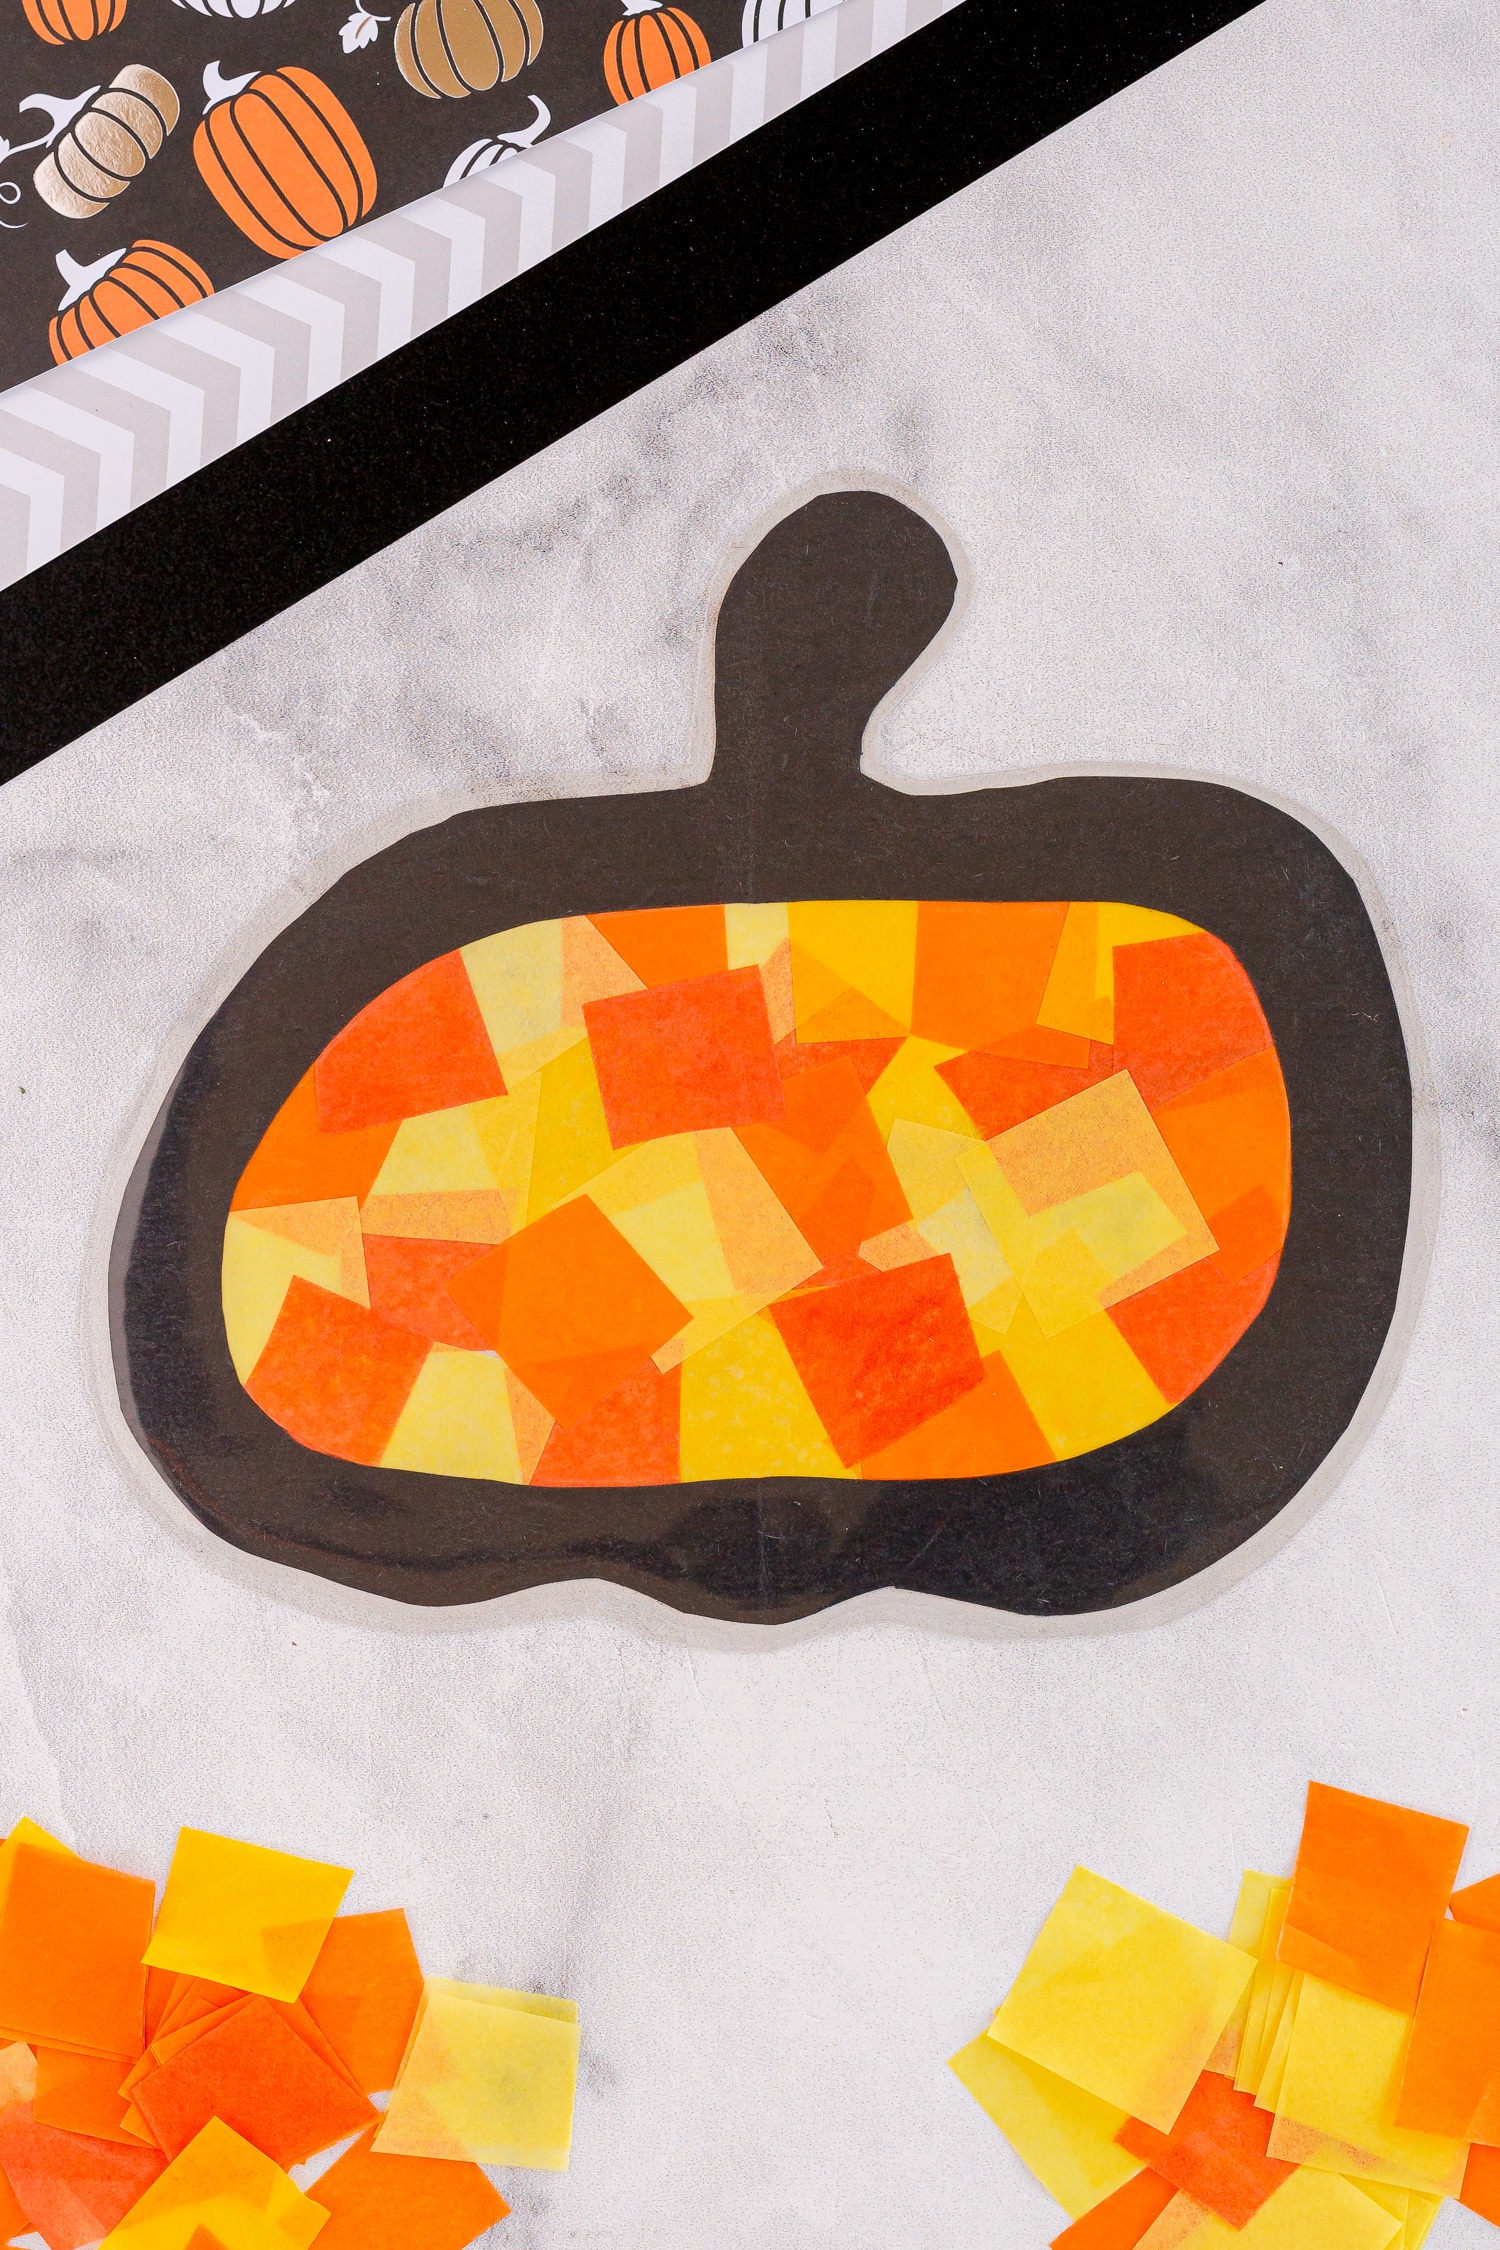
Pumpkin Suncatcher Craft
When we decorate our home for fall, we always like to get the kids in on the fun. Although I do like to make some of the decor myself and use a few store-bought items, there are plenty of crafts that are great for kids and perfect for hanging up on the wall! I love traditional works of art on paper and paper plate crafts for autumn, but I wanted to try something a little different this time.
This Pumpkin Suncatcher Craft is a unique take on a fall craft, and the kids have SO much fun with it! It gives them plenty of opportunities to cut, draw, and assemble their final masterpieces. Plus, they can get super creative with the placement of their tissue paper squares to make their pumpkin suncatchers totally unique!
Pumpkin Suncatchers would work great for a fall classroom craft, homeschool arts and crafts activity, or for a fall craft party. They’d make a great addition to your Halloween activity lineup, too!
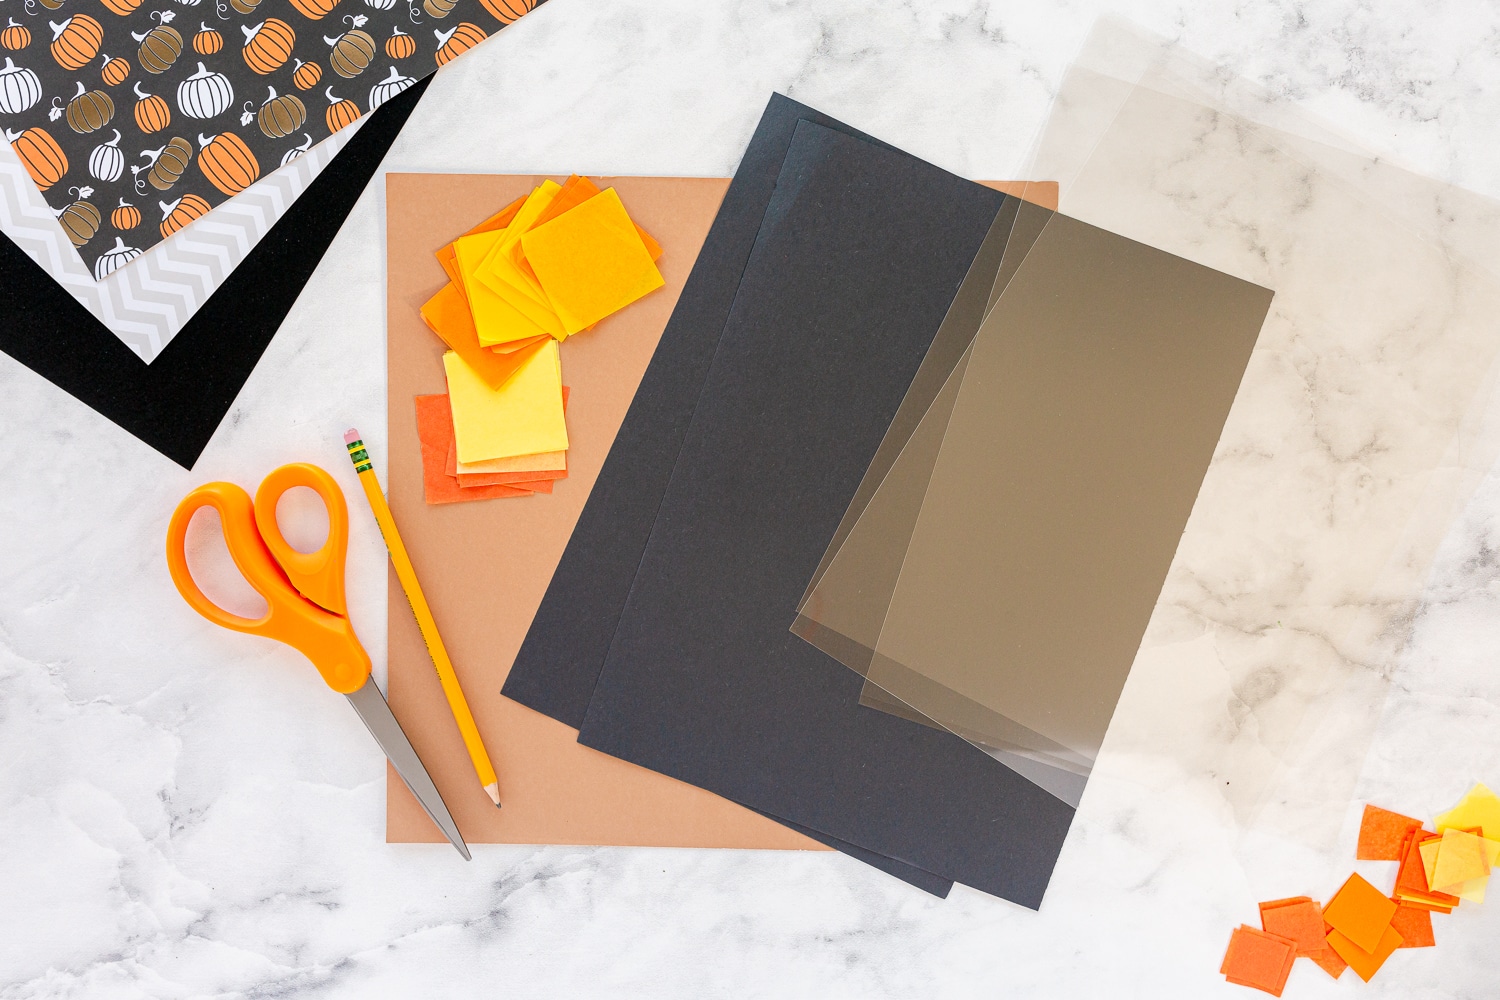
Supplies you’ll need:
- Pumpkin template
- Black construction paper or cardstock
- Tissue paper squares in shades of orange and yellow
- Contact paper or self adhesive laminating sheets
How to make Pumpkin Suncatchers
Follow these easy steps to make these adorable suncatchers for fall!
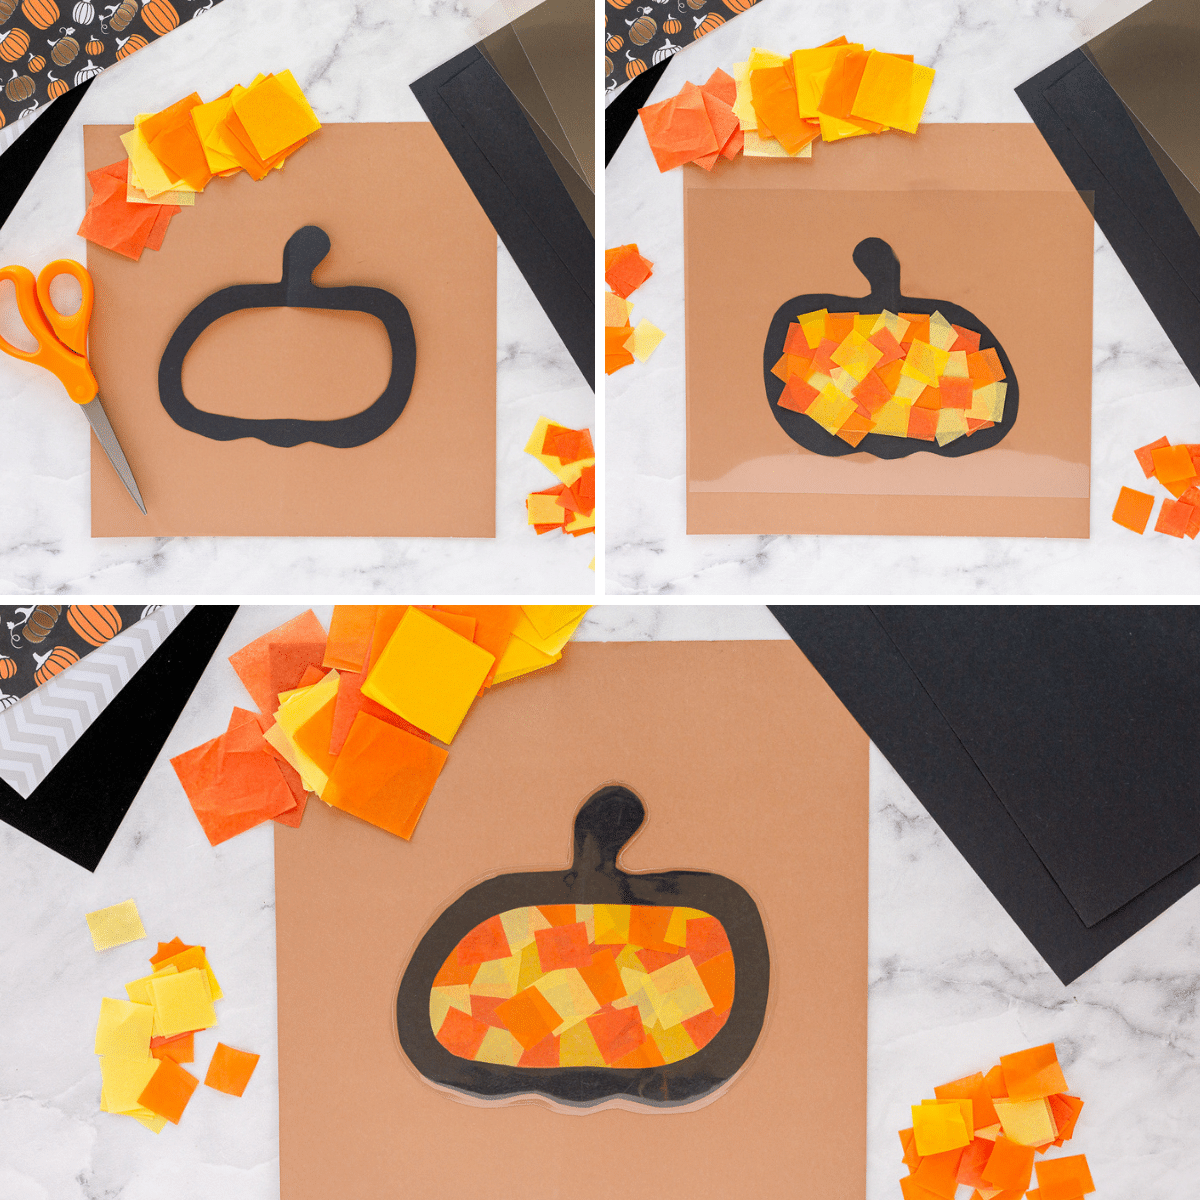
- First, cut out the pumpkin frame with your black construction paper. To do this, you’ll want to trace your pumpkin template on a piece of black paper. Then, fold it in half and draw a line about an inch outside of where you traced the template. Finally, cut along both lines with the piece of paper folded in half, unfold, and you have your pumpkin frame!
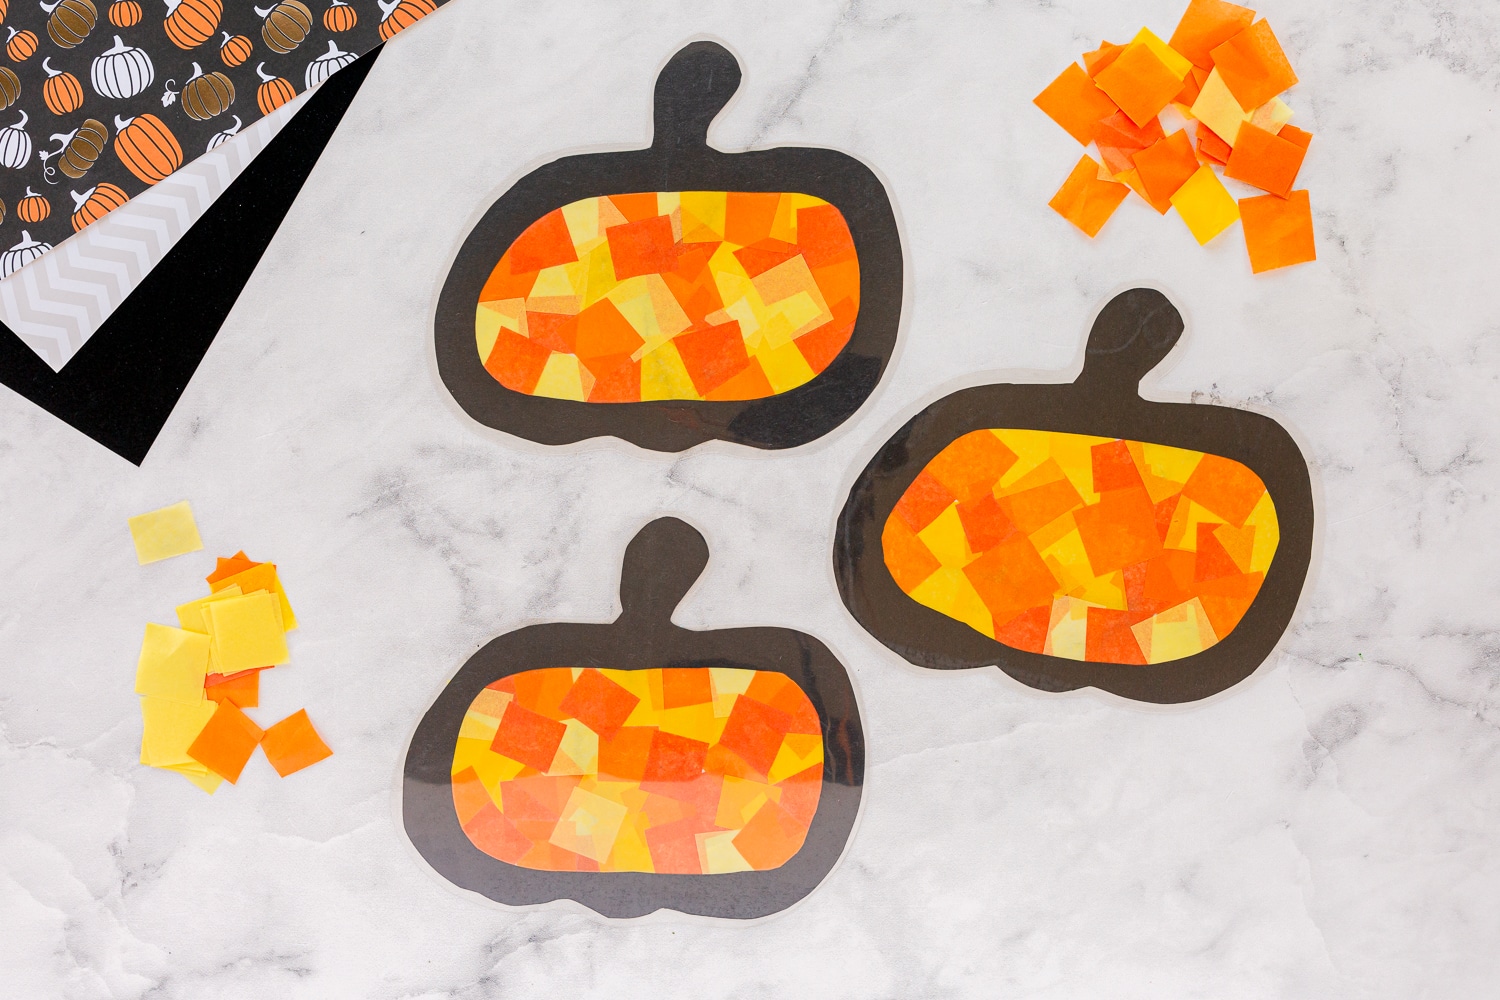
- Next, lay your frame on a piece of contact paper or laminating sheet, sticky side up. Then, place your colorful squares of tissue paper inside the frame. Be sure to cover all of the sticky areas!
- When fully covered, place another piece of contact paper on top. Press down until nice and flat, being sure to smooth out any air bubbles that get caught under the contact paper.
- Lastly, turn the project around and cut around the pumpkin, leaving about a ¼ inch of the contact paper around the pumpkin to be sure it stays together. To hang it up, use a small piece of double sided tape on the frame area to cling to a window!
Tips for making pumpkin suncatchers
- You can either cut the colorful tissue paper into squares or let the kids cut them out themselves. If you’re making these suncatchers with a little one who can’t handle scissors quite yet but wants to make their own, they can tear their tissue paper into pieces instead!
- Making the frames can get a bit tricky for younger kids, especially if they accidentally cut through their frame. If you’d prefer, you can make the frames ahead of time and let them do all the rest. The colorful squares are where the fun is at, anyways!
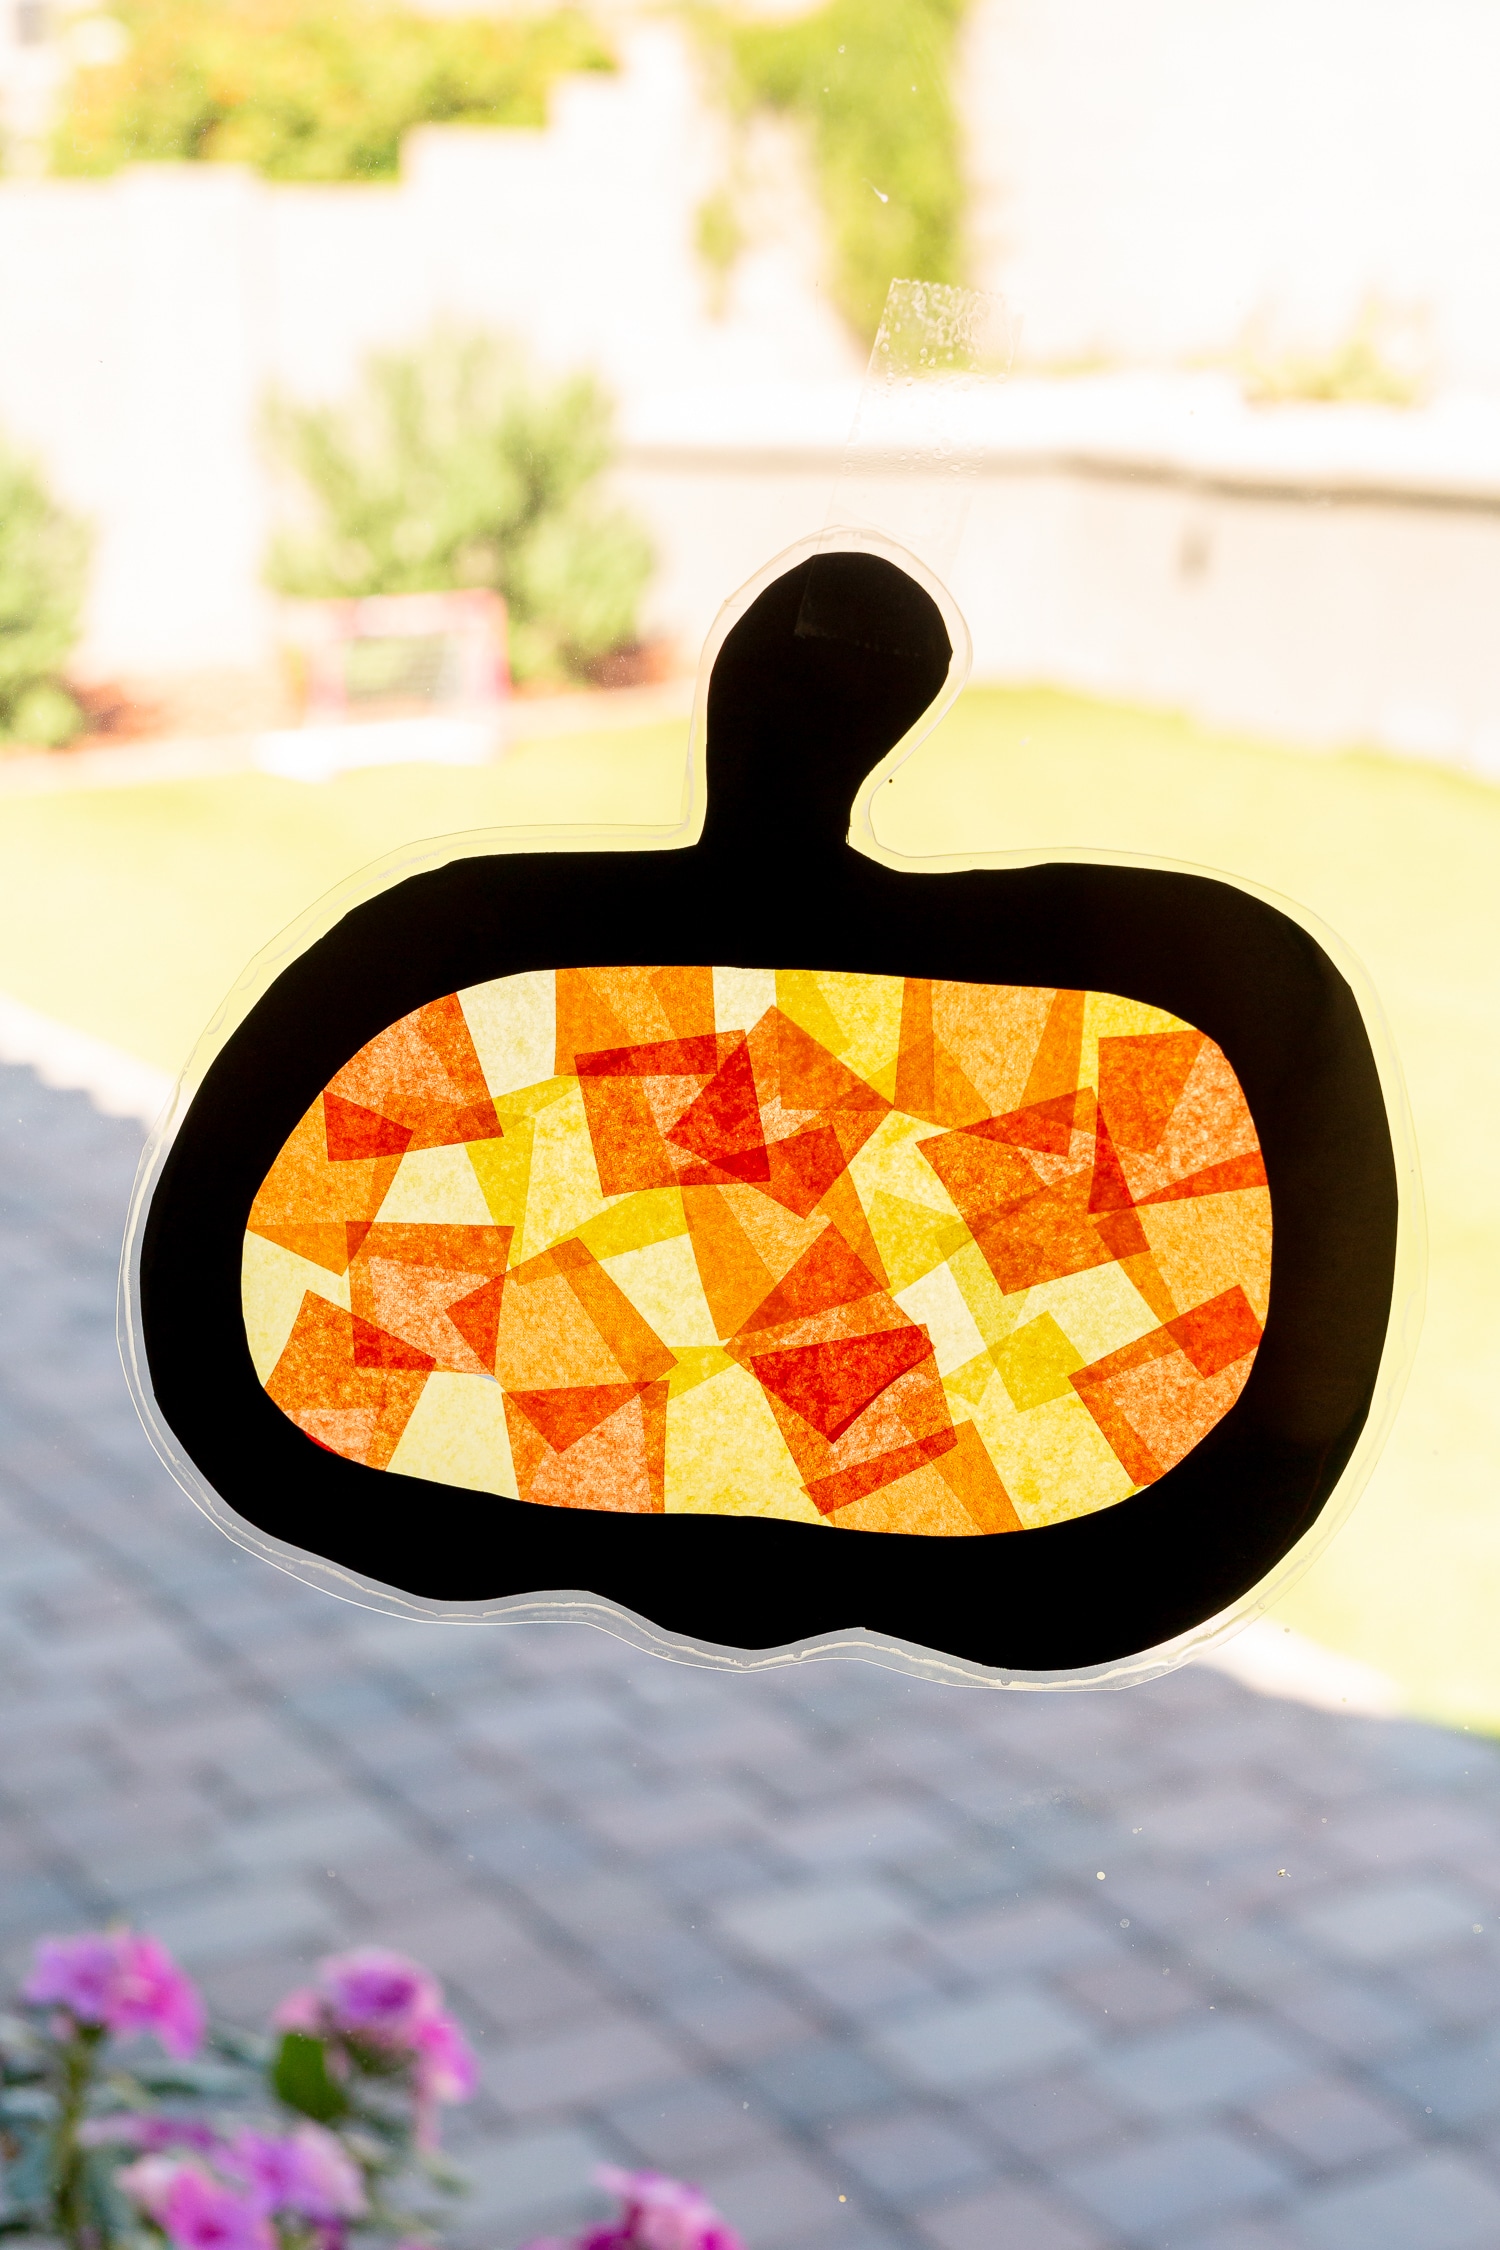
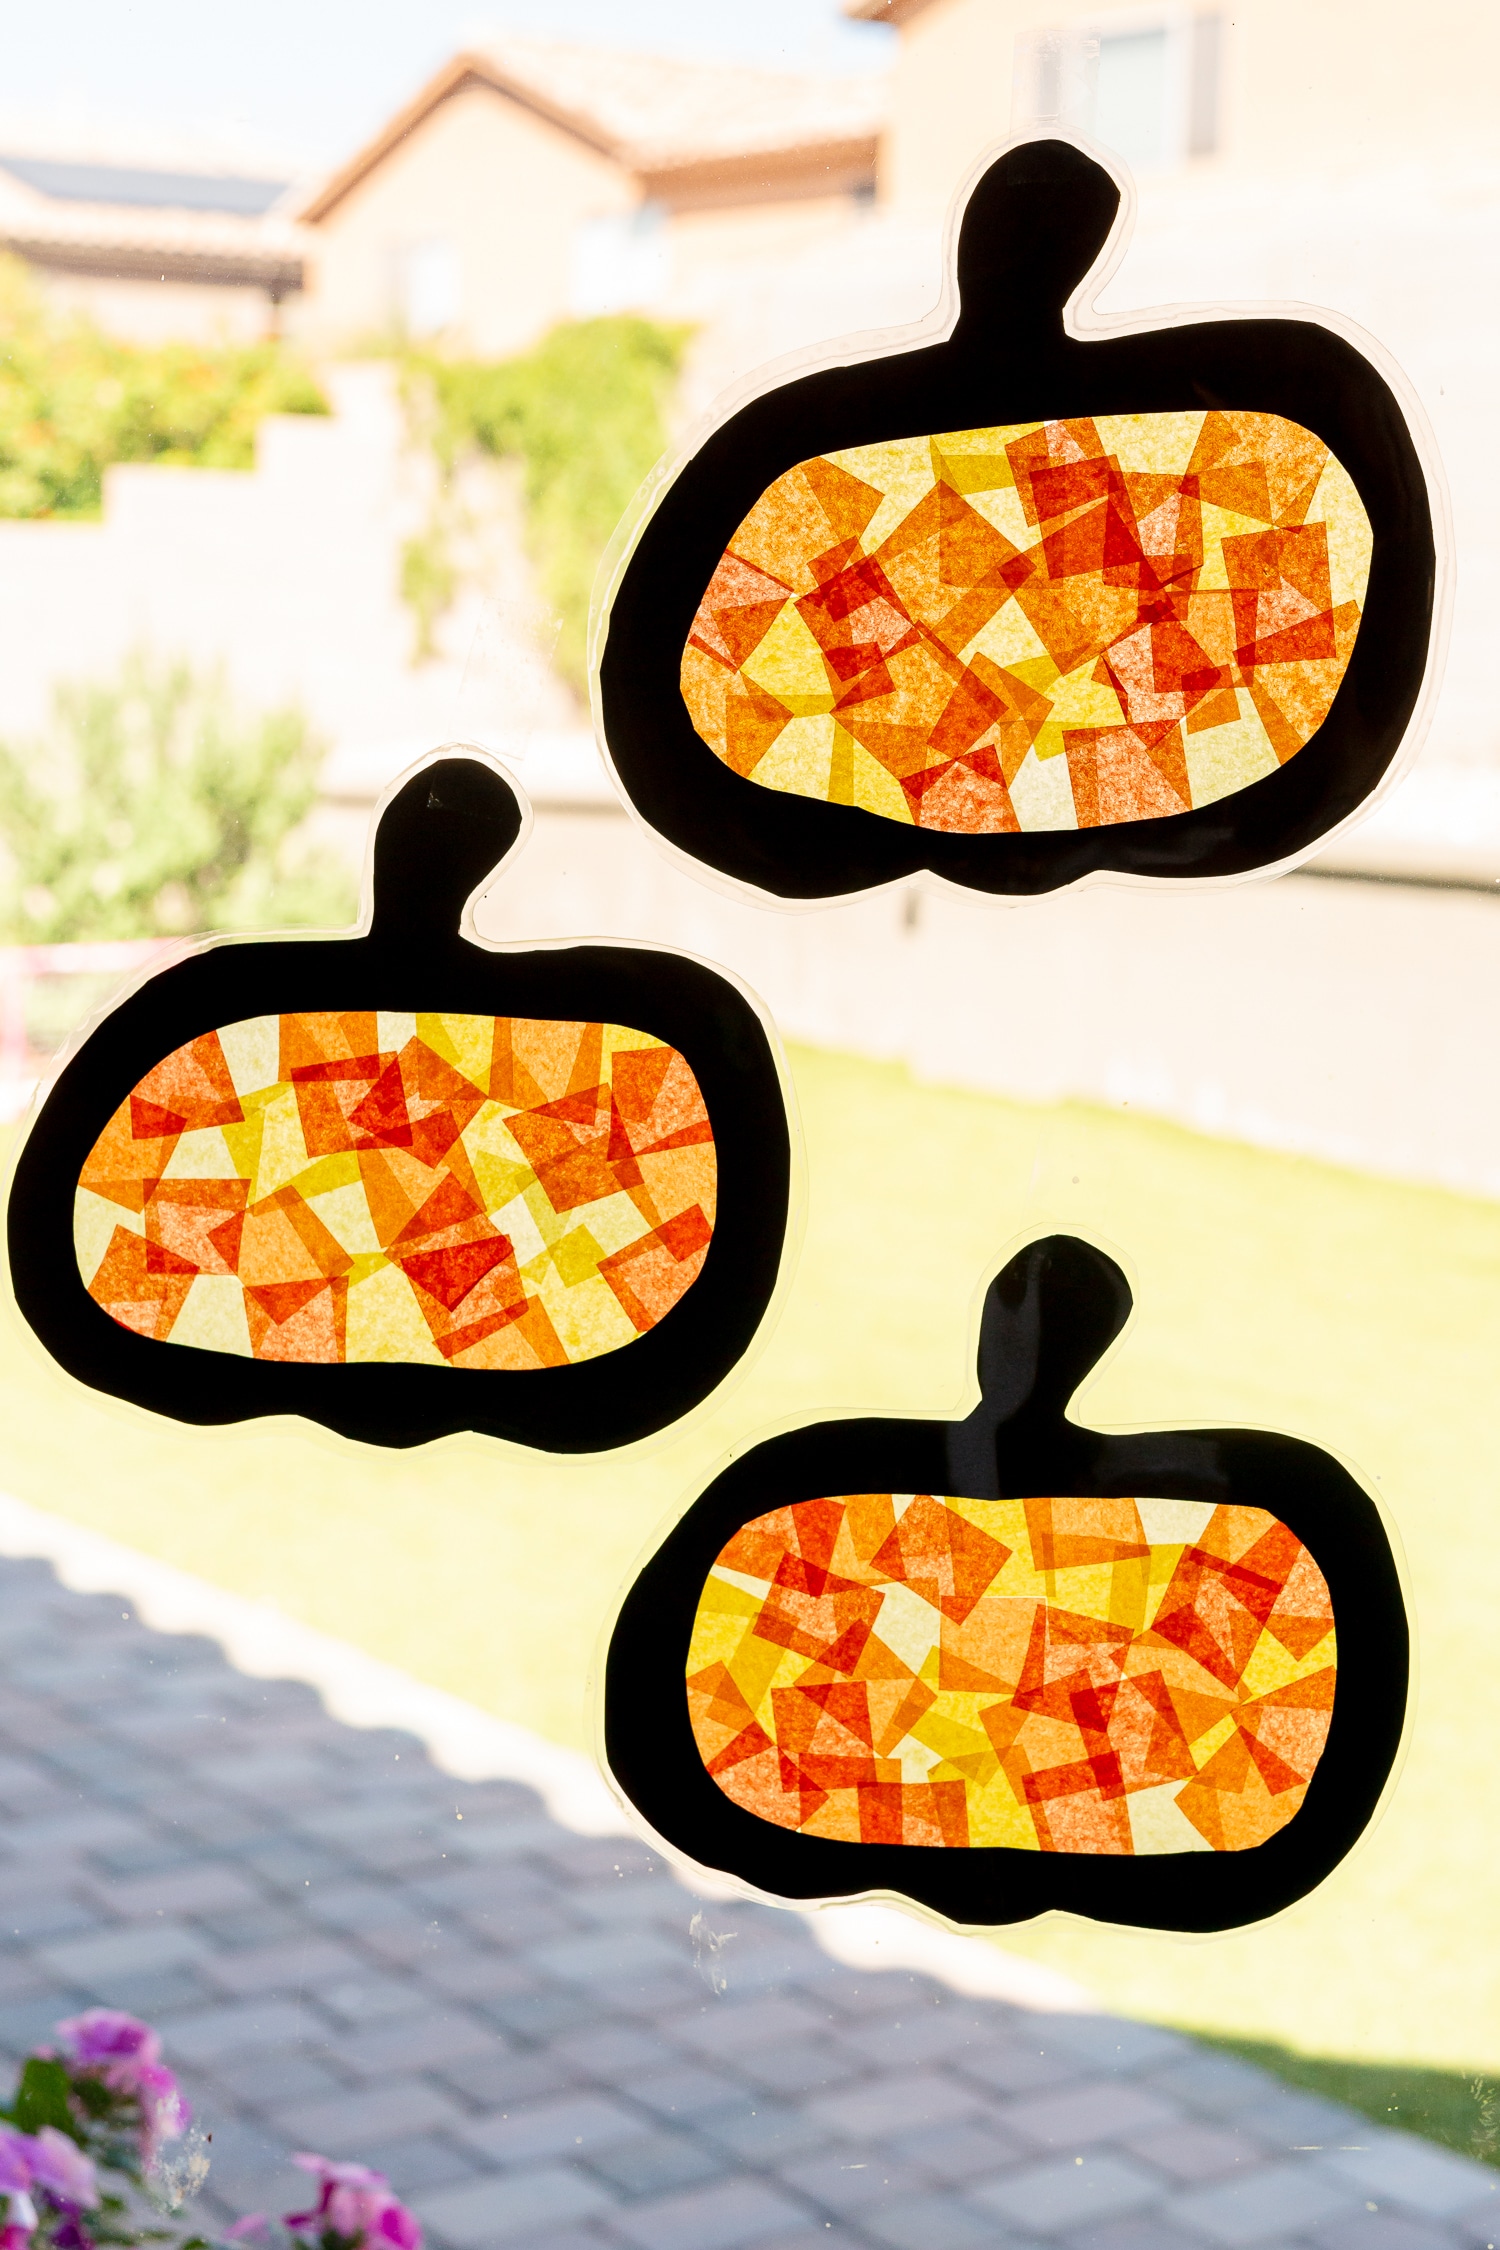
- Hang these pumpkin suncatchers on a window that gets a lot of light for the best effect. Although they still look great while the sun isn’t shining through, they look even more amazing when the light hits!
For more fun Fall Activities, try these!
Loved crafting these pumpkin suncatchers with your kiddos? Try out these other adorable fall crafts!