As an Amazon Associate I earn from qualifying purchases.
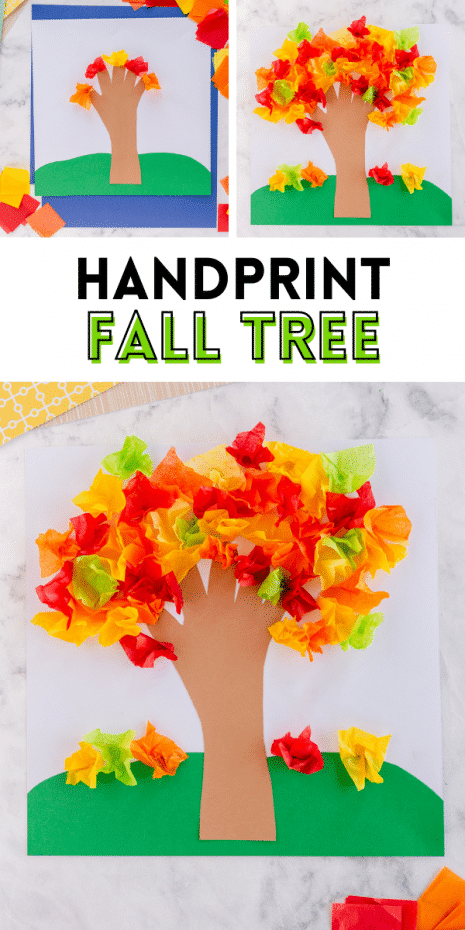
This Handprint Fall Tree kids craft is the perfect activity for autumn! All you need is cardstock and tissue paper to create this adorable work of fall art.
Handprint Fall Tree Craft
Fall crafting season is in full swing, and I’m so excited to share another cute creation with all of you! One of my favorite things about fall (among many) is the changing colors of the leaves. They are so beautiful to look at and really get you into the fall spirit.
Kids love looking at the colorful oranges, reds, and yellows, and browns of the changing leaves, too. It seems magical to them, especially when they’re young. That’s why I wanted to center this kids craft around fall trees!
To make the trunk of the tree, you will trace your kiddo’s handprint. I love this idea for the trunk because it not only produces a great final product, but it gives you a cute memento to hold onto. I especially love kids crafts that have those special personal touches!
This Handprint Fall Tree craft is great for the classroom, homeschooling, and just for having some fun at home! I’d love to hear about your recreations in the comments below. Without further ado, let’s get into the tutorial!
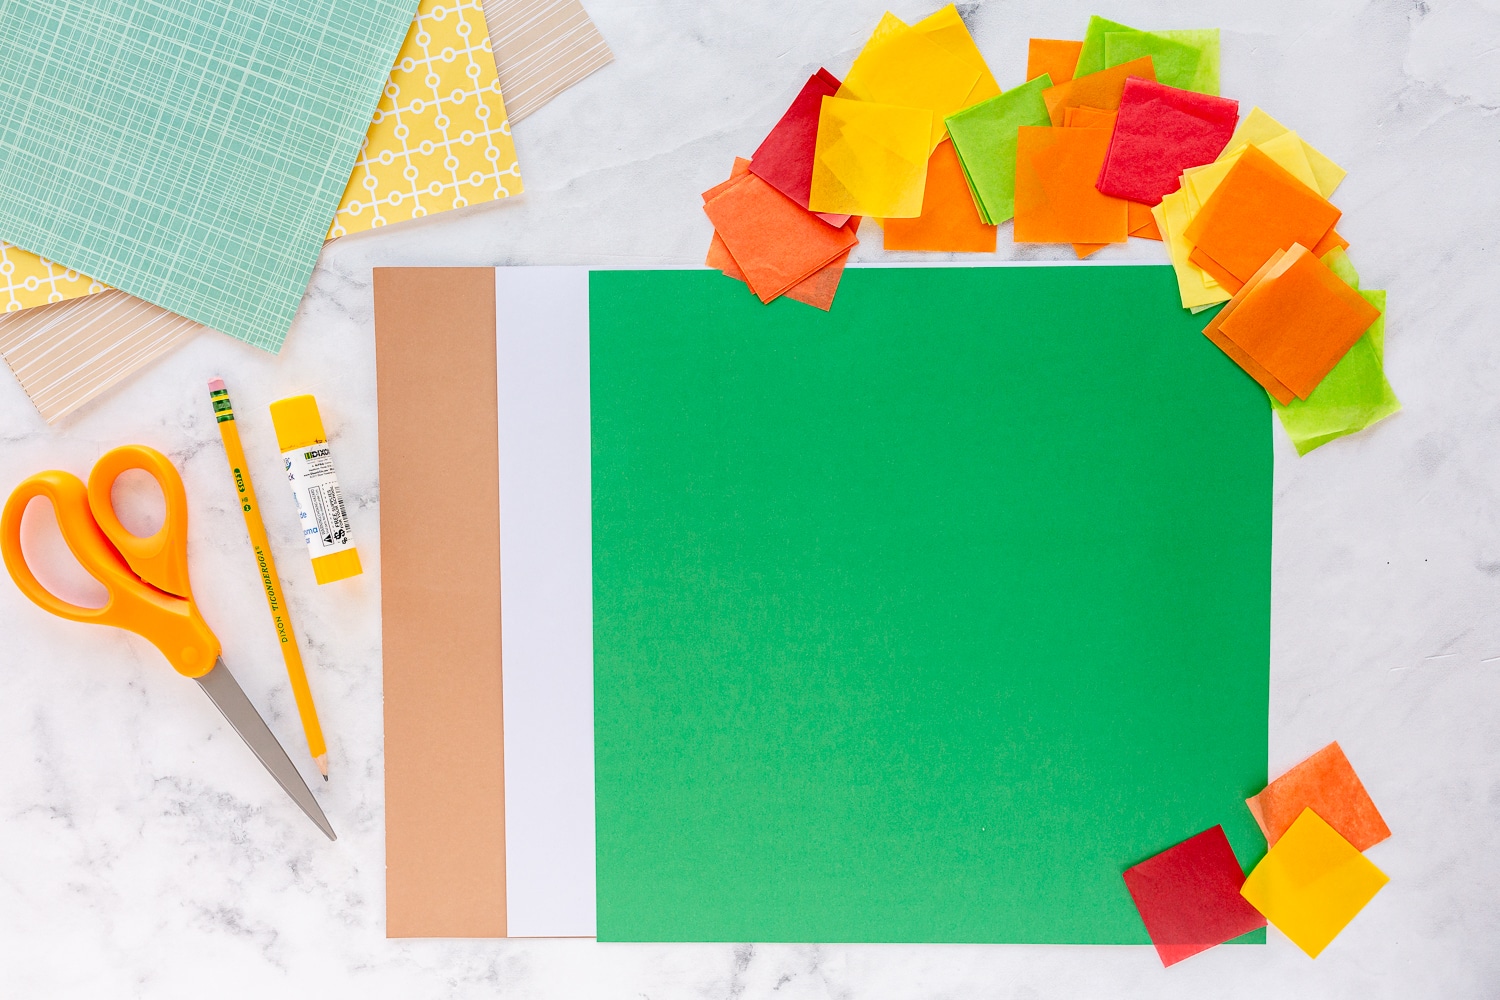
Supplies you’ll need:
You only need a few simple supplies to make a Handprint Fall Tree at home! If you’re a frequent crafter, you may already have these items in your stockpile. Here is what you will need:
- 1 piece of 12 x 12 cardstock, white
- Cardstock, brown and green (1 piece of each)
- Tissue paper squares in shades of orange, brown, light green, yellow, and red
- Scissors
- Pencil
- Glue
How to make a Handprint Fall Tree
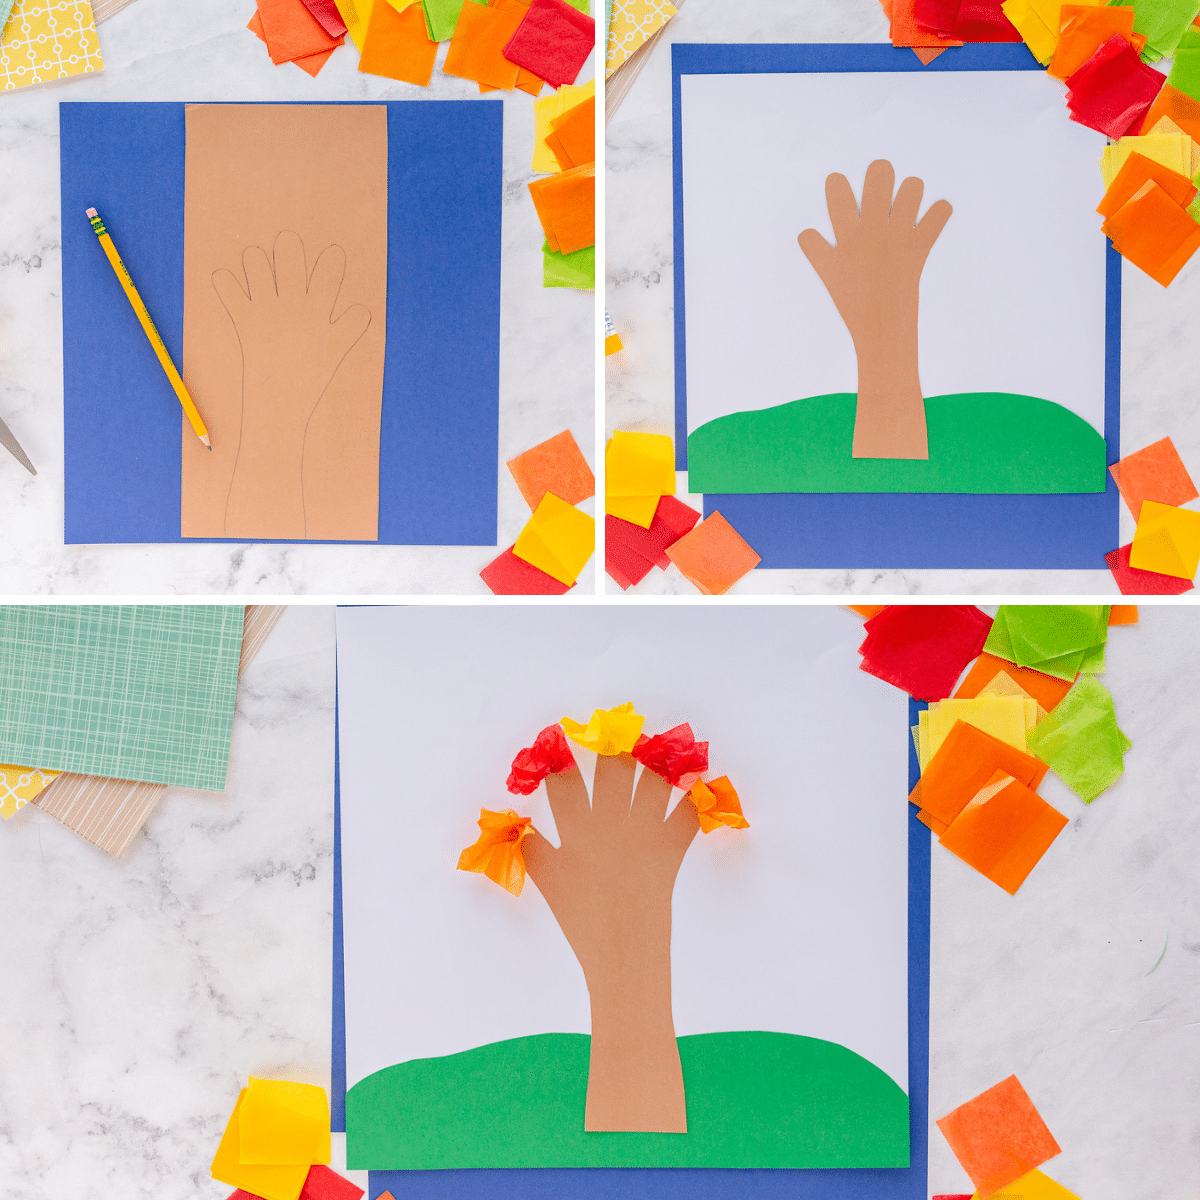
- Start off by having your kiddo lay their hand down on a piece of brown cardstock. Then, trace around their hand with a pencil. You can help them trace or let them do it themselves! After you have your traced hand, let your child cut out the shape or help them out.
- Next, cut out a layer of green grass out of your green cardstock. We cut ours with curved edges to make it look like a hill!
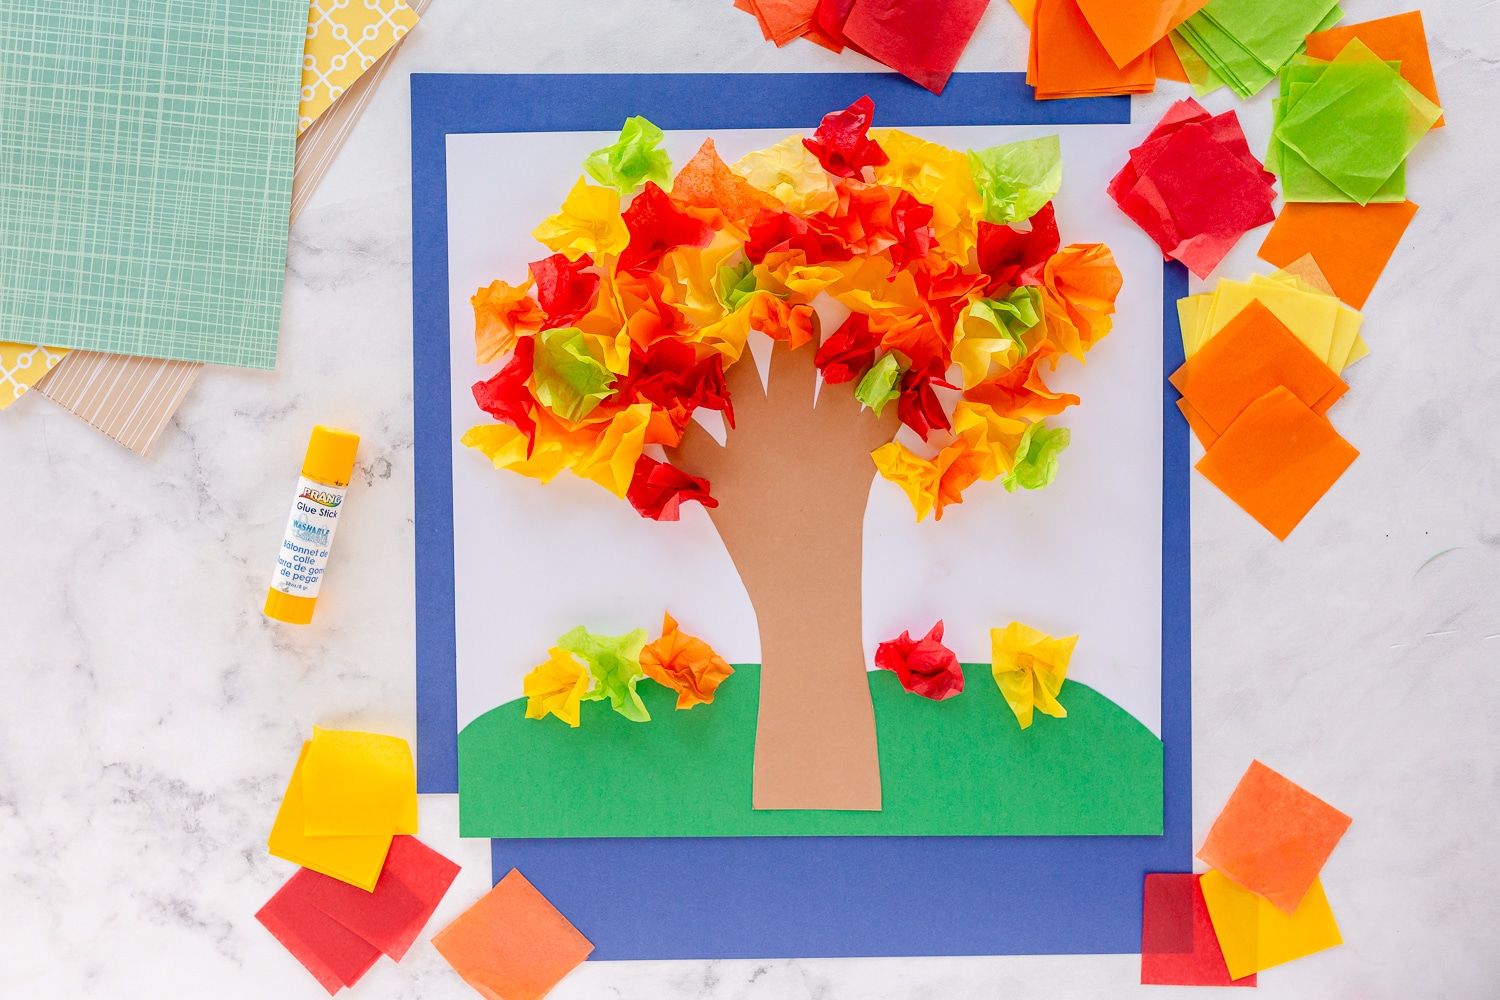
- Once you have your grass cut out, glue it onto a piece of 12 x 12 white cardstock. You want to make sure that the bottom of the grass is lined up with the bottom of the white paper.
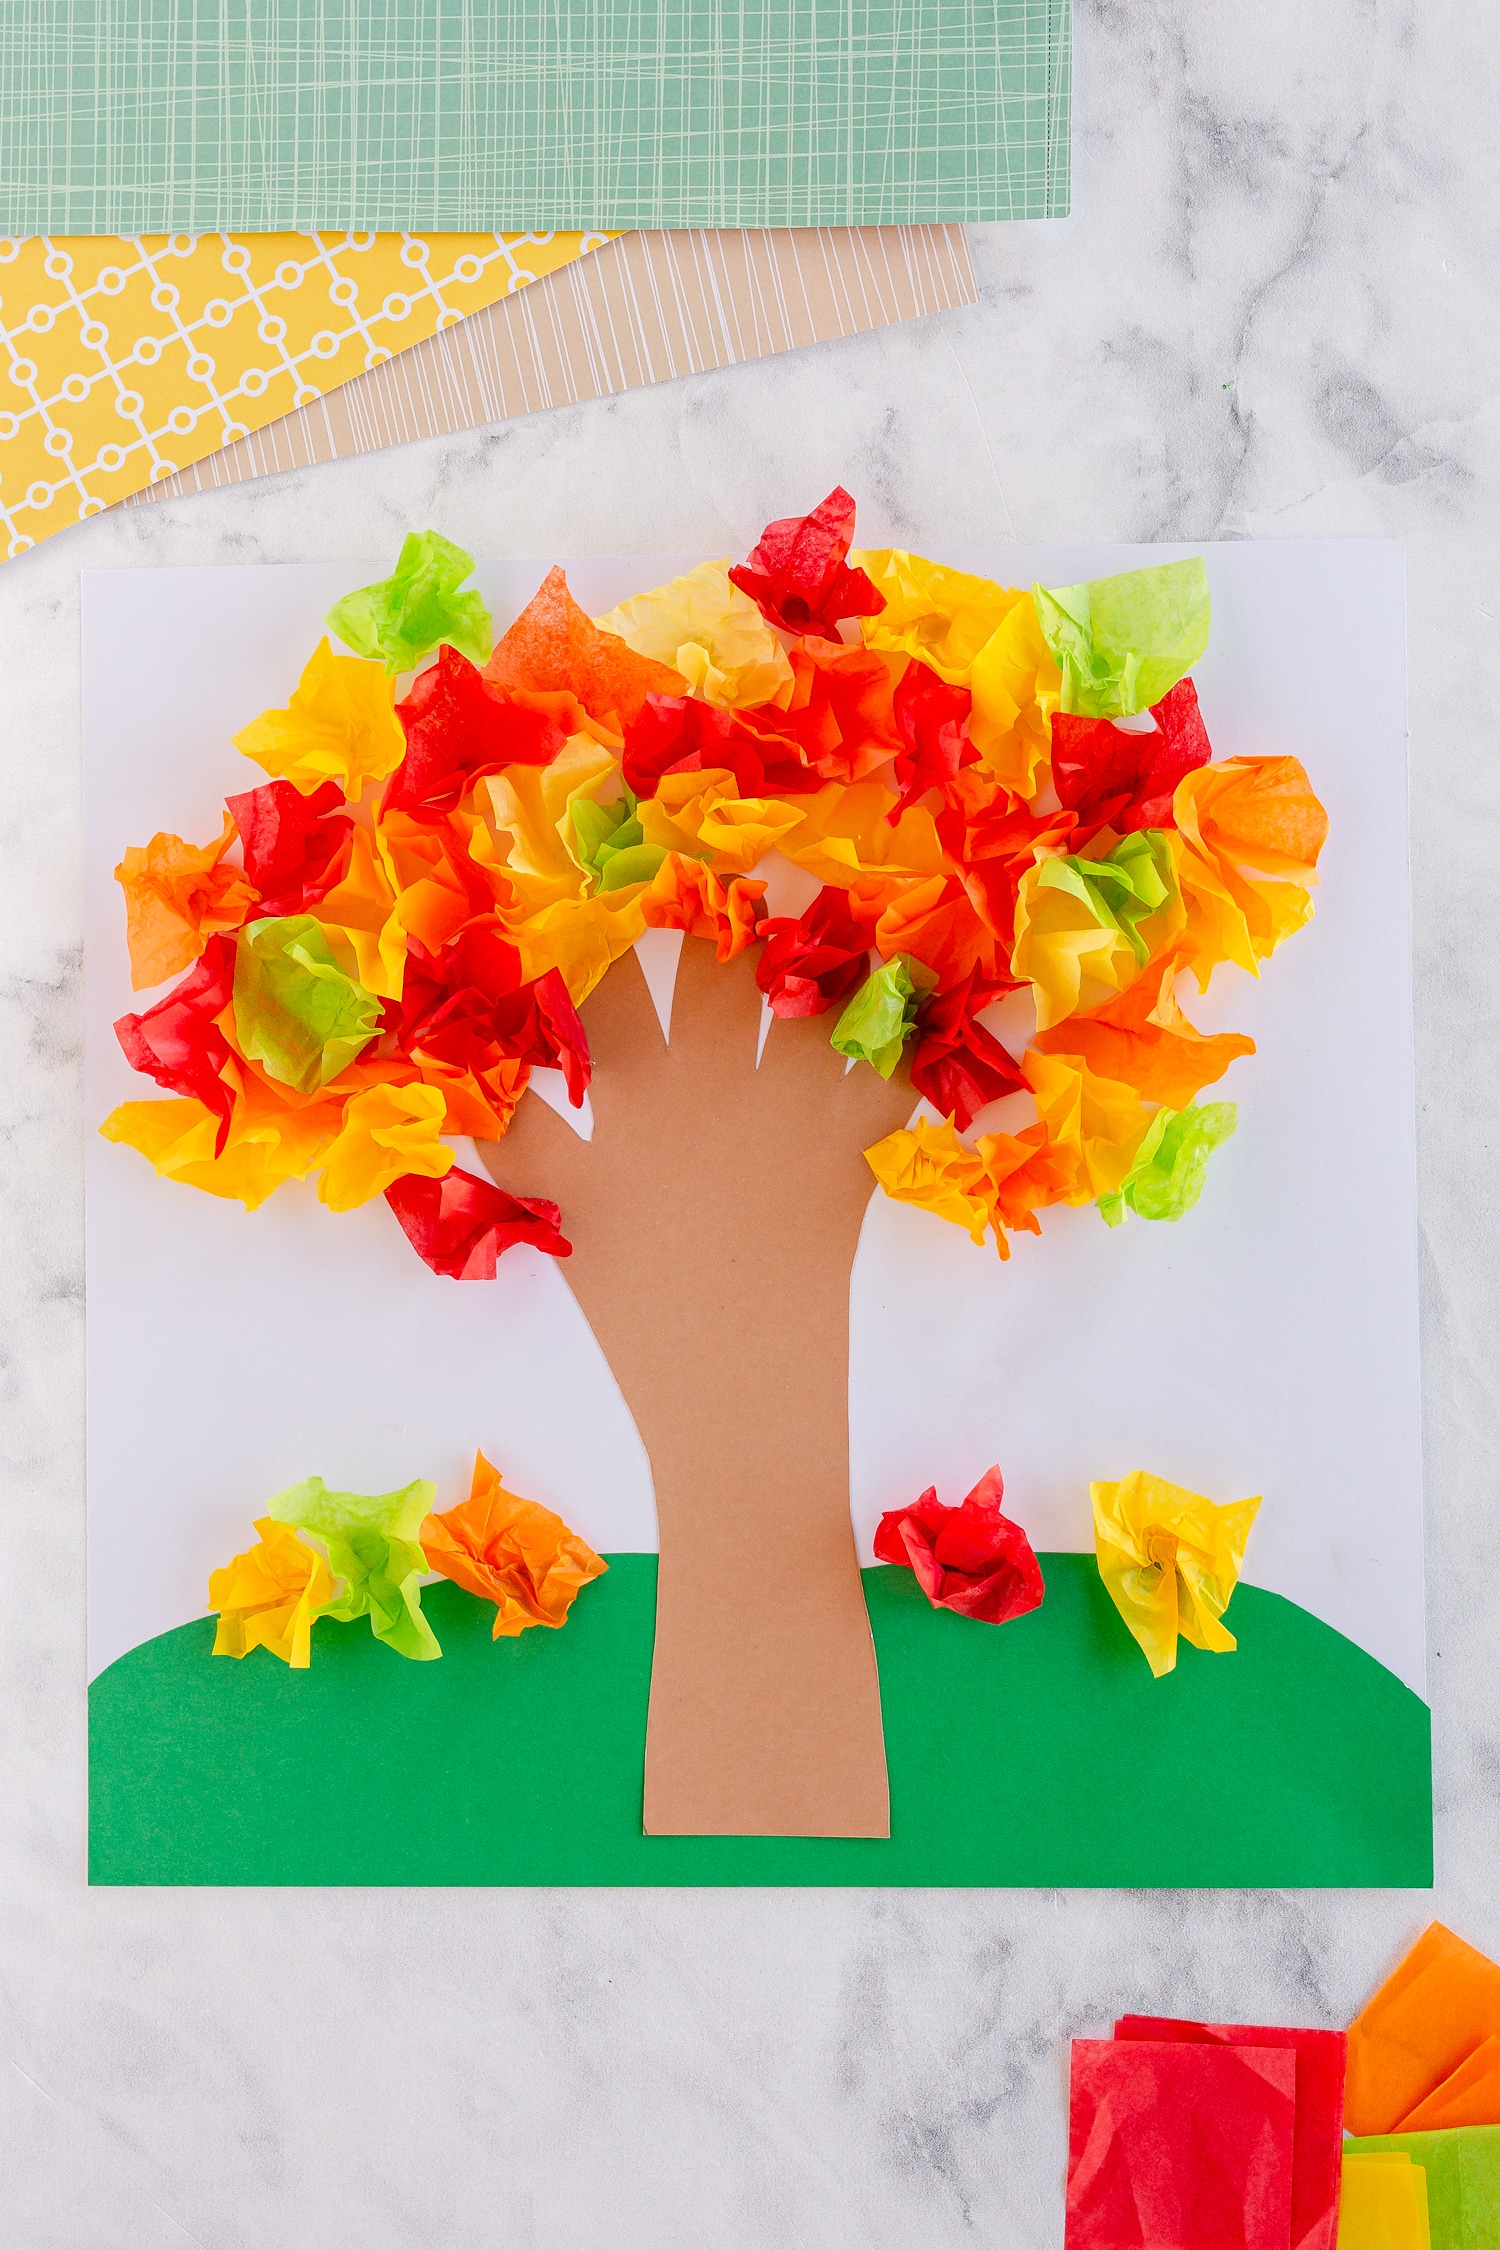
- After you have your grass glued down, add your tree in the middle of the grass. Try to position the tree about halfway up the paper so that you have plenty of room for the tissue paper leaves!
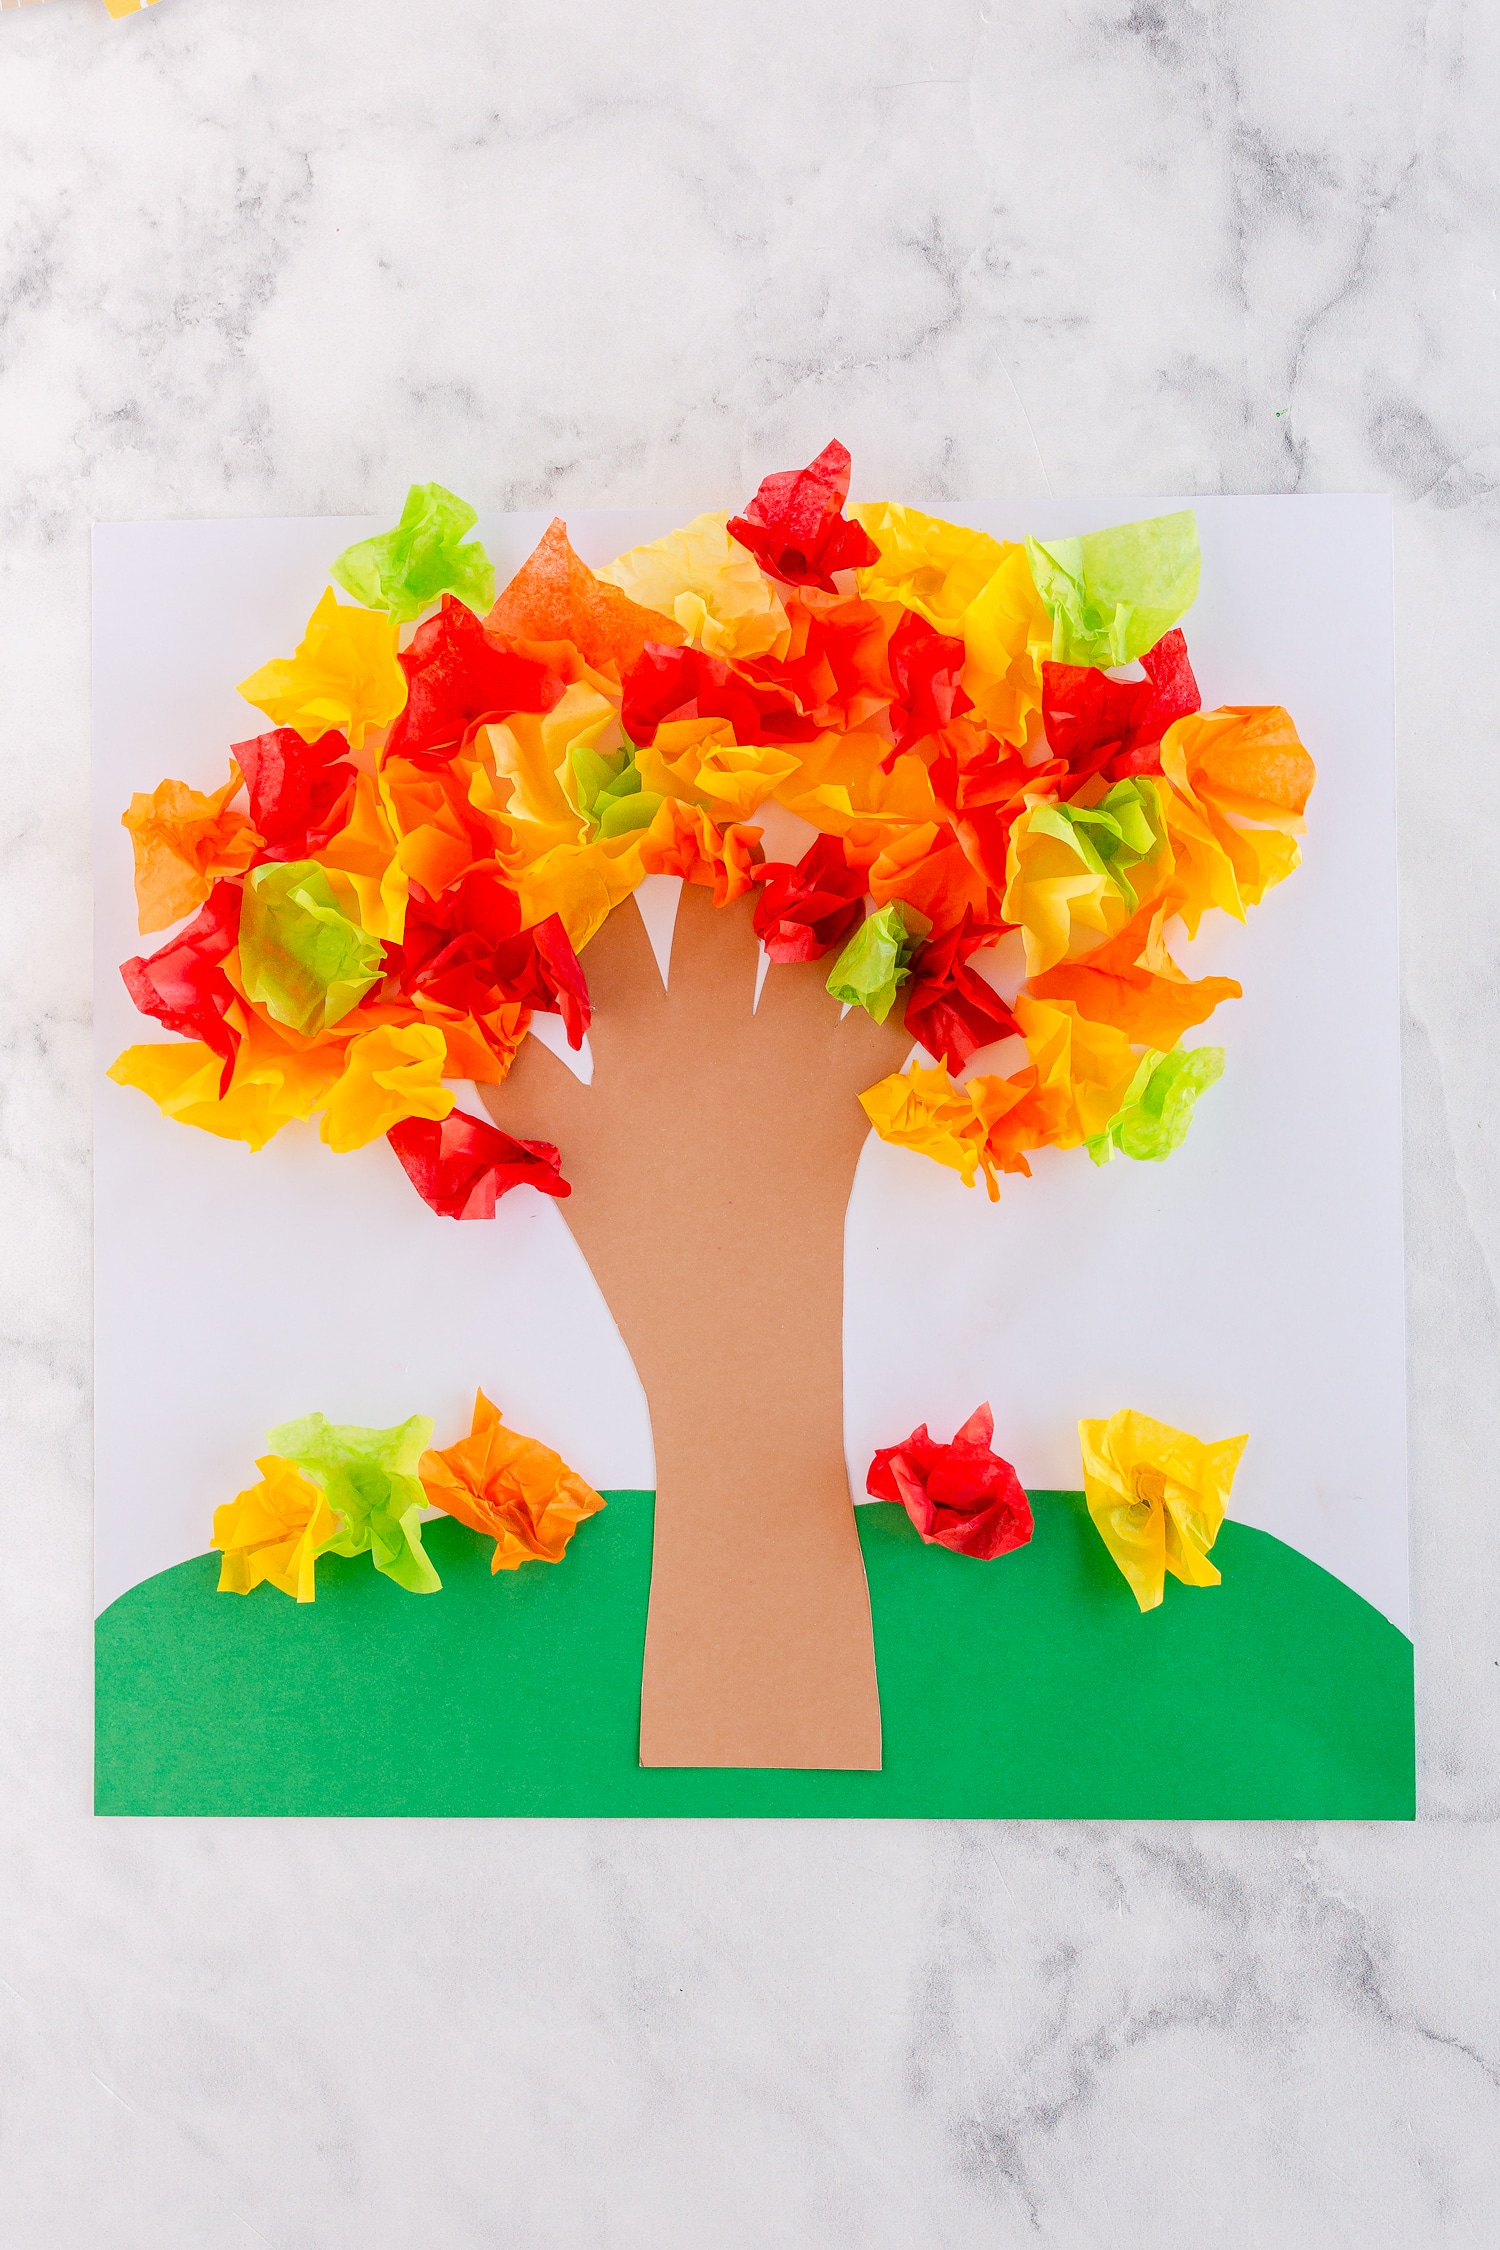
- Take your tissue paper squares and lightly crush them with your fingers. Glue the tissue paper squares around the fingers, leaving a little space so you can see some of the finger popping through. Encourage your kiddo to mix up the colors to mimic the beautiful fall foliage.
- Finally, add a few tissue paper leaves down near the bottom on the grass to look like fallen leaves!
Tips for making a handprint tree
- Use this craft to teach your kiddos about why the leaves change color in the fall! It’s a great way to get in a little science lesson while you craft.
- If you’d like, you can actually rip up the tissue into pieces instead of using scissors to cut them into perfect squares. Since the cutting of the squares can get a bit tedious, this is much easier for speedy crafting! Plus, it goes well with the rustic look of the leaves.
You might like these other fall crafts!
If you loved this adorable handprint fall tree craft, check out these other autumn-inspired crafts! We’ve got something for plenty of fall fun this season.