As an Amazon Associate I earn from qualifying purchases.
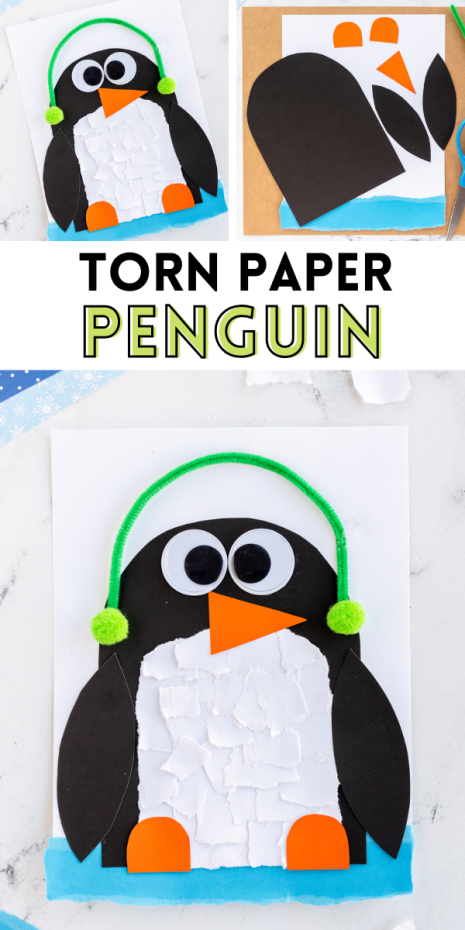
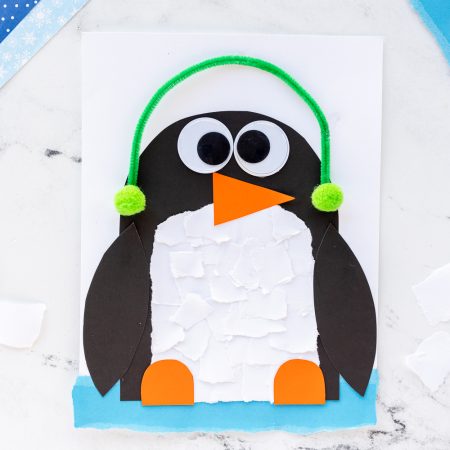
This Torn Paper Penguin craft is fun for kids of all ages! It’s the perfect paper craft on a chilly winter day.
If you are looking for a fun way to practice fine motor skills with your kids, this torn paper penguin craft is just the thing for these chilly winter days. It’s a great way to keep kids busy when they are stuck in the house, and they make adorable decorations for the home and fridge when they are complete.
This activity is also great if you are doing a winter animal study with students in the classroom. The adorable penguins look amazing up on the wall or on a bulletin board paired with their research. Just tear paper to create their white tummies, and kids will have much fun.
HOW TO VIDEO:
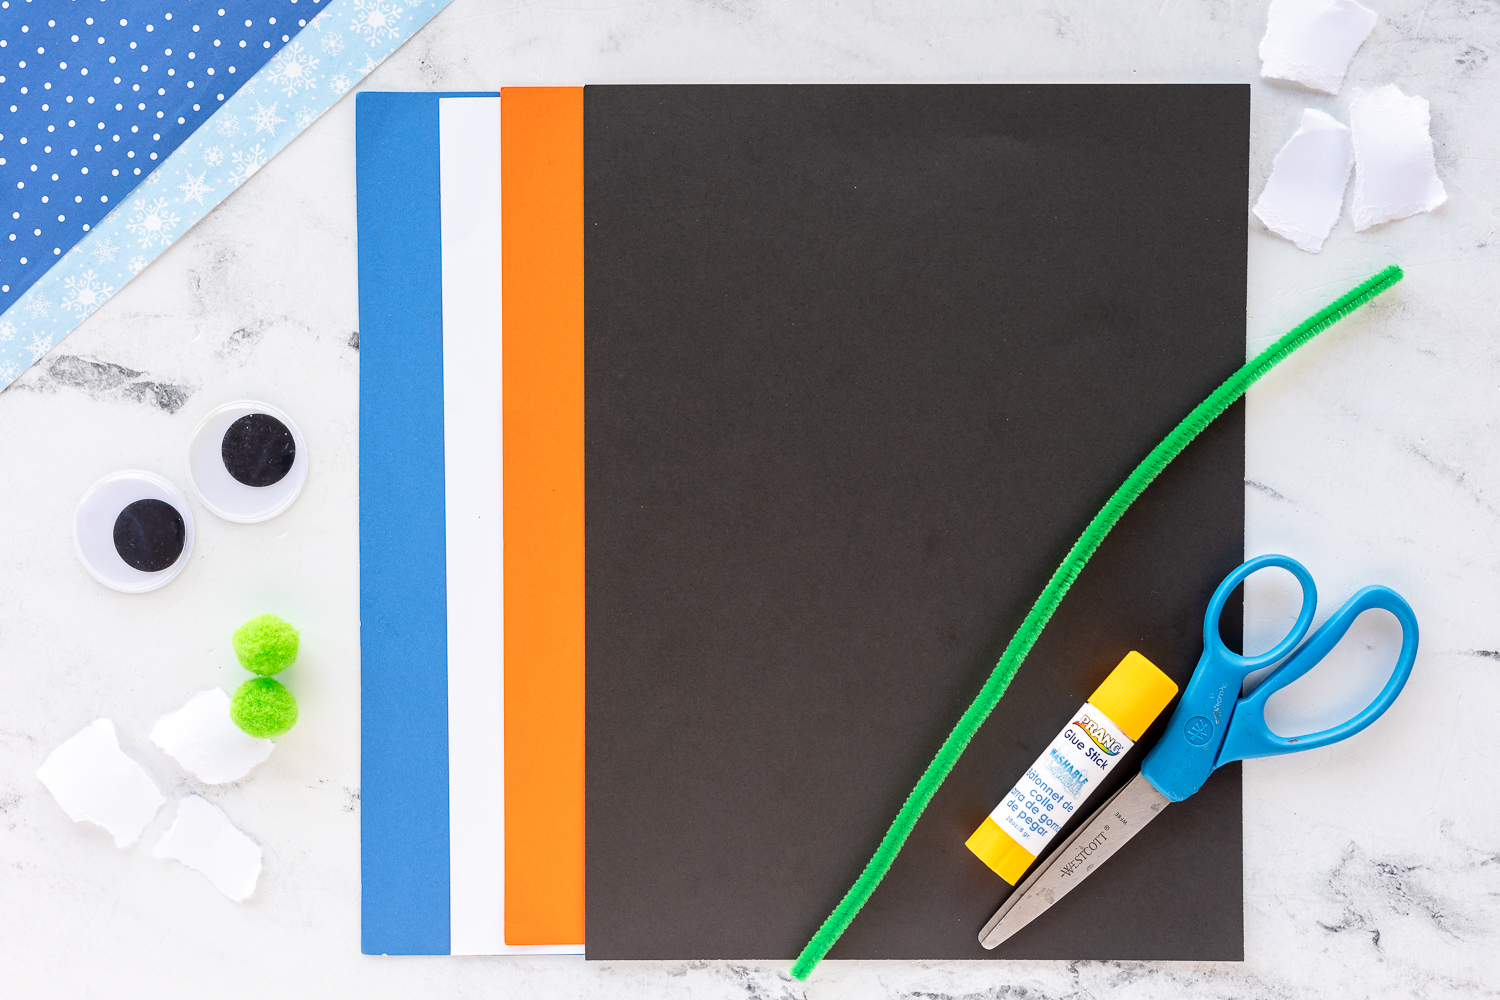
Craft Supplies Needed for a Torn Paper Penguin
This winter craft requires minimal supplies and is super easy to create. Kids of all ages will enjoy making their paper penguins. Grab these supplies from your local craft store or Walmart, and you’re ready to go.
- Blue, white, black, and orange cardstock
- White 8 x 11 cardstock
- Green pom poms
- Green pipe cleaners
- Large googly eyes (mine were 1 1/2 inch)
- FREE Penguin template
The ripped paper is a wonderful way to keep busy fingers occupied. There’s no special torn paper technique, just rip into small pieces.
How to Create Your Own Torn Paper Penguin
Creating this art project is super simple. Use it for kids from about 4 to upper elementary. Some older kids still love doing activities like this because it’s calming and adorable. Ripping small pieces of paper is an amazing way to strengthen tiny muscles in the hands and fingers, especially in young children.
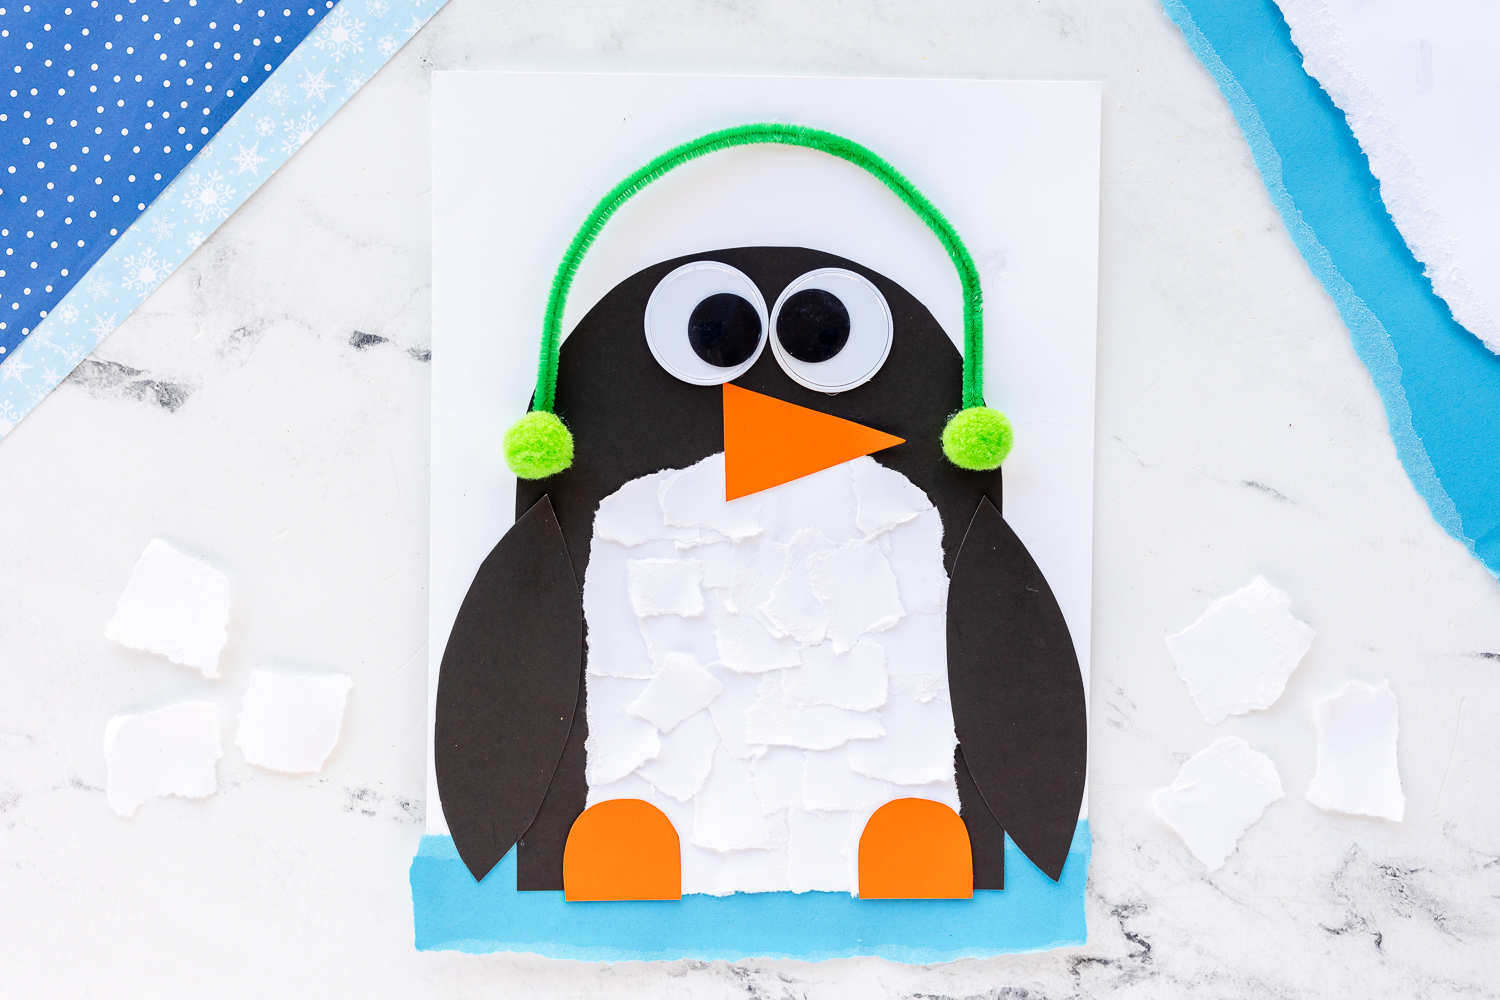
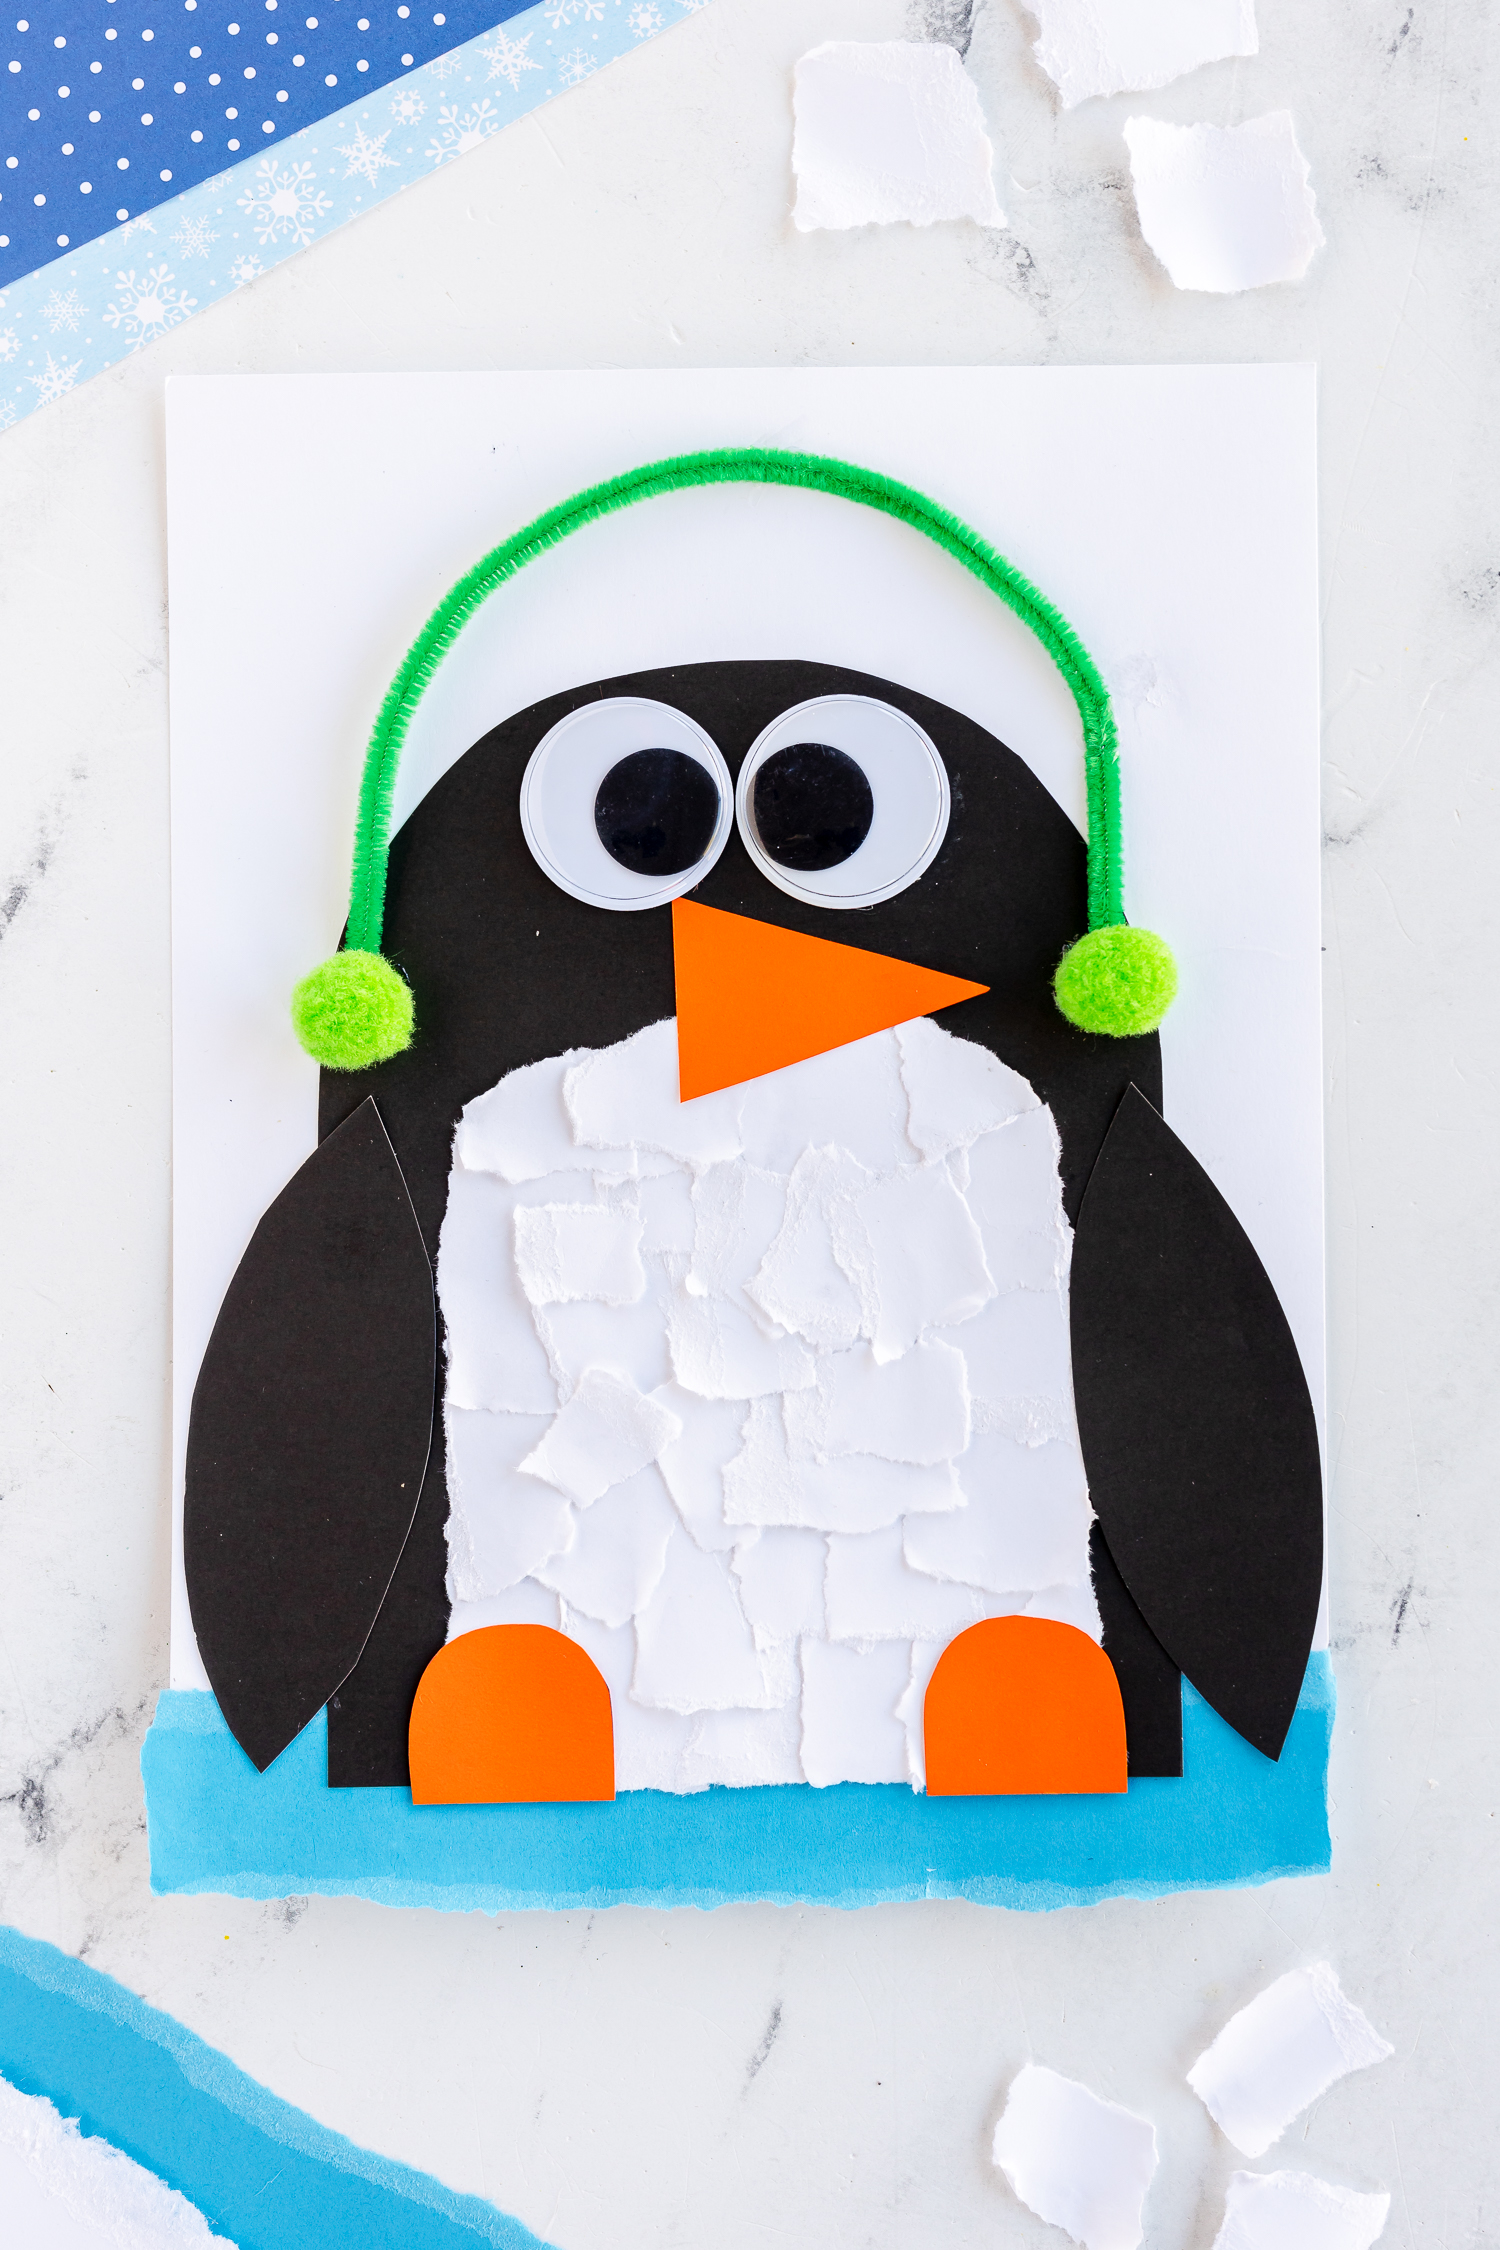
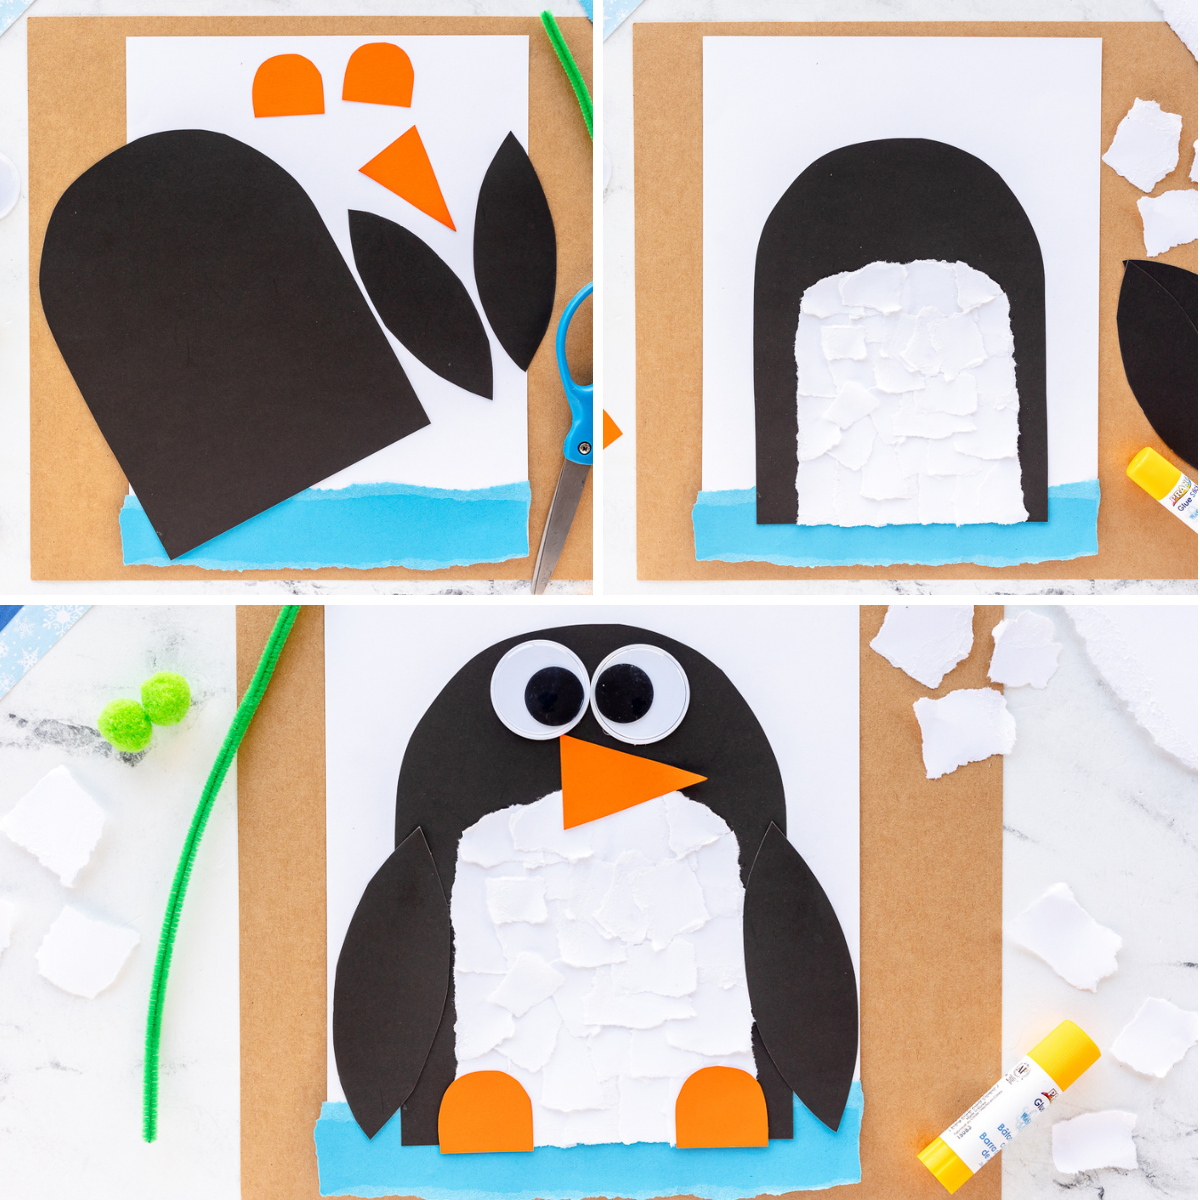
- Start by ripping your blue piece of paper and placing it on the bottom edge of the white paper. This will look like ice that the penguin is sliding or standing on.
- Add your black penguin body using a glue stick or liquid glue.
- Rip white paper pieces and place them on the belly of the penguin.
- Cut out your other FREE template pieces (wings, feet, beak) and add them to the body.
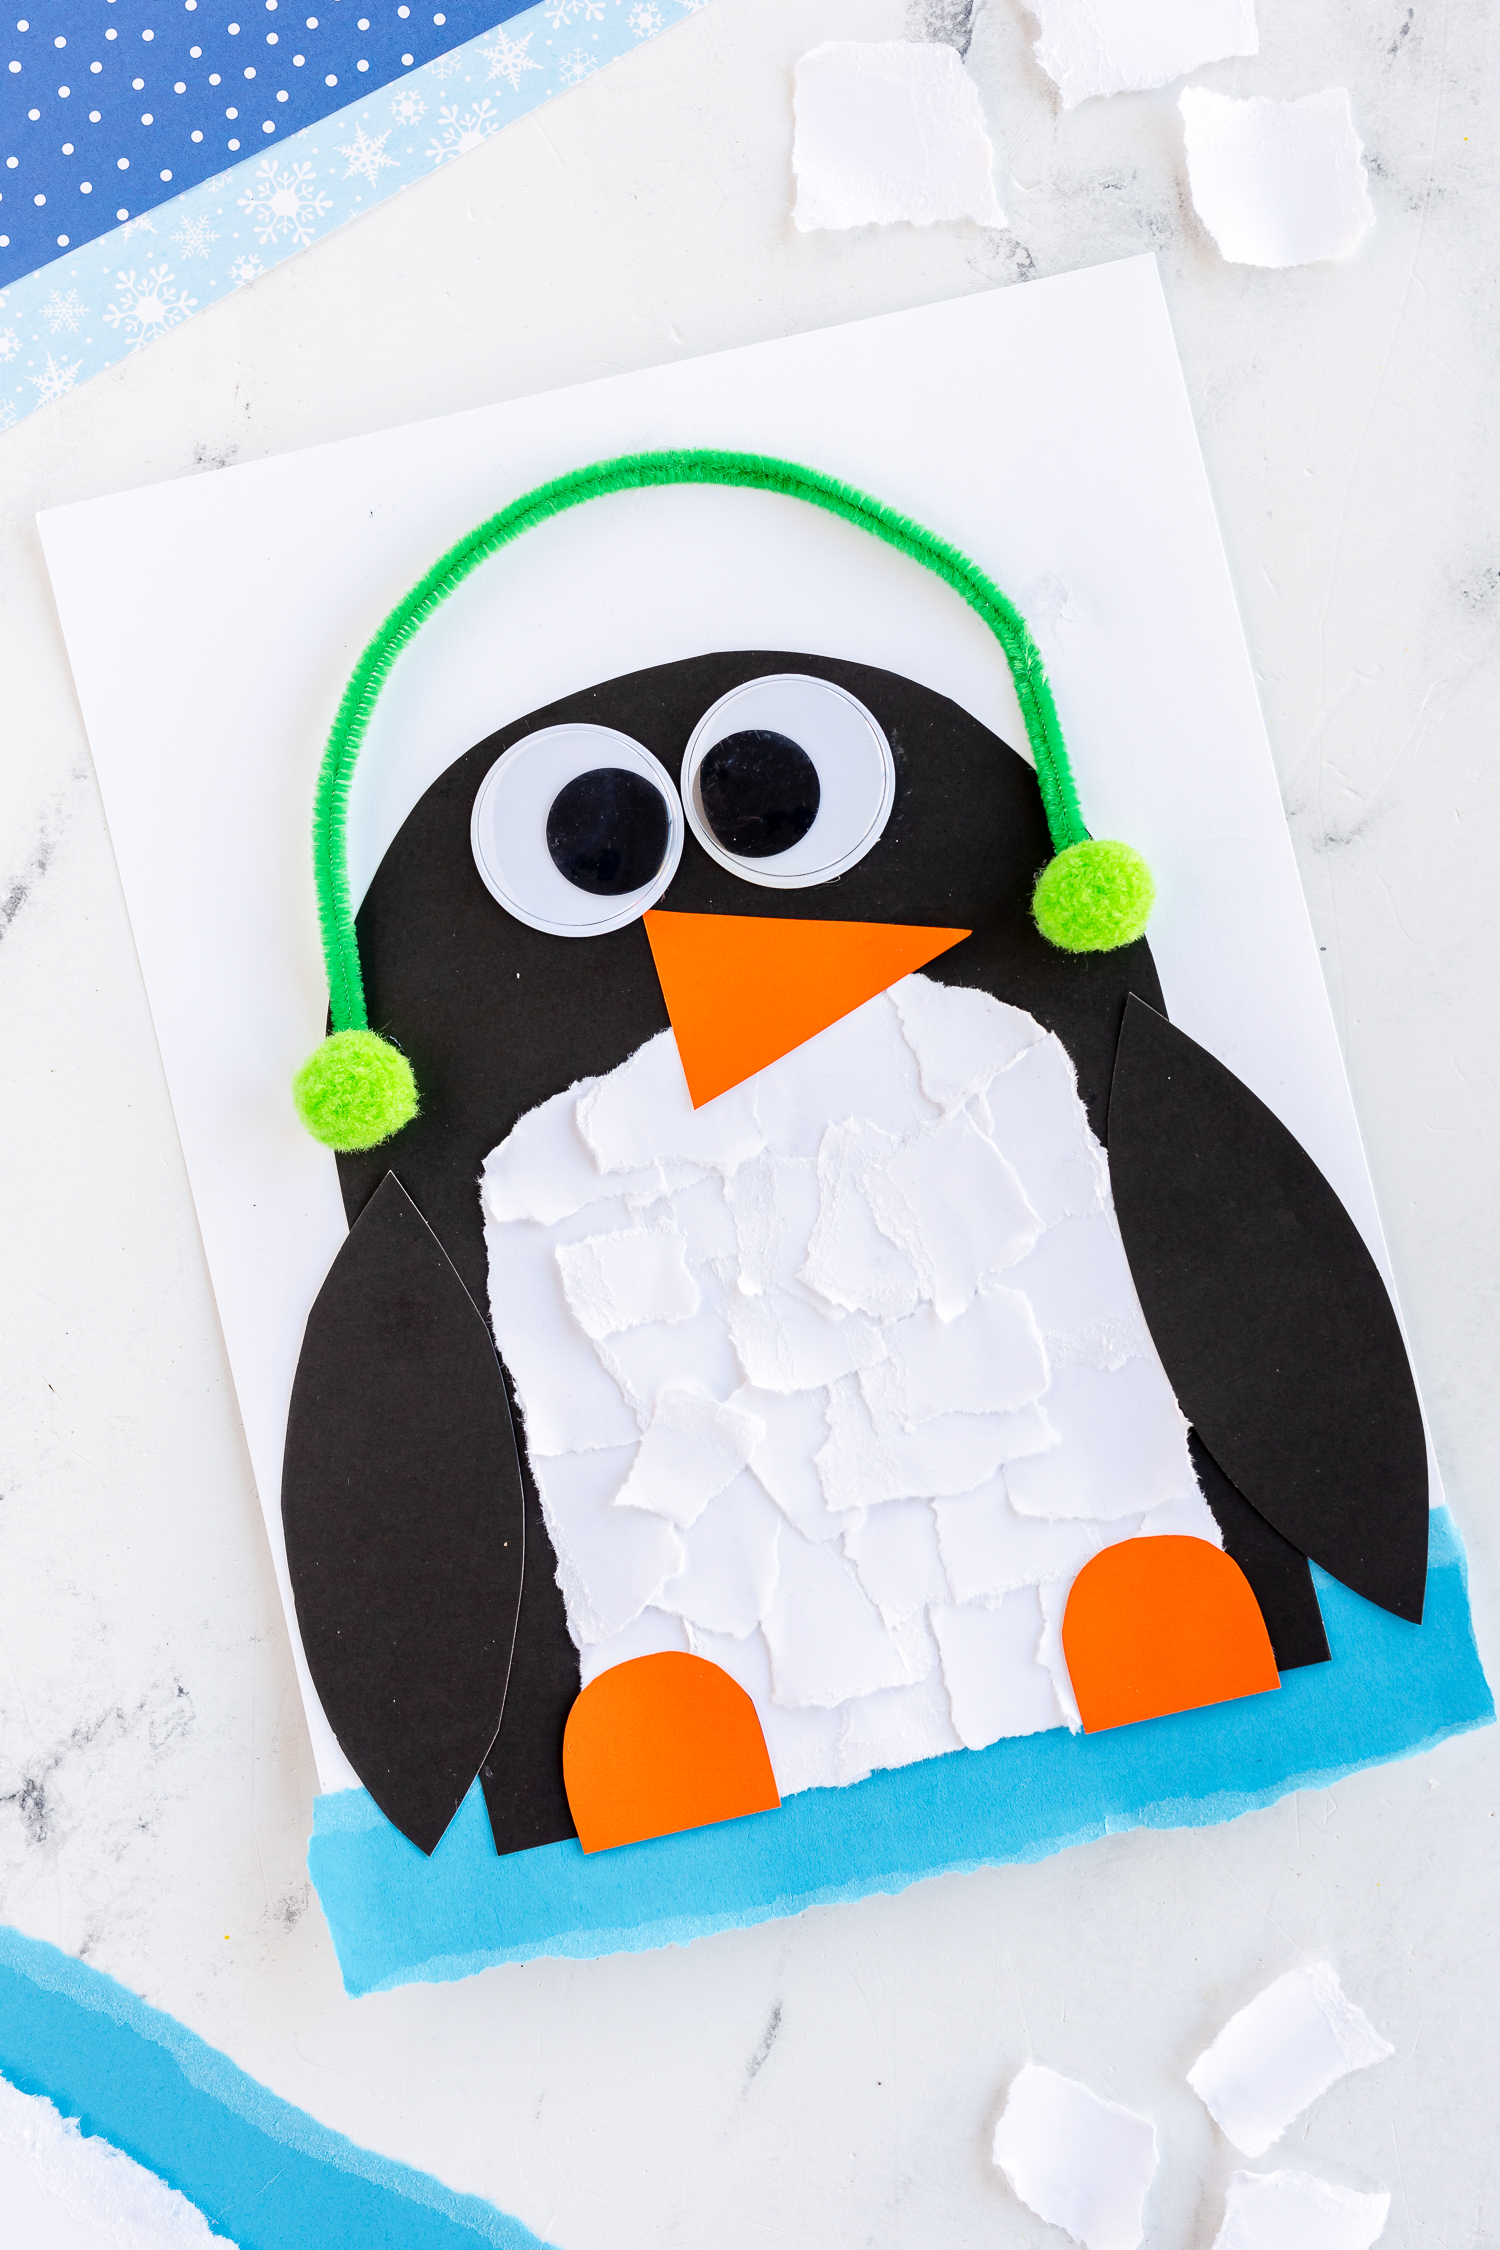
- Add a pipe cleaner and pom poms to the head as ear muffs.
- The finishing touch is the silly googly eyes!
Little kids will have a blast creating this simple craft. It’s perfect for any day of the year, but super helpful on those days when it’s too cold to go outside and run around.
Pair it With a Book
If you want to pair your fun craft with a read-aloud, try some of these exciting titles. Kids love reading and listening to stories. Having a craft to follow makes it even more enjoyable. Create some fun memories with a cuddly book and a fun craft.
- Tacky the Penguin by Helen Lester – Follow this little penguin on his adventure with friends in the arctic!
- Penguin Problems by Jory John – A penguin tells readers all about the troubles of being a penguin in a hilarious story.
- Penguin in Peril by Helen Hancocks – When a penguin is stolen by three kittens, they try to get him to help them catch a fish, but will they succeed?
- The Emperor’s Egg by Jane Chapman – Read all about the young life of a penguin, from egg to hatchling!
- Penguin and Pinecone by Salina Yoon – This adorable story is an unlikely friendship and tale involving two silly characters. Kids love it.
Other Options for the Penguin Craft
As you are preparing your craft, consider whether you want to use torn paper or other materials to make the penguin’s belly. Cotton balls make for another cute option. Cotton ball penguins are just as cute, and kids work on their fine motor skills with them, too! Get creative with the white materials you put on the belly. Try beads, marshmallows, glitter glue, tissue paper, and anything else you can find around the house.
If you are looking for more fun penguin activities and winter crafts, try these amazing activities. They are just as simple to prep and so much fun to create. Perfect for the home or the classroom.
- Penguin Toilet Paper Rolls – Use scrap paper and paper rolls to make puppets.
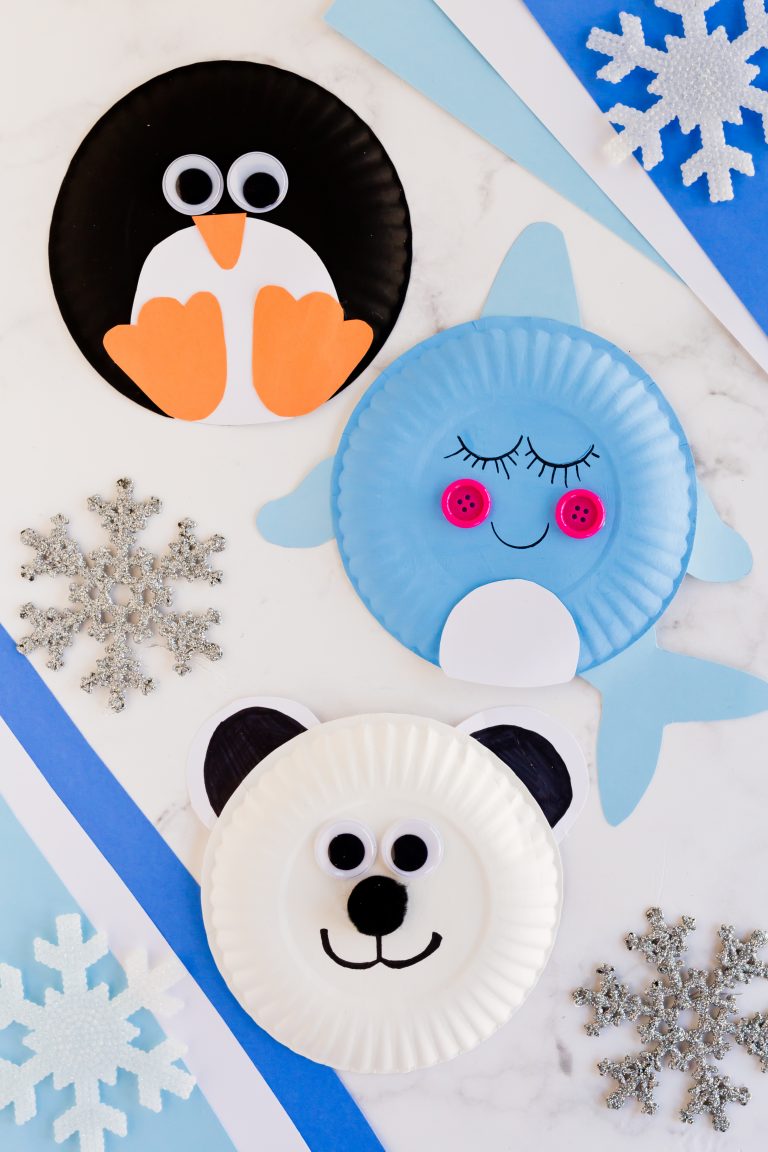
- Paper Plate Winter Animals – Make a polar bear, penguin, and other arctic animals on a paper plate.
- Torn Paper Snowman – Create a chilly snowman using materials like the ones above.
Torn Paper Penguin
Supplies
- Blue, white, black, and orange cardstock
- White 8 x 11 cardstock
- Green pom poms
- Green pipe cleaners
- Large googly eyes (mine were 1 1/2 inch)
- Penguin template FOUND HERE
Instructions
- Start by ripping your blue piece of paper and placing it on the bottom edge of the white paper. This will look like ice that the penguin is sliding or standing on.
- Add your black penguin body using a gluestick or liquid glue.
- Rip white paper pieces and place them on the belly of the penguin.
- Cut out your other template pieces (wings, feet, beak) and add them to the body.
- Add a pipe cleaner and pom poms to the head as ear muffs.
- The finishing touch is the silly googly eyes!


Hi! Love this craft but the template link no longer works. Is there another way to access it? Thanks!