As an Amazon Associate I earn from qualifying purchases.
Using simple art supplies like paper, buttons, and markers you can create a captivating world of magic and imagination with this Paper Bag Fairy House!
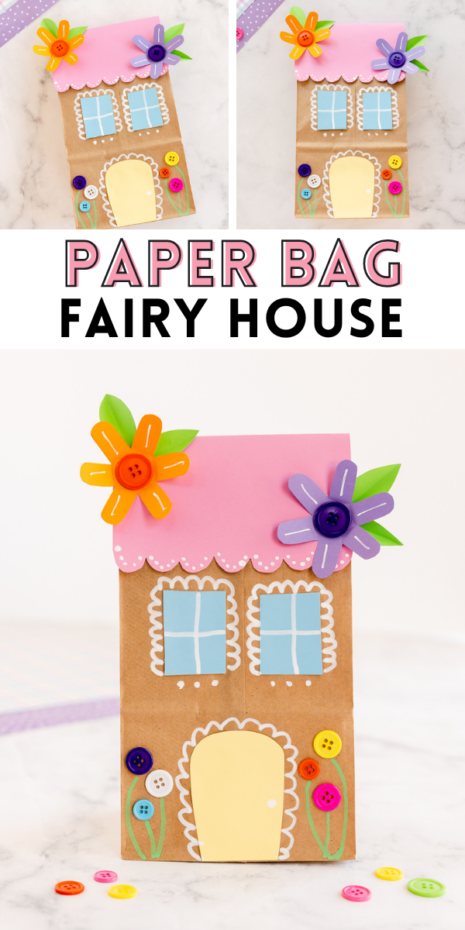
Create a captivating world of magic and imagination with this Paper Bag Fairy House! Transform a simple brown paper bag into a whimsical abode where fairies dwell, allowing children to unleash their creativity and embark on enchanting adventures.
Step into the enchanting world of fairy crafts with our delightful Paper Bag Fairy House! This magical DIY project combines creativity, fine motor skills, and the joy of imaginative play. With a brown paper lunch bag as the base and a variety of craft materials like construction paper, decorative paper, and magnetic play pieces, your little ones can bring their very own fairy house to life. It’s the perfect activity for kids of all ages, providing a great way to explore their creativity and create a fairy garden right at home. Let’s dive into this enchanting craft and let the magic unfold!
HOW TO VIDEO:

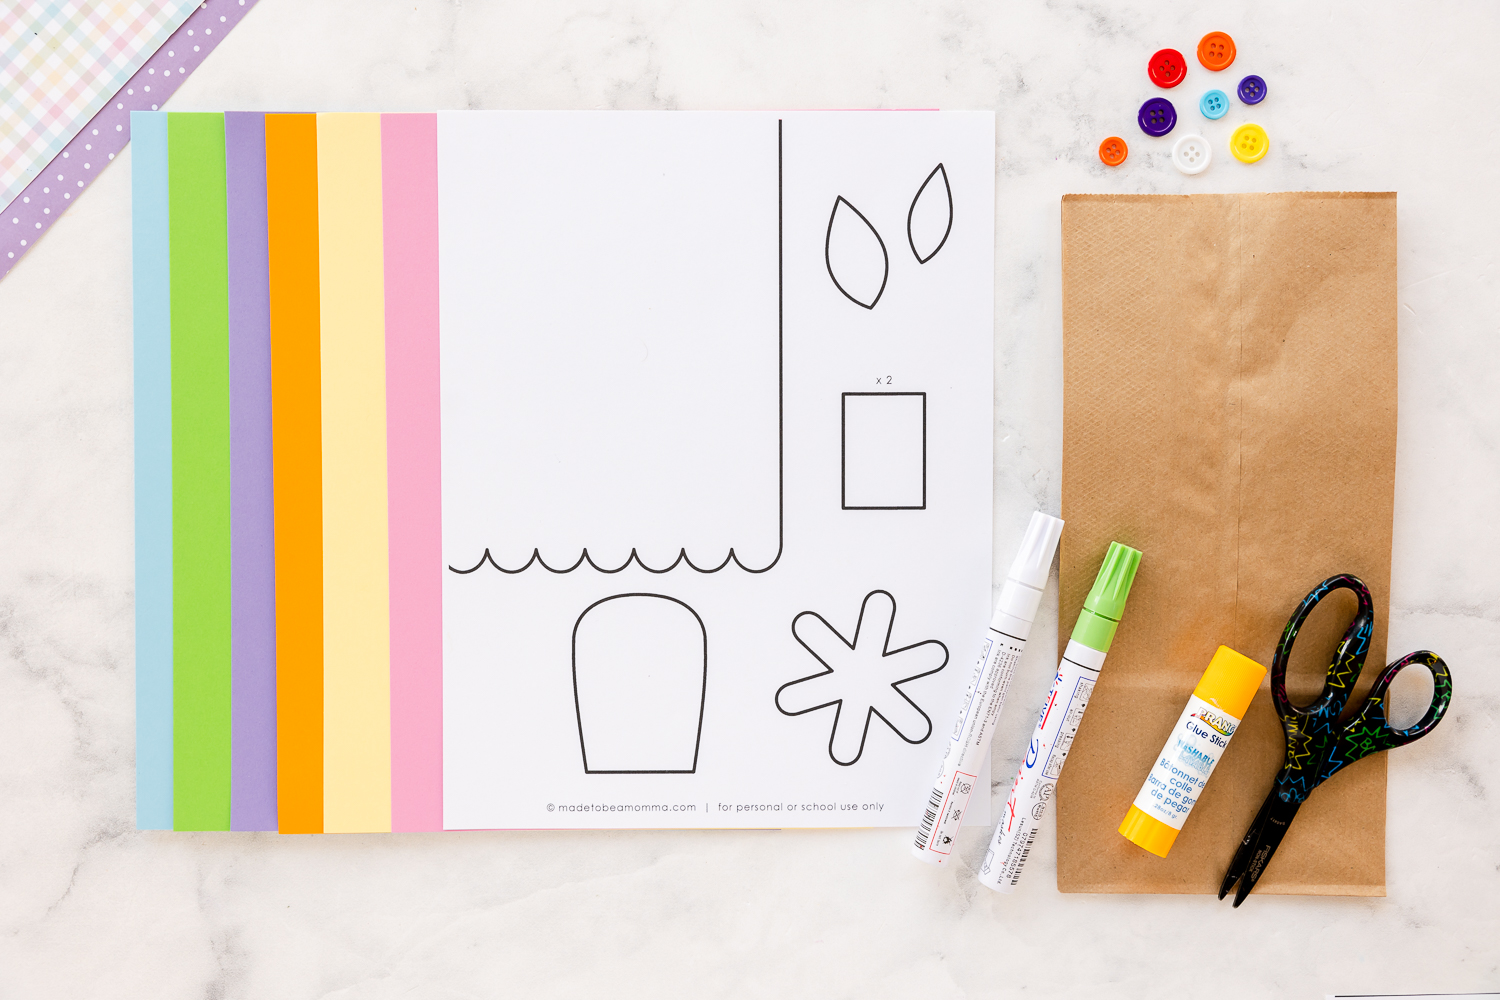
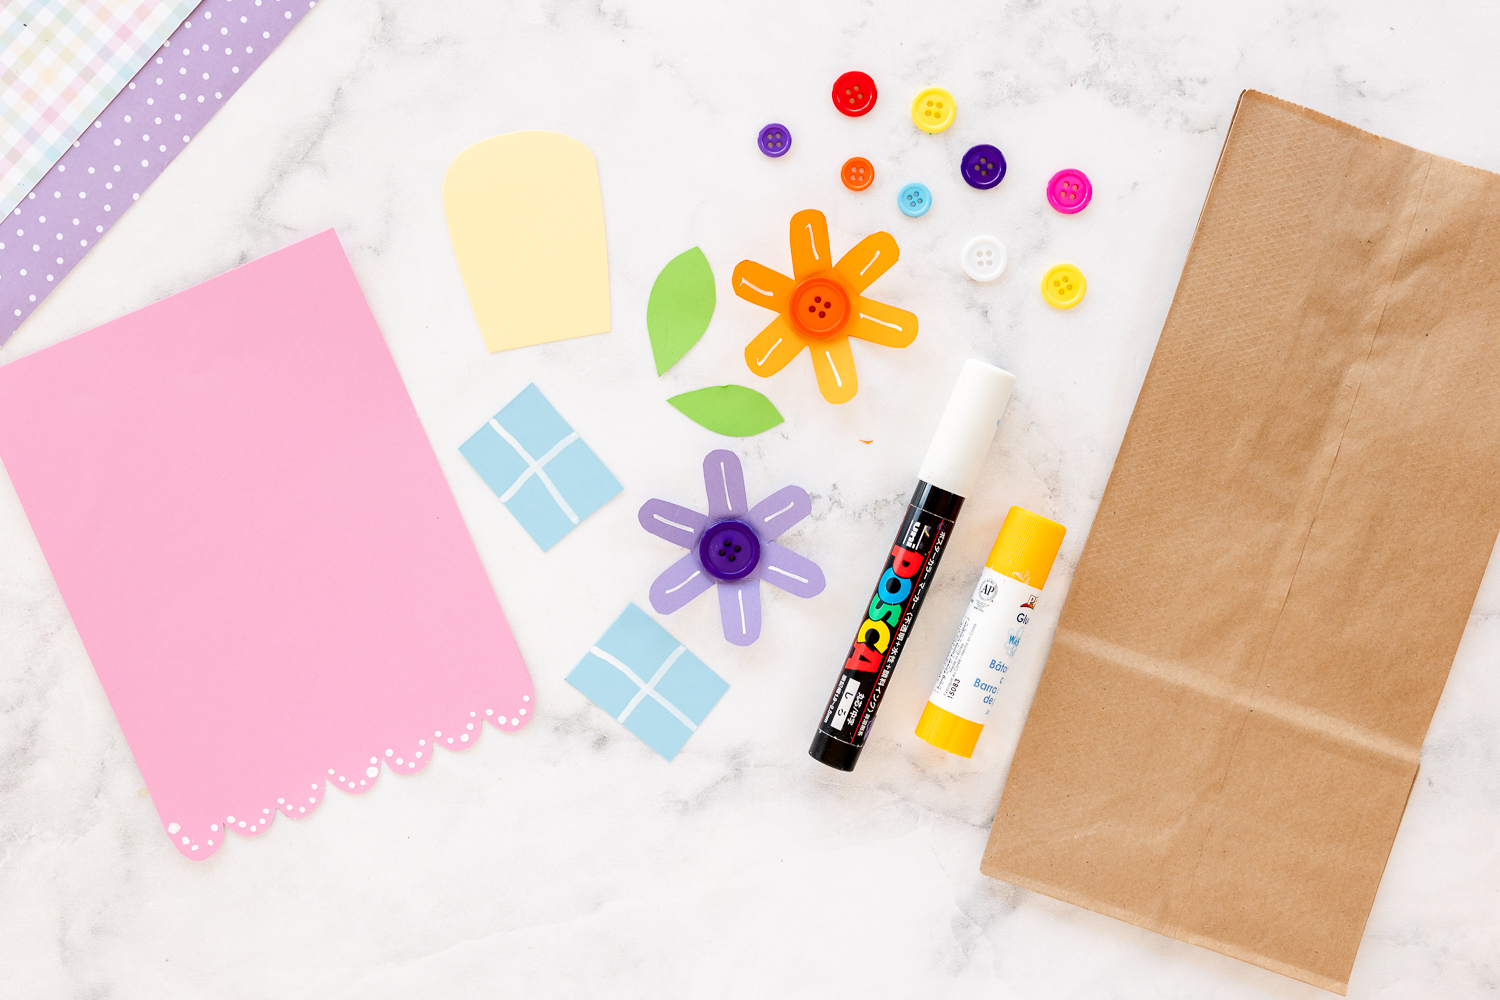
Craft Supplies Needed:
All you need are a few simple supplies, and you can make this fun craft!
- Cardstock – Pink, Yellow, Purple, Orange, Light Blue (Baby Blue), and Green
- Brown Paper Lunch Bags
- Buttons (Two Sizes)
- Paint Pens, White and Green
- Free Template
How To Make a Paper Bag Fairy House
Step 1: Preparing the Fairy House Pieces
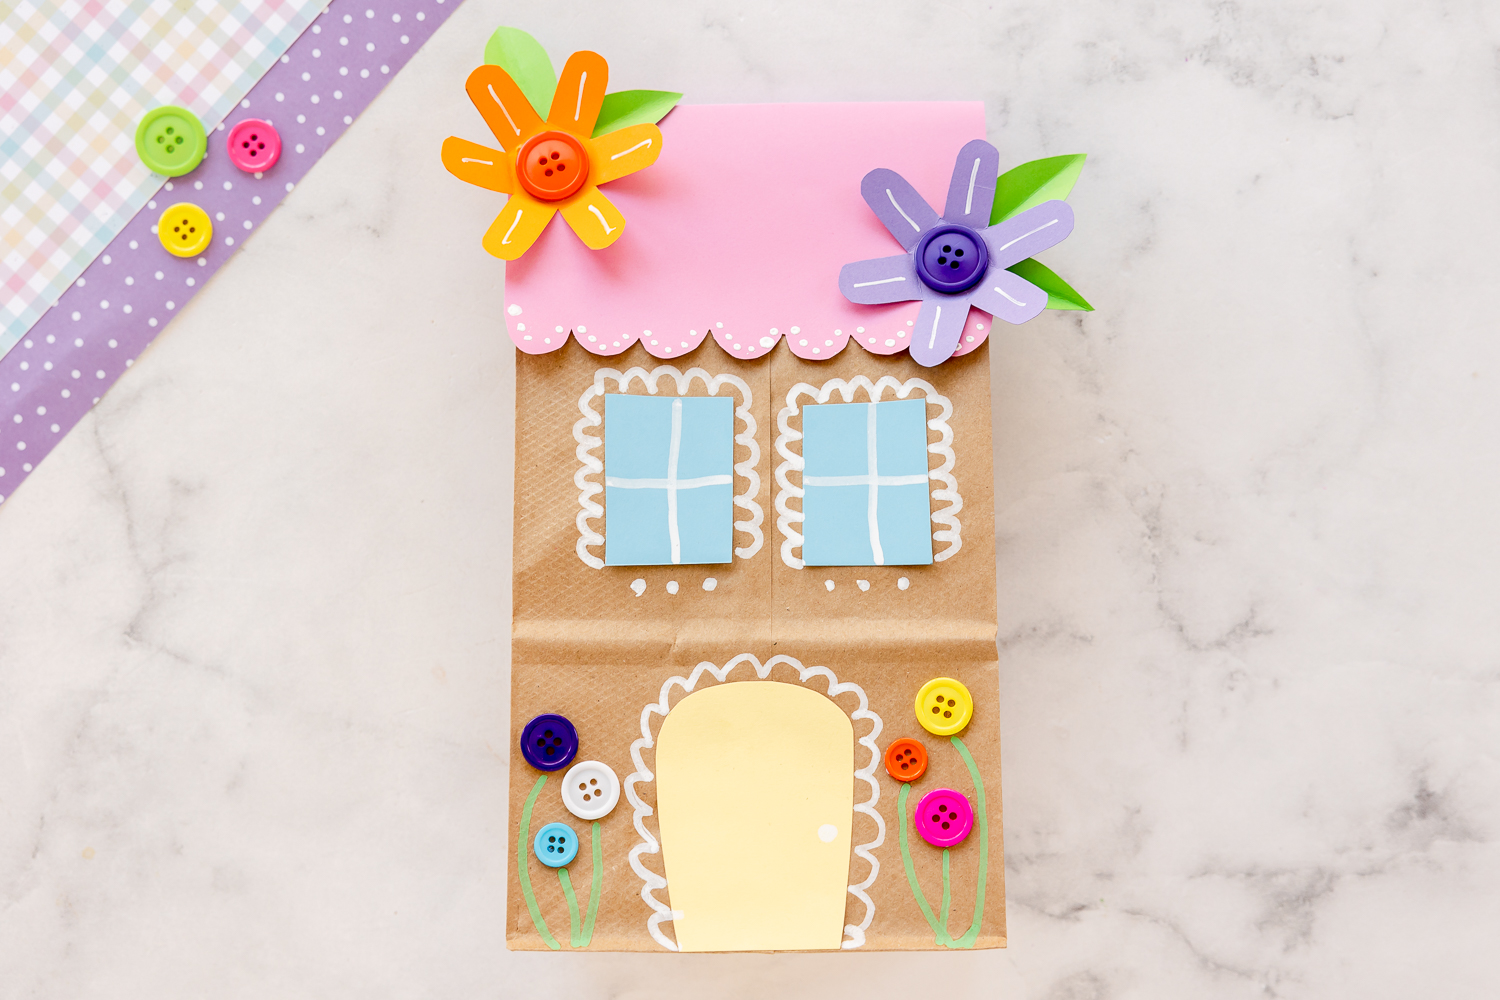
- Cut out template pieces and add designs are desired. Add little dots following the scalloped roof. Make flowers and add buttons to the middle. Add white lines in the middle of the petals. Add green leaves if desired.
Step 2: Build your Fairy House
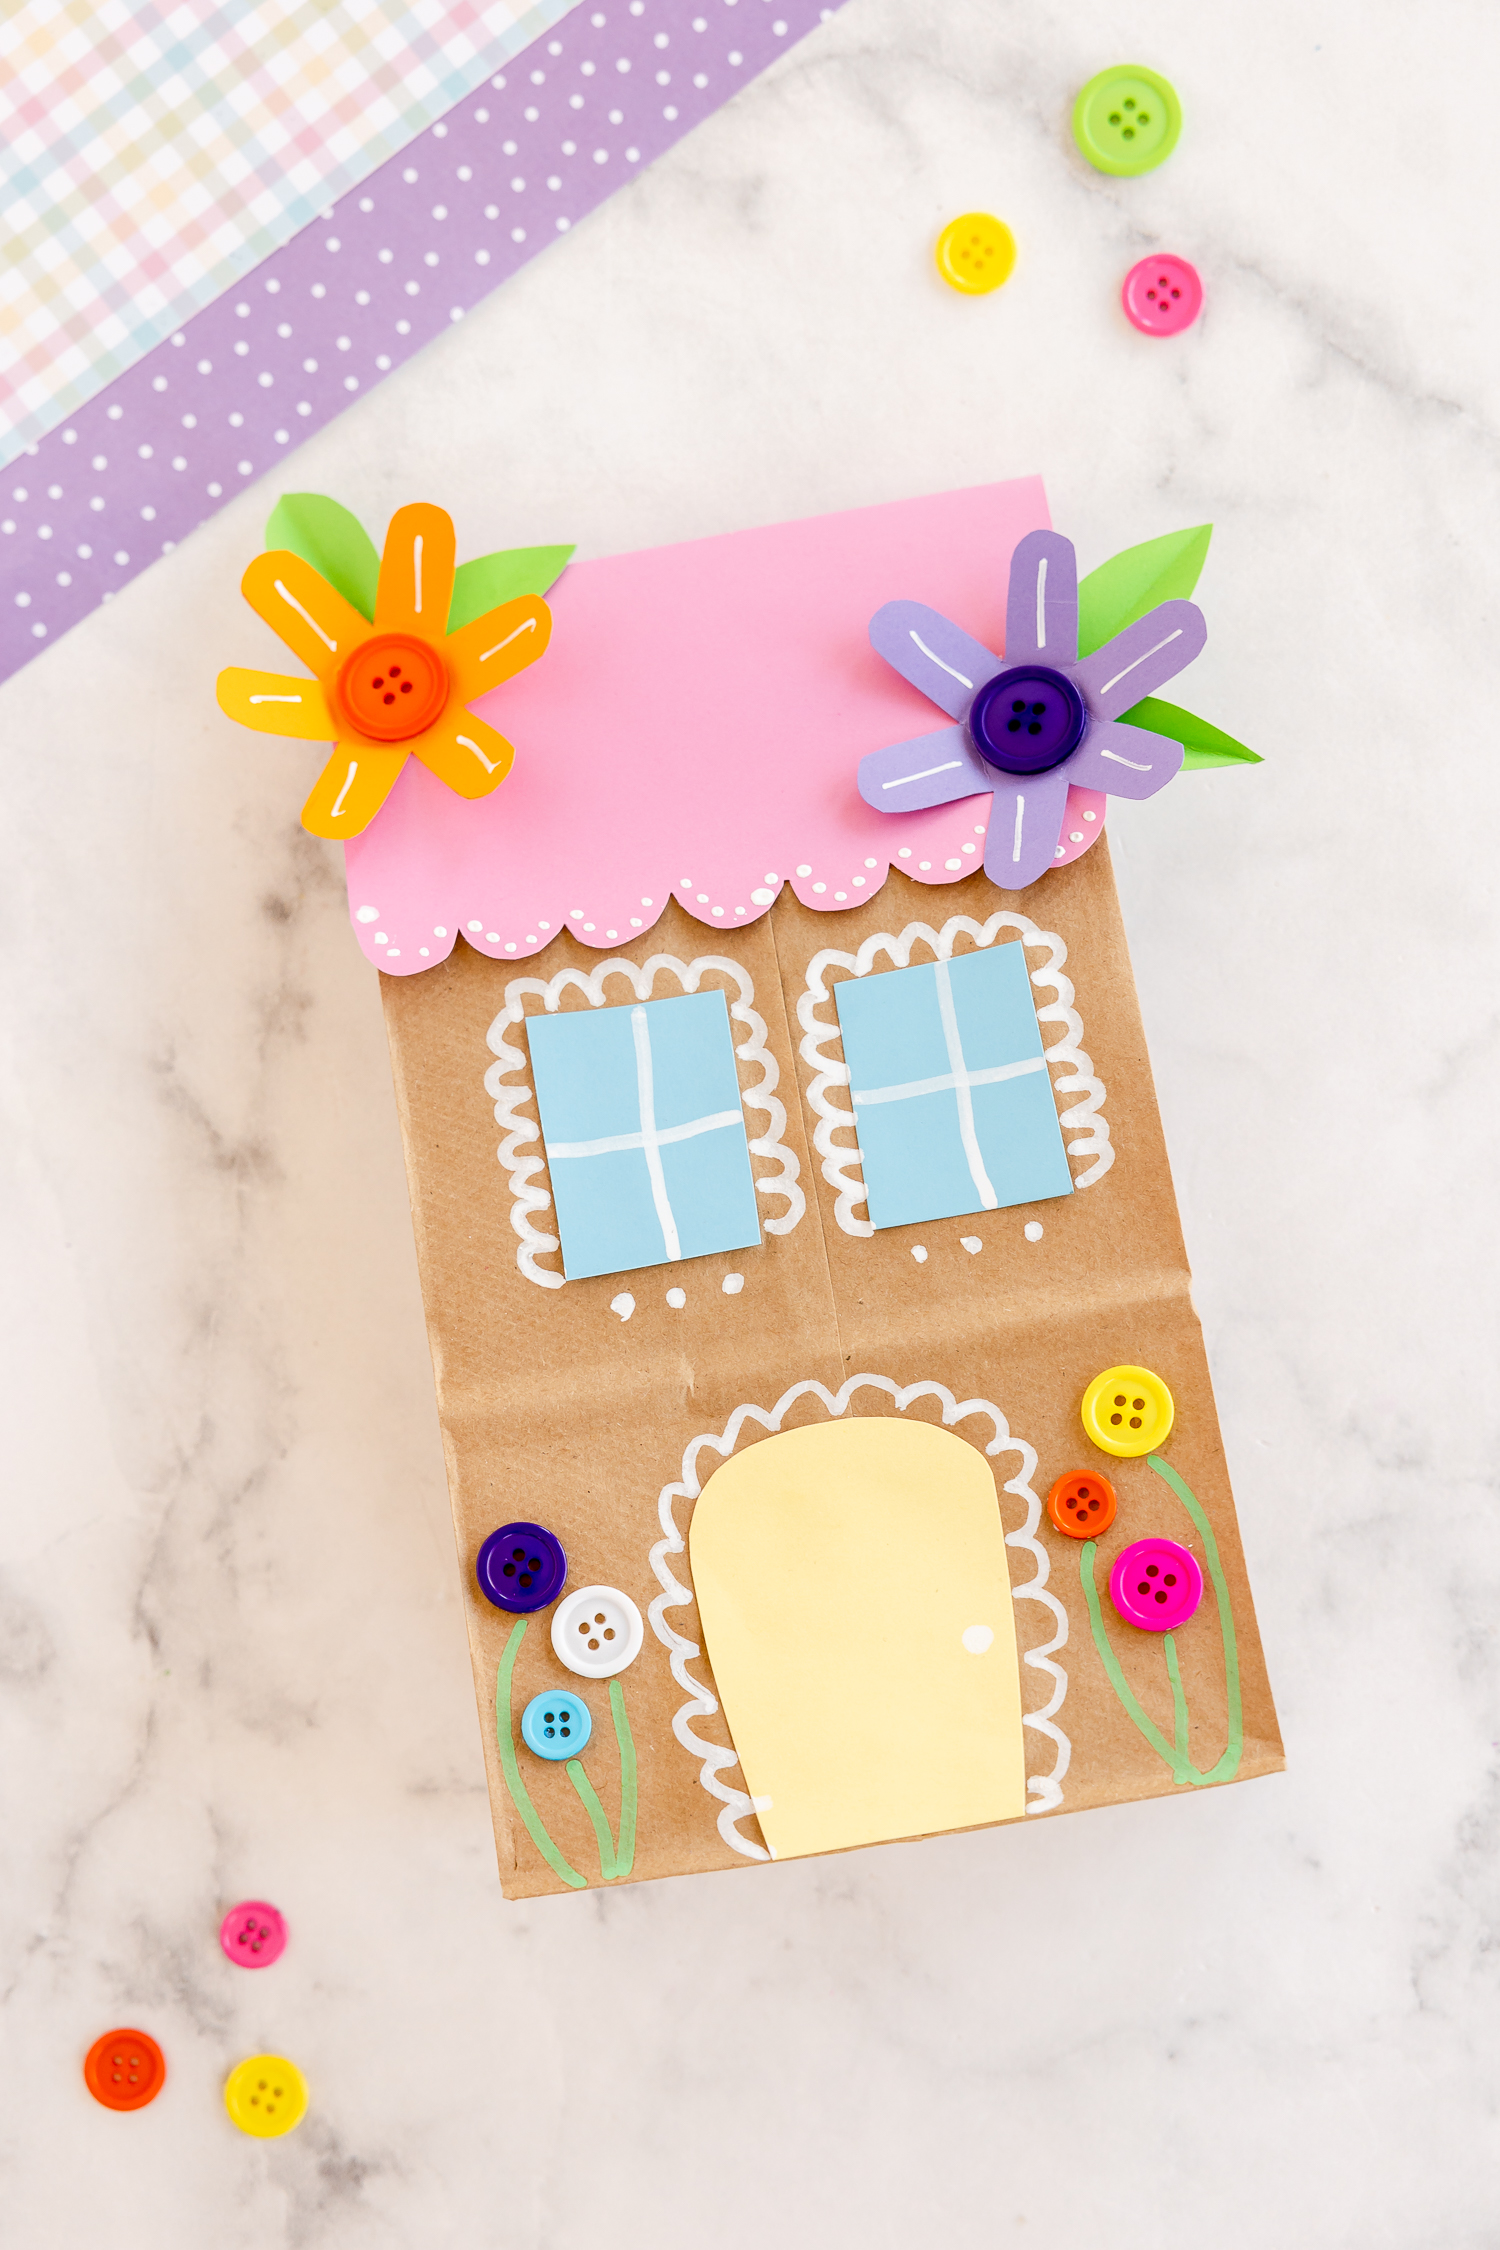
Open the paper bag and puff it up a little. This will help it stand up and look a little fuller. Fold the lunch bag over about 1 inch to form it’s roof shape.
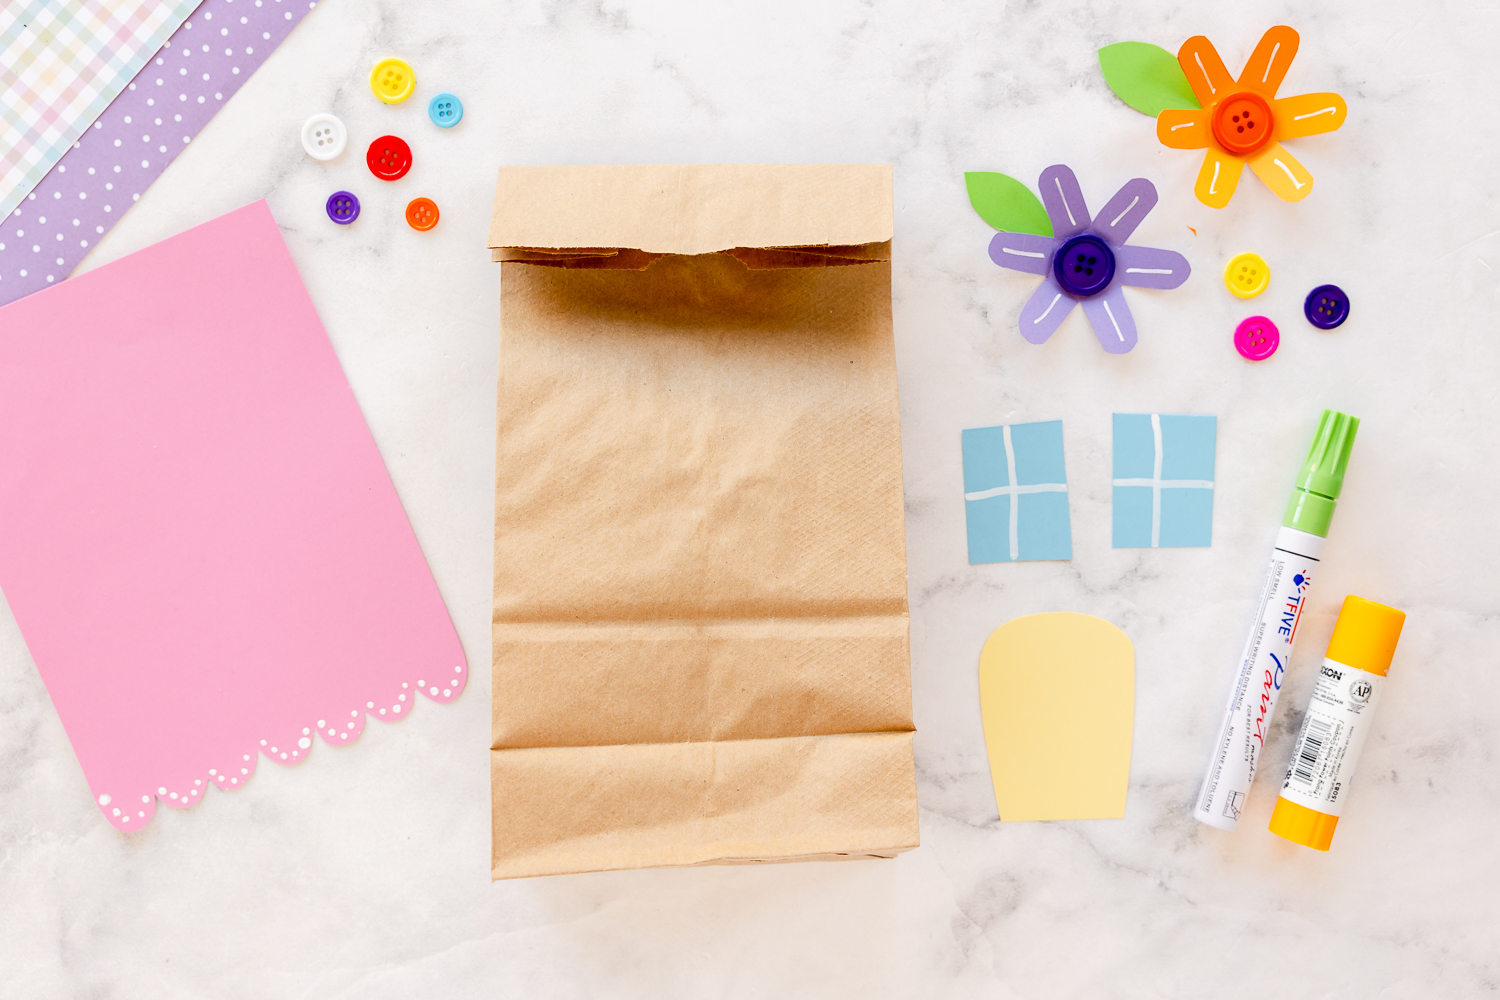
Step 3: Adding the Details
Add the remaining house elements. Draw a scallop around three sides of the windows and around the door. Add three dots under the window and door knob. Add flowers with a green paint pen and buttons to the outside of the house (two bigger ones and one tiny)

Tips for Making a Paper Bag Fairy House
- Use natural materials like pine cones, popsicle sticks, and small branches to incorporate into the design. These elements add a touch of authenticity and bring the fairy house to life.
- Attach craft sticks to make a wooden stand to stick your little houses in the ground to create a real life magical fairy garden!
- Glue magnetic pieces onto the back of your paper bag and stick the magnetic fairy house on the refrigerator to make an adorable garden scene!
- Attach a piece of twine or string to the top of the bag so your kids can hang their decorated paper bags in their rooms!
Homeschool and Classroom Use:
- Improves Creativity and Imagination
This great fairy craft allows kids to unleash their creativity and imagination as they design and decorate their own unique fairy dwellings. It encourages them to think outside the box and create a magical world of their own. - Encourages Interactive Play
The paper bag fairy house provides a platform for interactive play. Kids can use the fairy house as a setting for imaginative play, storytelling, and role-playing. It becomes a focal point for their adventures and sparks endless hours of fun and entertainment. - Easy and Affordable
Crafting a paper bag fairy house is a budget-friendly activity that requires minimal supplies. It’s an accessible craft project that can be enjoyed by kids and parents alike without breaking the bank. It’s a wonderful way to spend quality time together while fostering creativity and having fun.