As an Amazon Associate I earn from qualifying purchases.
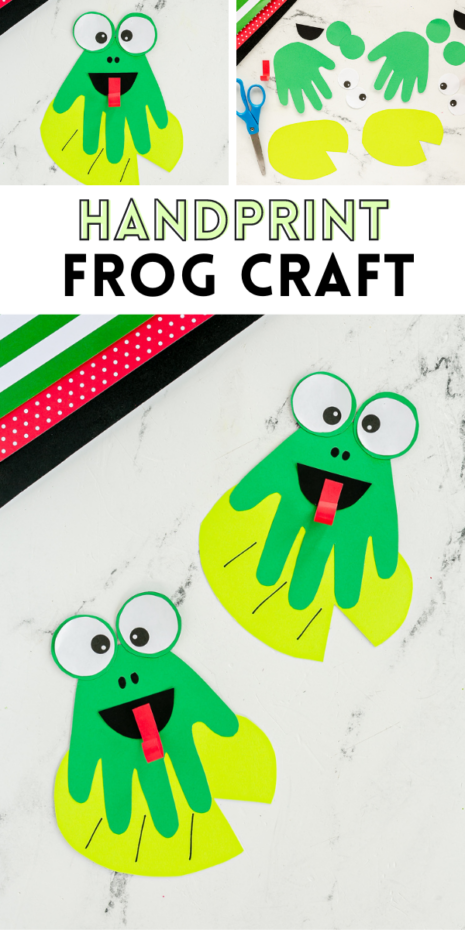

Hey there, crafters! Are you ready to hop into a fun, easy, and utterly adorable crafting project? Today, we’re going to use paper and a little bit of imagination to create a charming handprint frog. This craft is a blast to make and a great way to bond with the kiddos and ignite their creative spark. Whether you’re a teacher looking for a cool classroom activity or a parent aiming to create lasting memories (or just for something fun to do together!), this handprint frog craft is just the ticket!
HOW TO VIDEO:
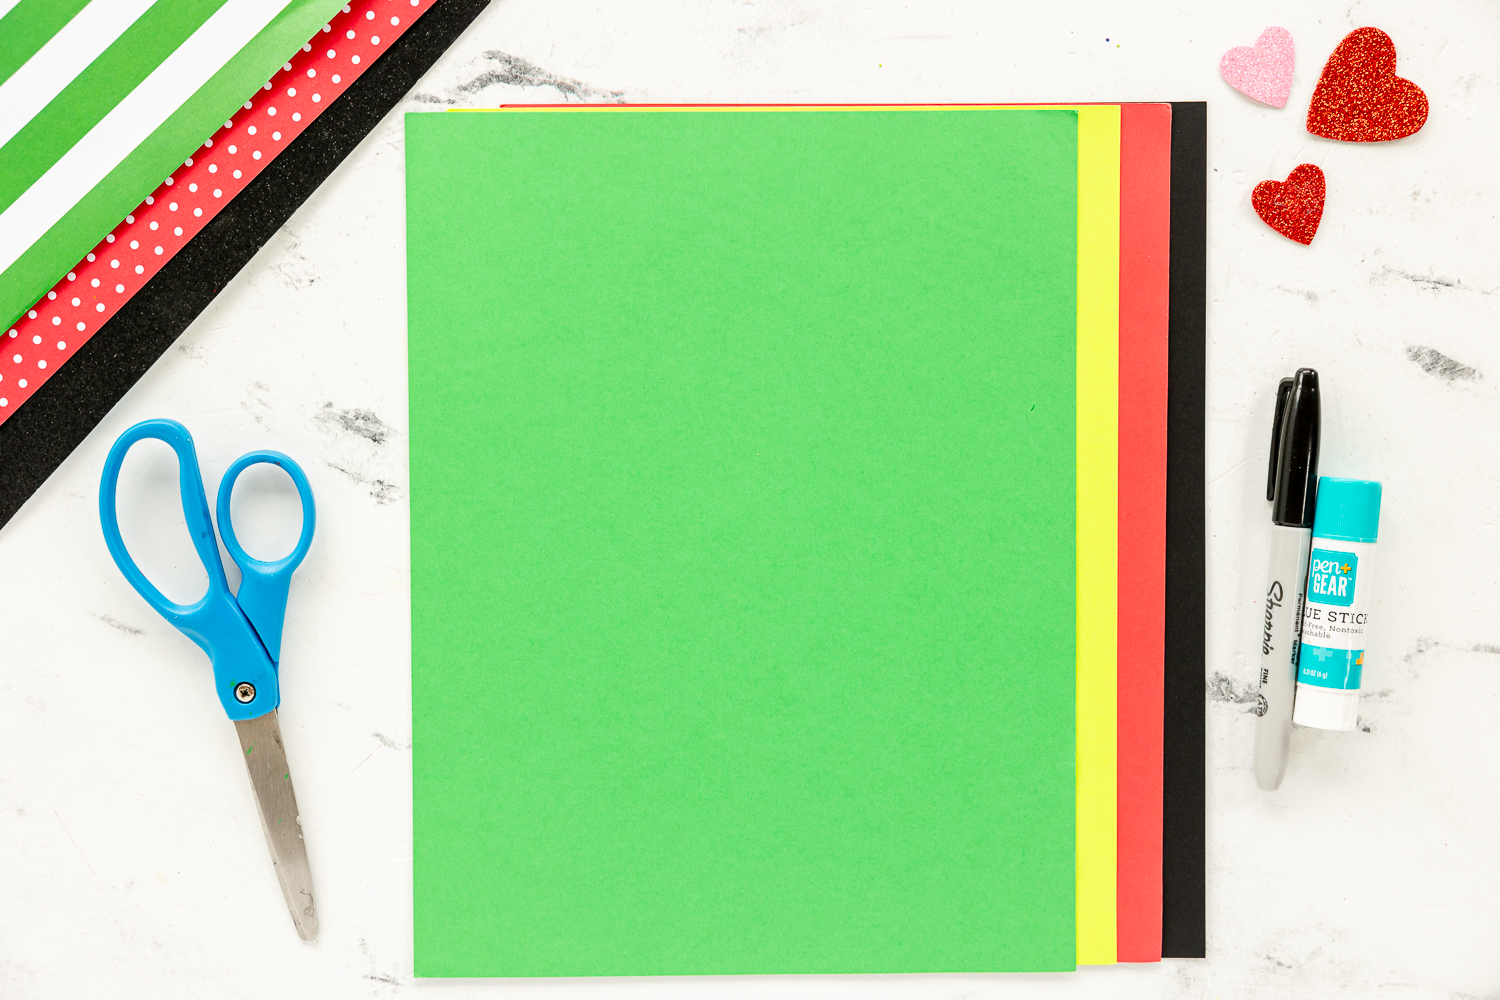
Supplies needed to make a Handprint Frog Craft
- Green paper (Think bright and froggy! The same shade you adored in our Valentine Frog craft)
- Lime green paper (for a pop of vibrant color)
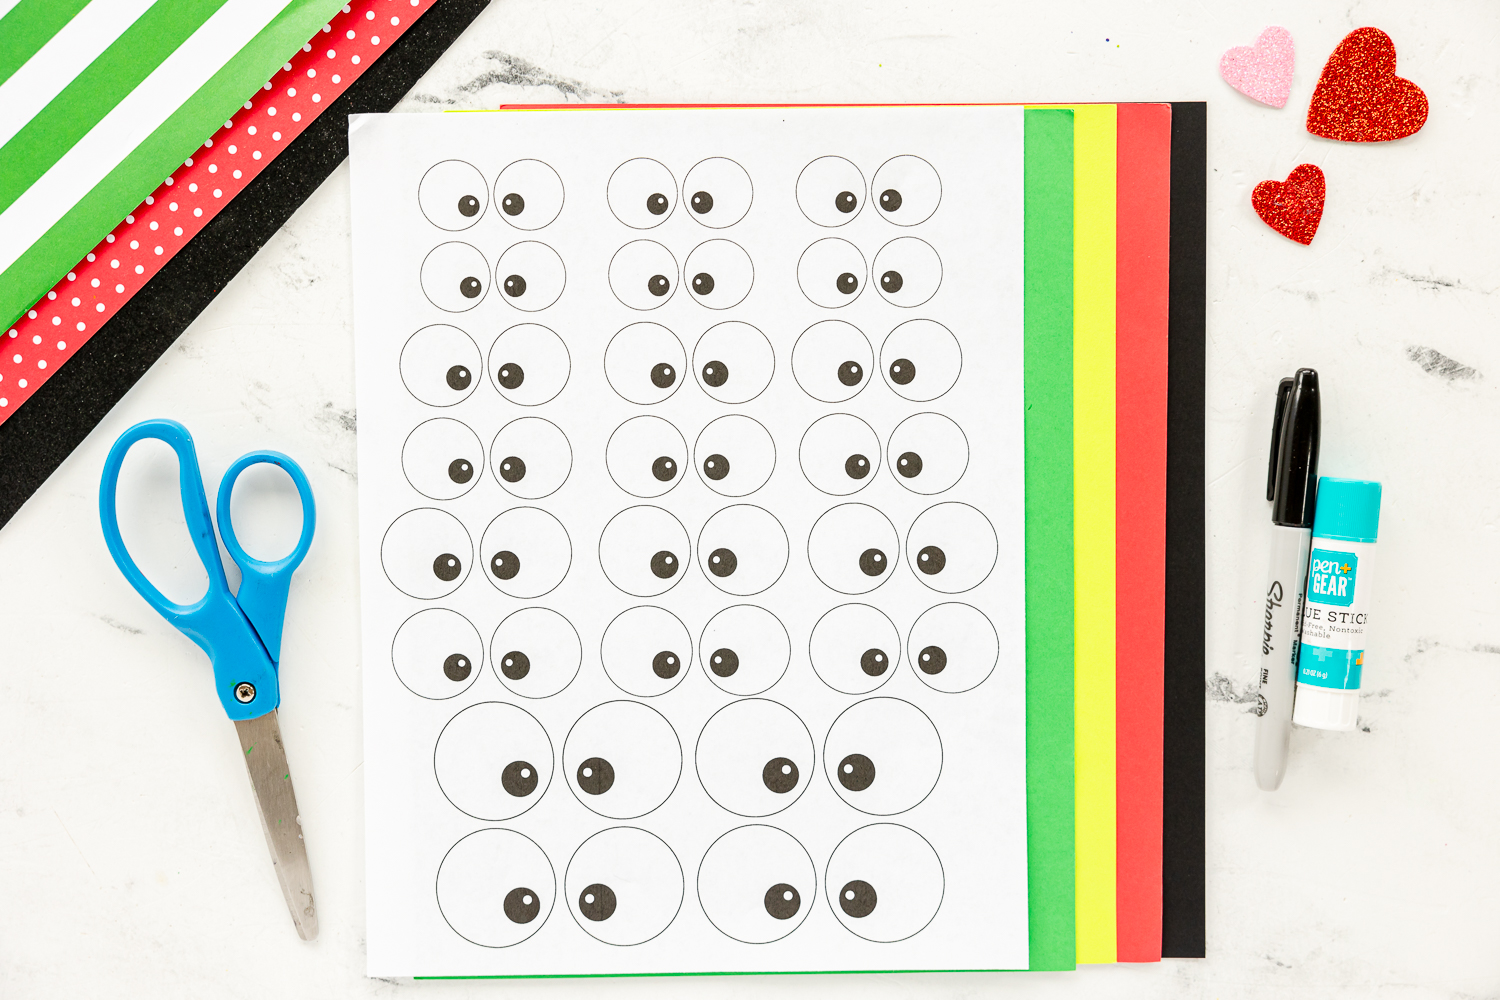
- Googly eye template (or actual googly eyes for that extra fun look)
- Red paper (for that cheeky little tongue)
- Black paper (we’re smiling already)
- Scissors (safety first, make sure an adult is around)
- Glue (stick to it!)
- A marker (for the finishing touches)
Step-By-Step Instructions
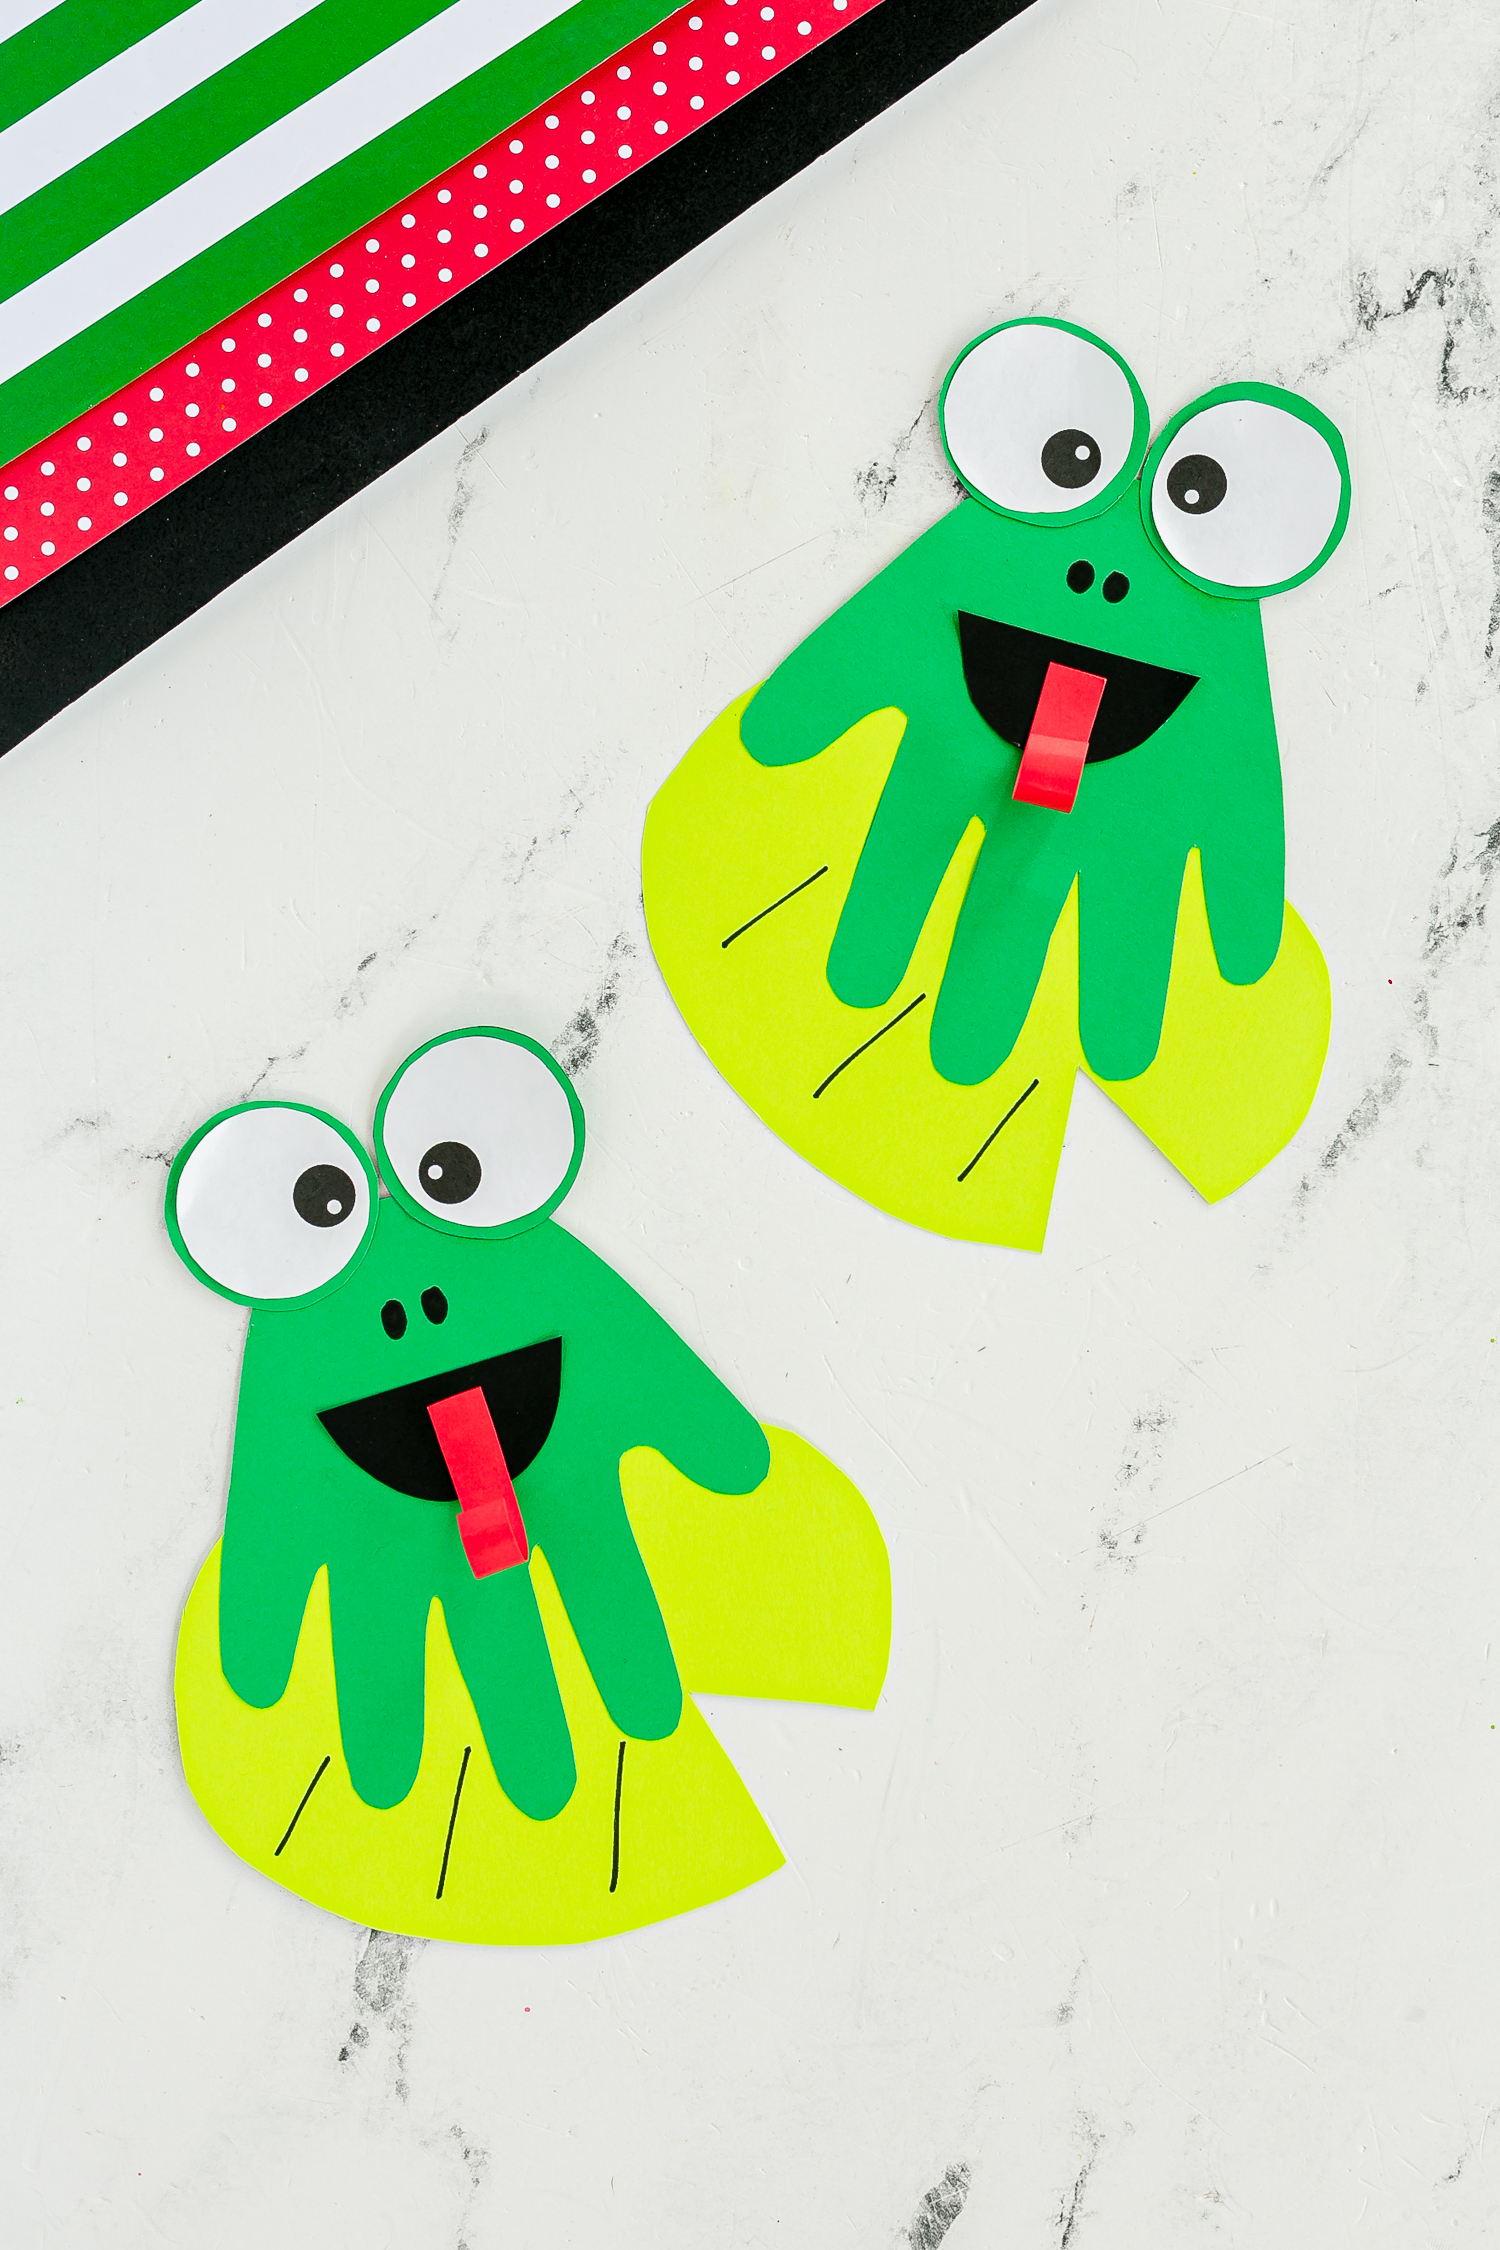
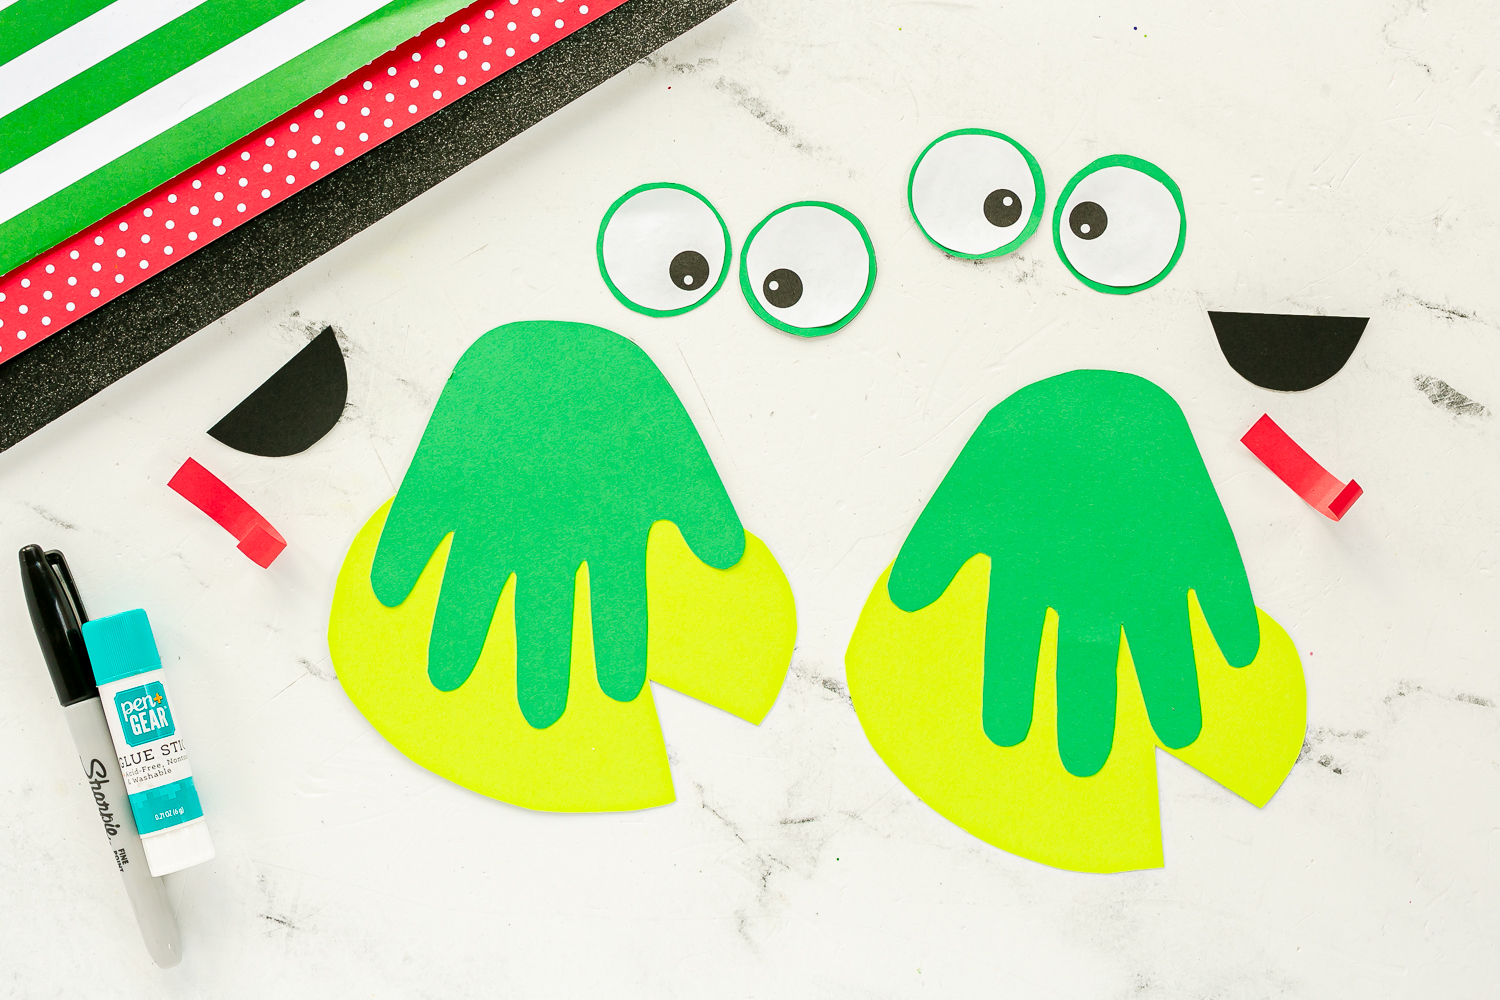
Step 1: Creating Your Frog’s Body
- Lay your green paper on a flat surface.
- Ask your child to spread their hand with fingers slightly apart, and trace around their hand. The fingers will be the frog’s legs, so point them downwards!
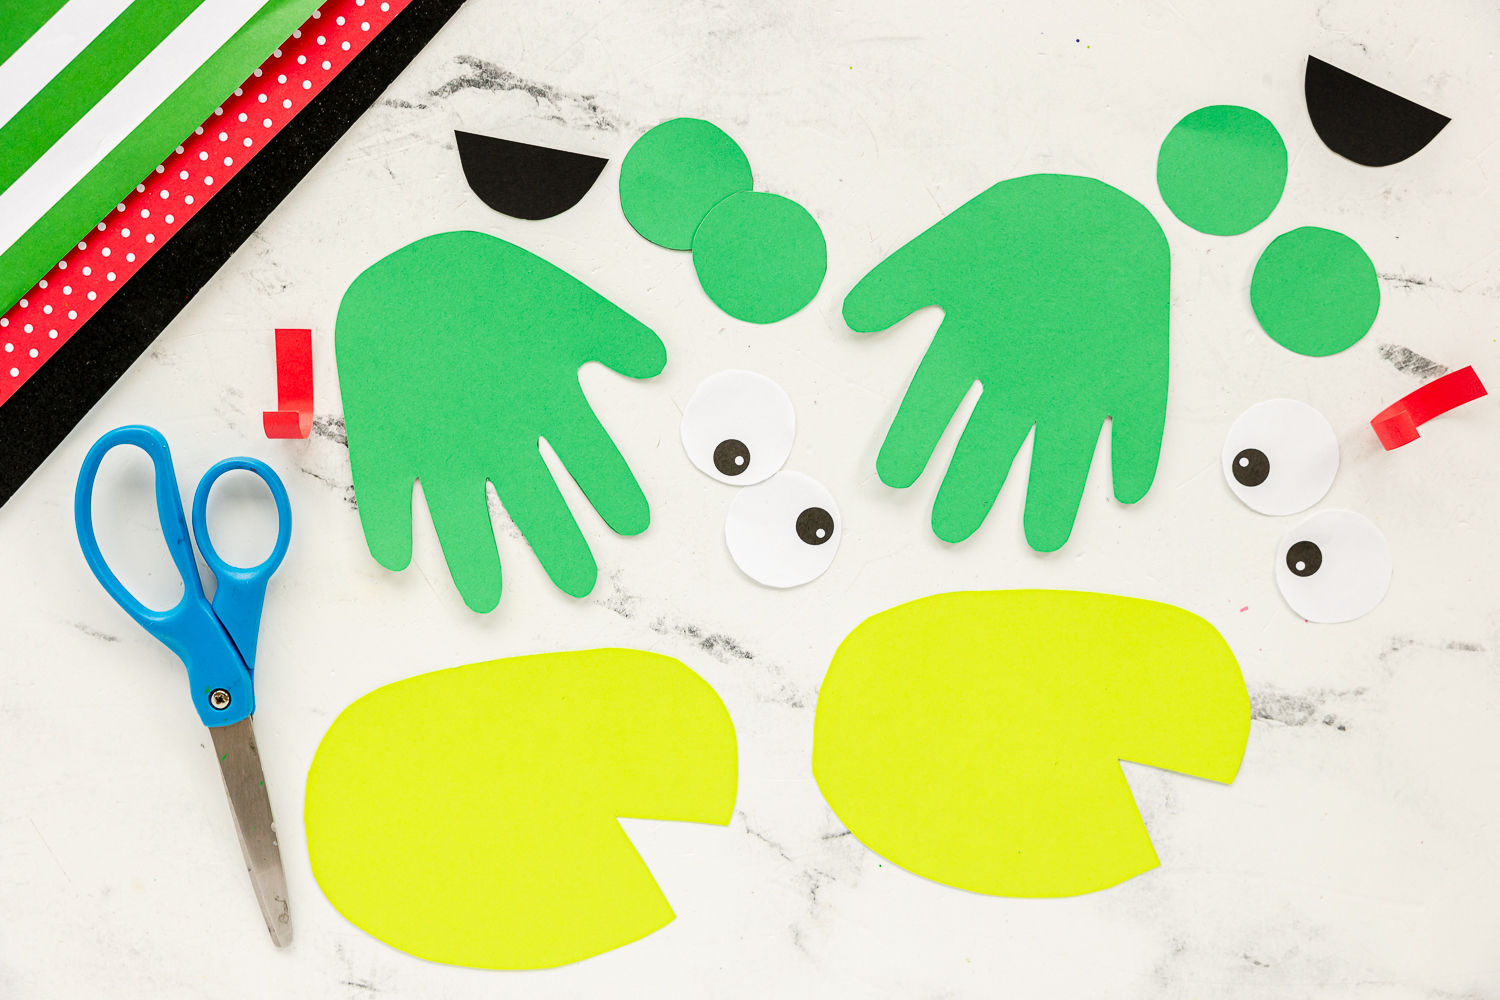
- Carefully cut out the handprint. This will serve as the body of our delightful frog.
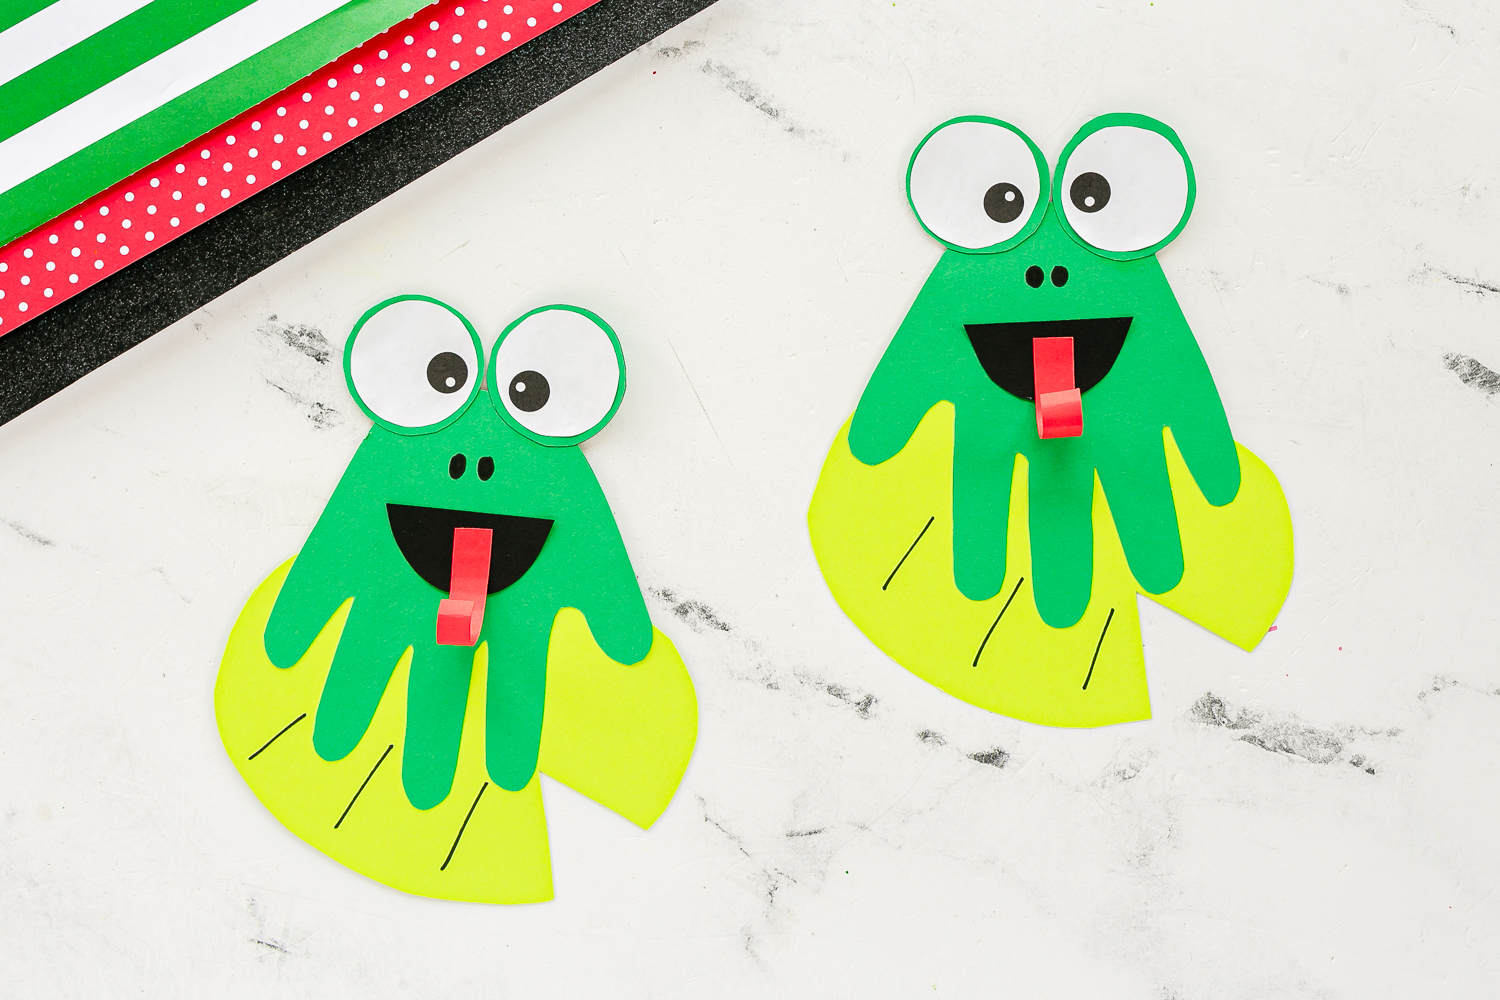
Step 2: Adding Some Eye-Popping Details
- Cut out two circles from your lime green paper – these will be the eyes. Make sure they’re proportionate to your frog’s body.
- Using the googly eye template or actual googly eyes, create the eyeballs. If you’re using the template, draw and cut out two smaller circles from white paper and add black dots in the middle.
- Glue the eyeballs onto the lime green circles.
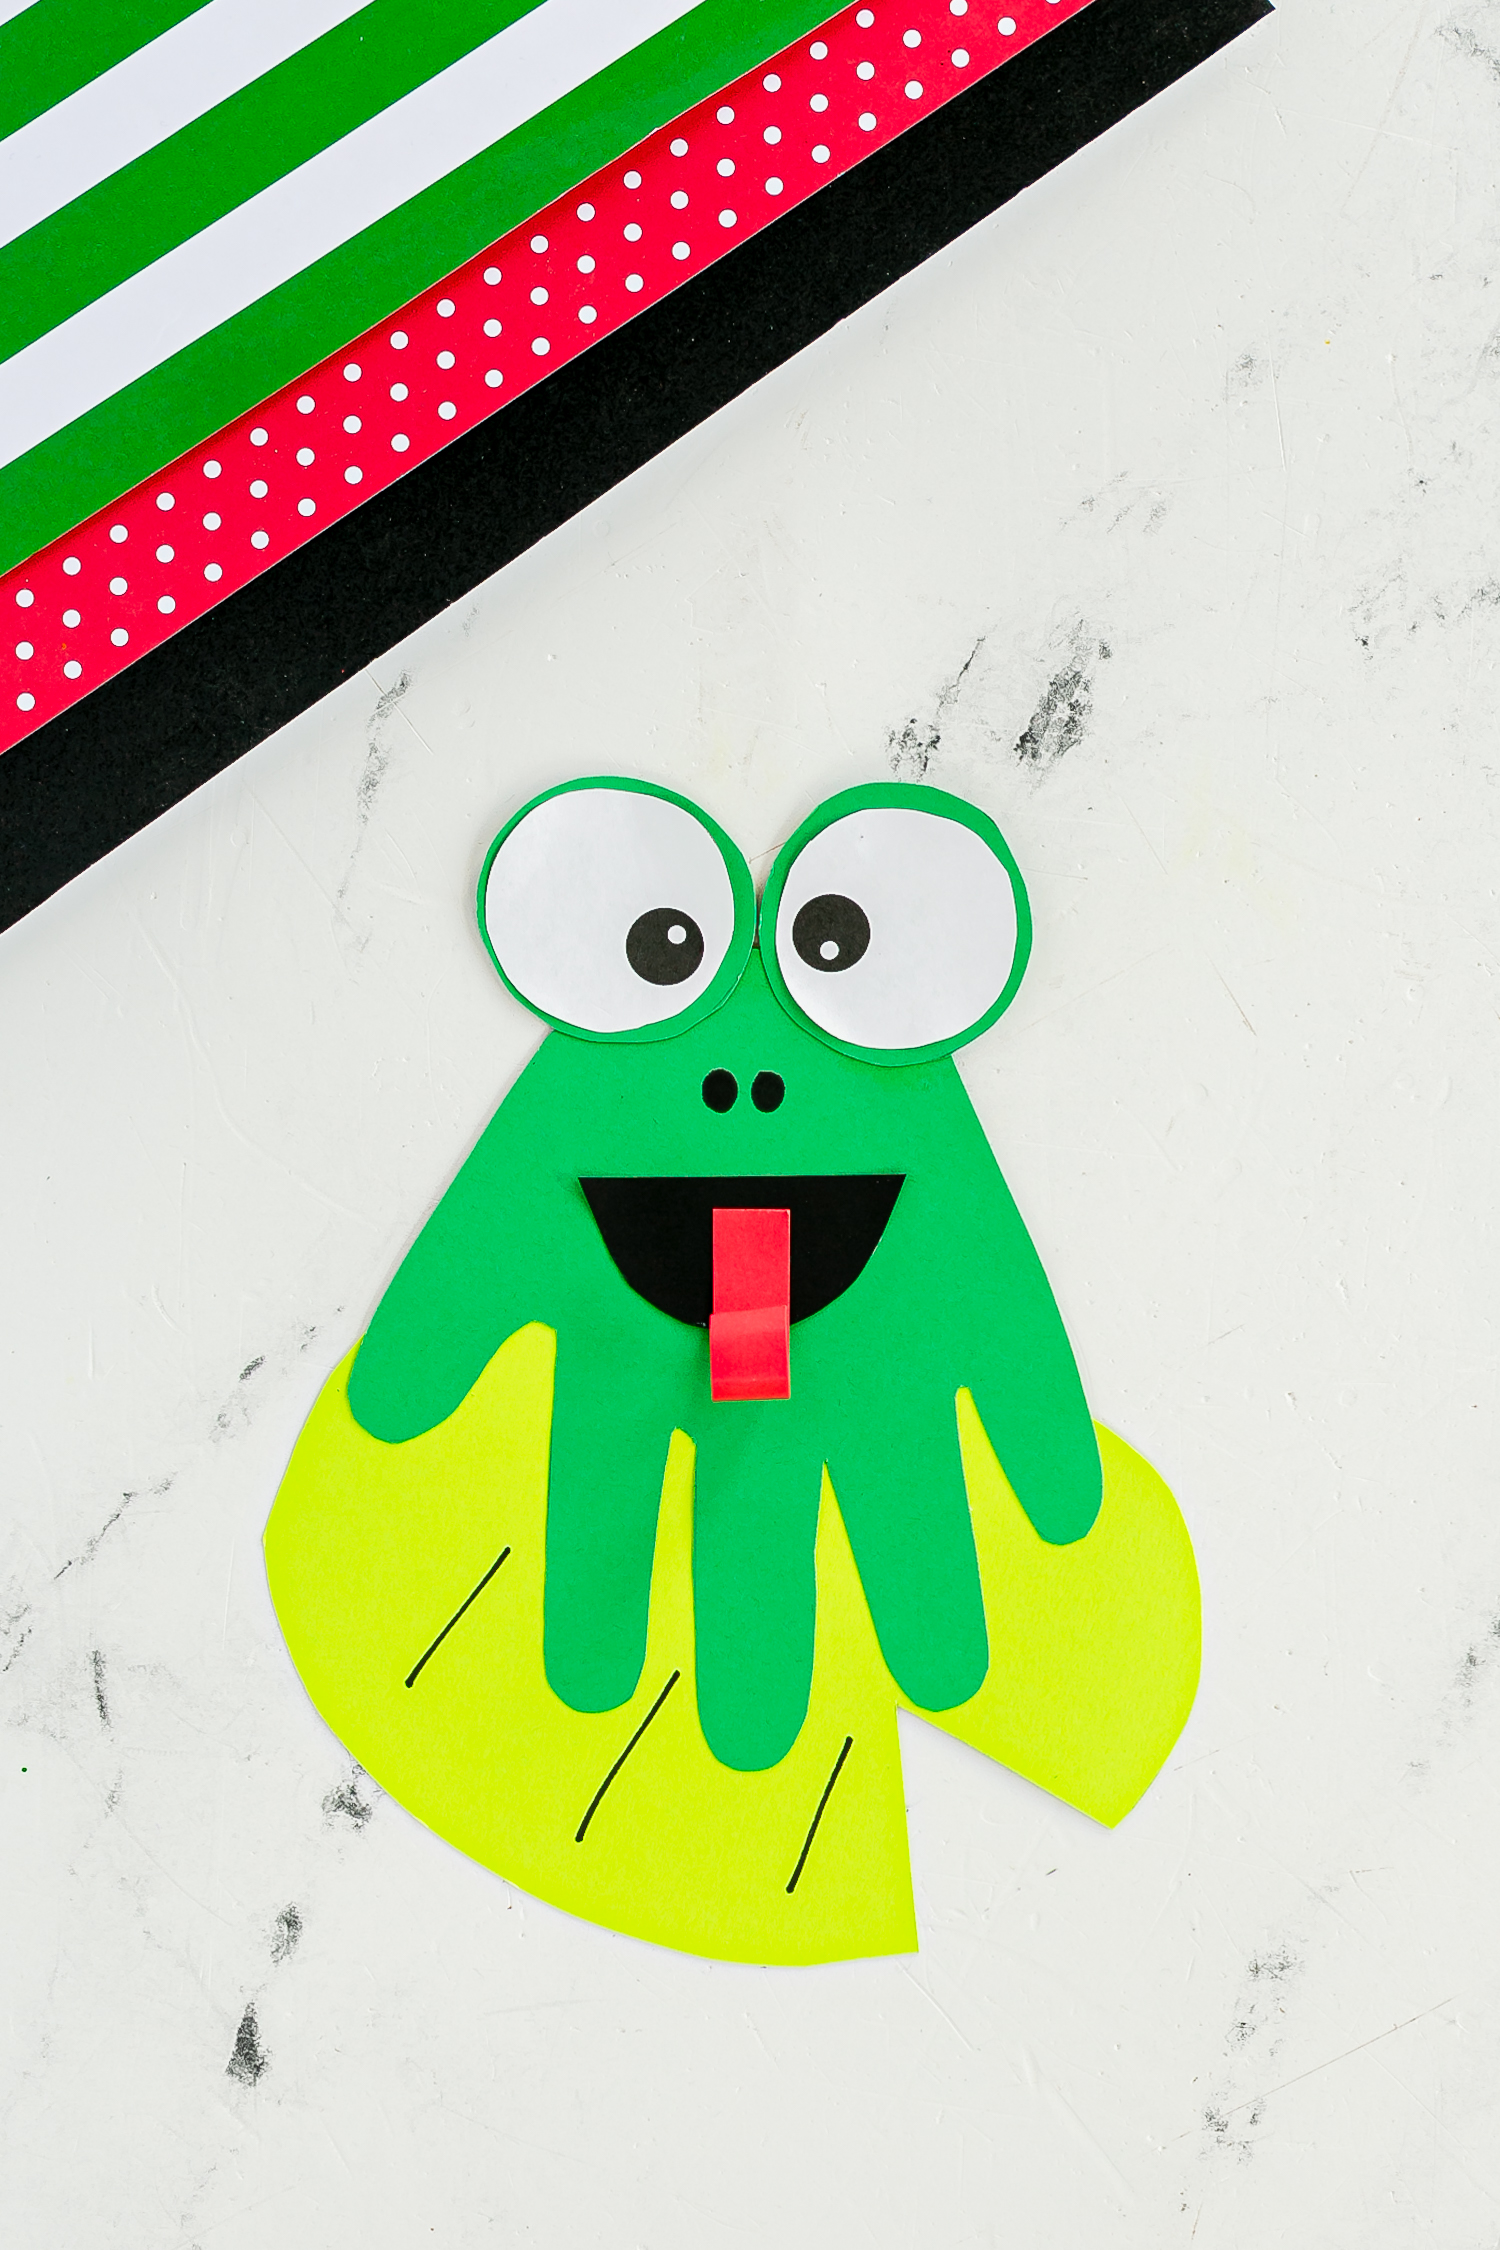
- Now, attach these lime green circles to the top part of the handprint (the palm area), bringing your frog’s face to life!
Step 3: Smile Wide
- Remember the smile from our Paper Plate Frog? Let’s mimic that!
- Cut a thin, curvy line from your black paper – this will be your frog’s happy smile.
- Glue it just below where the eyes sit.
Step 4: Tongue’s Out
- Cut out a thin, long strip from the red paper – this is going to be the tongue.
- If you’re feeling fancy, cut one end of the strip into a heart shape or a simple fork to give it that real froggy vibe.
- Glue the other end to the underside of the smile.
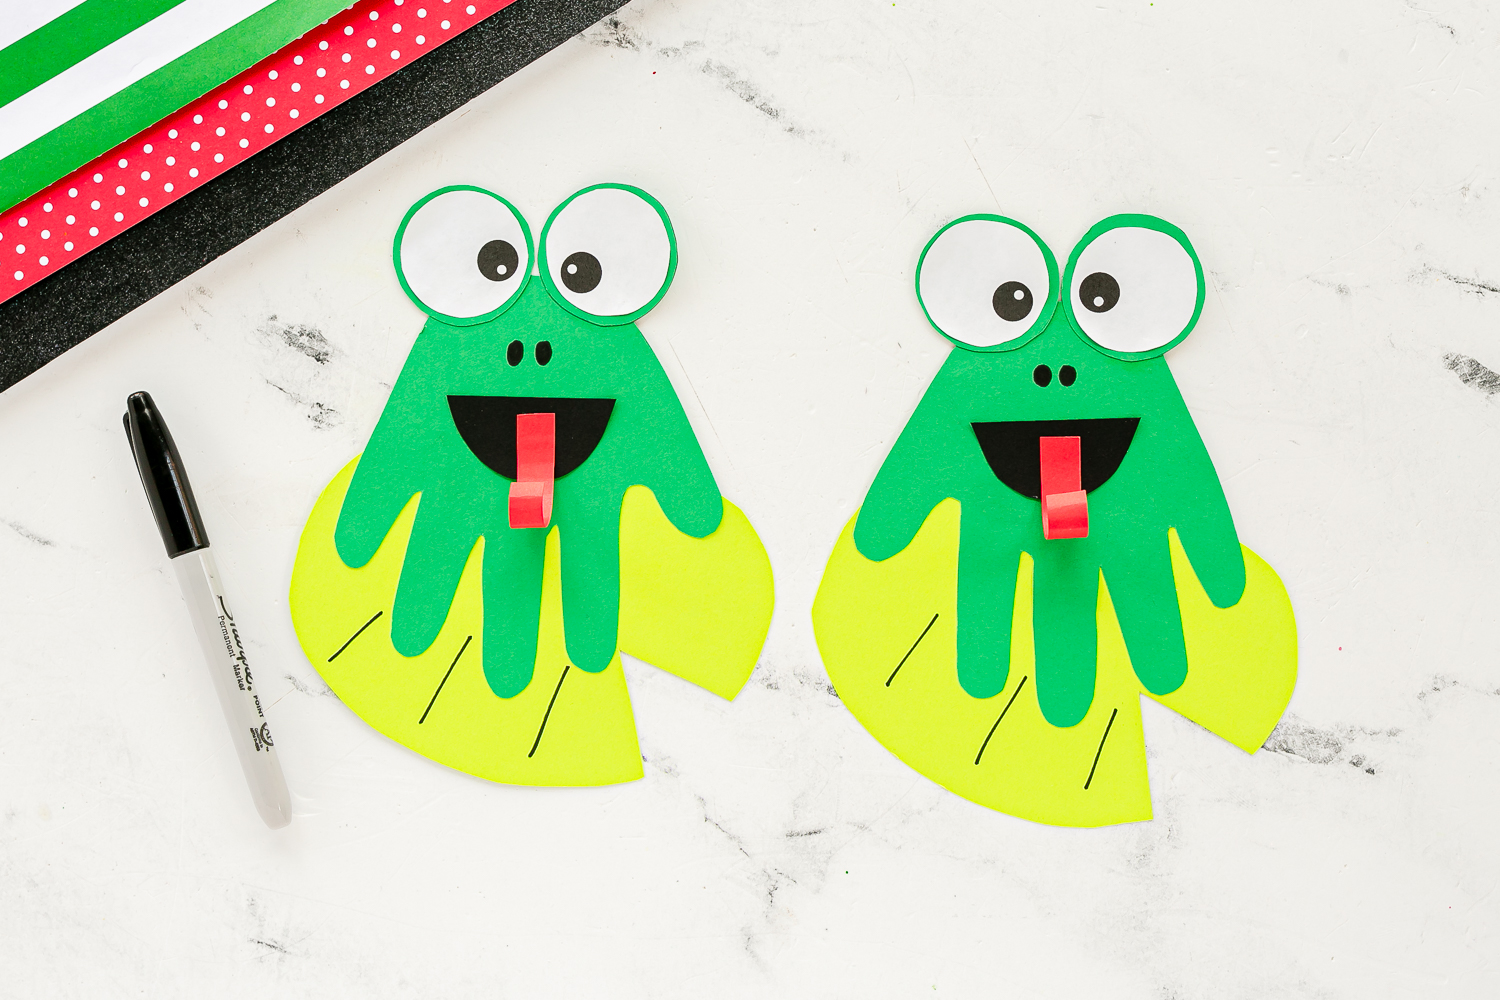
Step 5: Nosey Details
Now, here’s where we get a bit experimental. If you want to add nostrils, punch two small holes or cut tiny circles from the black paper and glue them just below the eyes. But hey, no pressure! If nostrils aren’t your thing, our froggy friend looks just as cute without them.
Step 6: Lily Pad Love
- Cut a large, rounded shape from your green paper to create a lily pad. Feel free to get creative with the edges for a more natural look.
- If your frog feels lonely, glue the handprint directly onto the lily pad. But remember, this crafty amphibian can also stand alone, ready to leap into your heart!

And voilà! You’ve now got an adorable, personalized handprint frog. This craft is perfect for spring and summer themes and an excellent way for kids to practice their cutting and gluing skills. Plus, it’s a charming way to preserve the size of your child’s handprint as a memorable keepsake.
Homeschool and Classroom Tips:
- If you’re working with very young children, prep the materials ahead of time.
- Personalize your frogs by changing up the colors or adding additional decorations like stickers or glitter.
- Turn this craft into a learning session by talking about frogs, their habitats, and life cycles.
Remember, the goal is to have fun, learn something new, and enjoy the precious moments of crafting together. So next time you’re looking for a delightful and simple project, remember this little green friend waiting to leap into your world of crafts.
Commonly Asked Questions
Can I use different colors?
Absolutely! Feel free to customize your frog with any colors you like.
What age is this craft suitable for?
This craft is great for kids aged 3 and up, with variations to suit different skill levels.
How can I make this craft educational?
Pair it with a lesson on amphibians, habitats, or even the importance of wetlands to make it a fun and educational experience.