As an Amazon Associate I earn from qualifying purchases.

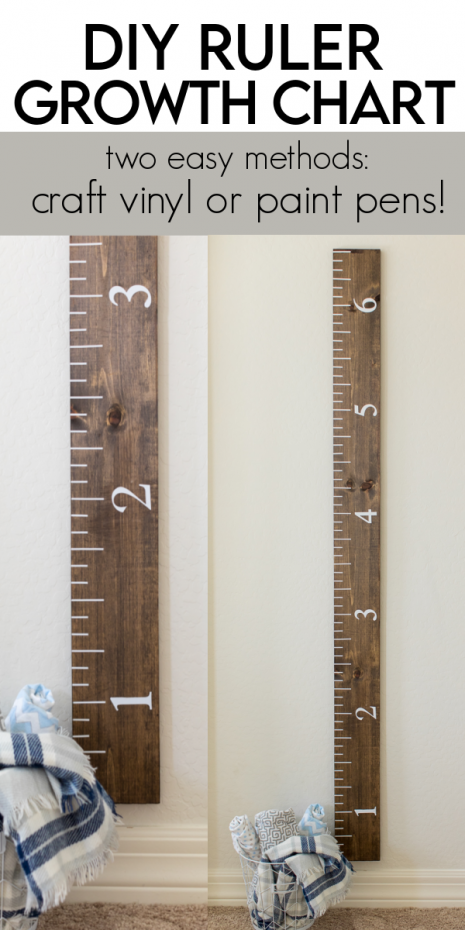
This DIY Ruler Growth Chart tutorial is a perfect project for a keepsake and hanging art for the kids rooms! Easy instruction to build a Ruler Growth Chart!
Ruler Growth Chart
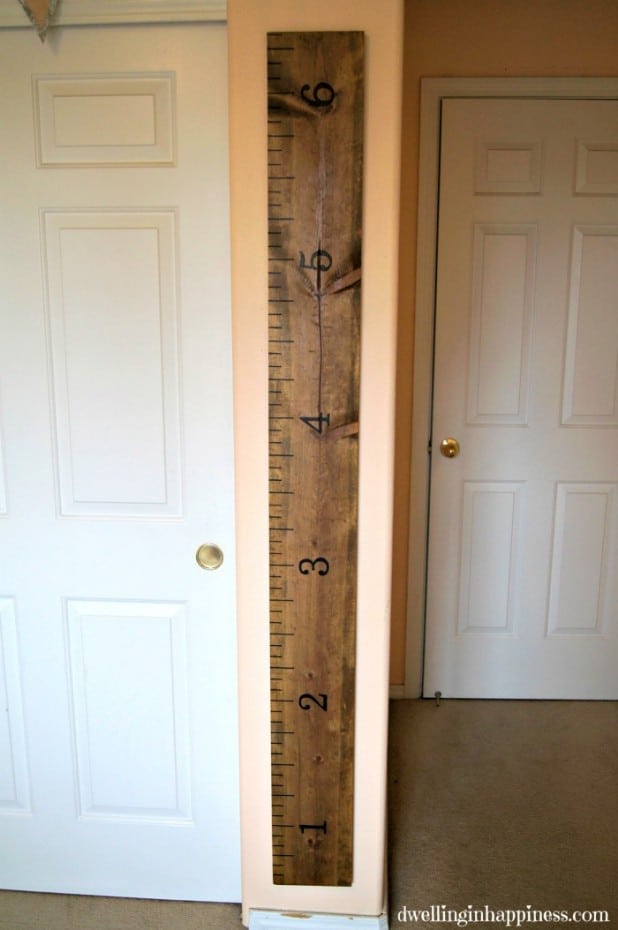
This growth chart ruler is such a fun way to measure your kids growth over the years! It makes a wonderful gift for baby showers and first birthday parties! My sweet friend Amanda from Dwelling in Happiness, first shared this DIY ruler growth chart, here on Made to be a Momma almost 5 years ago! We revamped the post and added a second method for making this growth chart, which I prefer! If you have a vinyl cutting machine like a Silhouette or a Cricut you can have this DIY done in no time!
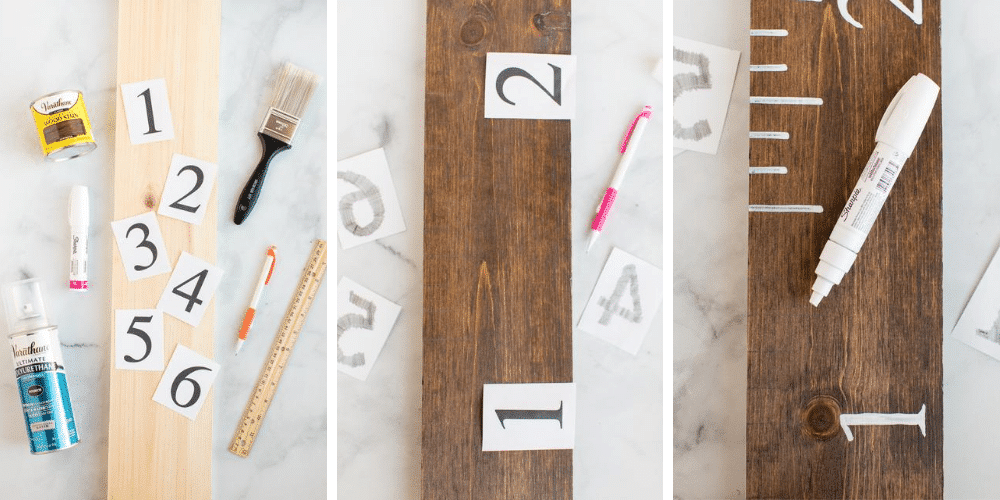
Ruler Growth Chart Supplies:
- 1x6x6 wood board
- Wood stain (whatever color you love- you can even paint it white and use black numbers)
- Polycrylic sealer, if desired
- Sandpaper
- Paint brush
- Ruler
- Pencil
- Printed Numbers 1-6 or Vinyl Cut Numbers (1-6)
- vinyl ruler markings ( VINYL VERSION ONLY-more specifics below)
- Paint pen (or a Sharpie!)
RULER GROWTH CHART DIRECTION- ORIGINAL VERSION
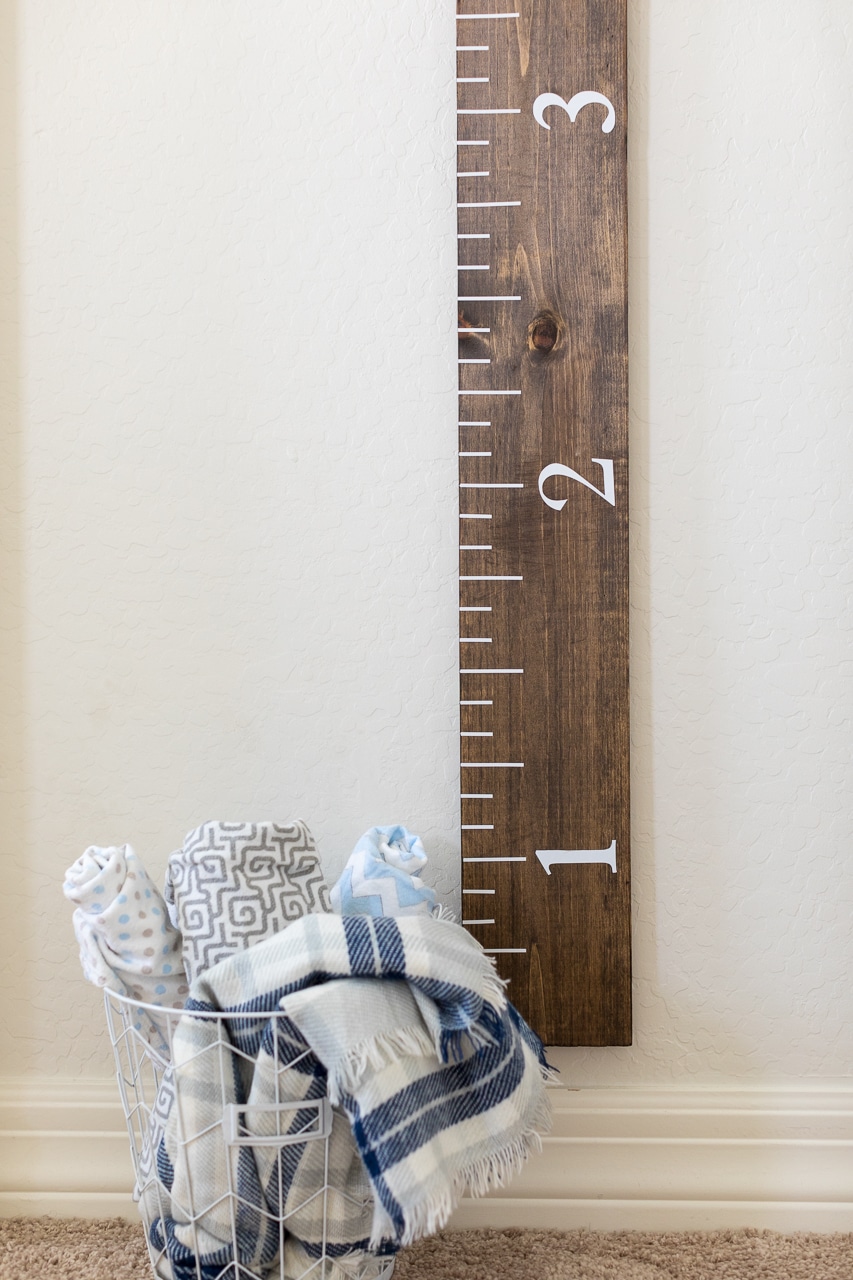
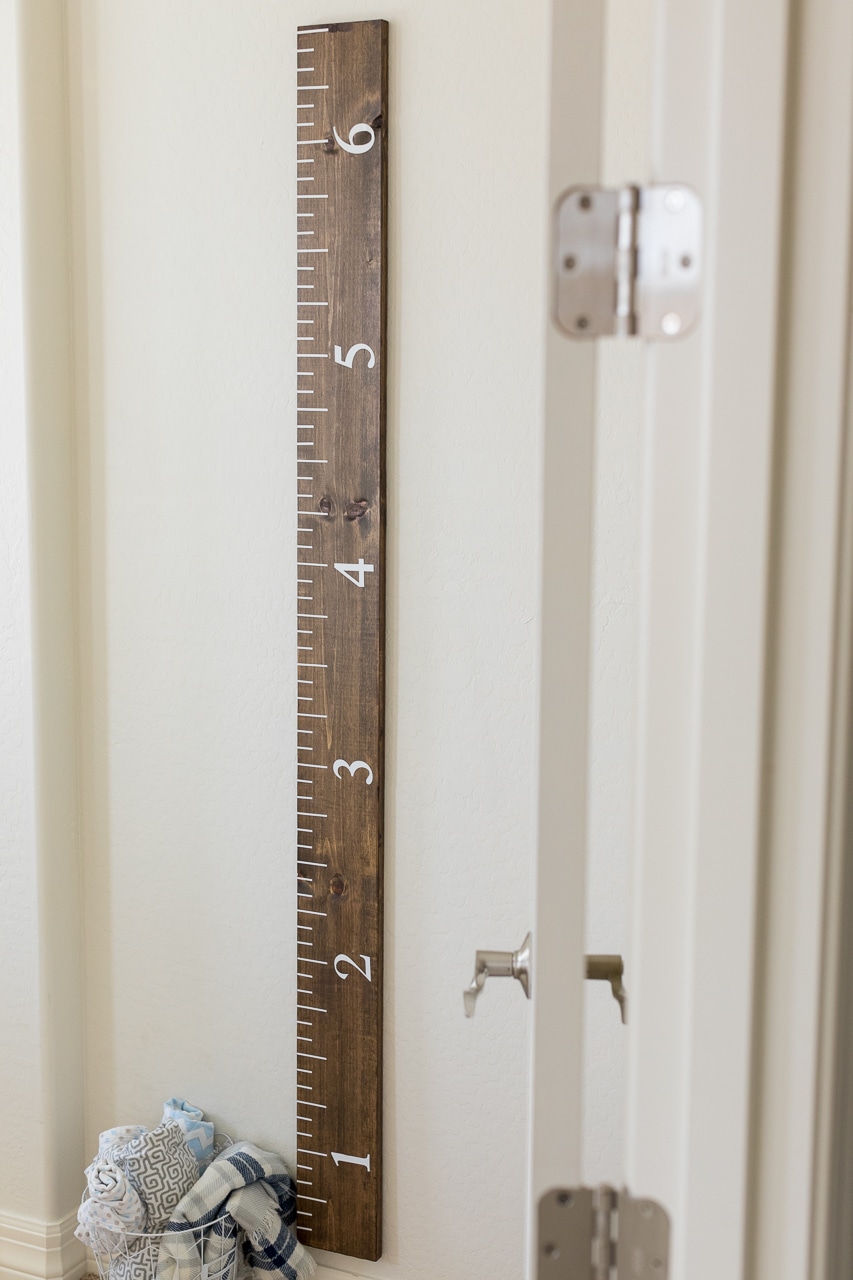
- Brush your desired wood stain onto your board. Depending on how dark you want your ruler, you can wipe off the stain with a towel after 5 minutes, or longer if you want it darker.
- Once the stain was dry, I sanded it down just a tad to give it just a little “warn” look.
- To make it look like a ruler: using a pencil and starting at the very bottom, measure up and mark a line every inch (some rulers are exactly an inch wide, so you can just move the ruler up and measure that way. However, make sure you measure the width of the actual ruler to make sure.
- I made every 3rd line to be 2 inches long (which represents the 1/4 inch mark on a ruler), and the rest are 1 inch long (to represent the 1/8 inch mark on a ruler
- Use a thin paint pen or a Sharpie and go back over your pencil lines.
- To transfer the numbers to the growth chart: cut them apart and rub a pencil all over the back, making sure the number is completely covered you can print them out HERE.
- Turn the number back over, and position it next to the second “1/4 inch” mark up from the bottom of your growth chart. Use a pen or pencil to trace the number.
- You will be left with a faint pencil outline of the number on the wood.
- Use your paint pen or Sharpie and color in the numbers.
- Continue with all the numbers. Once the paint or Sharpie is dry, cover with a clear a polycrylic sealer. I ended up using a spray polycrylic instead of the one I show in the materials photo, as I was afraid running a pant brush with it over the Sharpie would smear it! You can also choose not to add a sealer and make your markings over the years. Once your kids are grown you can choose to seal it then.
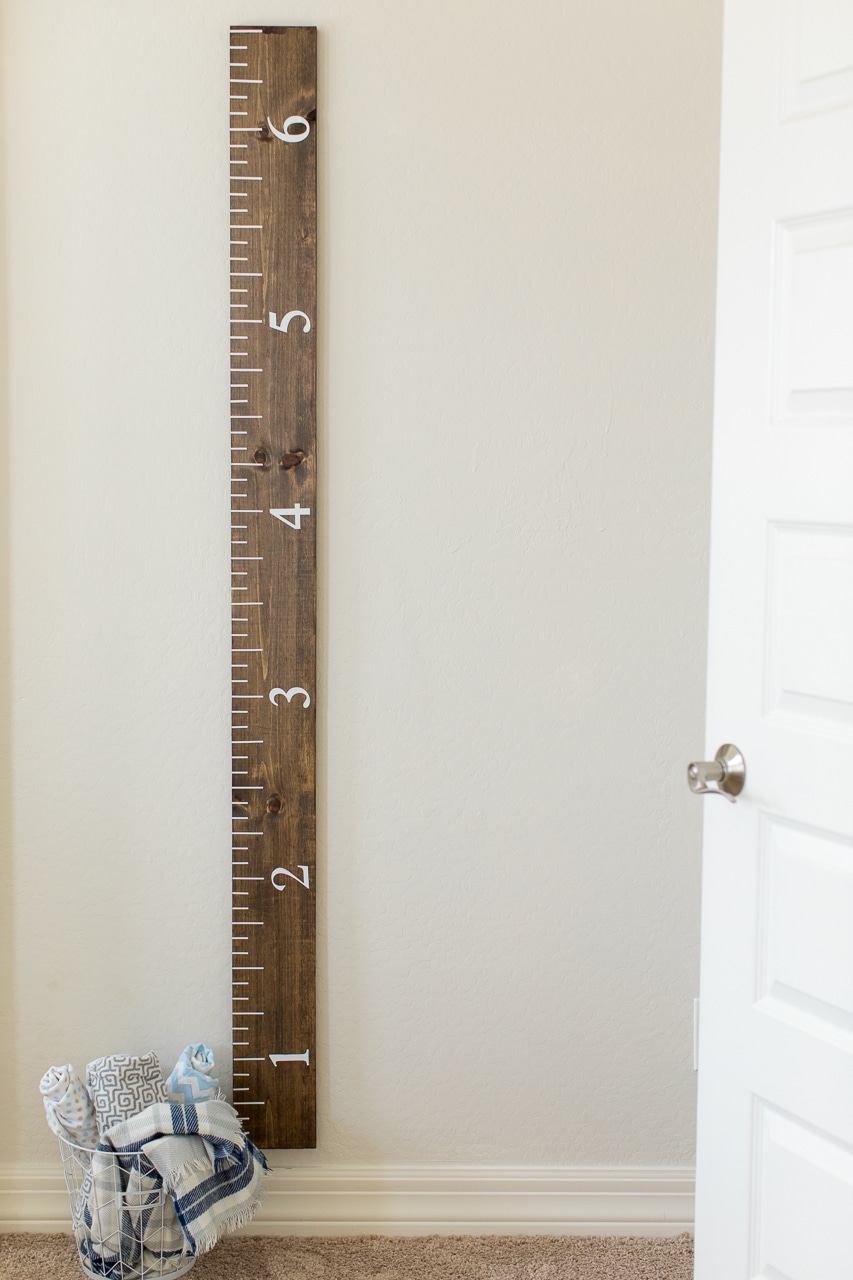
- I added a sawtooth hanger to hang on wall. Because we started the numbers 6 inches up, make sure to hang the growth chart exactly 6 inches from the ground.
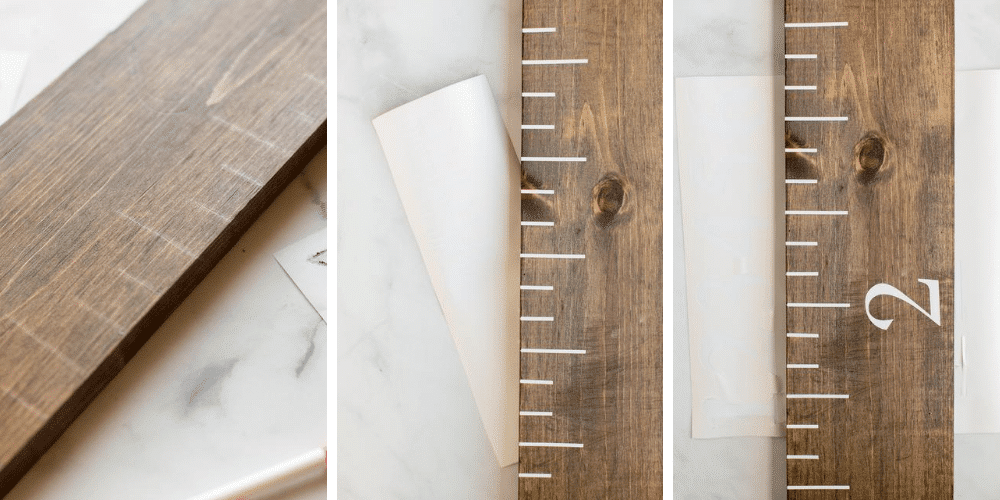
RULER GROWTH CHART DIRECTIONS: VINYL VERSION
- Brush your desired wood stain onto your board. Depending on how dark you want your ruler, you can wipe off the stain with a towel after 5 minutes, or longer if you want it darker.
- Once the stain was dry, I sanded it down just a tad to give it just a little “warn” look.
- Cut out strips of vinyl to use as your markings. My small lines were .13 inches x 1 inch. The larger lines were .13 inches by 2 inches. Just make a rectangle this size in your vinyl program and duplicate the amount needed.
- To make it look like a ruler: using a pencil and starting at the very bottom, measure up and mark a line every inch (some rulers are exactly an inch wide, so you can just move the ruler up and measure that way. However, make sure you measure the width of the actual ruler to make sure. You don’t HAVE To do this step but it makes it much easier to know where to place your vinyl strips.
- Cut out vinyl numbers and apply it starting at the second “1/4 inch” mark up from the bottom of your growth chart.
This post was originally posted April 13th, 2015. This post has been updated with new images and updated directions.


Great directions! I made this for one of grands for their birthday. It turned out great! Thanks!
I can’t thank you enough for this wonderful and well-written tutorial. We just moved from the house we had lived in for 15 years, and it was heartbreaking to paint over the measurements of our children on the wall. Since I transferred them to a scroll of paper, I can put them on our newly made ruler. I’d totally include a picture if your comments allowed that because it turned out perfect! Thank you! Thank you!
Hi, you say to use a 1x6x6 but your picture makes the ruler look bigger, like a 1x8x6. Is this the correct size?
Did I miss the answer to the “how do I mark the height ” ?
Can you still sharpie over the protective coat?
How do the new measurements stand up to the polycrylic? Should I leave the polycrylic off, until the child is grown? Wanting to make these for both of my children, and their little’s for Christmas, but I’m worried about their future measurements over the top of POLY?
Can I paint over the stain instead of using a marker? And then seal all of that with polycrylic?
Documents do not always open with the same fonts, depending on each computer. It might help if you save the document as a pdf instead and post that. Thanks for the tutorial! 🙂
What do you use to mark the child’s height?