As an Amazon Associate I earn from qualifying purchases.
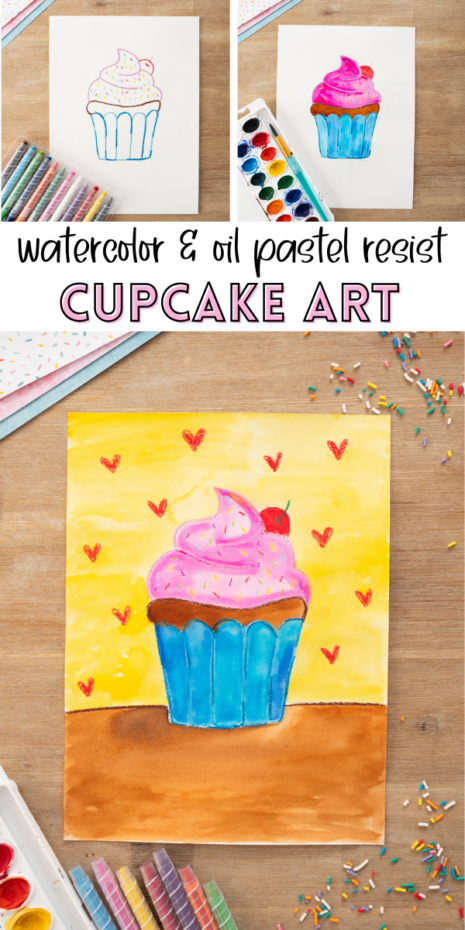
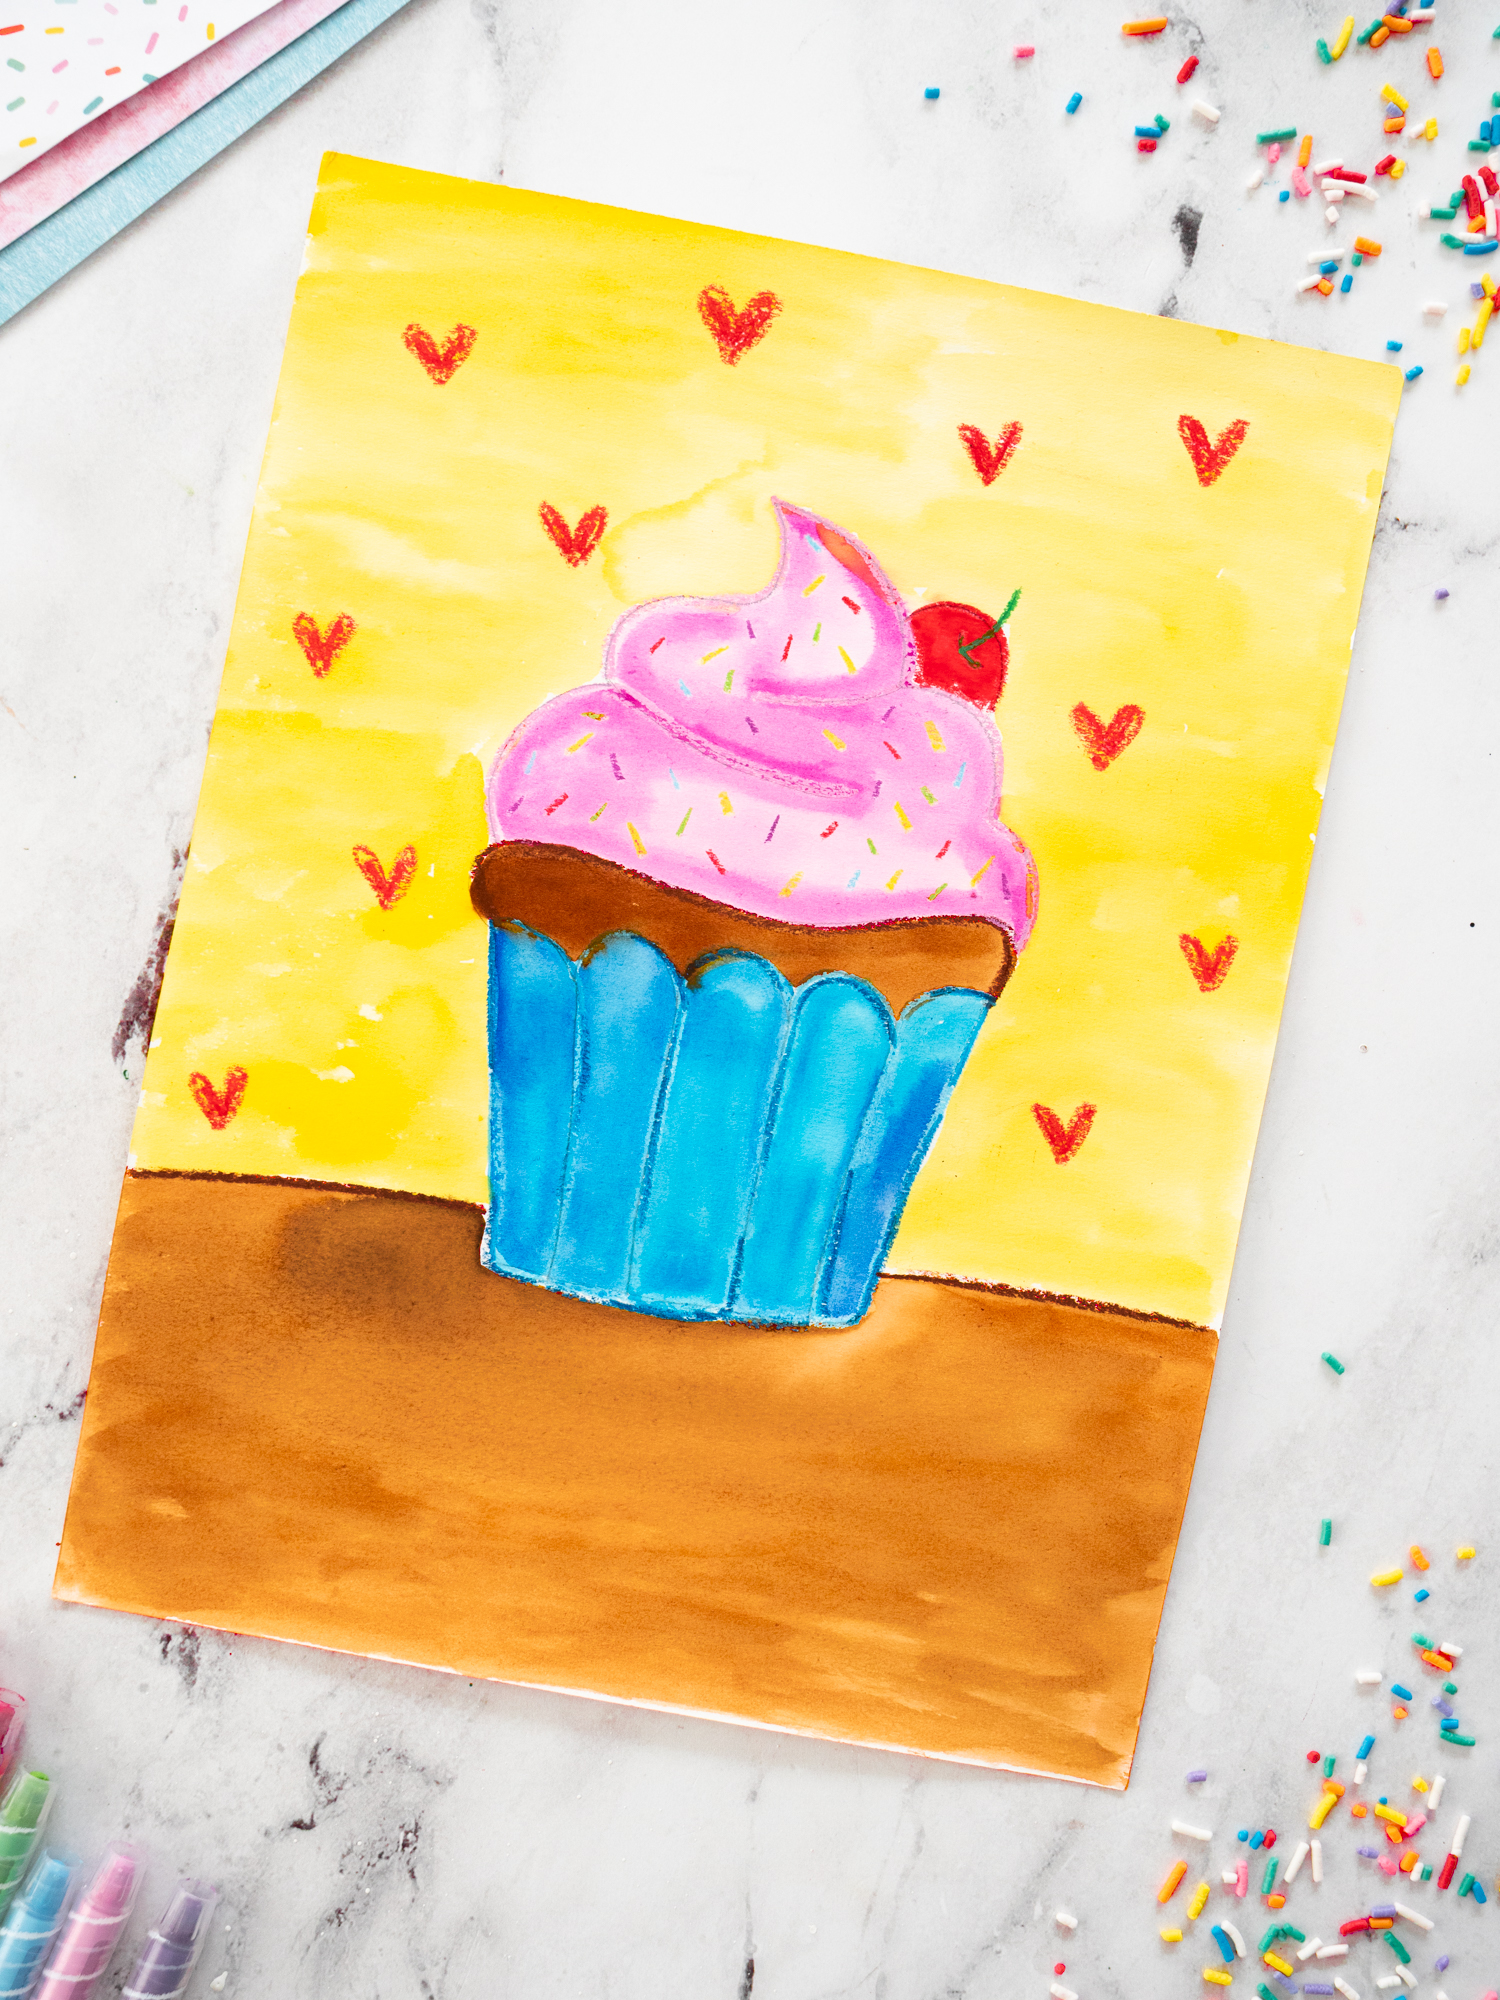
Create this bright Watercolor Cupcake Art for kids using an easy oil pastel resist technique. Kids design their own cupcake with sprinkles and a cherry, then watch the watercolor pop! Includes a free how-to-draw guide.
Watercolor Cupcake Art
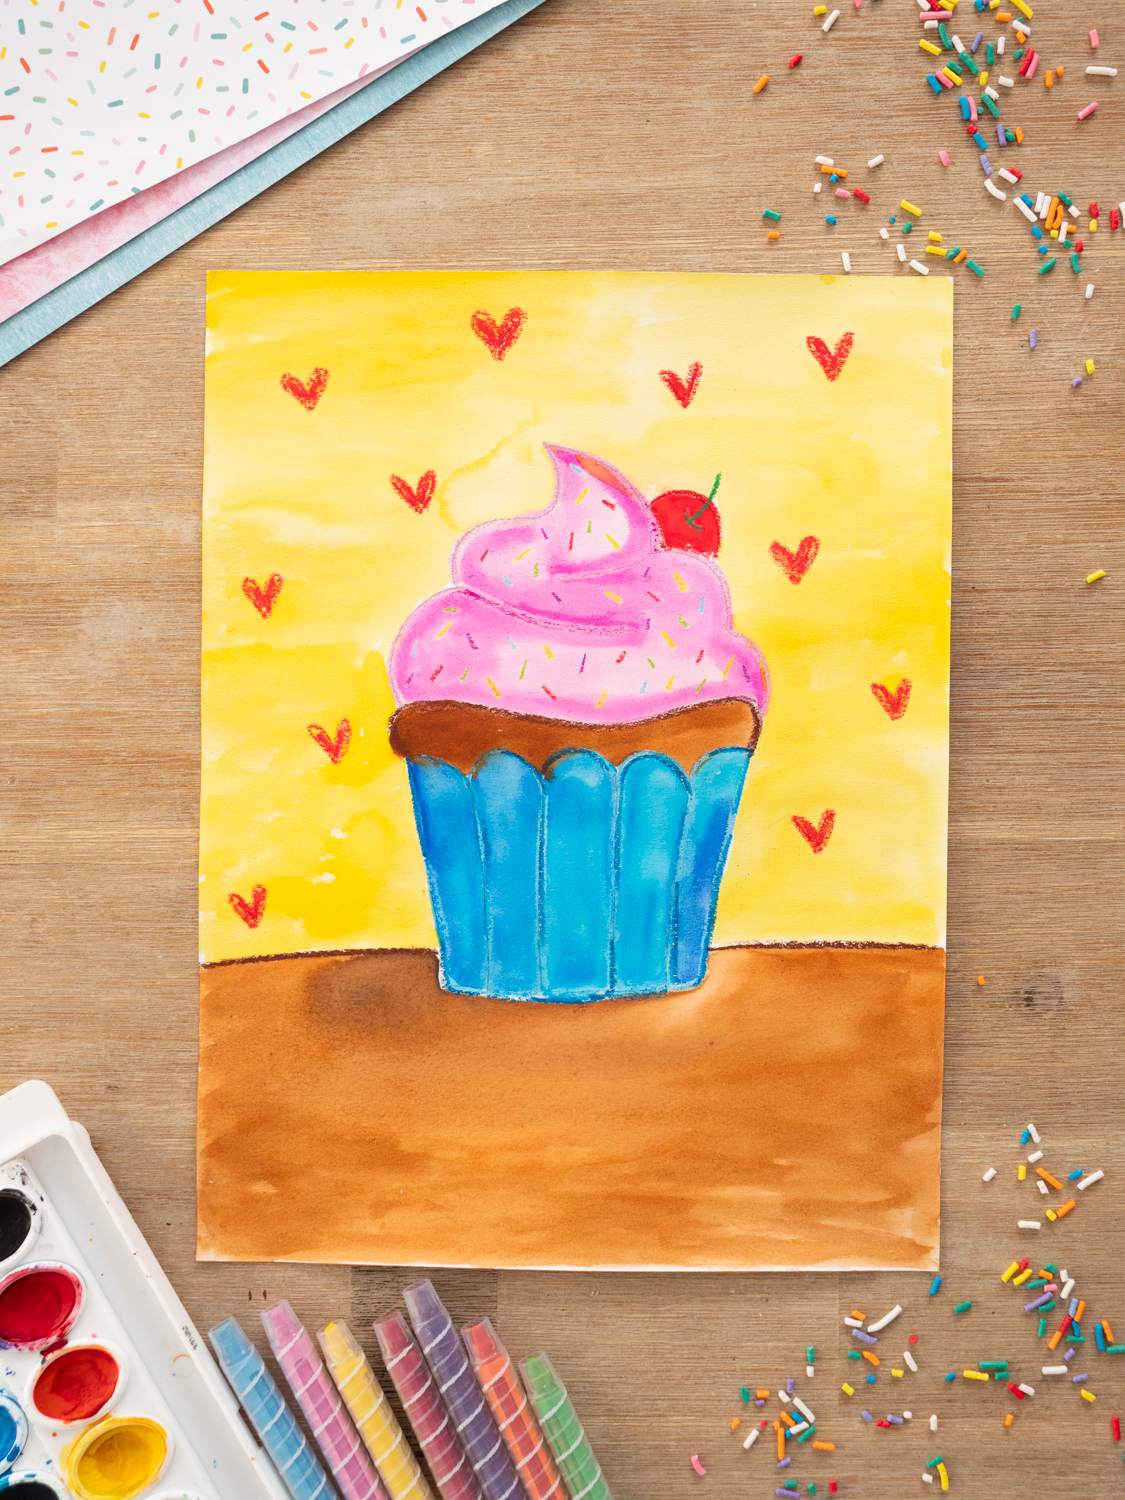
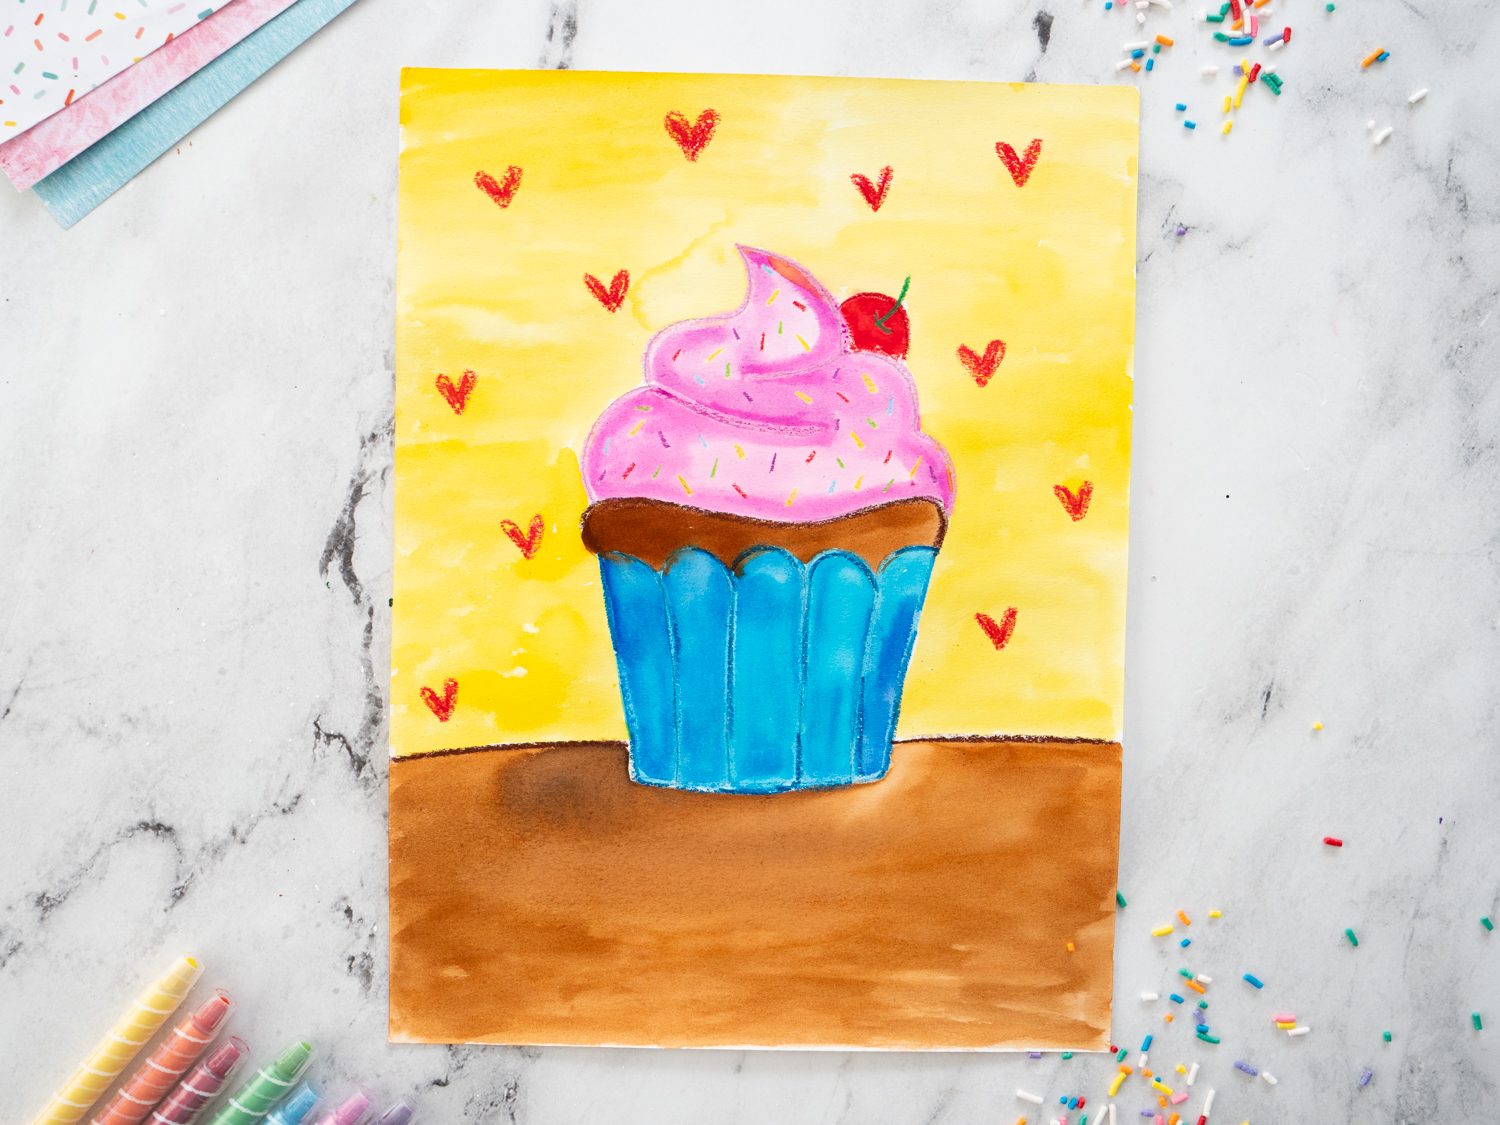
This Watercolor Cupcake Art is bright, cheerful, and so much fun for kids to create! With swirly pink frosting, colorful sprinkles, and a bold cupcake wrapper, this project is the perfect mix of playful and artistic. Kids get to design their own cupcake and then bring it to life using watercolor paint and a fun oil pastel resist technique. It’s simple, vibrant, and absolutely adorable when finished! My art students loved this project!
Why Kids Love This Cupcake Art Project
There’s just something about cupcakes that makes kids smile. With this project, they get to:
- Design their own unique cupcake!
- Add colorful sprinkles
- Choose wrapper colors
- Watch the oil pastel resist magically pop as you brush watercolor right over it!
- Add a cherry on top (if they want!)
Every cupcake turns out completely unique — which makes it perfect for classrooms, small groups, or siblings crafting together.
Materials Needed To Make A Watercolor Cupcake Art
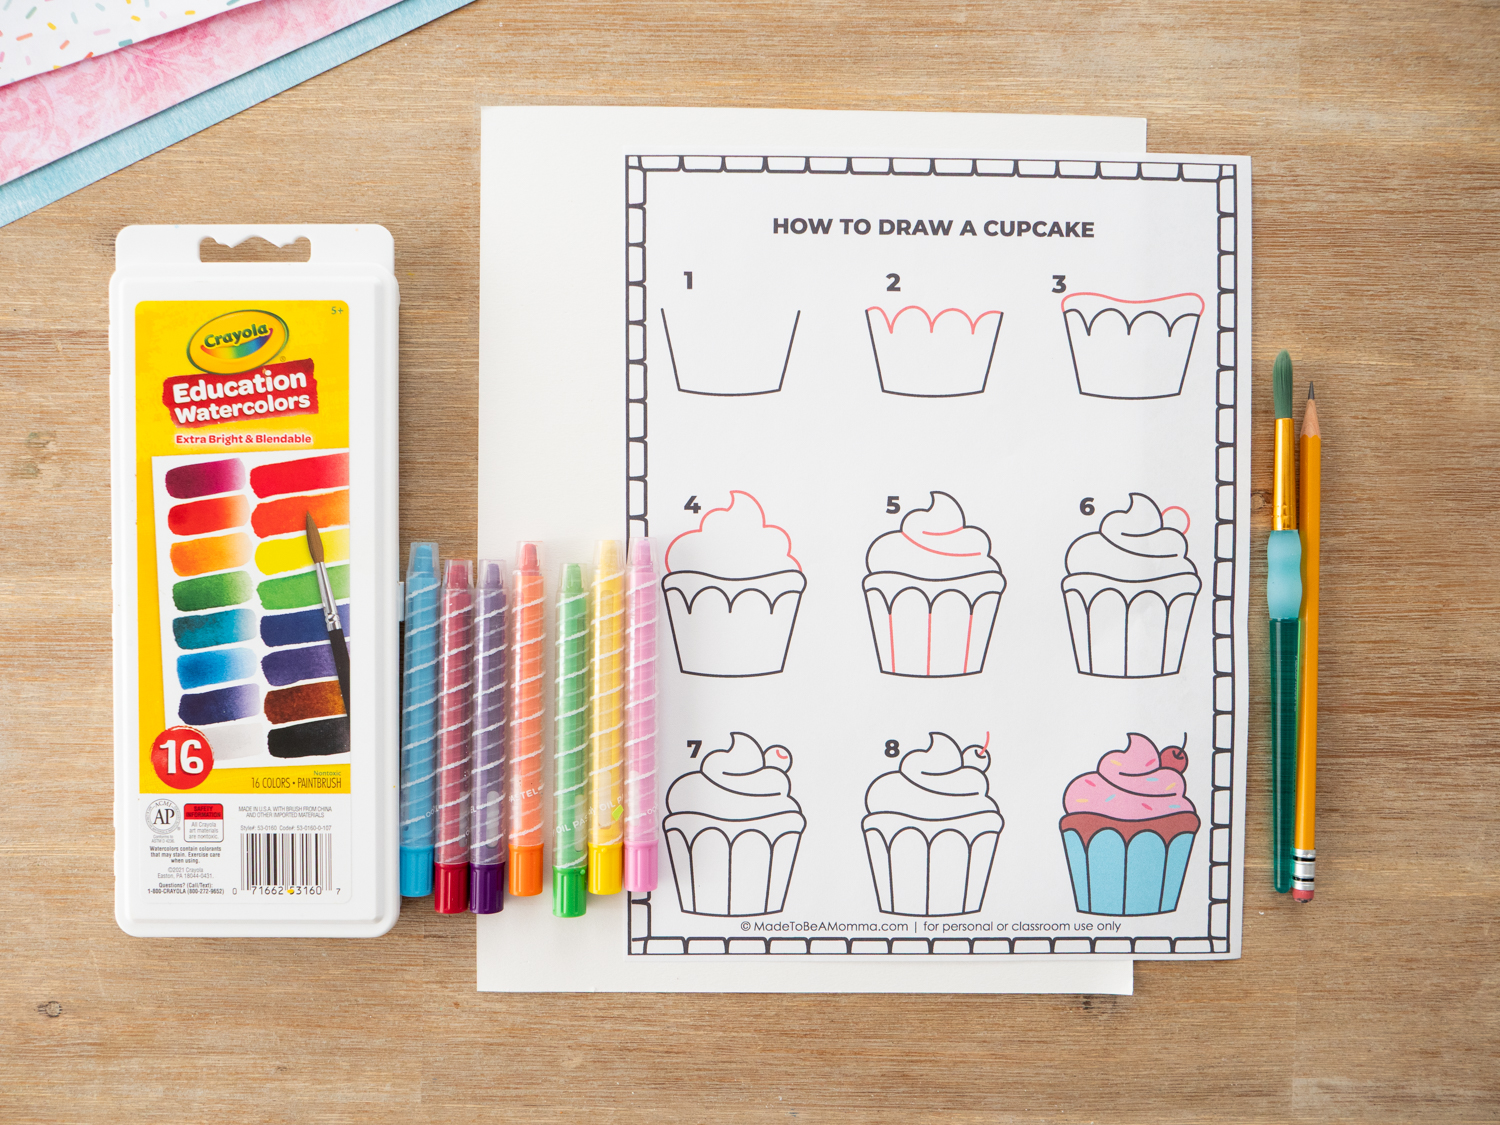
- Free How to Draw a Cupcake Guide and our Cupcake Inspiration Guide
- Watercolor Paper – we love this brand!
- Watercolor Pallet and Brush – we love this brand and also this brand!
- Oil Pastels – we love this brand and also this brand!
- Pencil
How to Make a Popsicle Stick Arctic Fox
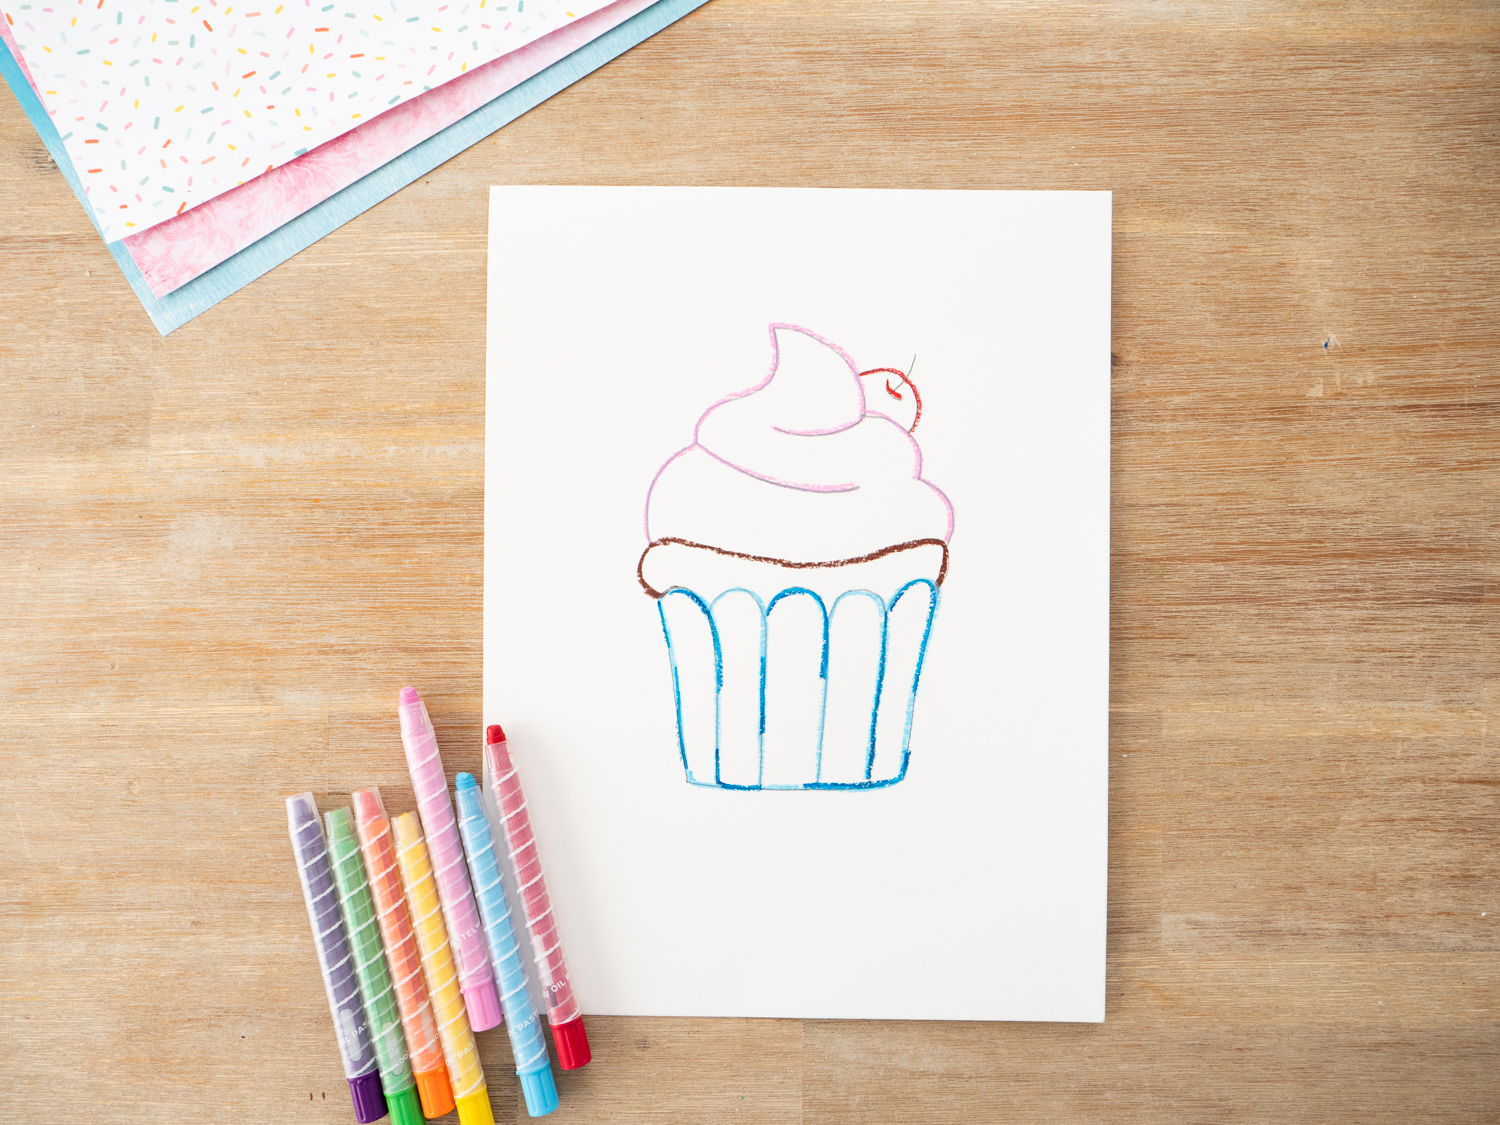
STEP ONE:
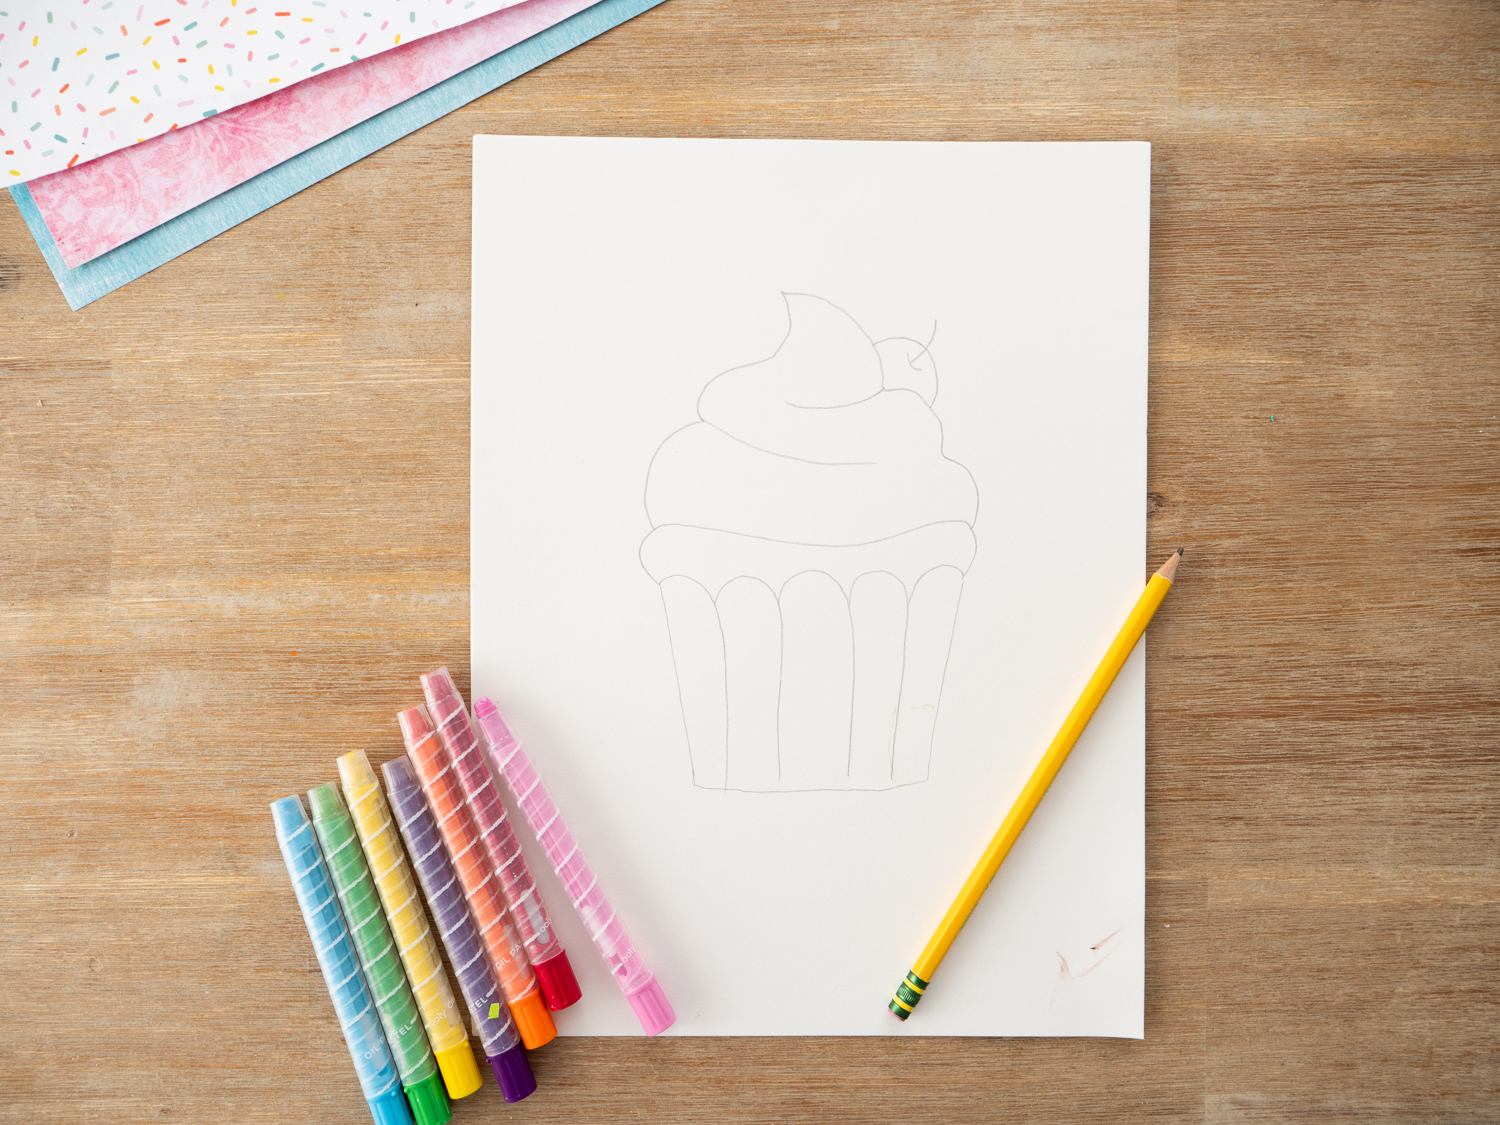
- Using our free cupcake drawing guide, draw a cupcake onto the center of your watercolored paper.
STEP TWO:
- Outline your cupcake with your favorite oil pastel colors. We outlined our cake color, cupcake liner (using two different shades of blue), cherry and frosting.
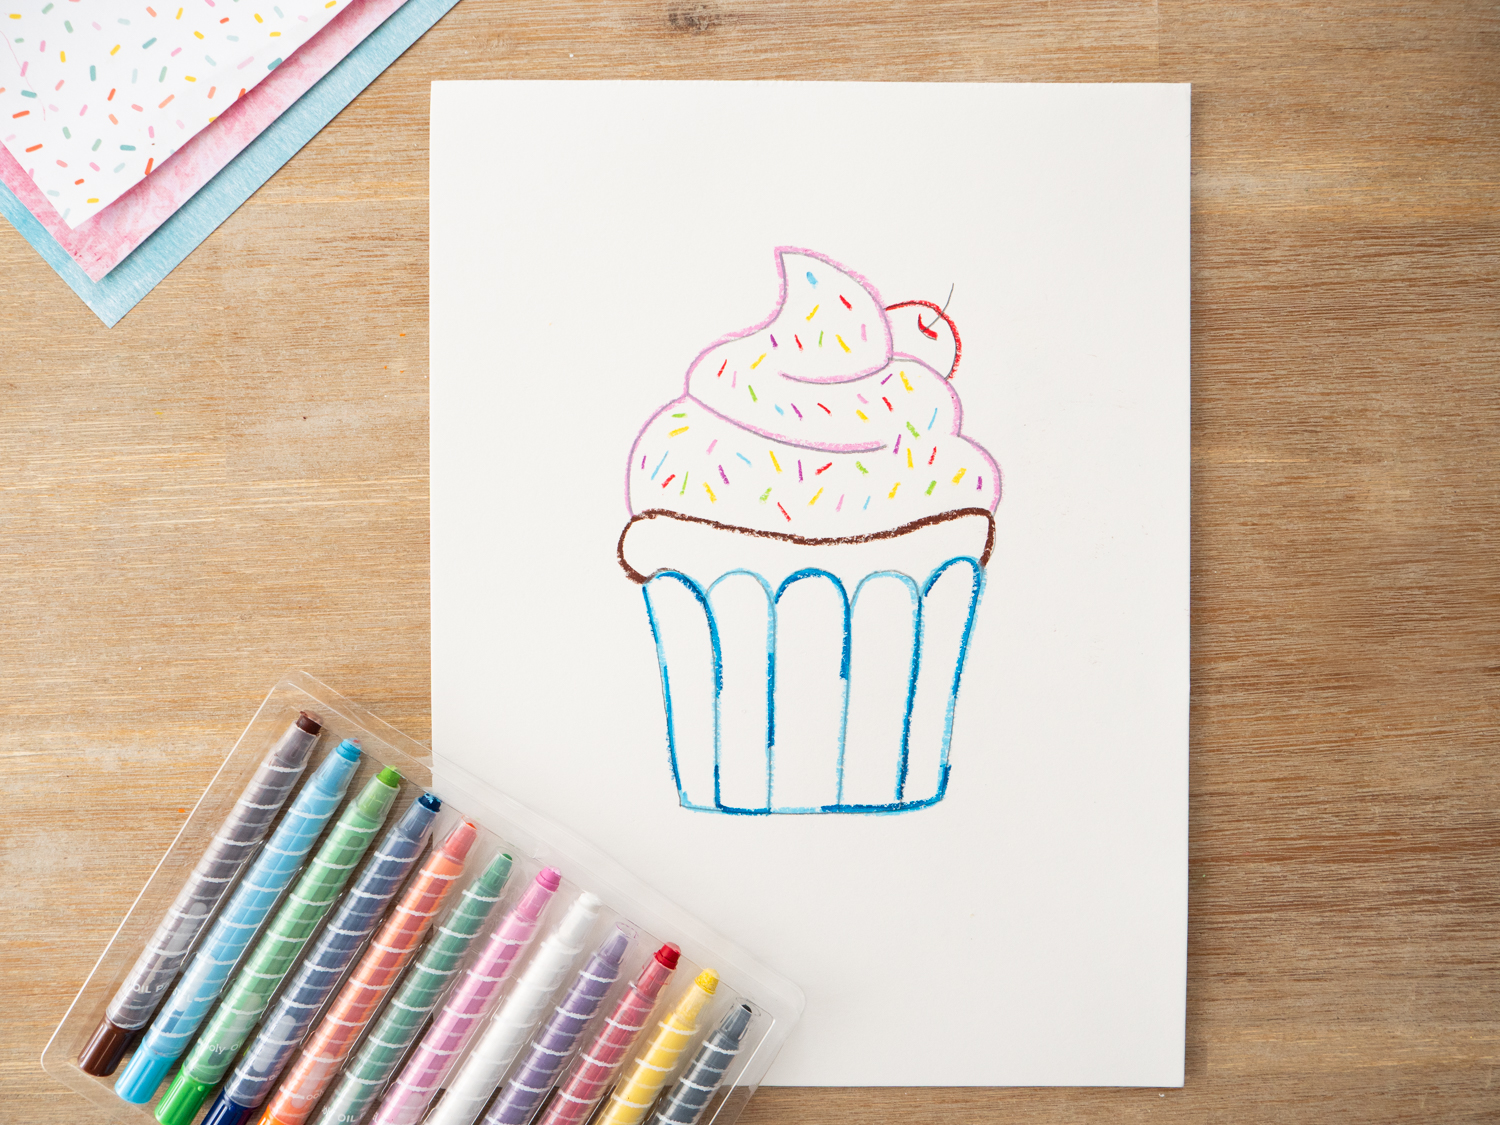
STEP THREE:
- If adding sprinkles, add small marks of oil pastels to your frosting section. These sprinkles will “pop” when the watercolor paint is painted over it.
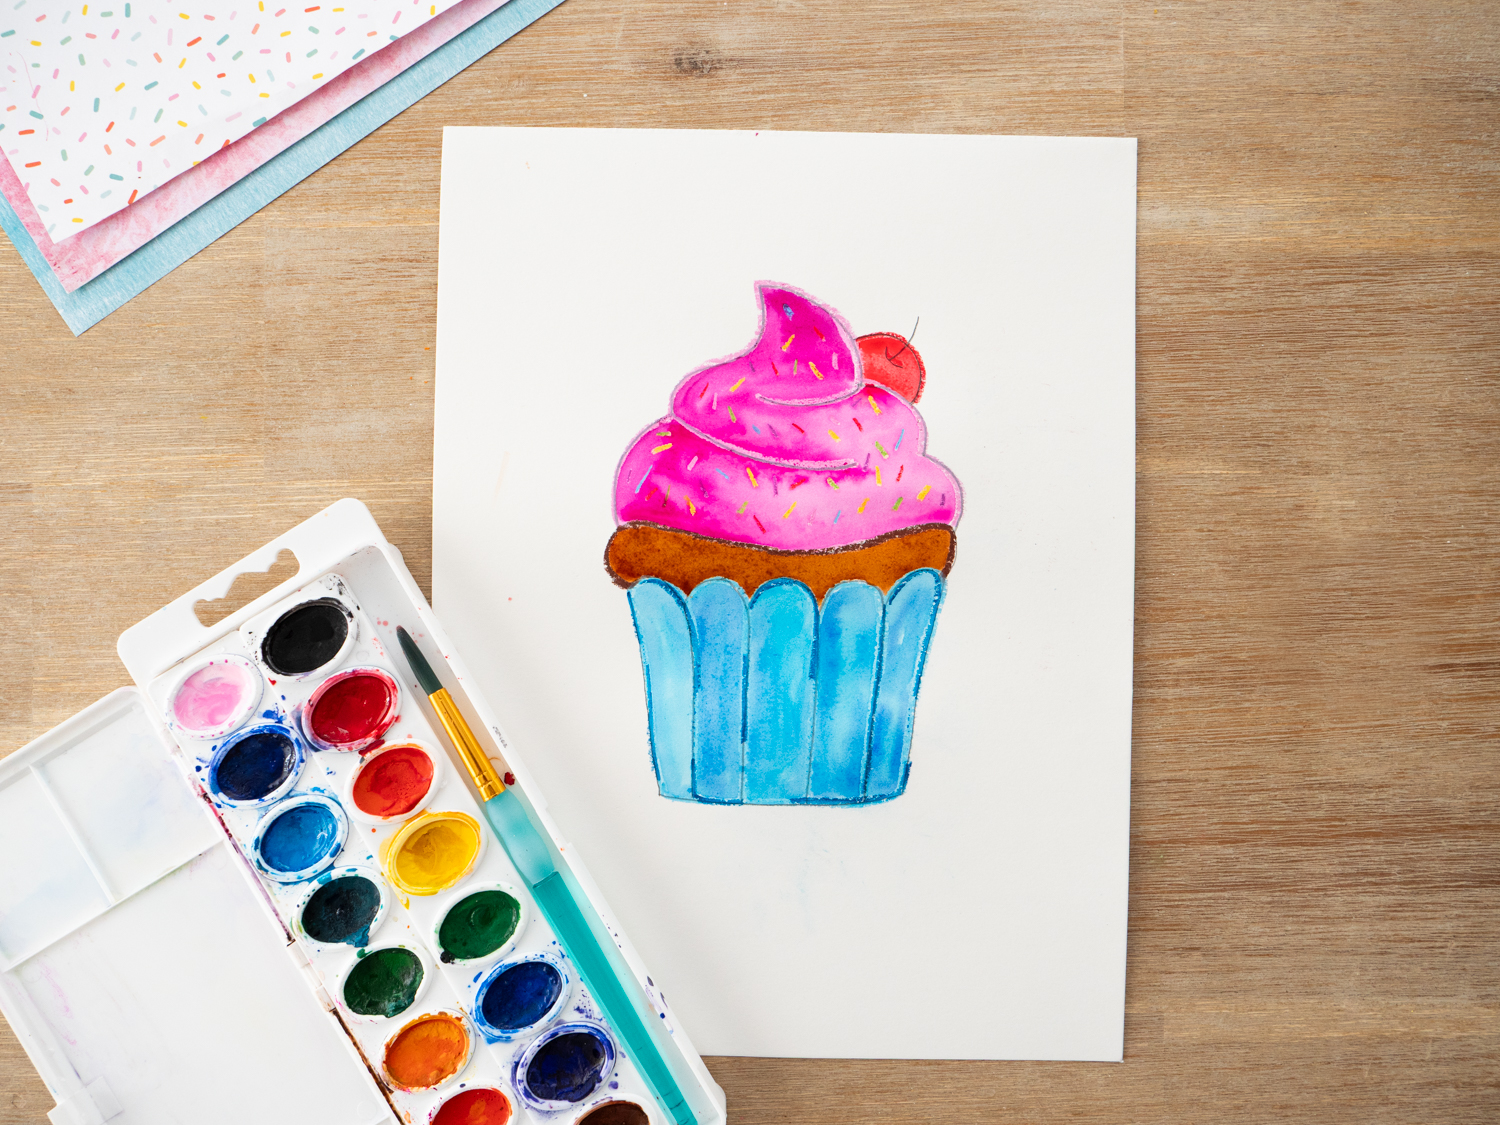
STEP FOUR:
- Watercolor your cake, cupcake liner, frosting and cherry.
STEP FIVE:
- Using your oil pastels, draw a horizontal line on each side of your cupcake to create a simple “table.” Then decorate your background with fun designs like hearts, polka dots, swirls, or any pattern you’d like!
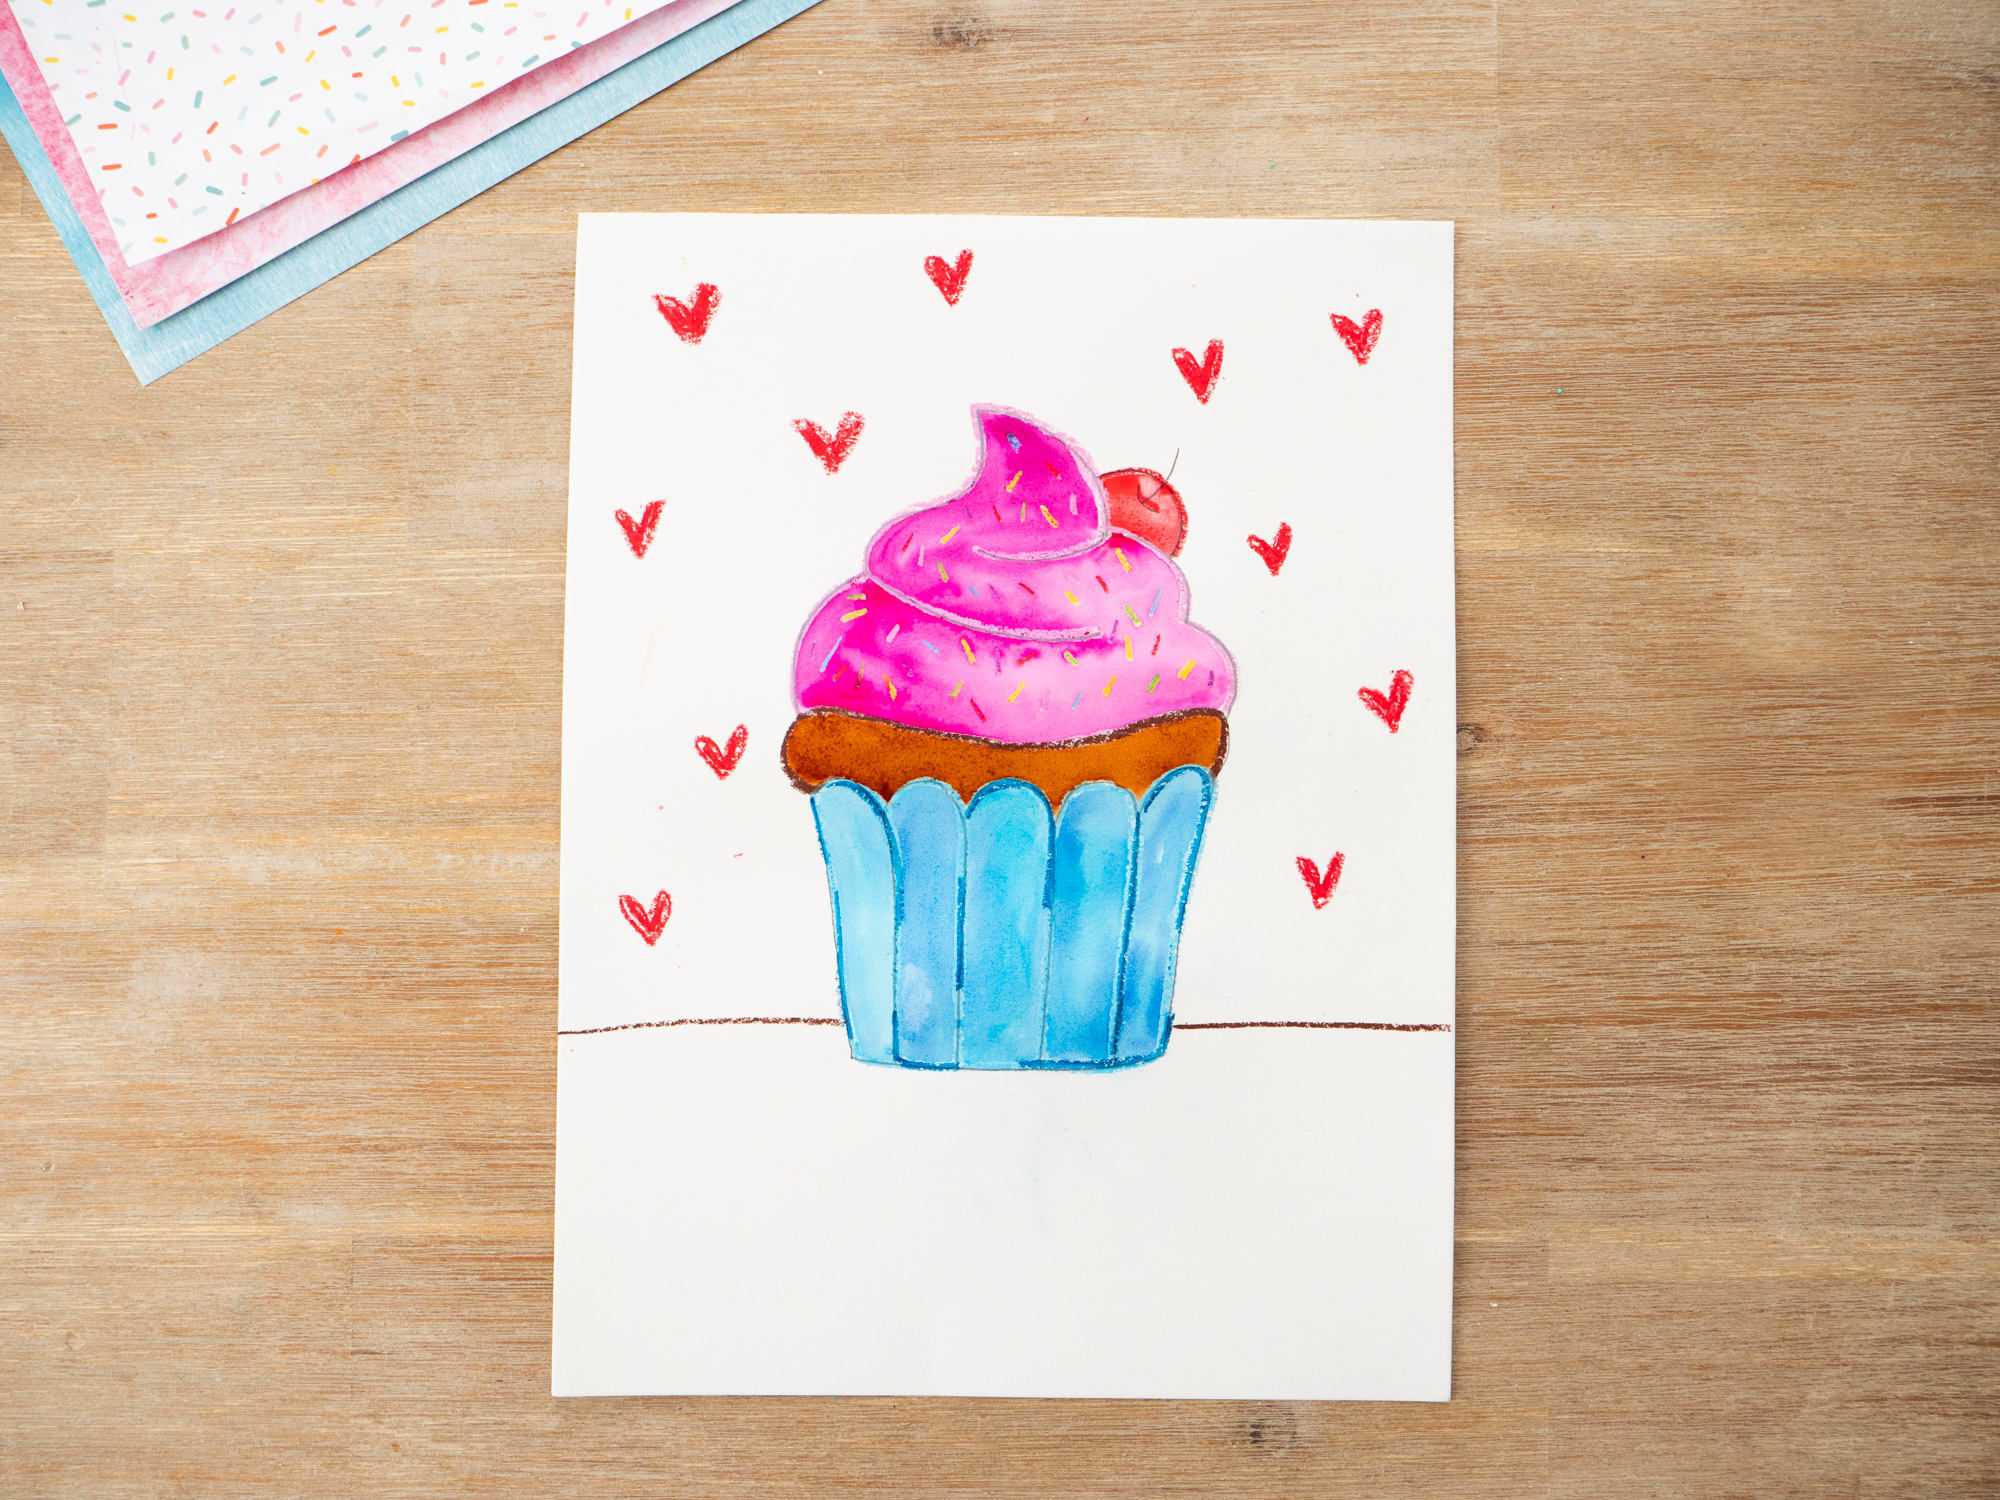
STEP SIX:
- Watercolor the “table” and the background in your favorite colors.
- Add a “shadow” with a touch of brown oil pastels, or a darker shade of brown watercolor.

For more Treat Inspired Crafts Try These: