As an Amazon Associate I earn from qualifying purchases.
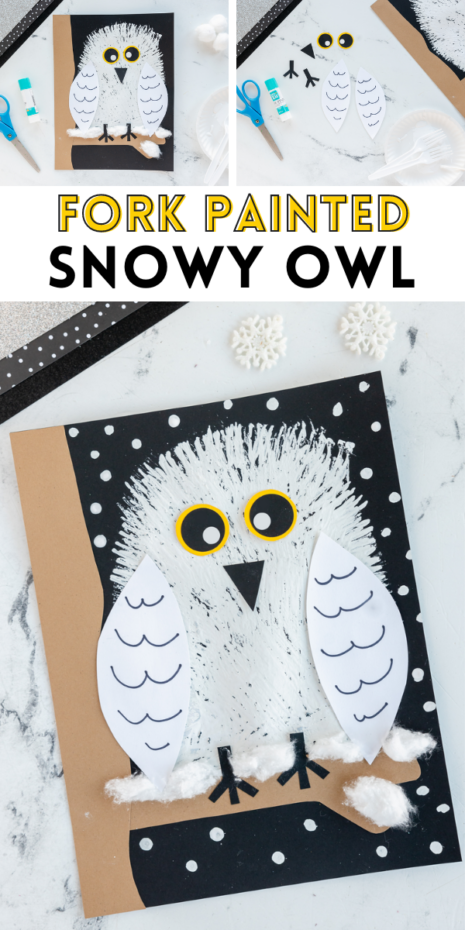
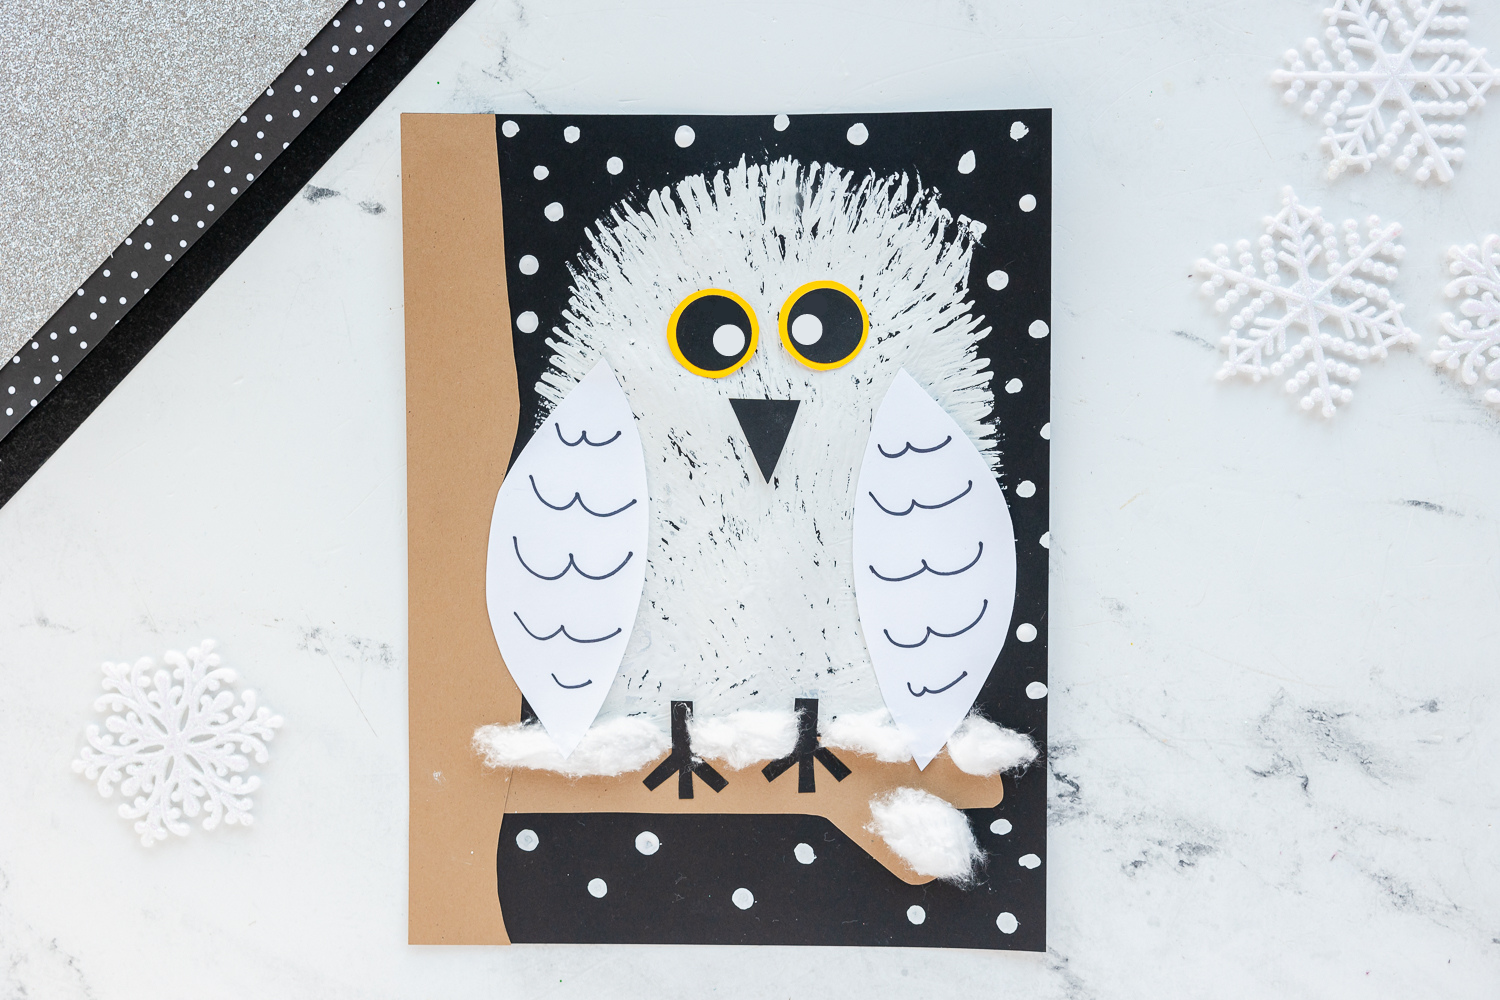
This Fork Painted Snowy Owl is such a fun winter craft for kids! Use a plastic fork, paint and other simple craft supplies to make this little owl friend!
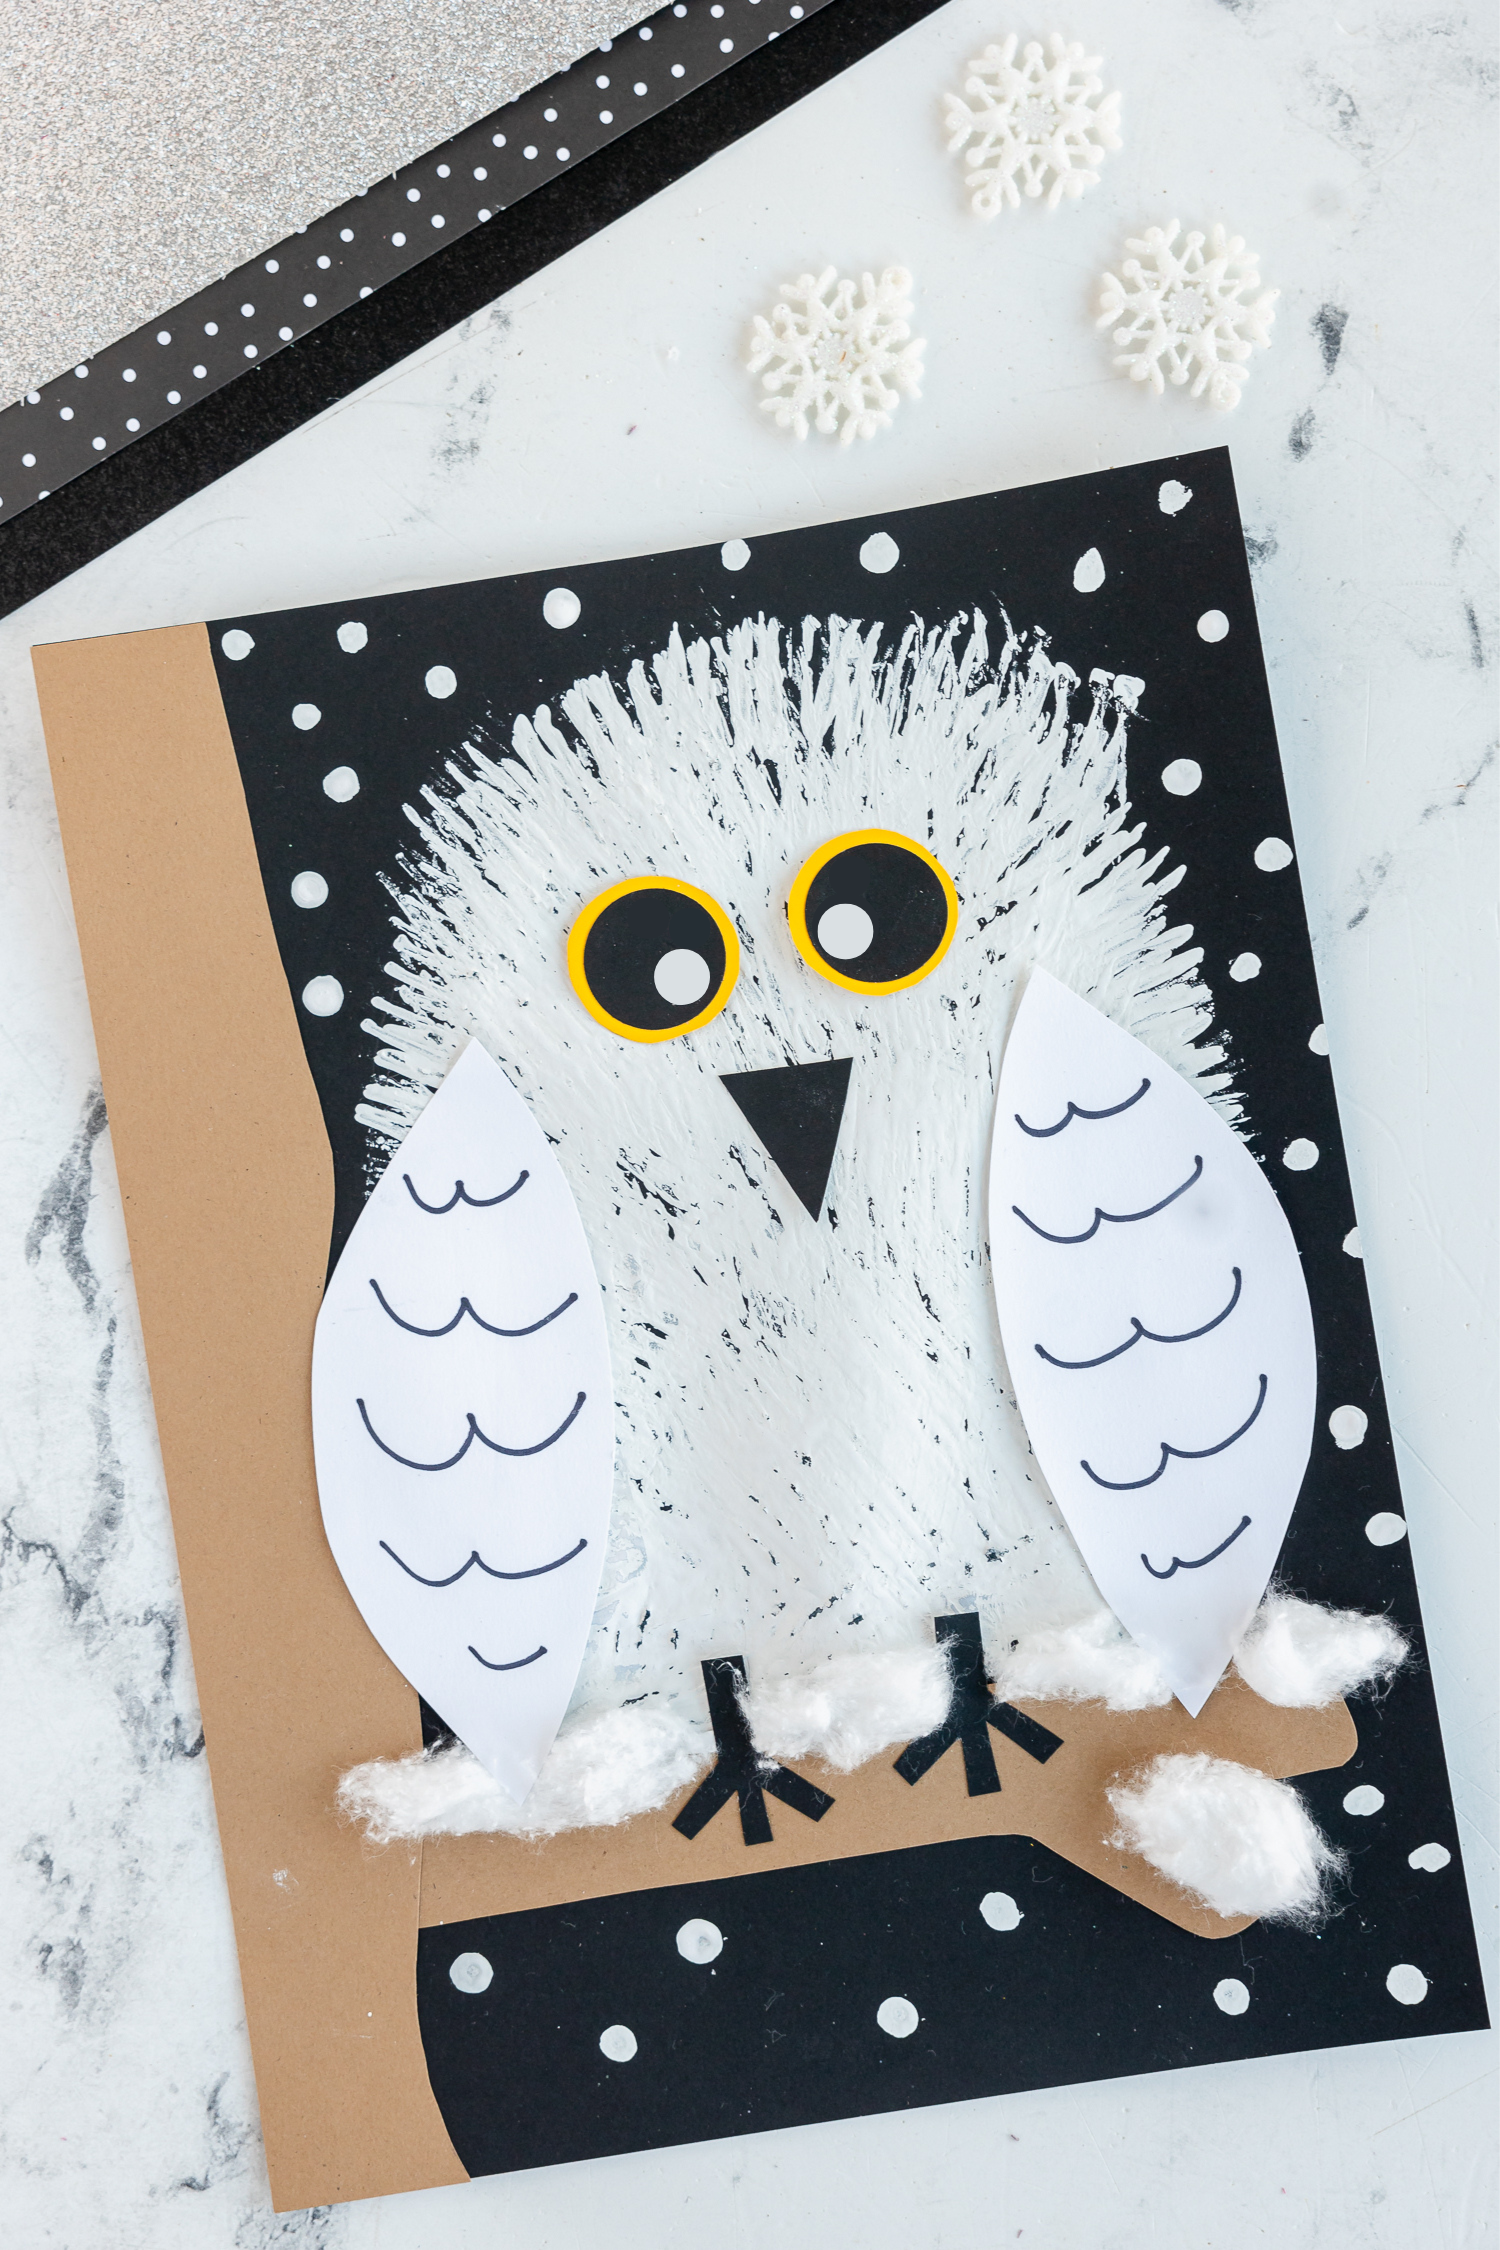
Looking for a unique and fun craft idea for kids? Try making a Fork Painted Snowy Owl! This project is not only simple and enjoyable but also a great way to explore creativity and texture in art. Using everyday items like plastic forks and cotton balls, kids can create a beautiful snowy owl on a branch.
What is a Fork Painted Snowy Owl?
A Fork Painted Snowy Owl is a creative craft project where you use a plastic fork to paint an owl, typically on a piece of cardstock. This method of painting creates a unique texture that mimics the feathers of an owl.
The craft involves dipping the back of the fork in white paint and then pressing and dragging it across the paper to form the body and wings of an owl. Additional details like eyes, a beak, feet, and a branch for the owl to sit on are often added with other materials like cardstock, cotton balls, and pom poms.
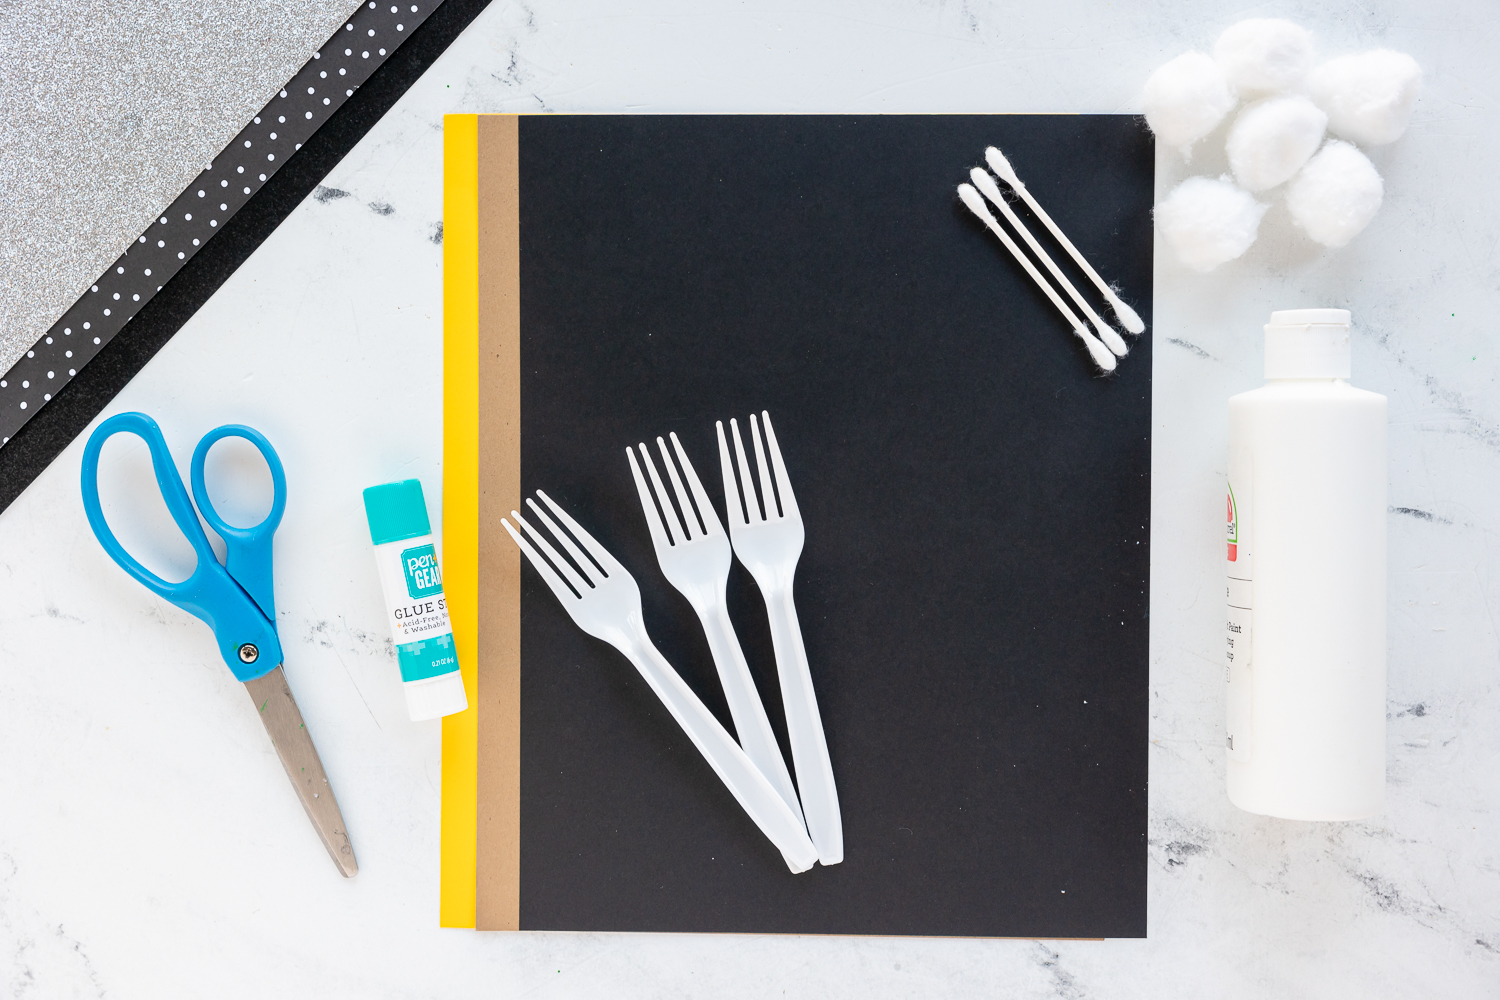
Materials Needed To Make A Fork Painted Snowy Owl
- Plastic Forks
- White Paint
- Black Cardstock (8 x 11)
- Brown, Black, and Yellow Cardstock
- Cotton Balls
- Qtip or a small paintbrush
How To Make a Fork Painted Snowy Owl
This craft is super fun and easy to make! Here’s how.
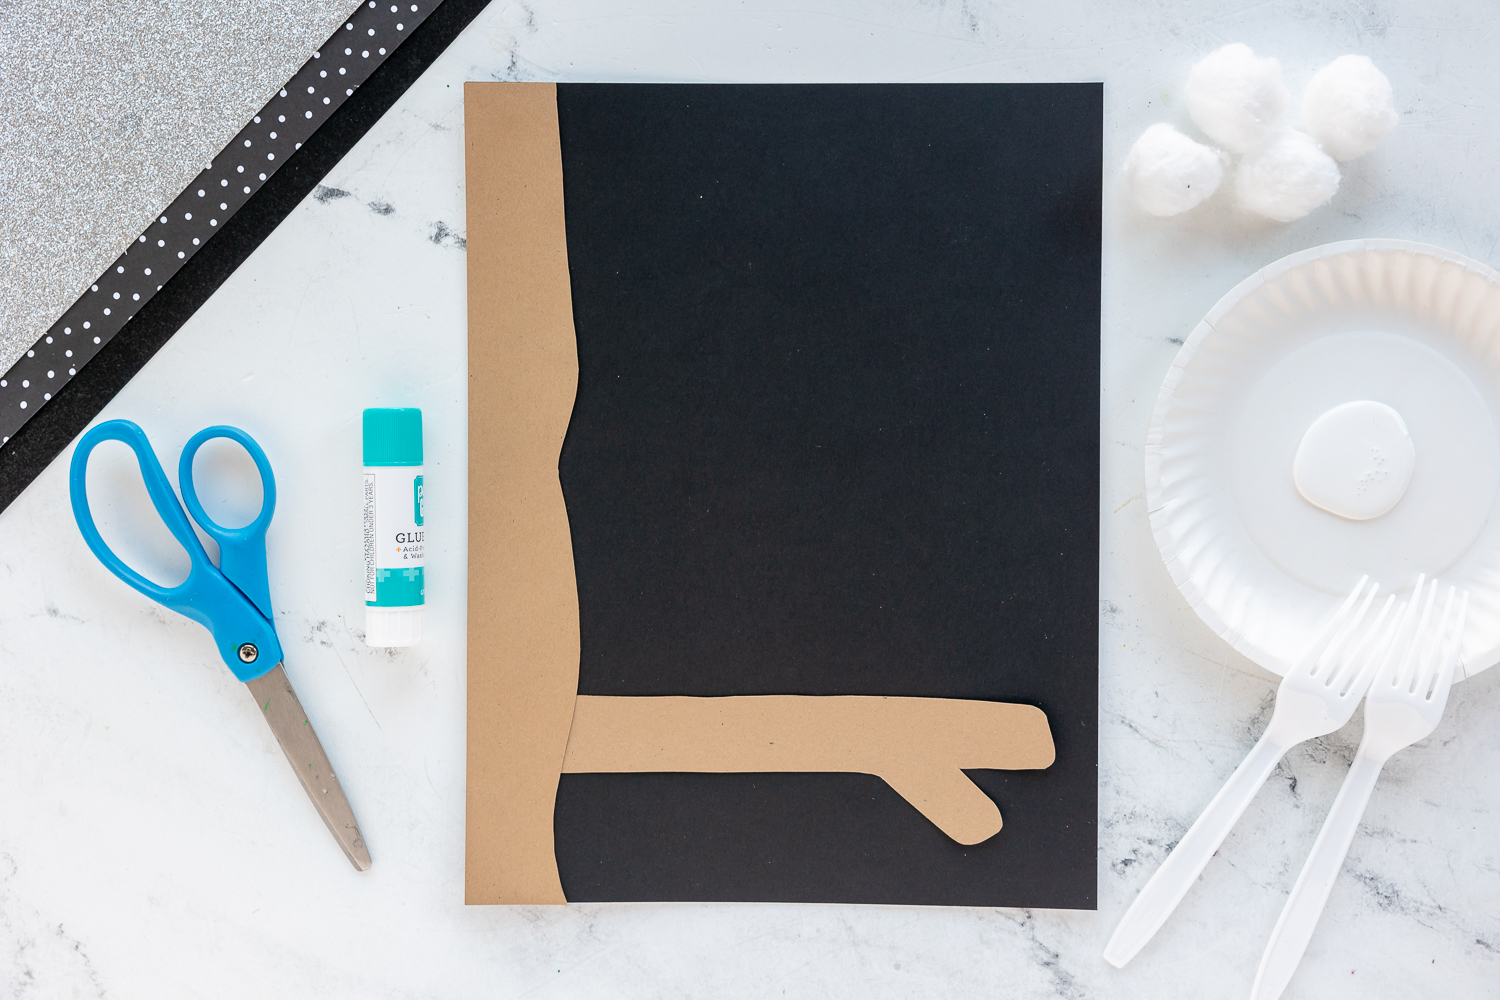
Step 1: Prepare Your Background
Lay your black cardstock vertically on your workspace. This will be the background for your snowy owl.
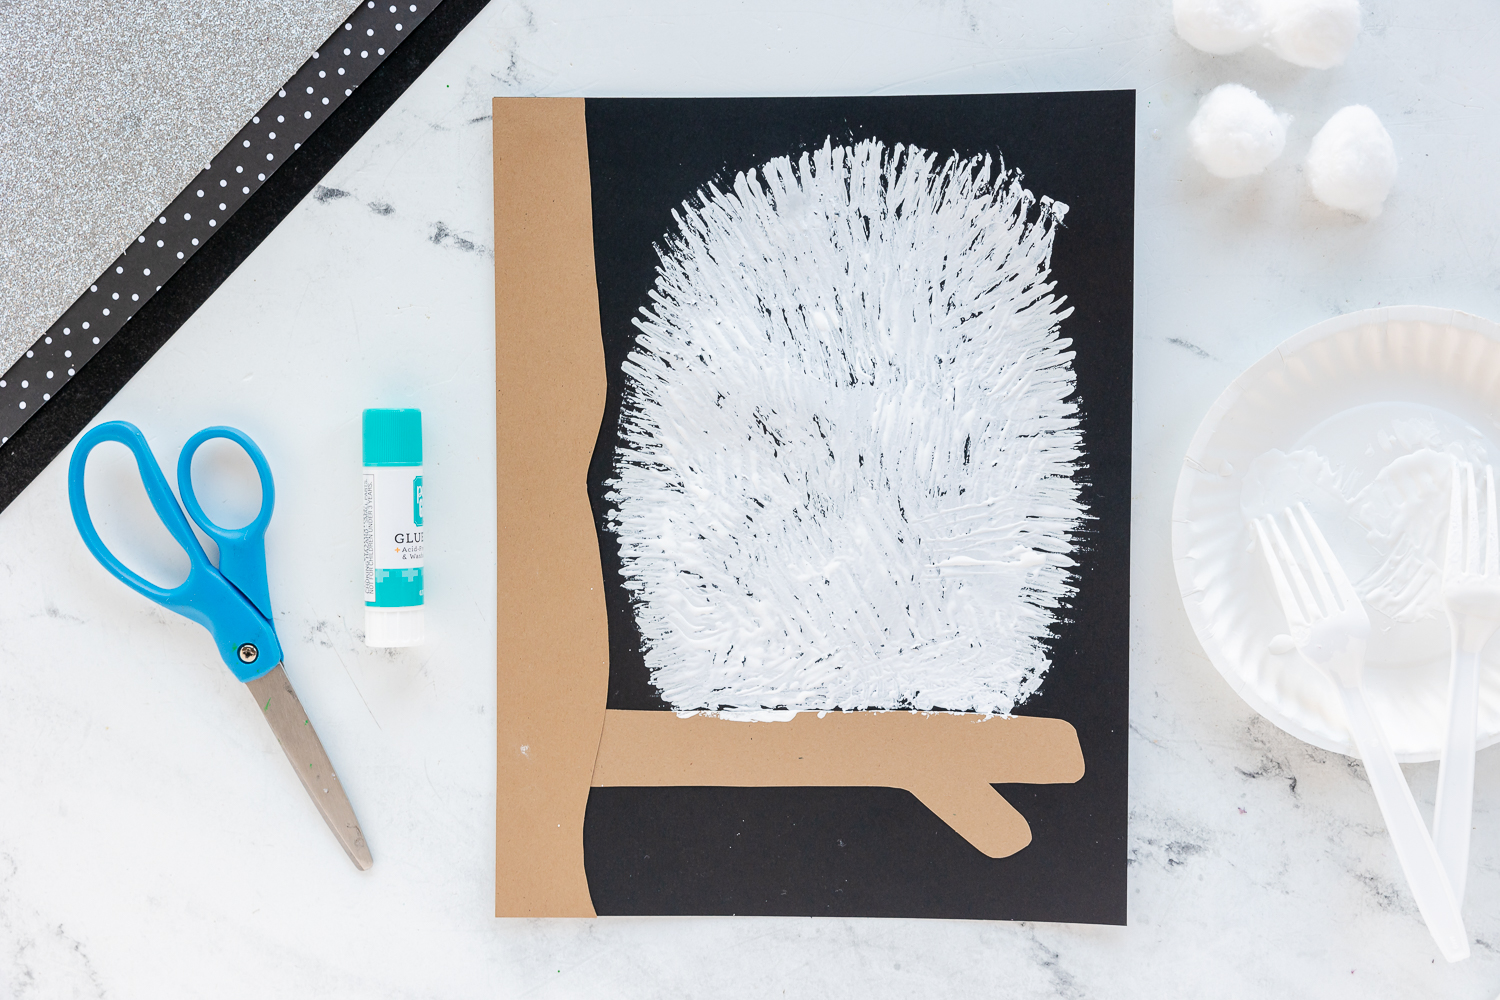
Step 2: Create a Branch
Cut a piece of brown cardstock to make a branch shape. Place it at the bottom of your black paper. You’ll add snow details to it later, just like in our red cardinal craft.
Step 3: Paint Your Owl
Dip the back of your plastic fork into white paint. Use the fork to create an oval shape on the black paper for the owl’s body.
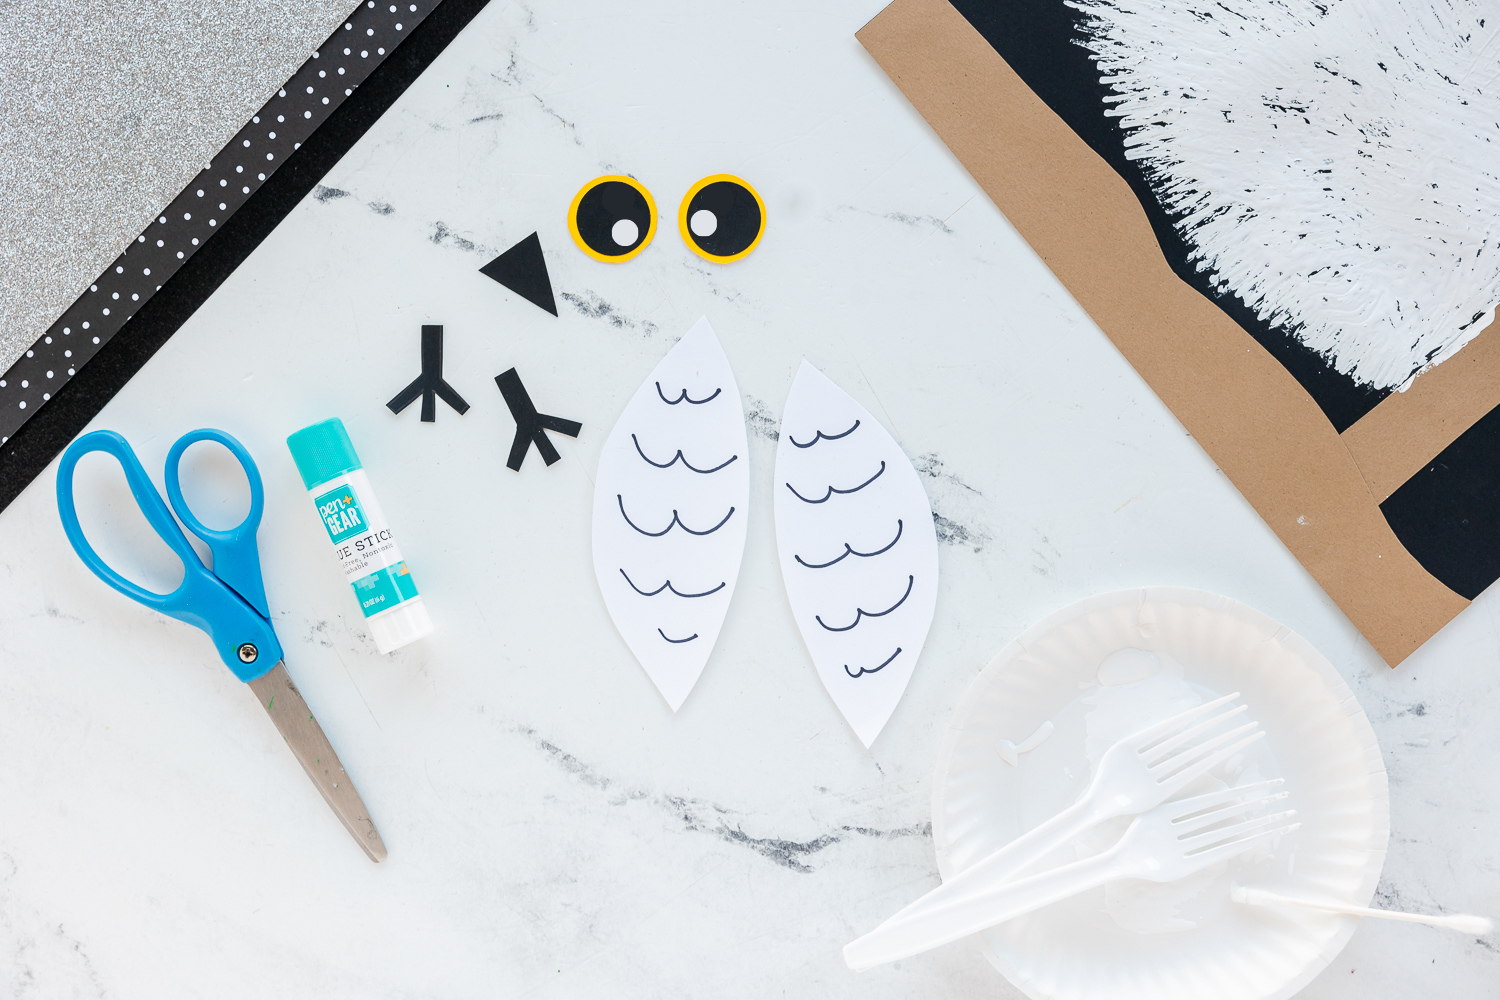
Step 4: Add Details to Your Owl
Cut small feet and a nose from the black cardstock. For the eyes, use yellow and black cardstock. Add highlights to the eyes. To make the wings cut out two wing shapes from your white cardstock. Draw wide ‘W’ shapes with a black marker and glue them on either side of the owl’s body.
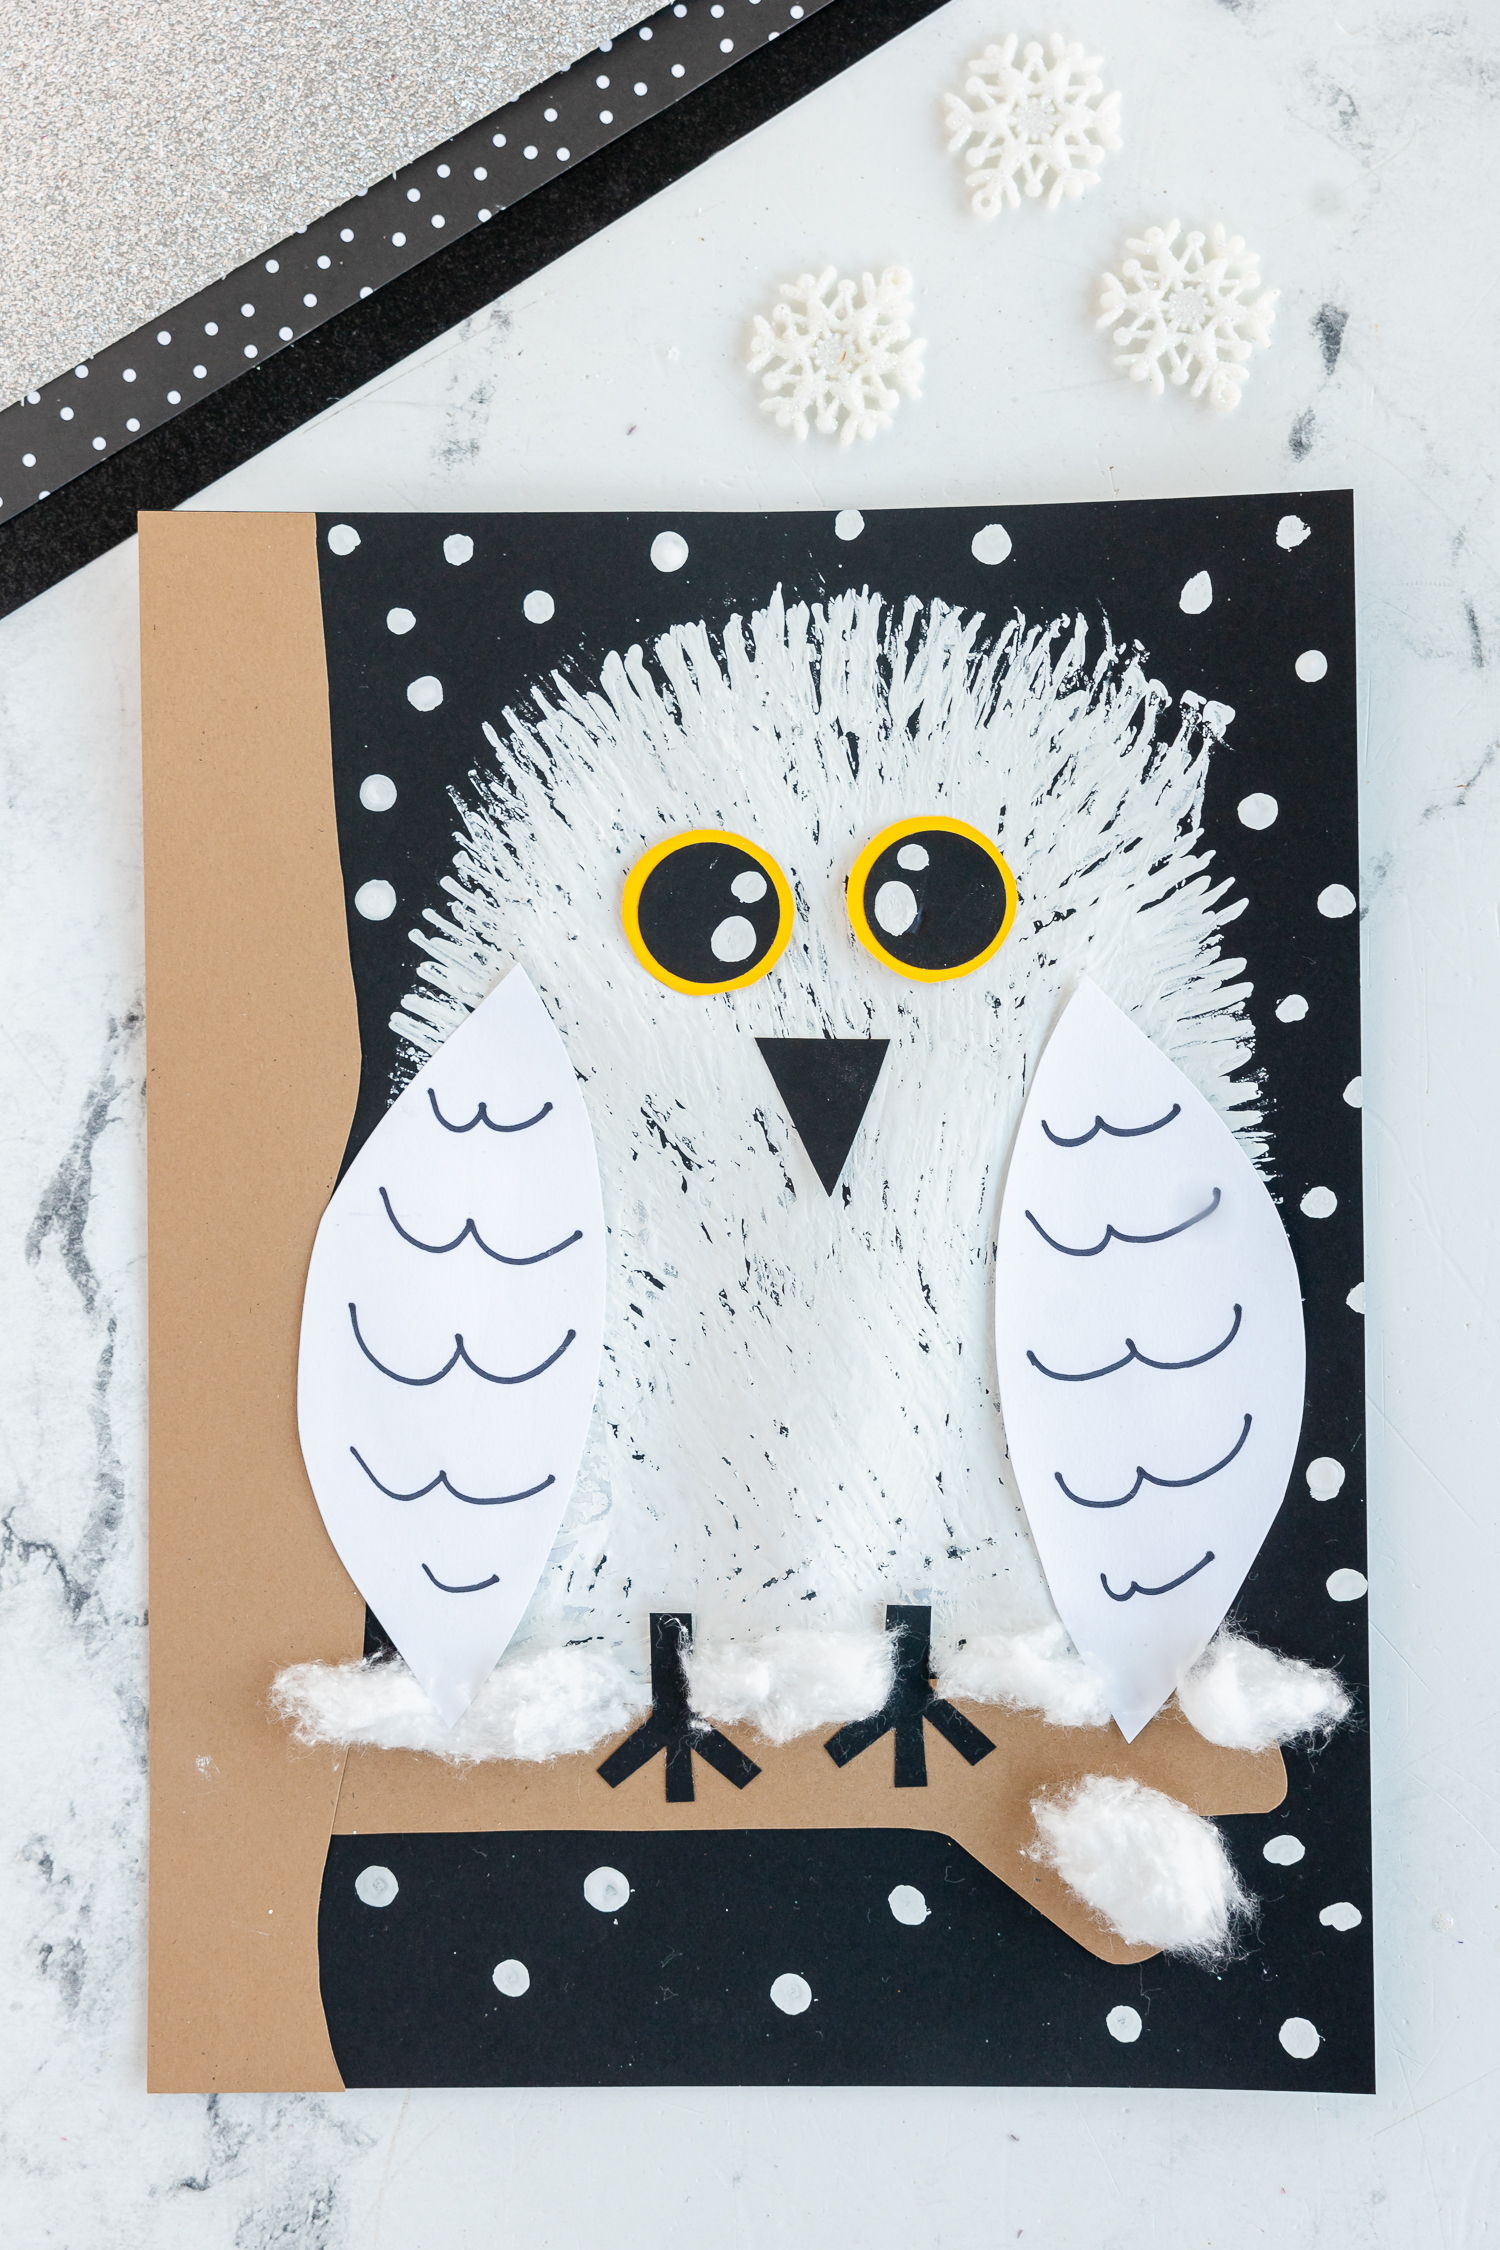
Step 5: Final Touches
Once your owl is dry, glue cotton balls to the branch for snow. Then, dip a Qtip or the tip of a paintbrush in white paint to add small snowflakes around your owl.

Creative Variations of Fork Painted Snowy Owl
Once you’ve mastered the basic design, you can get creative with your owl:
- Colorful Backgrounds. Instead of using black cardstock, try different background colors. Dark blue or purple can give a twilight effect, while lighter shades can create a daytime scene.
- Seasonal Twists. Adapt the craft to different seasons. Use fall colors for the branch and leaves for autumn, or add flowers for a spring-themed owl.
- Owl Sizes and Shapes. Change the size of the owl by adjusting the amount of fork strokes used. You can also alter the shape of the owl to make it look like it’s in different positions.
- Mixed Media. Incorporate other materials like glitter for snow or fabric scraps for the branch. This adds texture and depth to the artwork.
Commonly Asked Questions
What age group is this craft suitable for?
This craft is ideal for children aged 4 and up. Younger children may need assistance with cutting and gluing, but the painting part is fun and easy for all ages.
Can I use a different type of paint?
Absolutely! While white acrylic or poster paint works well, feel free to experiment with other types like watercolors or finger paints for different effects.
How can I make the owl’s feathers more realistic?
Try using the fork in different directions to create feather-like textures. You can also layer the paint strokes to give a more feathered appearance.
What alternatives can I use if I don’t have cotton balls for snow?
You can use torn pieces of white paper, foam, or even white fabric scraps. For a sparkling effect, try using white glitter.
Can this craft be adapted for a group activity?
Yes, this is a great group activity! Each child can make their own owl, and it can be a part of a larger winter-themed display.
How long does it take to complete this craft?
The craft can take about 30 minutes to an hour, depending on the drying time for paint and glue.
How do I preserve the finished craft?
Once dry, you can laminate the artwork or frame it behind glass. This way, it can be preserved and displayed as a keepsake.
Fork Painted Snowy Owl
Supplies
- Plastic Forks
- White paint
- Cardstock black 8 x 11
- Cardstock black, brown, yellow
- Cotton balls
Instructions
- Place your black paper vertically.
- Make a brown branch at the bottom of your paper. Using your fork make a oval shape for your owl.
- Make two wings with the wide w’s.
- Glue on either side of owl once dry.
- Add small black feet, black nose, and yellow and black eyes.
- Add cotton balls to branch and dip qtip or tip of paint brush in paint and add some snow around owl.