As an Amazon Associate I earn from qualifying purchases.
Learn how to make DIY scratch art for kids using crayons, paint, and simple supplies you already have at home. This colorful scratch paper activity is easy, creative, and perfect for art time, homeschool, or rainy day fun.
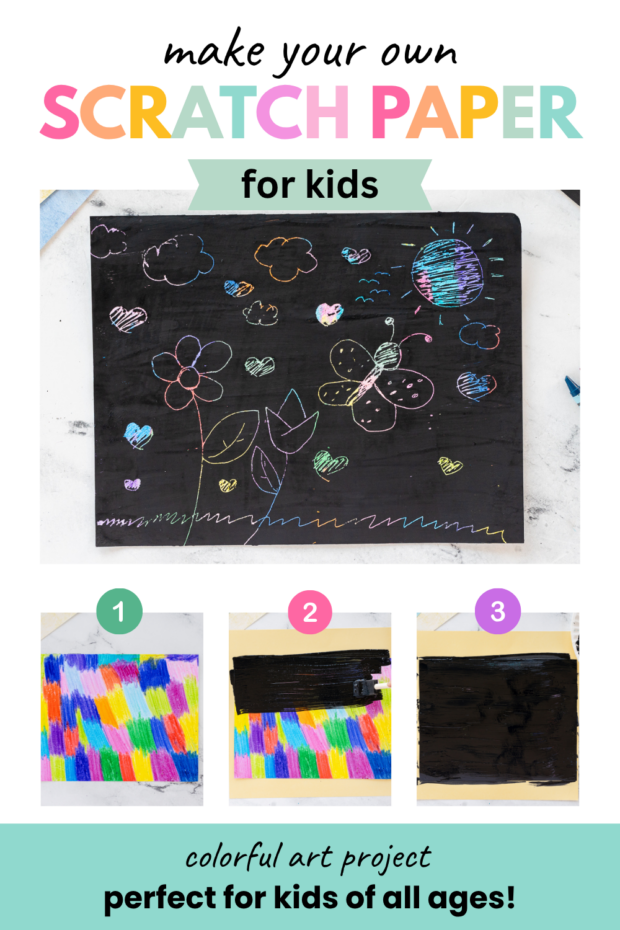
DIY Scratch Art for Kids
Did you know you can make your own DIY scratch art for kids using crayons, paint, and paper? This colorful scratch art activity is easy to create at home and makes a fun process art project for kids of all ages.
Homemade scratch art paper is created by layering bright crayon colors underneath black paint. Once dry, kids can scratch away the top layer to reveal rainbow colors and creative designs underneath. This DIY scratch painting activity is simple, inexpensive, and perfect for art time, homeschool, classrooms, or rainy afternoons at home.
What is Scratch Art?
Scratch art is an art activity where kids scratch away black paint to reveal colorful designs hidden underneath. It’s sometimes called scratch painting, crayon scratch art, or scratch paper art.
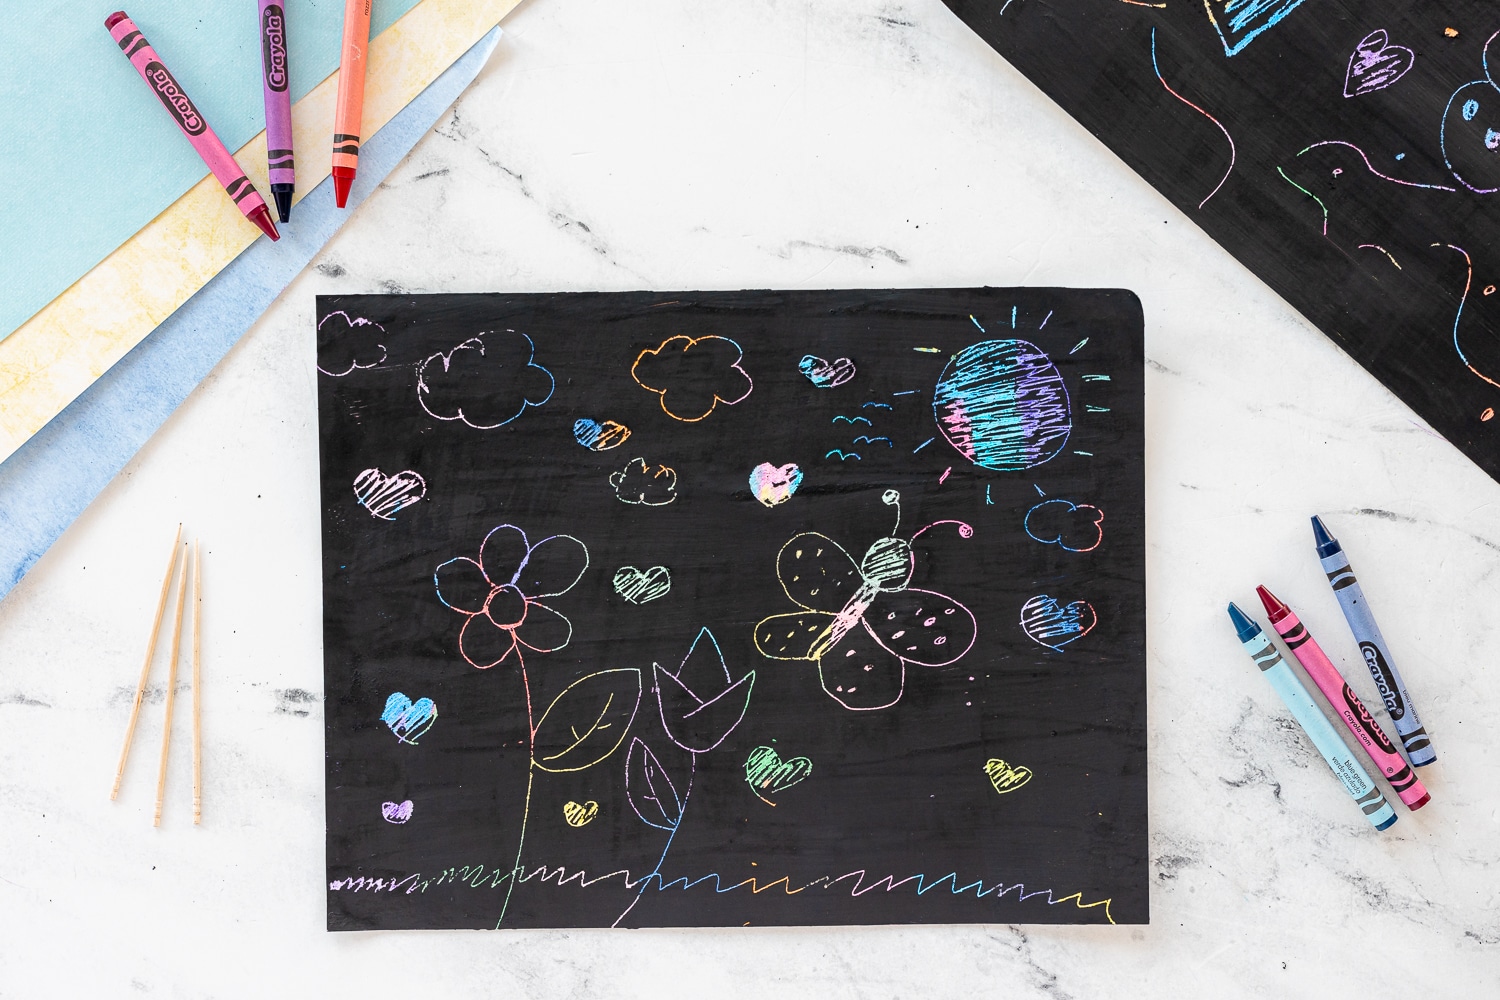
Kids can use wooden skewers, toothpicks, styluses, or craft sticks to draw patterns, shapes, doodles, and pictures into the black paint layer.
How to Make Scratch Art Paper Video:
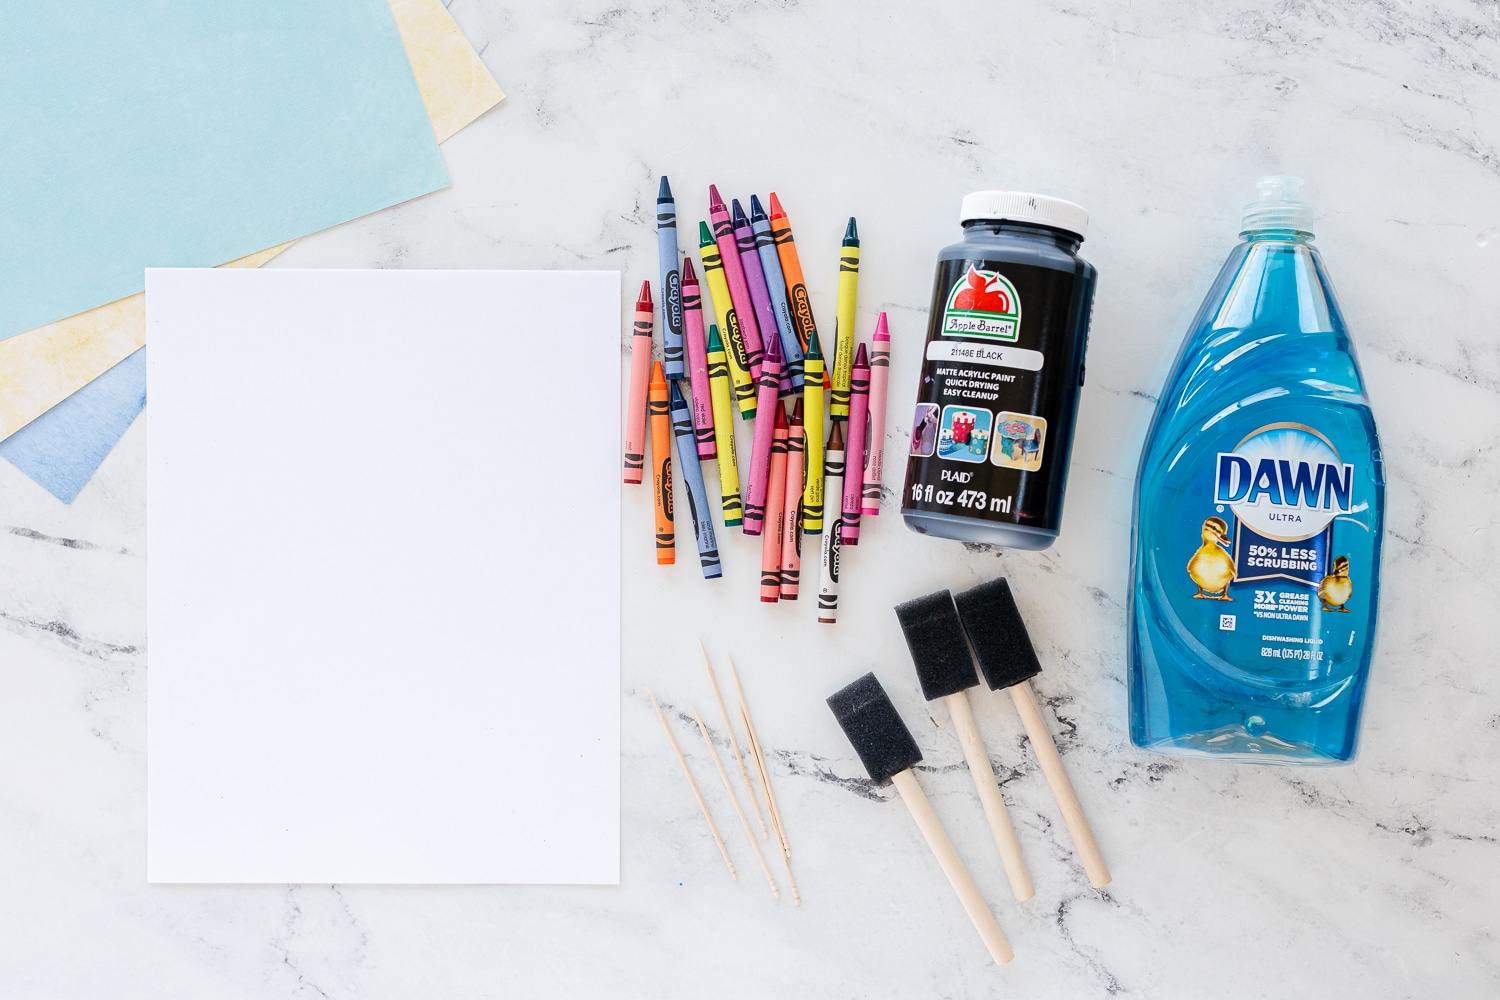
Materials Needed to Make DIY Scratch Art
The supplies needed to make this activity are objects you most likely already have. Anything you don’t have, run over to Walmart or the Dollar Tree to find. Most of my crafts involve simple art supplies you can find for cheap or at no extra cost!
- White cardstock paper *
- Crayola Crayons or Oil Pastels
- Black craft paint – I used Black Apple Barrel Paint
- Dish soap, such as dawn or regular dish detergent
- Mini wooden skewers (these work best for younger kids with little hands)
- Foam brush
TIPS
- I recommend using card stock instead of regular white paper because it is sturdier and will hold up better when the scratching process begins.
- Oil Pastels will make a brighter finished product but they tend to be more expensive than crayons. You can use either supply.
- Acrylic paint is non toxic but not necessarily washable off of clothes. If you are working with younger kids you can use a washable kids paint or black tempera paint.
Kids can use their scratch art paper to create colorful scratch drawings, doodles, shapes, patterns, and creative designs while practicing fine motor skills and exploring process art.
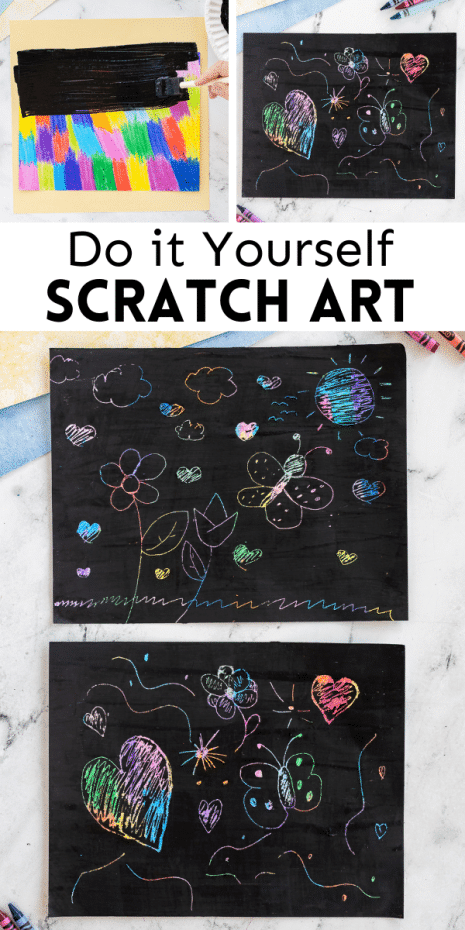
How to Make Scratch Paper
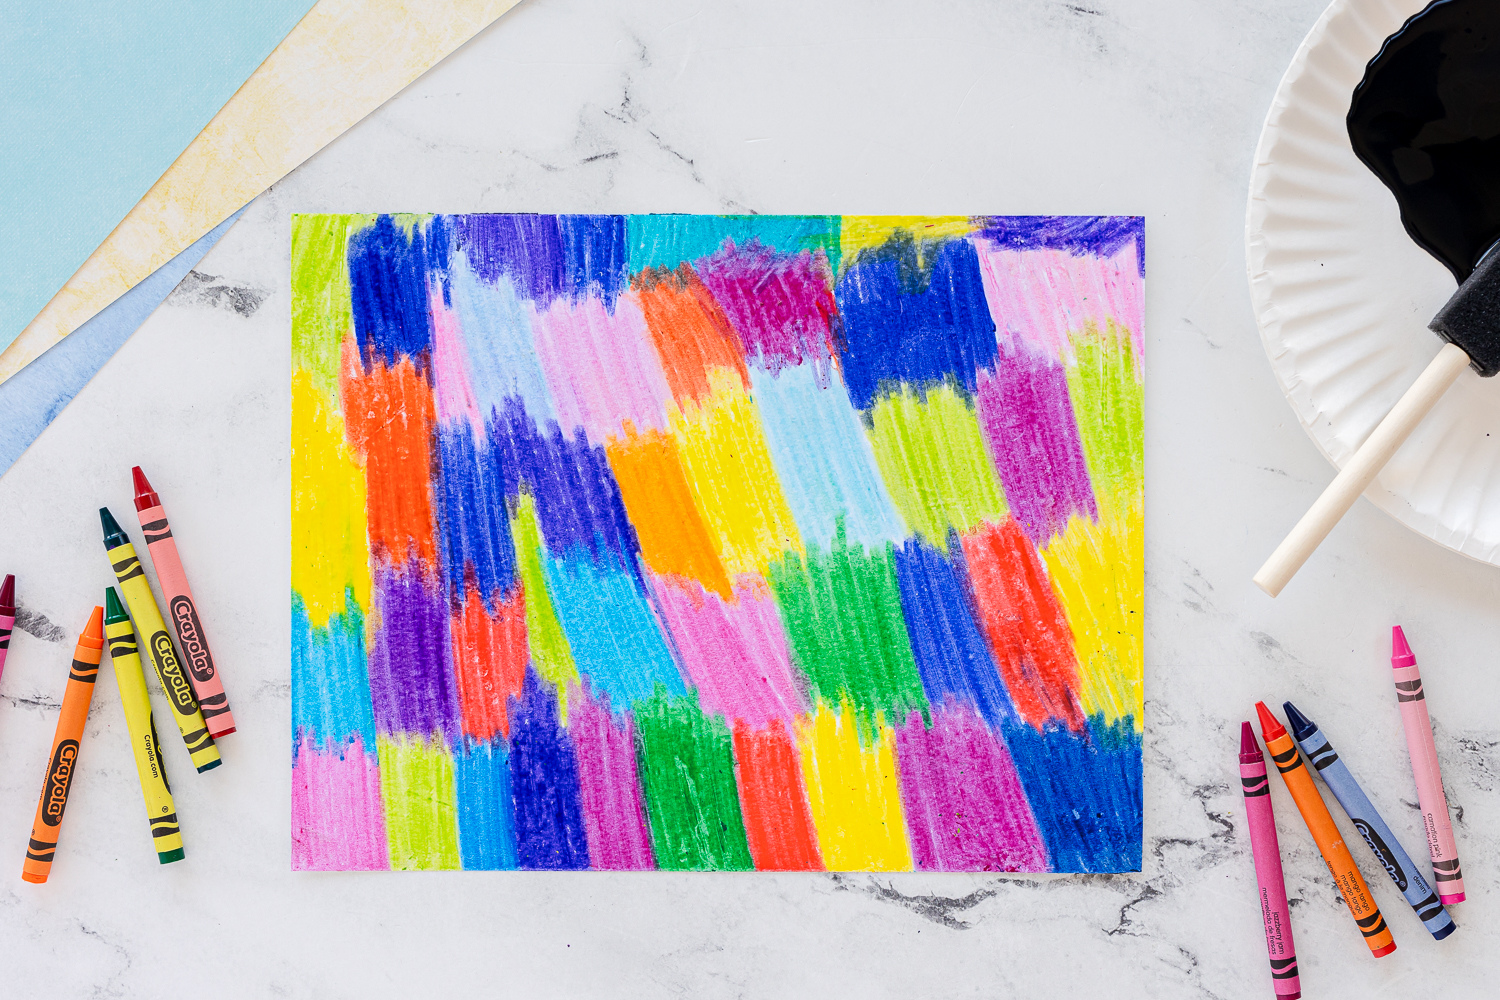
Step One:
- With your crayons, color all over your paper. Try to add small areas of colors and cover the entire sheet. Use as many colors as you can. You will want to press firmly to make the crayon as dark as possible. I choose vivid colors that will stand out against the black paint. You want the areas to be dark and waxy-looking. Any white areas won’t scratch off.
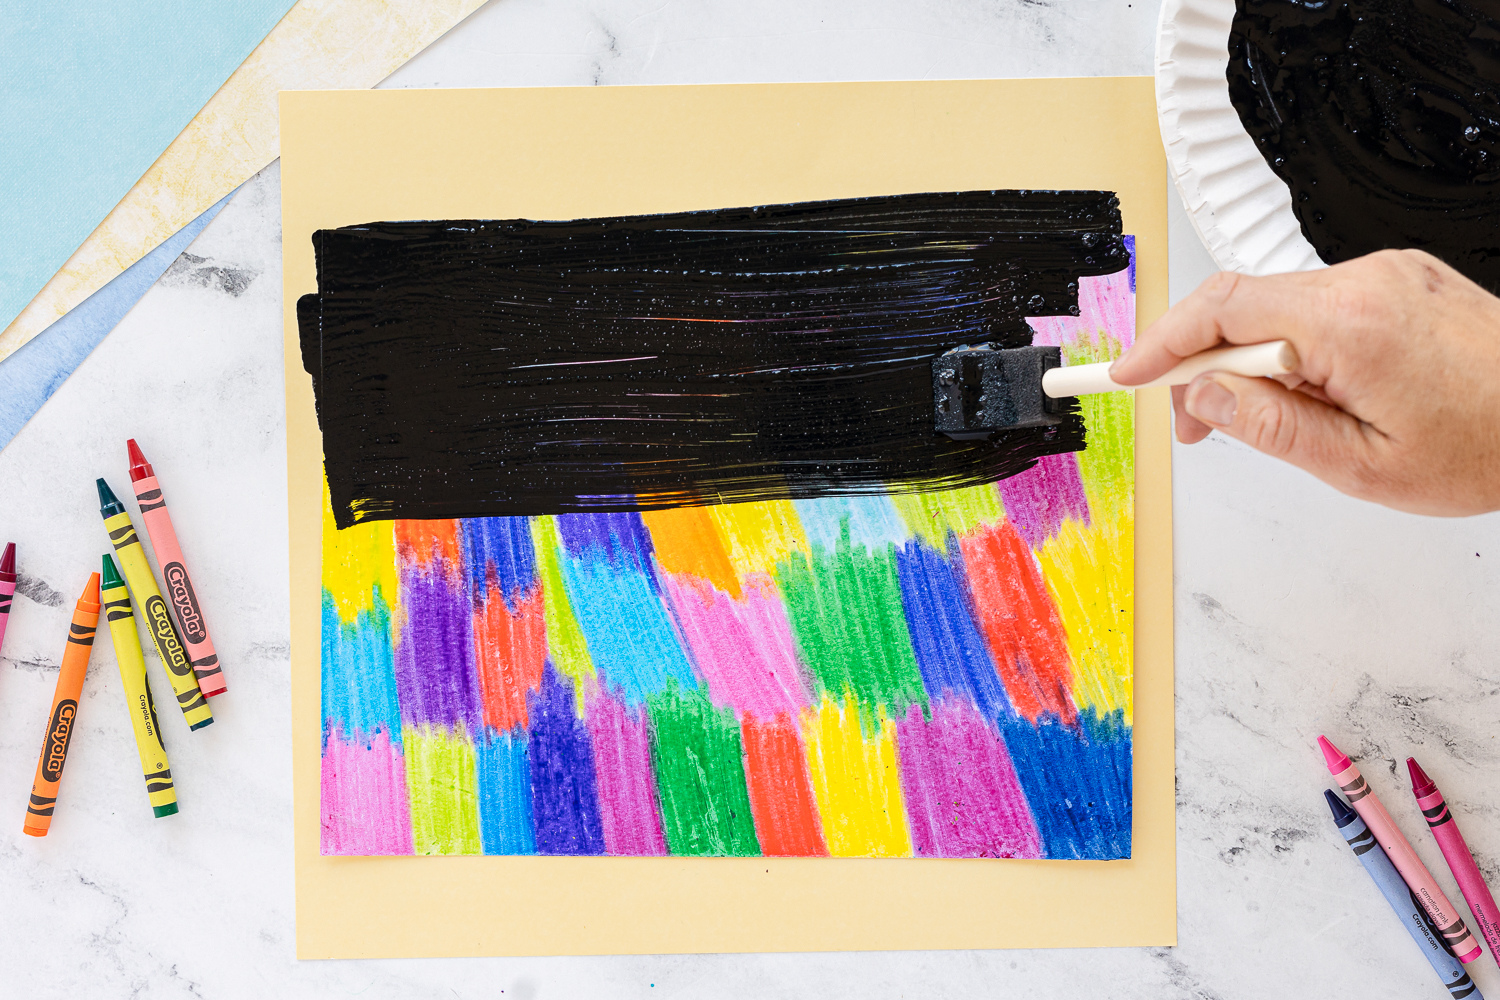
Step Two:
- In long strokes, paint the black paint on top of the crayon-colored paper. You want the paint to cover the paper so you can’t see any of the markings underneath. Cover everything but don’t make it too thick. This will make it difficult to scratch off. I usually do two very light coats instead of one thick paint layer. Let the first coat of wet paint dry before applying the second.
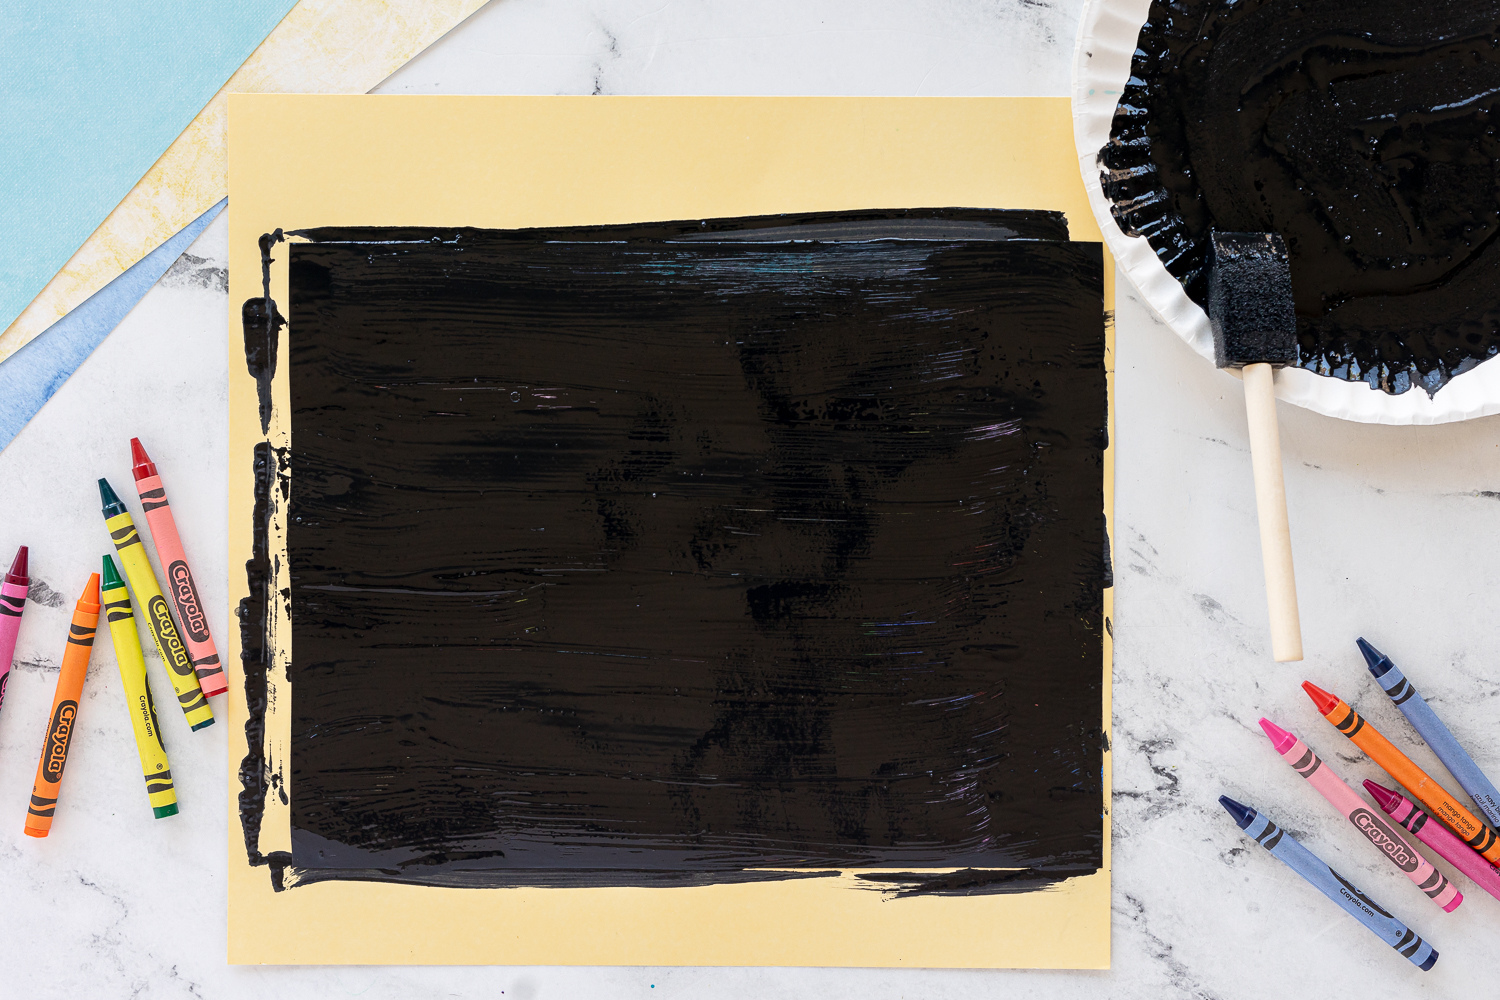
Step Three:
- Allow the entire page to dry fully. This might take an hour or so.
- Scratch to your hearts content 🙂
DIY Scratch Art FAQs
- How do you make scratch art?
To make scratch art, color paper with crayons or oil pastels, cover it with black paint mixed with dish soap, let it dry, and scratch designs into the surface. - Why do you add soap to scratch art paint?
Dish soap helps the black paint stick to the waxy crayon surface. - What can kids use to scratch scratch art?
Kids can use wooden skewers, toothpicks, chopsticks, styluses, or craft sticks. - Can you make scratch art with crayons?
Yes! Crayons are one of the easiest and most affordable ways to make DIY scratch art at home.
Scratch Art Ideas for Kids
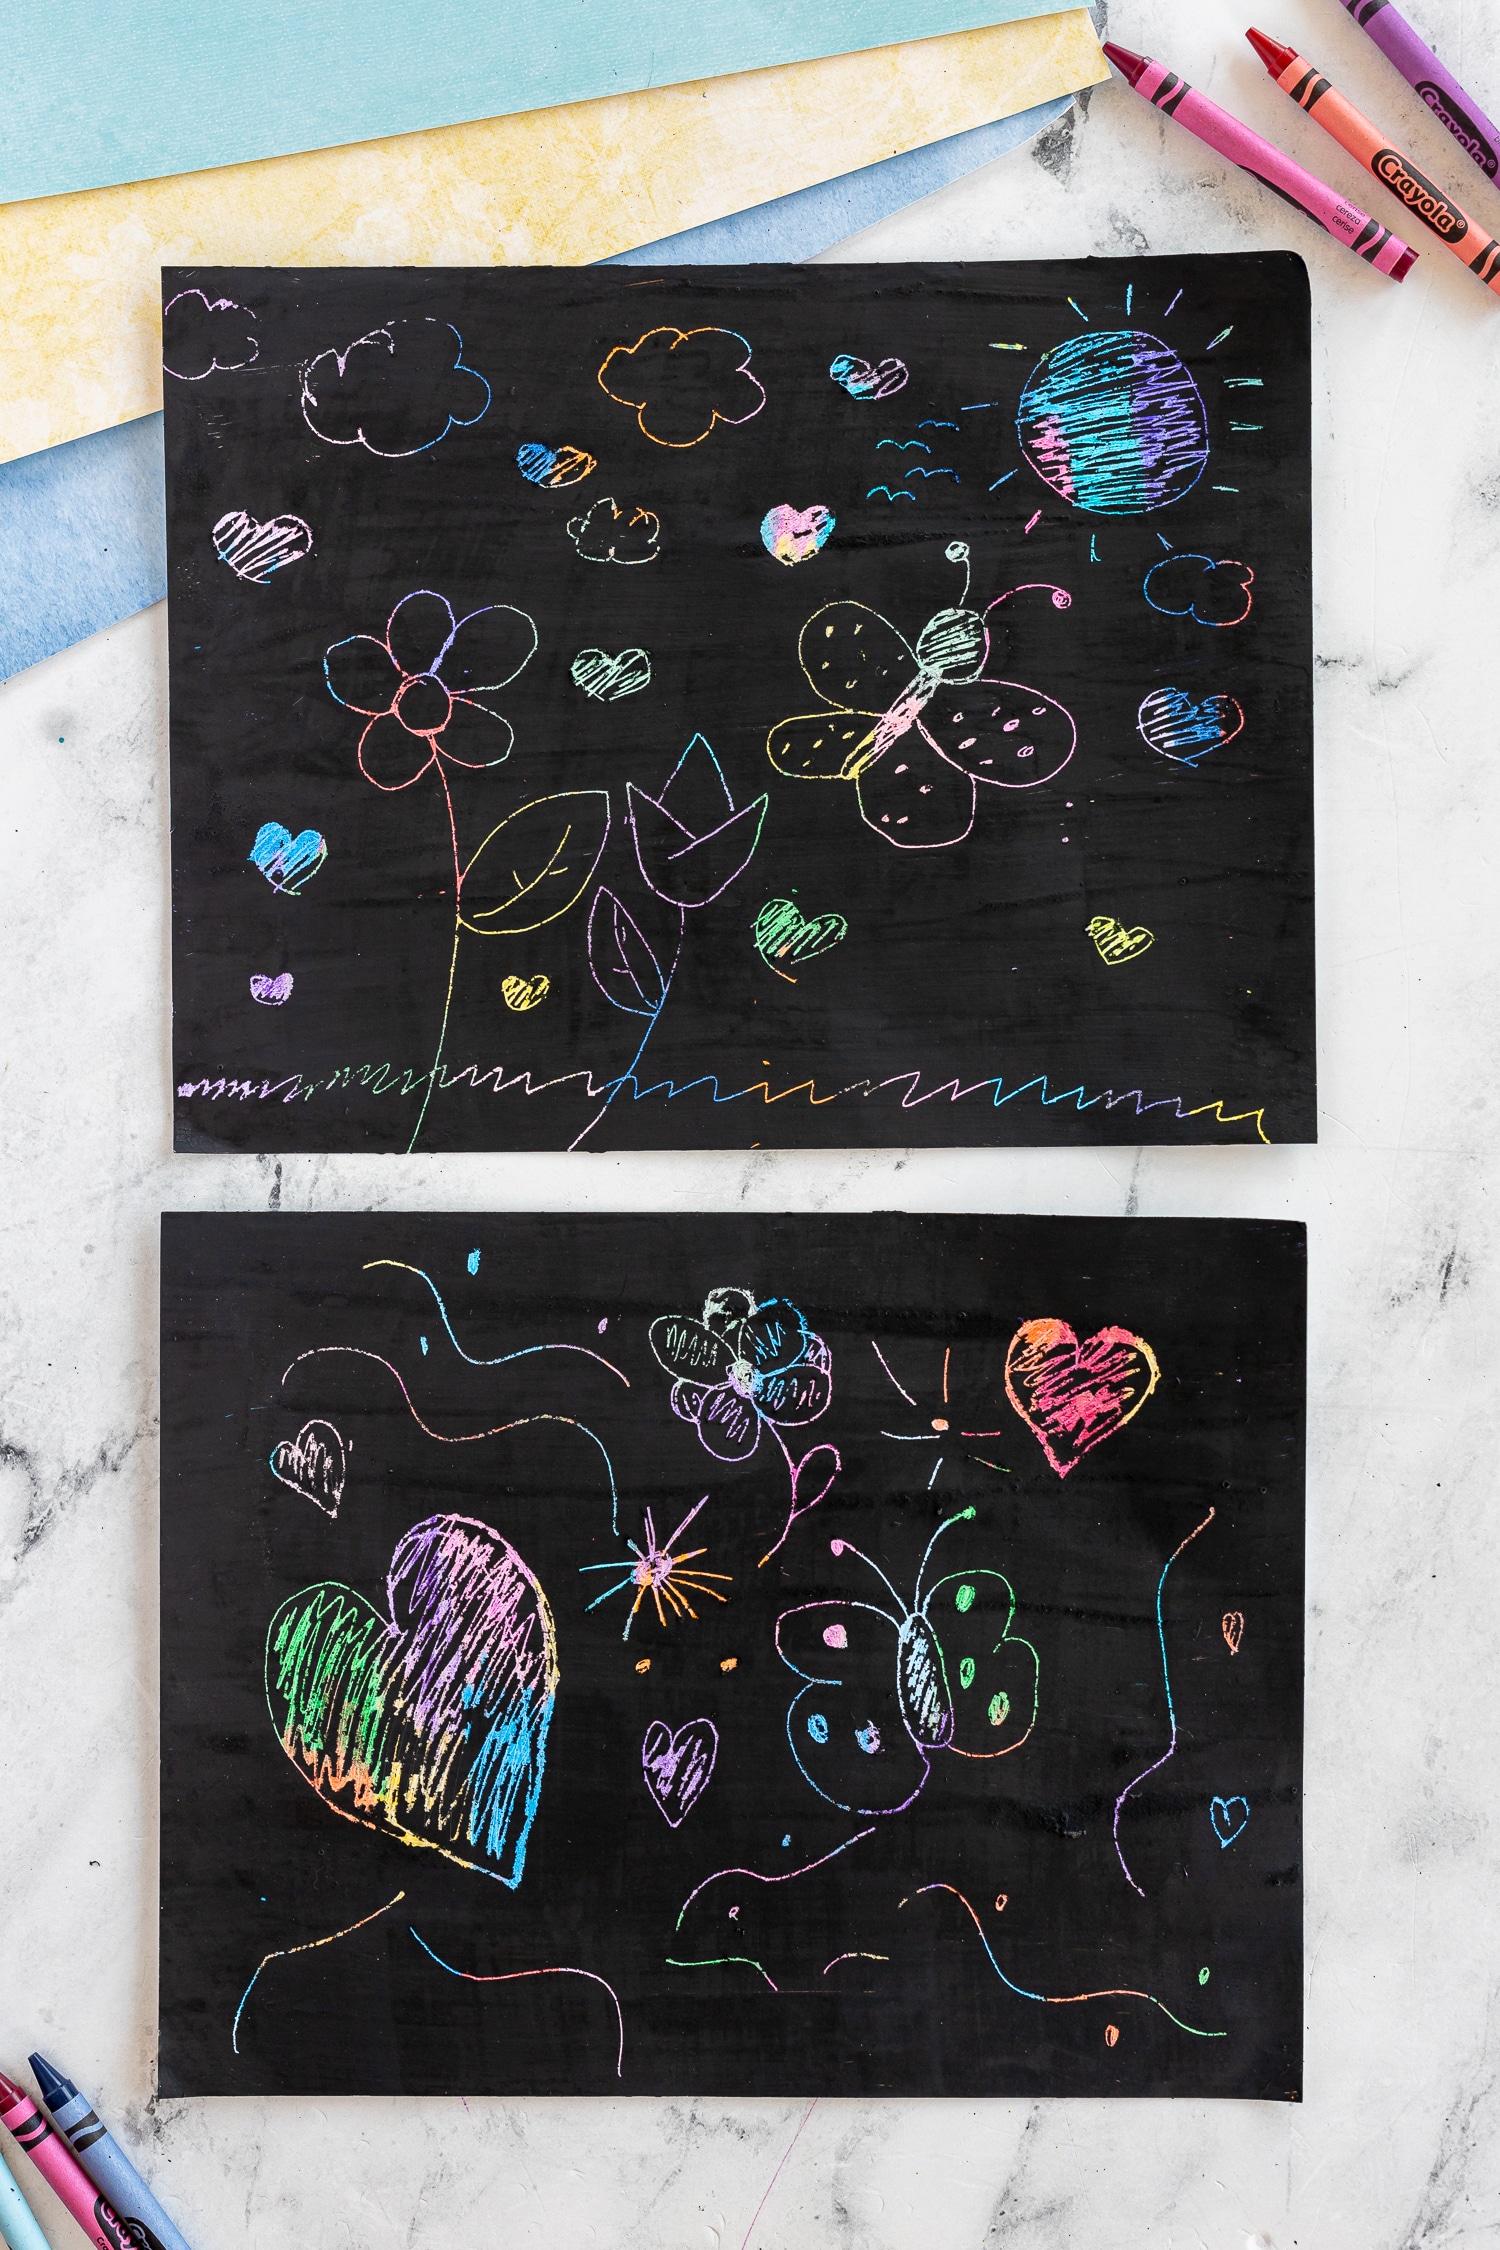
These colorful DIY scratch art boards can be used for all sorts of fun and creative activities. We love keeping a stack of homemade scratch paper on hand for easy art time, rainy afternoons, or quiet creative play. Kids can use them to create rainbow scratch drawings, doodles, patterns, and fun designs while exploring their imagination.
Try using your scratch art paper to:
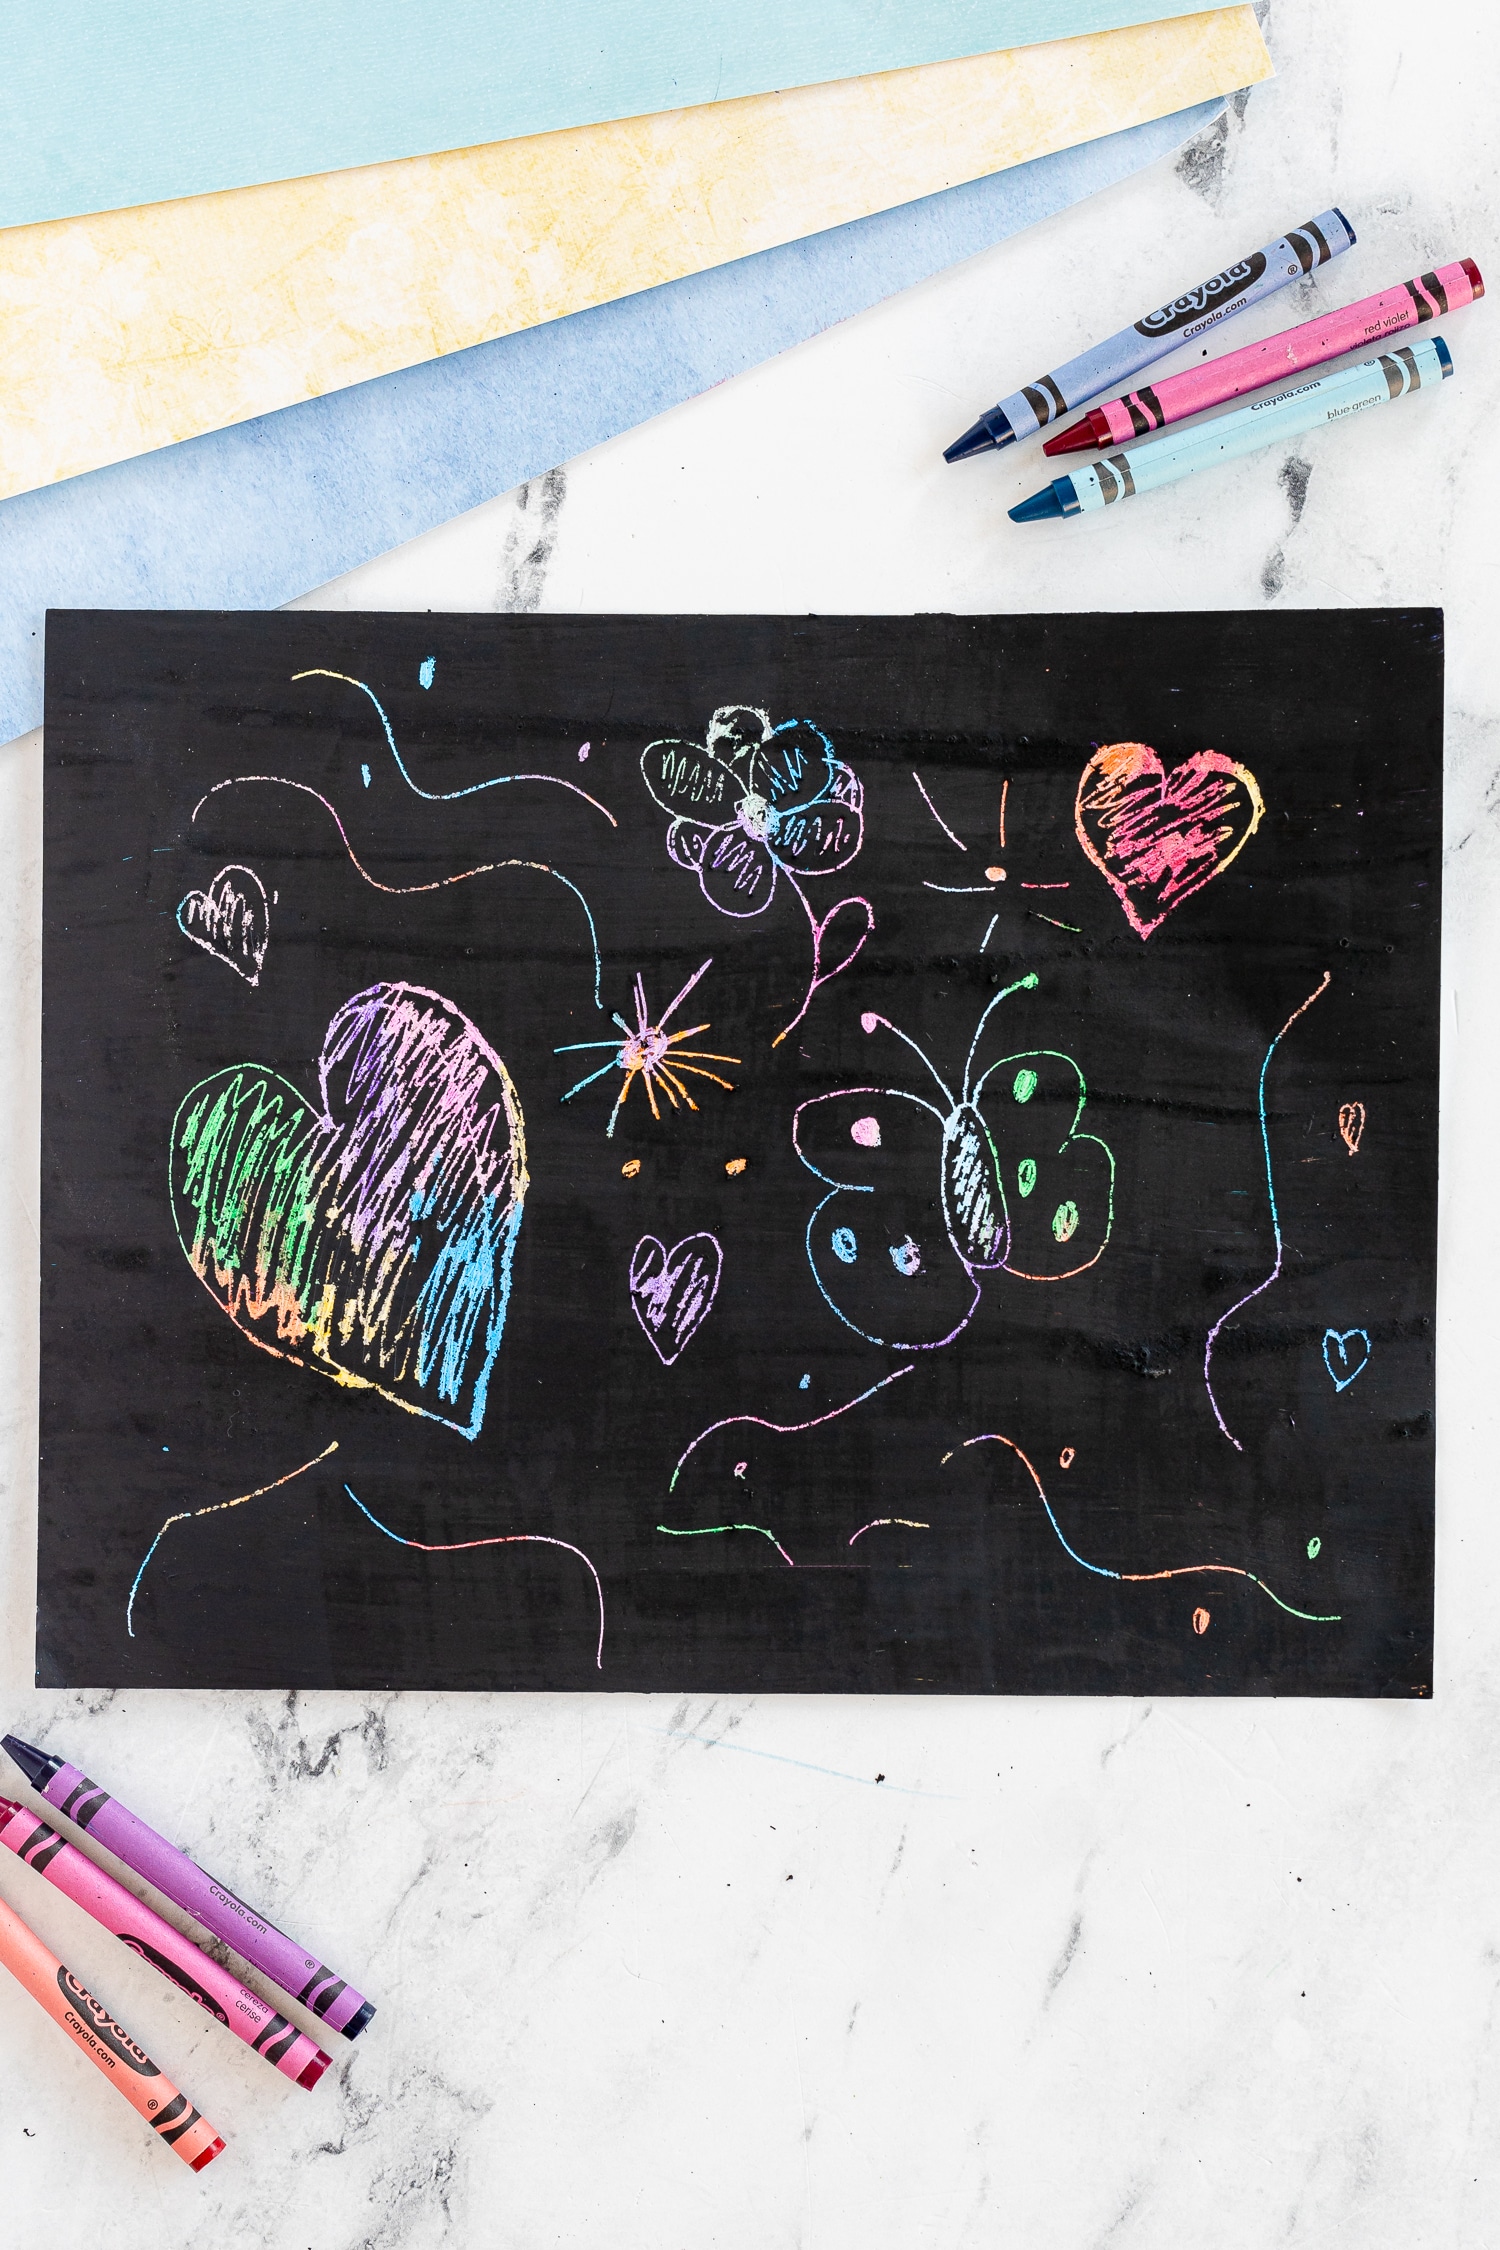
- Draw smiley faces, flowers, butterflies, and animals
- Practice writing names, letters, and numbers
- Create colorful scratch drawings and abstract art
- Design homemade birthday cards or notes for friends
- Explore process art and creative drawing activities
- Scratch away the entire black surface just to reveal the rainbow colors underneath
This easy scratch art activity is perfect for kids of all ages and makes a fun addition to homeschool art, classroom centers, summer art activities, or creative free play at home.
Other Scratching Tool Options
If you don’t want your kids using wooden or bamboo skewer tools for their DIY scratch art, they can also use toothpicks or any other hard-edged tool. I have seen people take the soft part of a Q-tip and use the plastic piece for scratching. Any skinny stick, popsicle stick, or wooden chopstick will work well! You can even find stylus tools on Amazon.