As an Amazon Associate I earn from qualifying purchases.

Make this adorable Coffee Shop Cup Craft for kids! A simple, creative café-inspired art project using cardstock, markers, and paint sticks ! It’s perfect for pretend play and design fun.

Coffee Shop Cup Craft for Kids
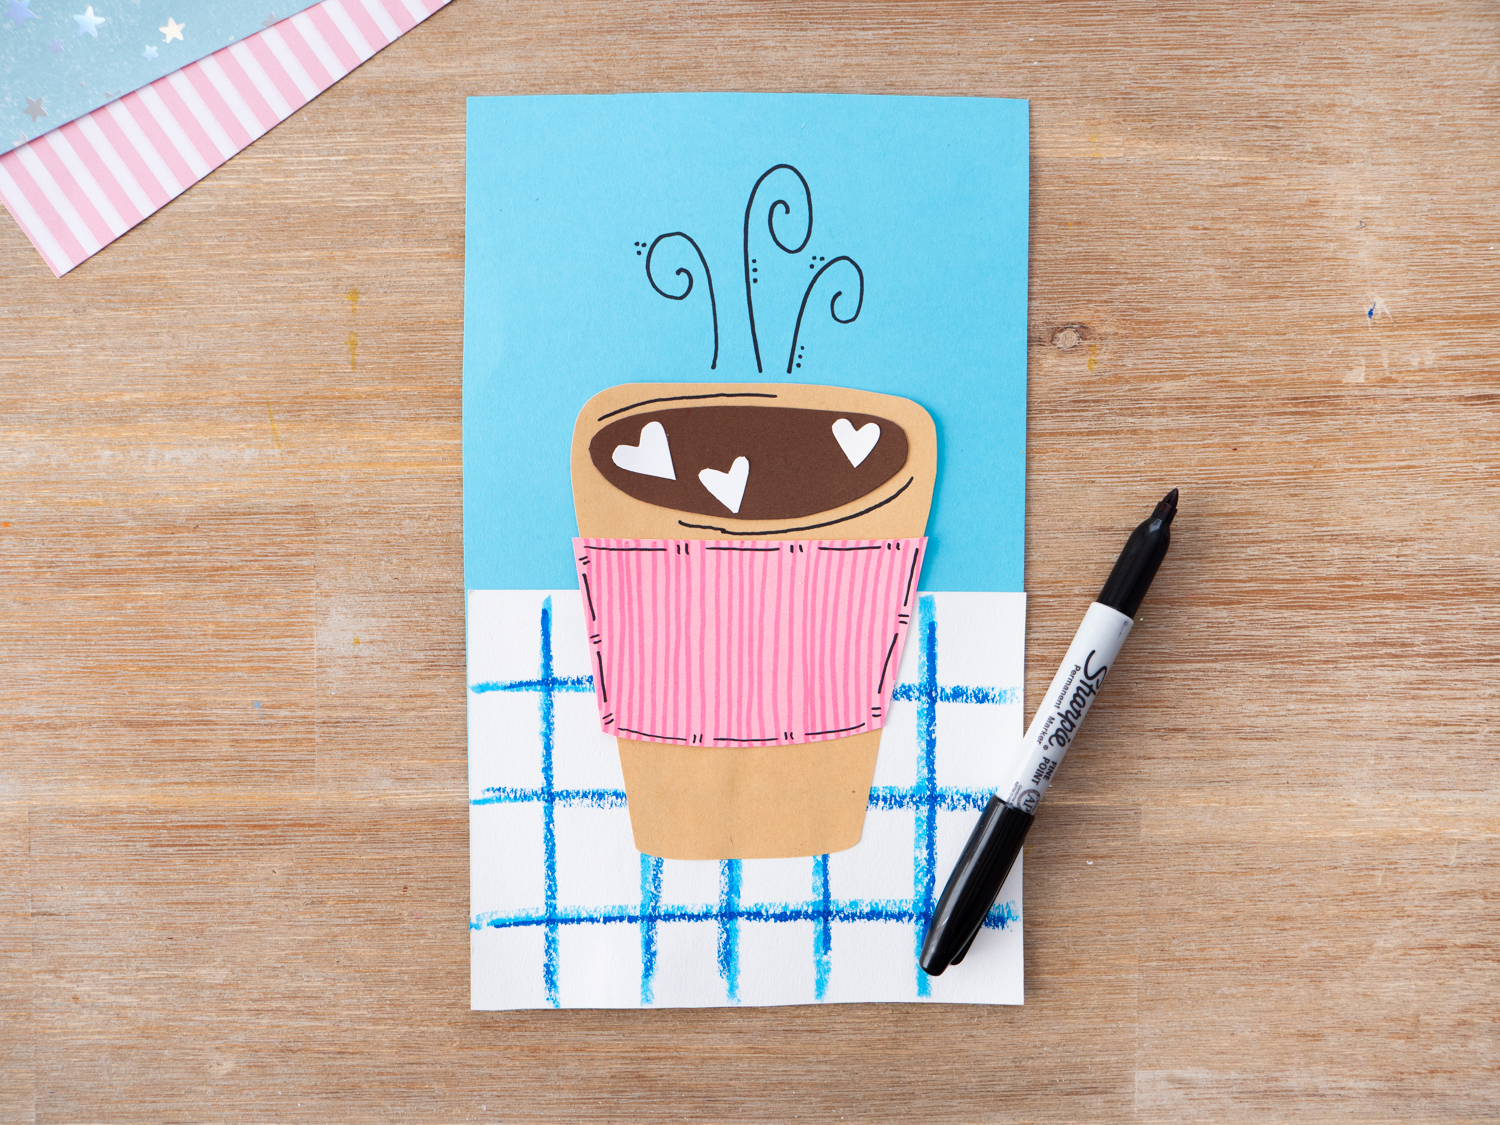
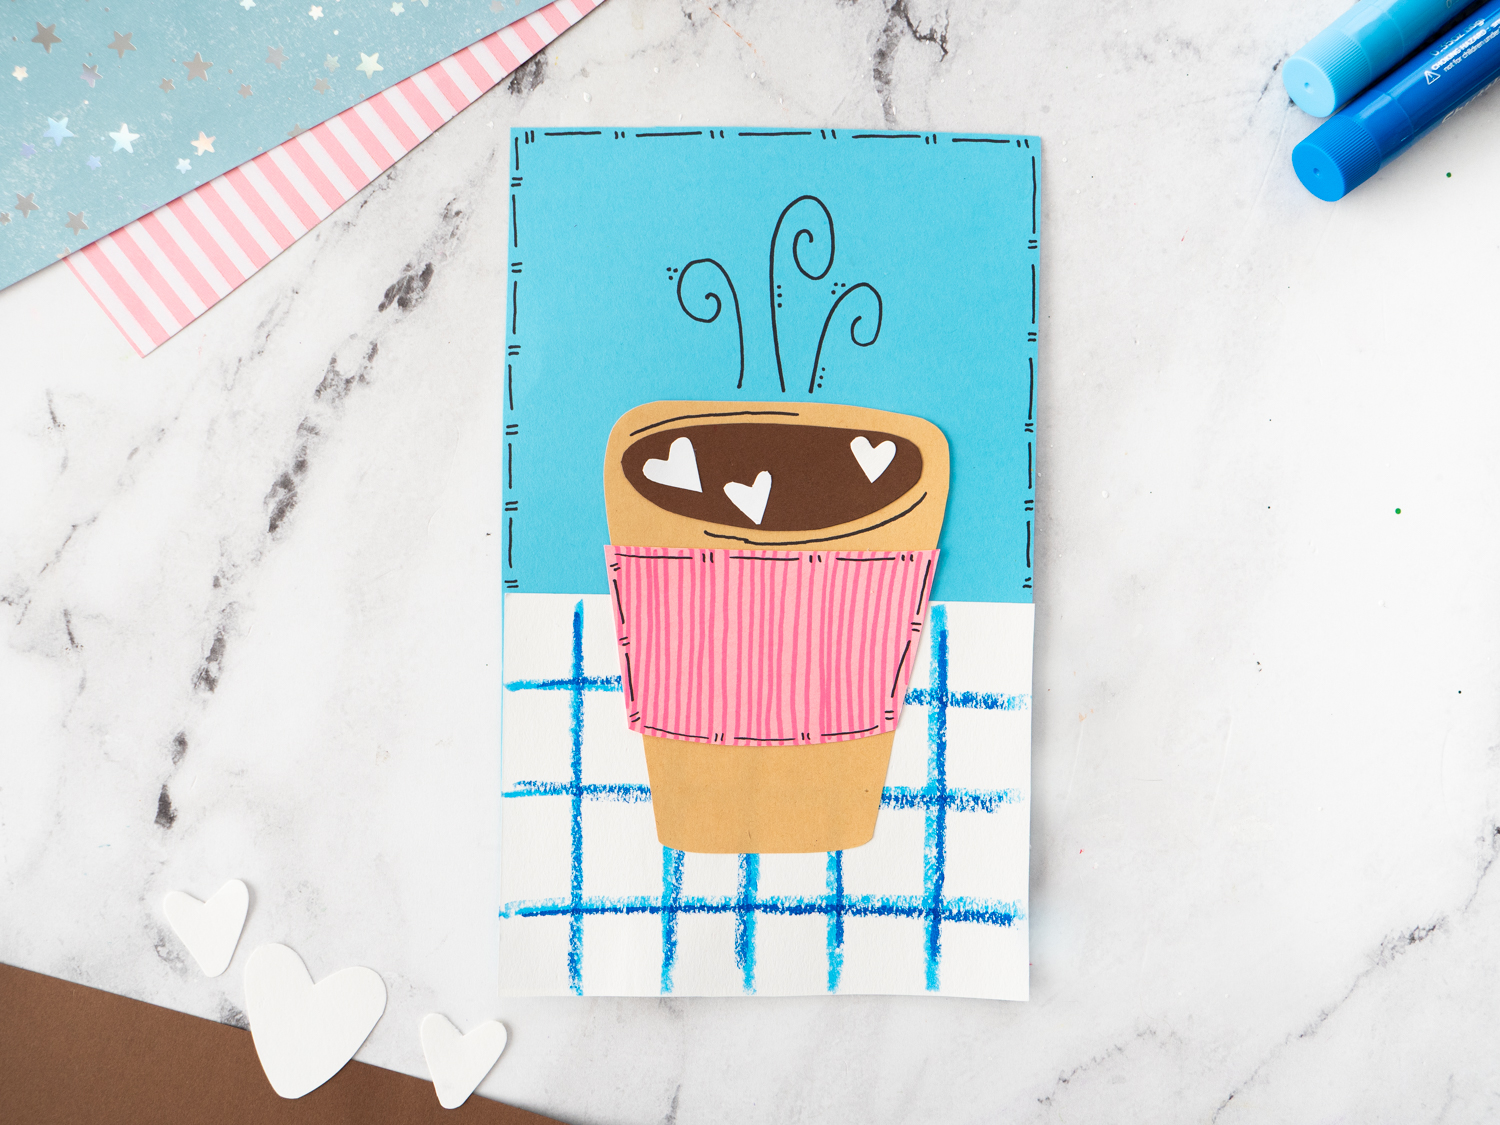
If your kids love playing coffee shop, bakery, or café at home, they are going to love this adorable Coffee Shop Cup Craft! This sweet little project lets kids design their very own custom café cup, complete with a decorated sleeve, cozy steam swirls, and a fun background to set the scene. It’s simple, creative, and perfect for an afternoon of hands-on art.
Why Kids Love This Coffee Cup Craft
This isn’t just cutting and gluing pieces together, kids get to:
- Choose their own color combinations
- Design patterns for the coffee sleeve
- Add logo-style details or simple shapes
- Create a background that feels like a real café
Some kids will go bright and bold. Others may choose soft, cozy colors. It’s such a fun way for them to put their own creative spin on it. And once it’s finished? It’s perfect for pretend play. Open that coffee shop for business!
Materials Needed To Make A Coffee Cup Craft
- Free Coffee Cup Craft Template
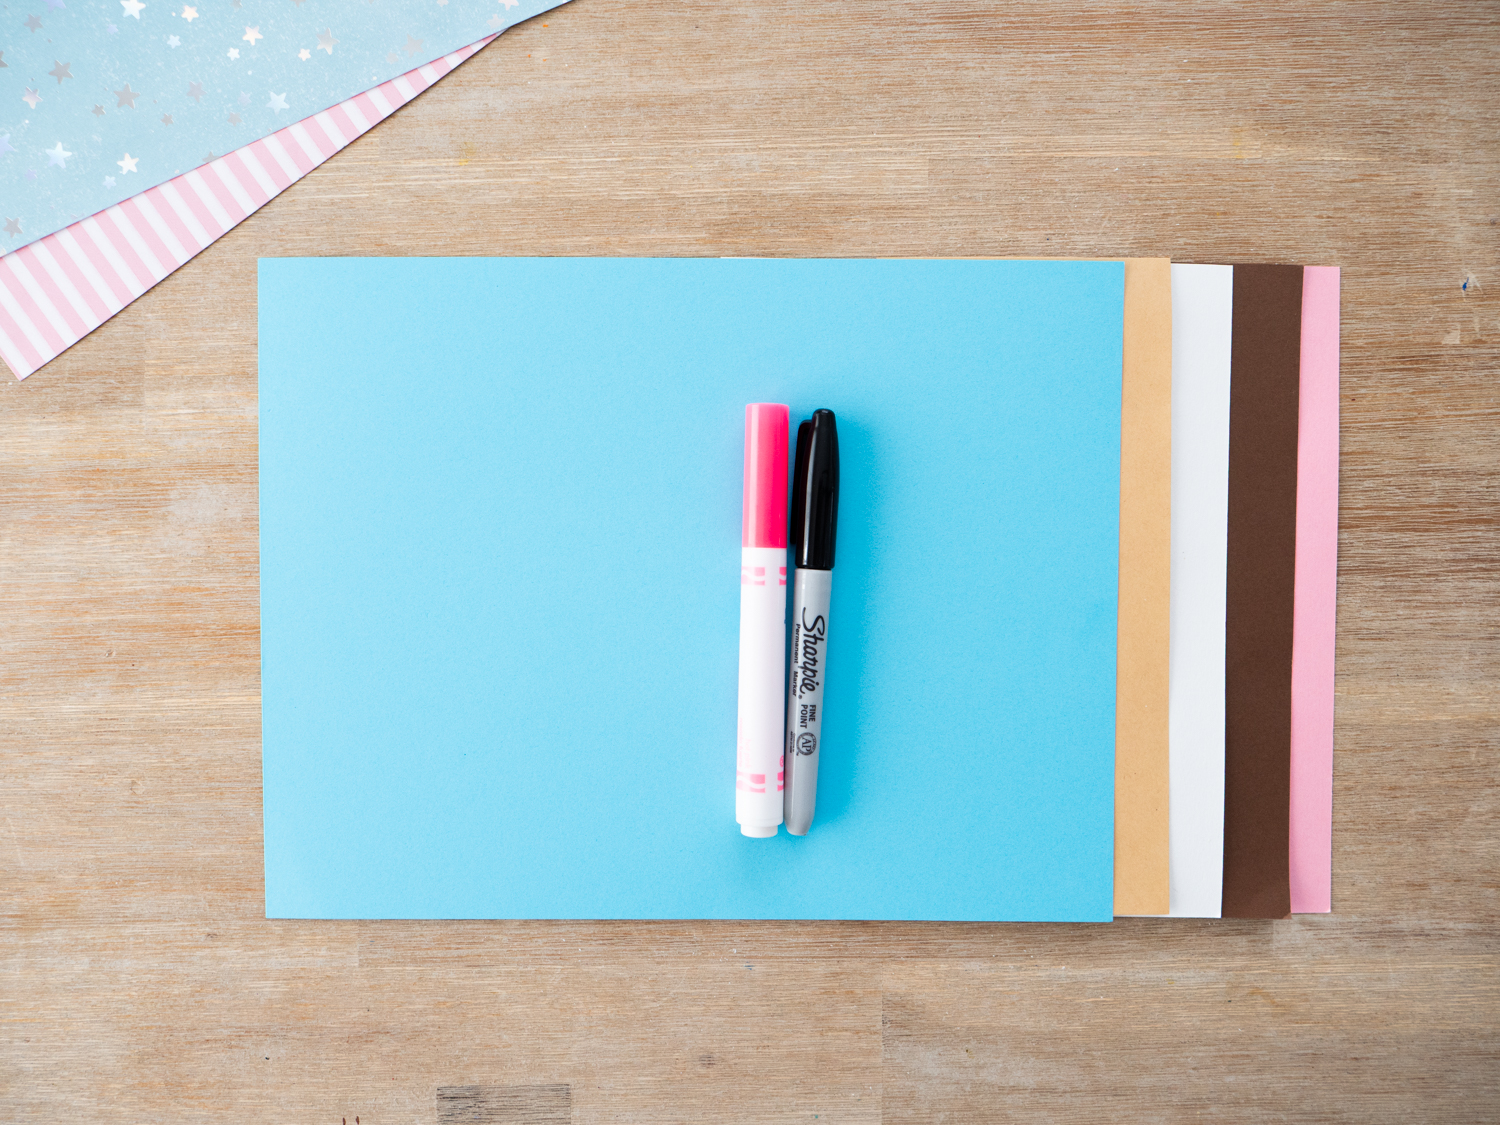
- Cardstock (blue, white, tan, brown, pink — or colors of your choice)
- Markers, Tempera Paint Sticks, or crayons (we used paint sticks)
- Black Sharpie – Ultra Fine or Regular works (for details around the edges)
- Scissors
- Glue
How to Make a Coffee Shop Cup Craft
Step One:
- Start off by cutting a colored piece of 8 1/2 x 11 inch piece of paper in half as your background piece. If desired you can also leave your colored background piece as the full size.
- Cut another piece of white cardstock to act as the table. We chose to use a white piece of paper but you can use whatever color you want!
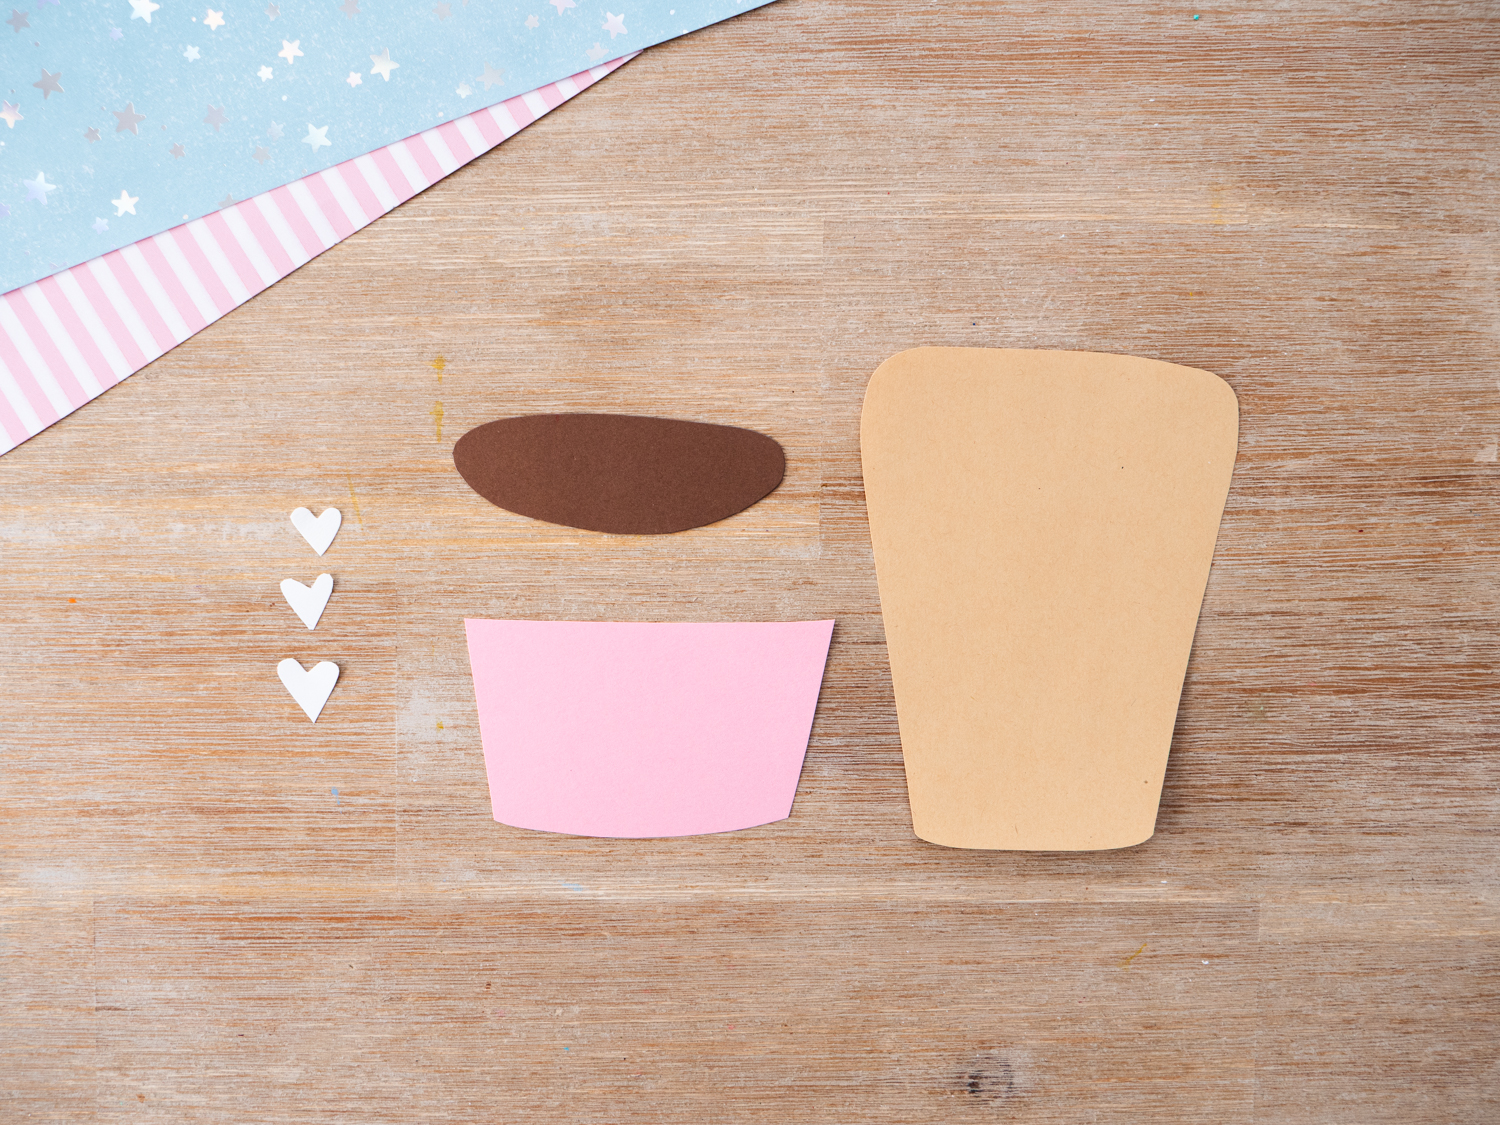
- Cut out your coffee cup template pieces from our free template.
Step Two:
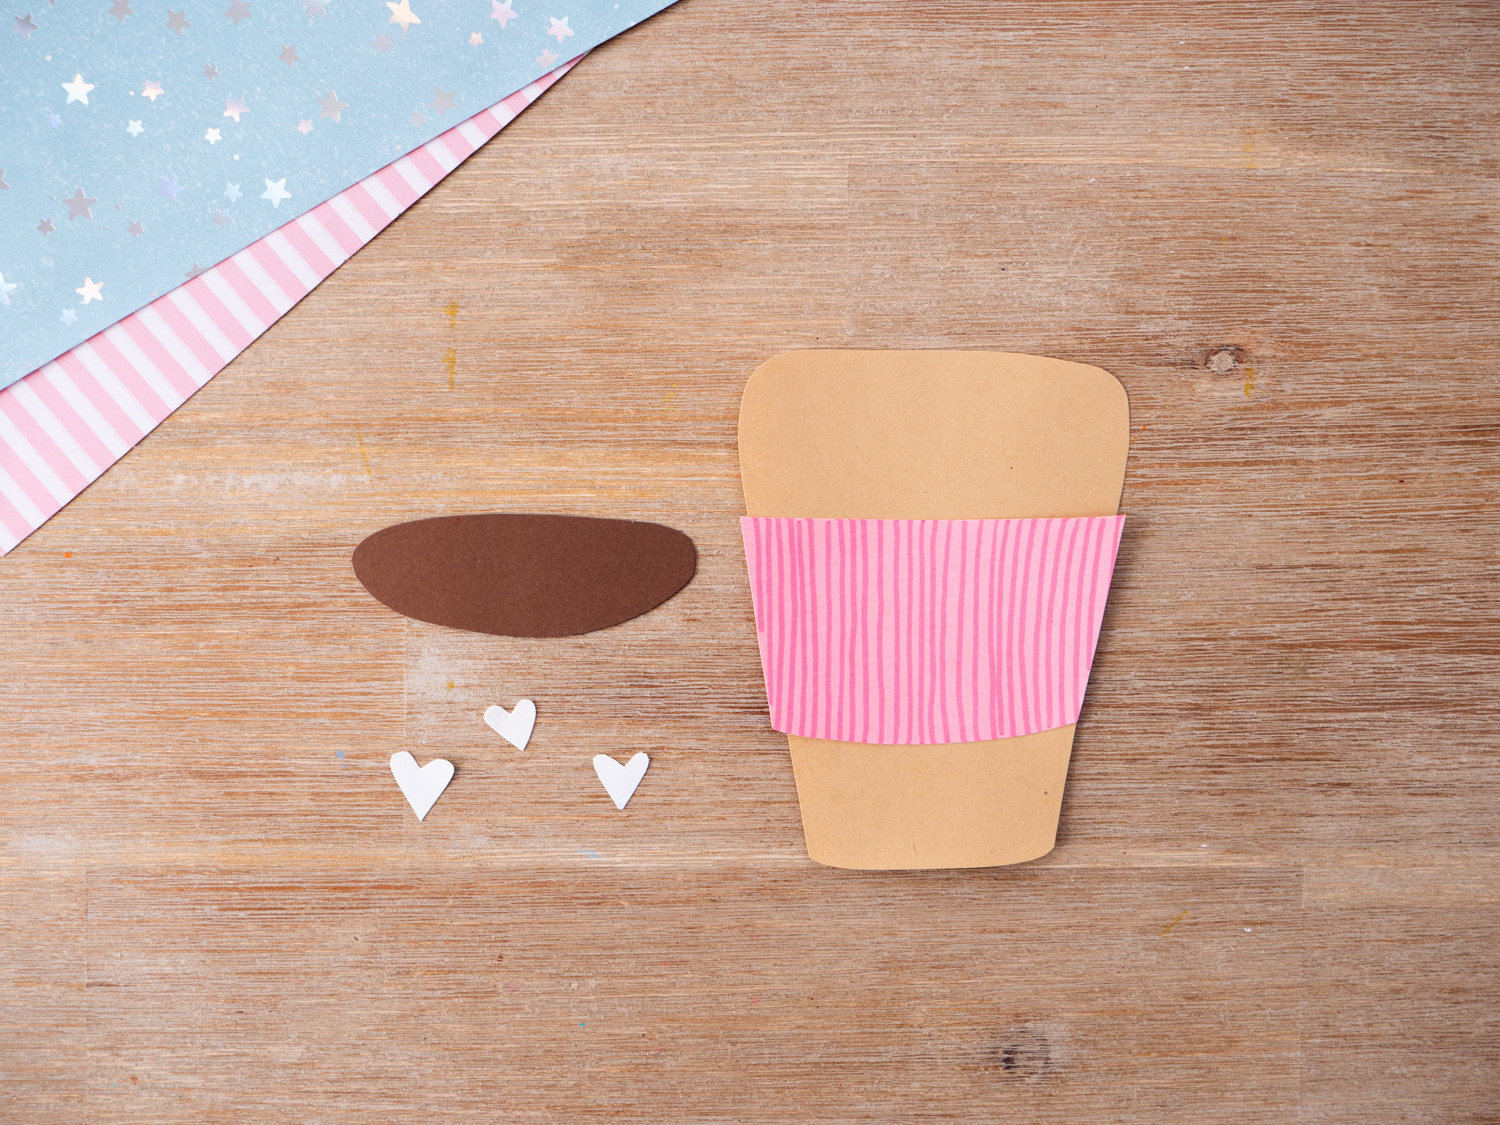
- Add your favorite line details or patterns to your coffee cup “sleeve” with marker or crayons. (We chose to add simple vertical lines but you can use whatever design you like or even have your kids design a logo!)
Step Three:
- Begin to assemble your coffee cup by gluing your sleeve to your coffee cup.
- Glue your “coffee” or “hot chocolate” piece to the top of your coffee cup.
- Add small white hearts or sprinkles if desired to look like mini marshmallows!

Step Four:
- Create your table piece by adding a fun background! We chose a simple plaid design using our favorite paint sticks. Just draw vertical and horizontal lines with two shades of blue to create an easy patterned look.

Step Five:
- Glue your table piece to your colored background piece.
- Glue your finished coffee cup to your table.
- Add swirls of steam and decorative line around the border of your artwork.