As an Amazon Associate I earn from qualifying purchases.

Are you ready to add some whimsy and color to your crafty day? Well, I’ve got just the thing for you—let’s dive into the magical world of creating bubble art for kids! This fun and easy project is perfect for anyone looking to sprinkle a little artistic flair into their day. So grab your supplies, and let’s get started!
Oil Pastel Bubbles
This unique art project is perfect for anyone looking to explore their artistic side and create something truly eye-catching. Using simple materials like black cardstock, chalk pastels or colored pencils, and a white paint pen, you’ll craft stunning bubble illustrations that pop with color and vibrancy against a dark backdrop. We tend to focus on a lot of crafts and activities for younger kids but this Art project really is perfect for kids of all ages – even those teenagers!
Have younger artists that want to join in? We tested these these pretty bubbles with some colored pencils that are formulated to be brighter on dark black paper. Regular colored pencils will work just fine they just might not POP as much. We love this option because let’s face it- chalk pastels can be messy! Chalk pastels also smear when touched so using colored pencils allows for little hands and arms to be mess free but still create something beautiful!

HOW TO VIDEO:
Supplies needed to Make Oil Pastel Bubbles
- Black Cardstock: Opt for the non-shiny kind that doesn’t leave oily fingerprints. I found some perfect sheets at a local craft store!
- Chalk Pastels: These are your color warriors, ready to bring your bubbles to life.
- Black Colored Pencils, if you would rather not use oil pastels
- Fine Point White Paint Pen: This will be your magic wand for tracing those perfect circles.
- Template Circles: You can either use cups or dishes to trace around if you like a more hands-on approach, or make a template like I did. For reference, my largest circle was about 3 inches in diameter.

How To Make Bubble Art for Kids
Step 1: Trace your circles
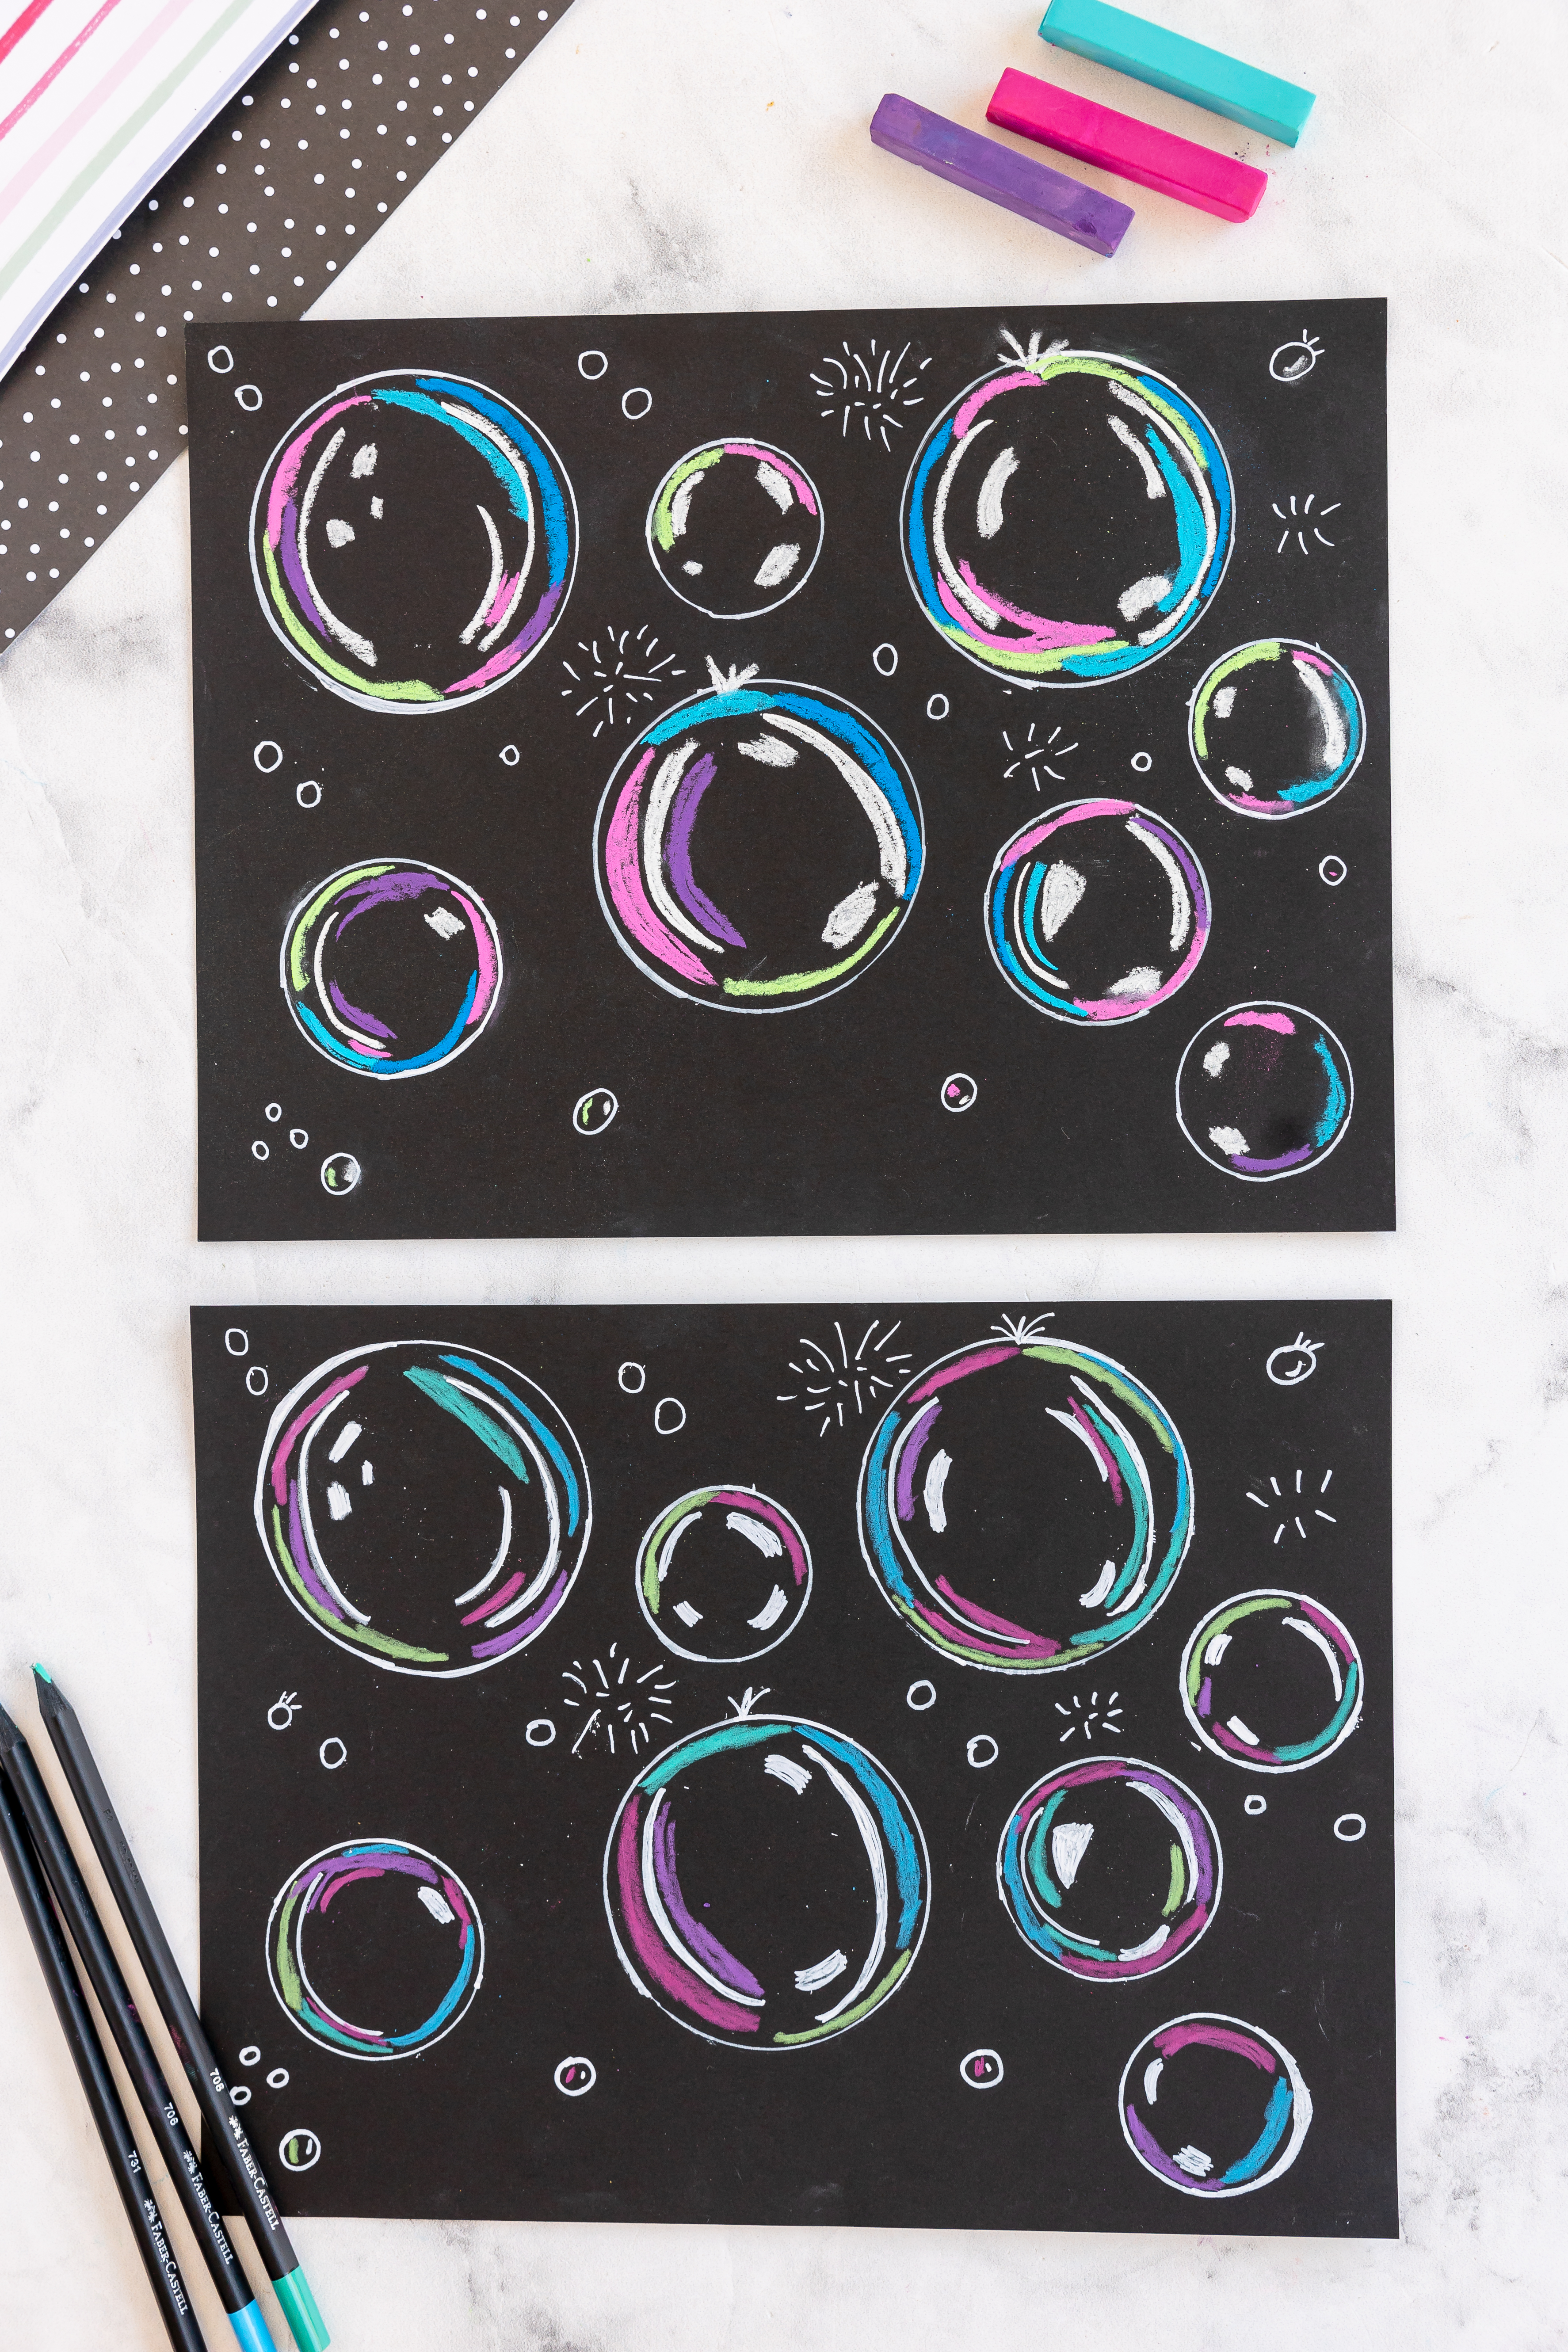
Start by cutting out your circle templates from thick cardstock. Using your white paint pen, trace three large circles, two medium, and a few smaller ones onto your black cardstock. Feel free to add some tiny circles and random ‘firework’ or ‘broken bubble’ designs for that whimsical touch. Let your paint marks dry for a few minutes before moving to the next step.

Step 2: Add highlights
With your chalk pastels or colored pencils, begin to add white highlights to your bubbles. You can vary your lines—some thin and curvy, others chunky, and even a few splotches here and there. Check out the photo reference to see the kinds of highlights I added!

Step 3: Color Time
Now for the fun part—coloring! Carefully go around each bubble with your chosen chalk pastels or colored pencils. The key is to keep your colors close to the line but vibrant enough to pop against the black background.

Crafty Tips:
- Layer Your Chalk Pastels for Depth. Oil pastels are great for layering. Start with lighter layers and gradually increase the intensity of color. This method gives you more control and produces a richer, more vibrant finish. Use a white or very light pastel as a base to make colors stand out even more against the black background.
- Keep Your Pastels Clean. Oil pastels can get dirty quickly, which might transfer unwanted colors onto your artwork. Clean them regularly by wiping them with a cloth. This ensures the colors remain vibrant and uncontaminated.
- Add Mixed Media. If you feel adventurous, mix other media into your project. For example, using metallic or glitter pens around or inside the bubbles can add a unique touch.