As an Amazon Associate I earn from qualifying purchases.
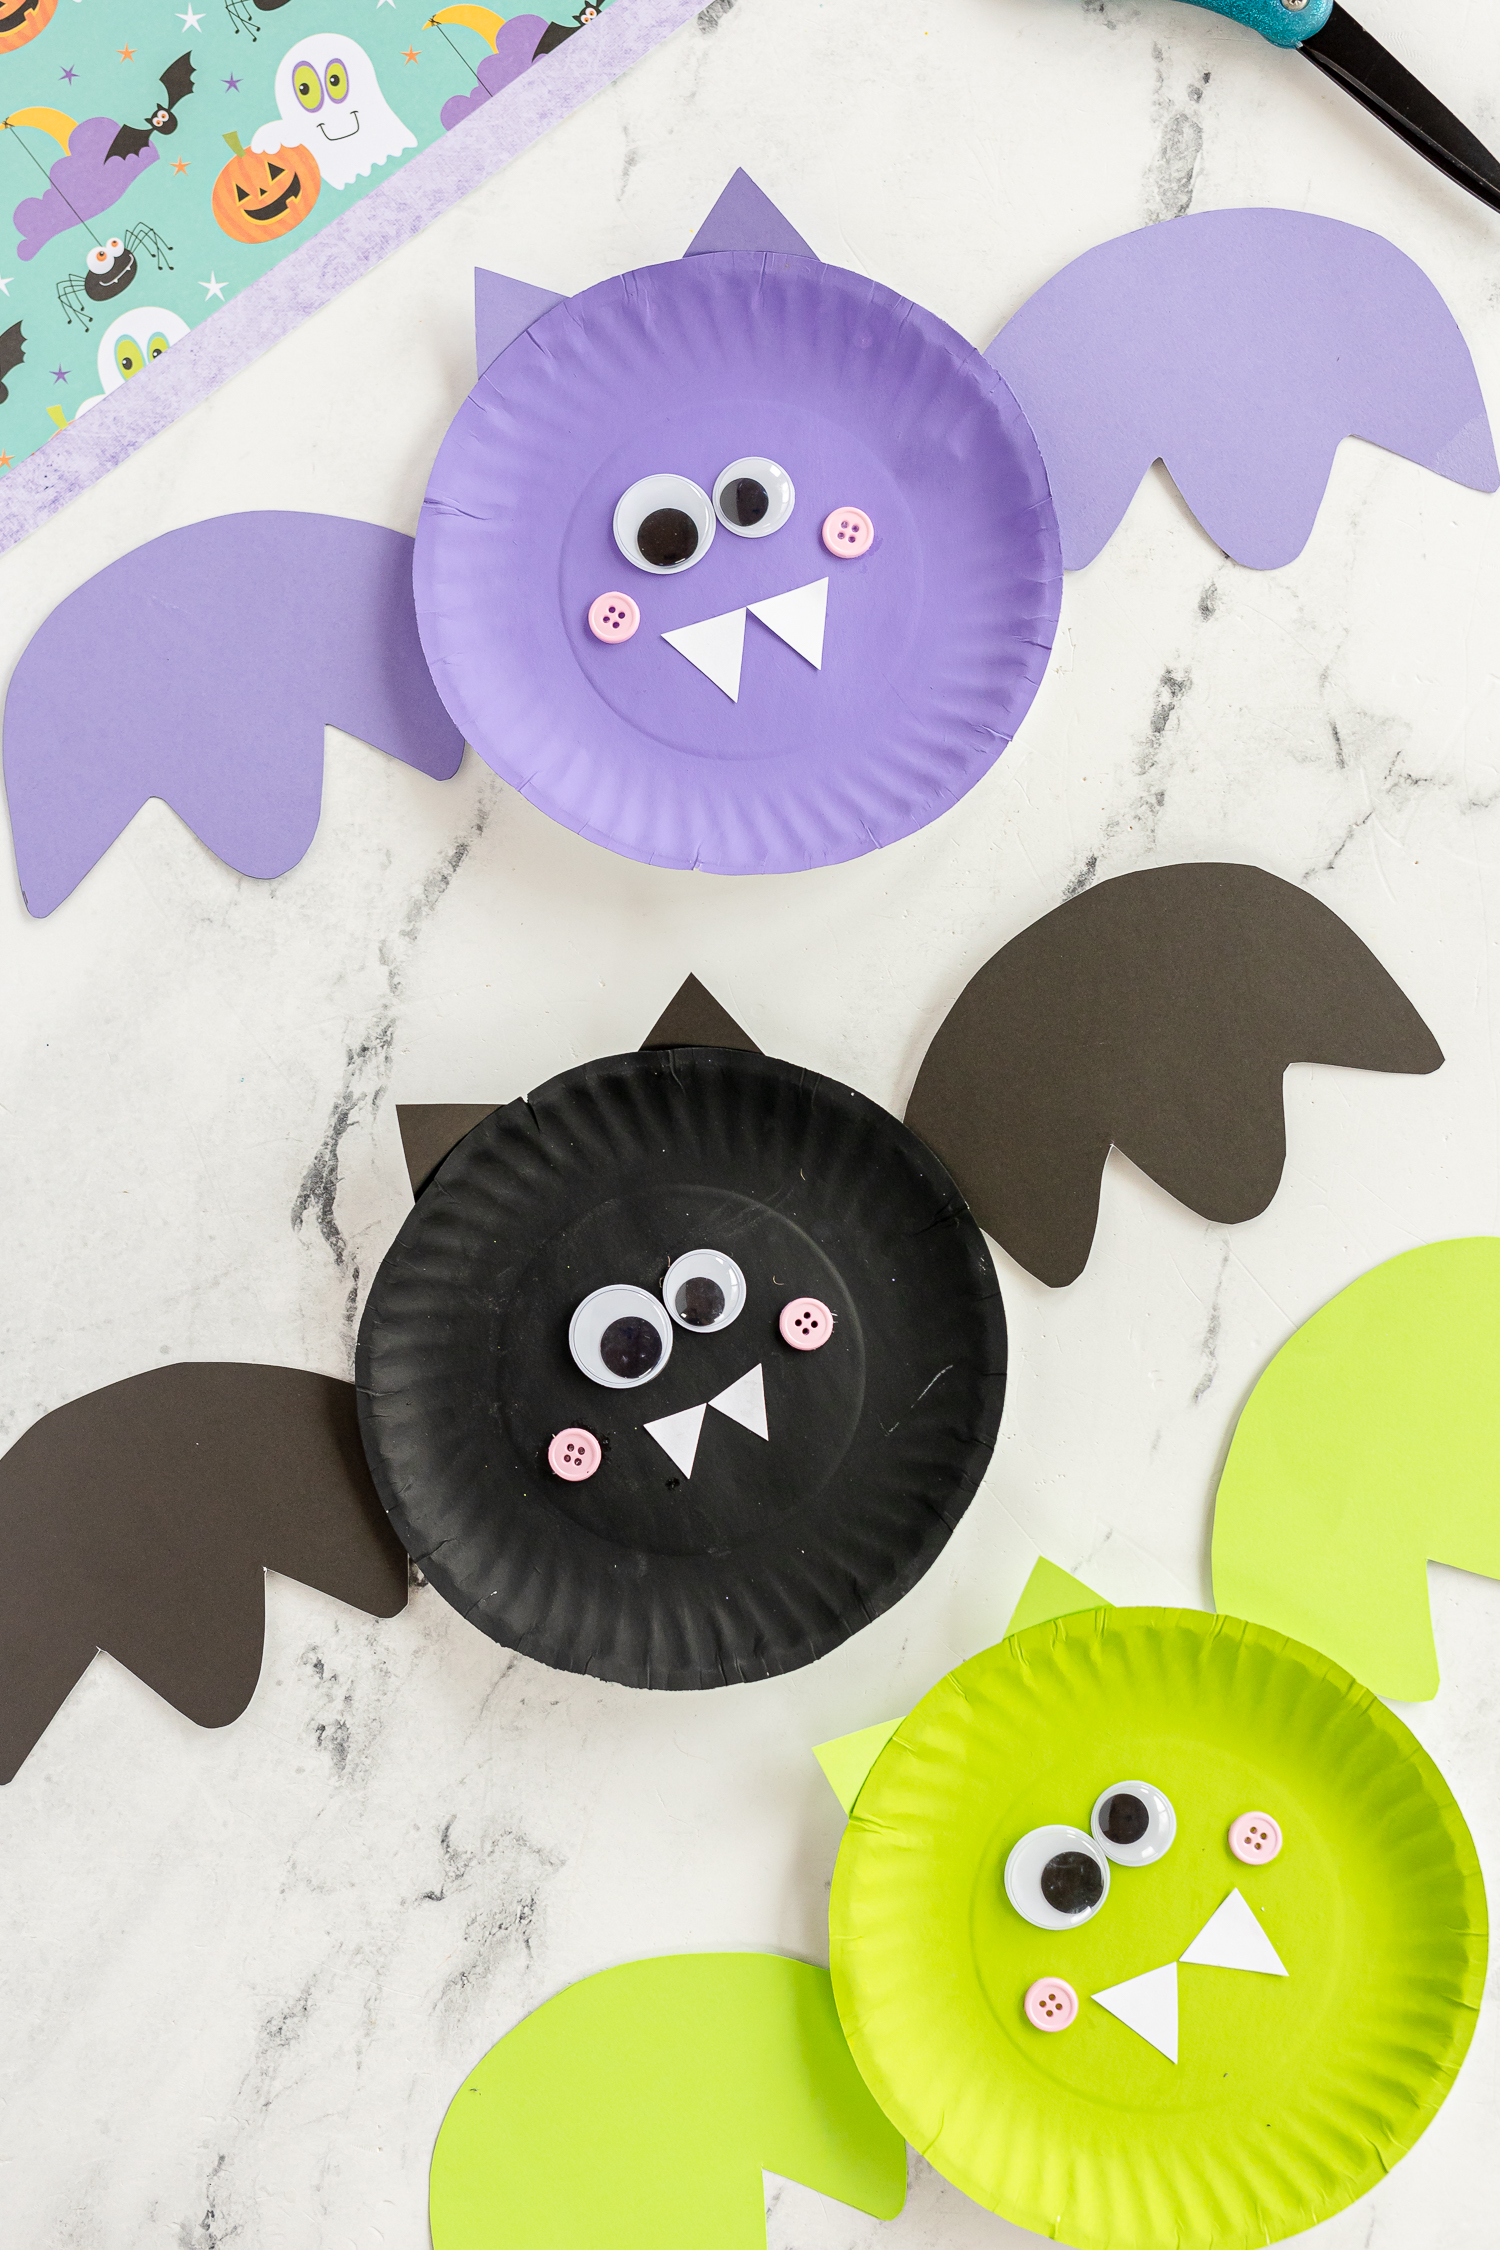
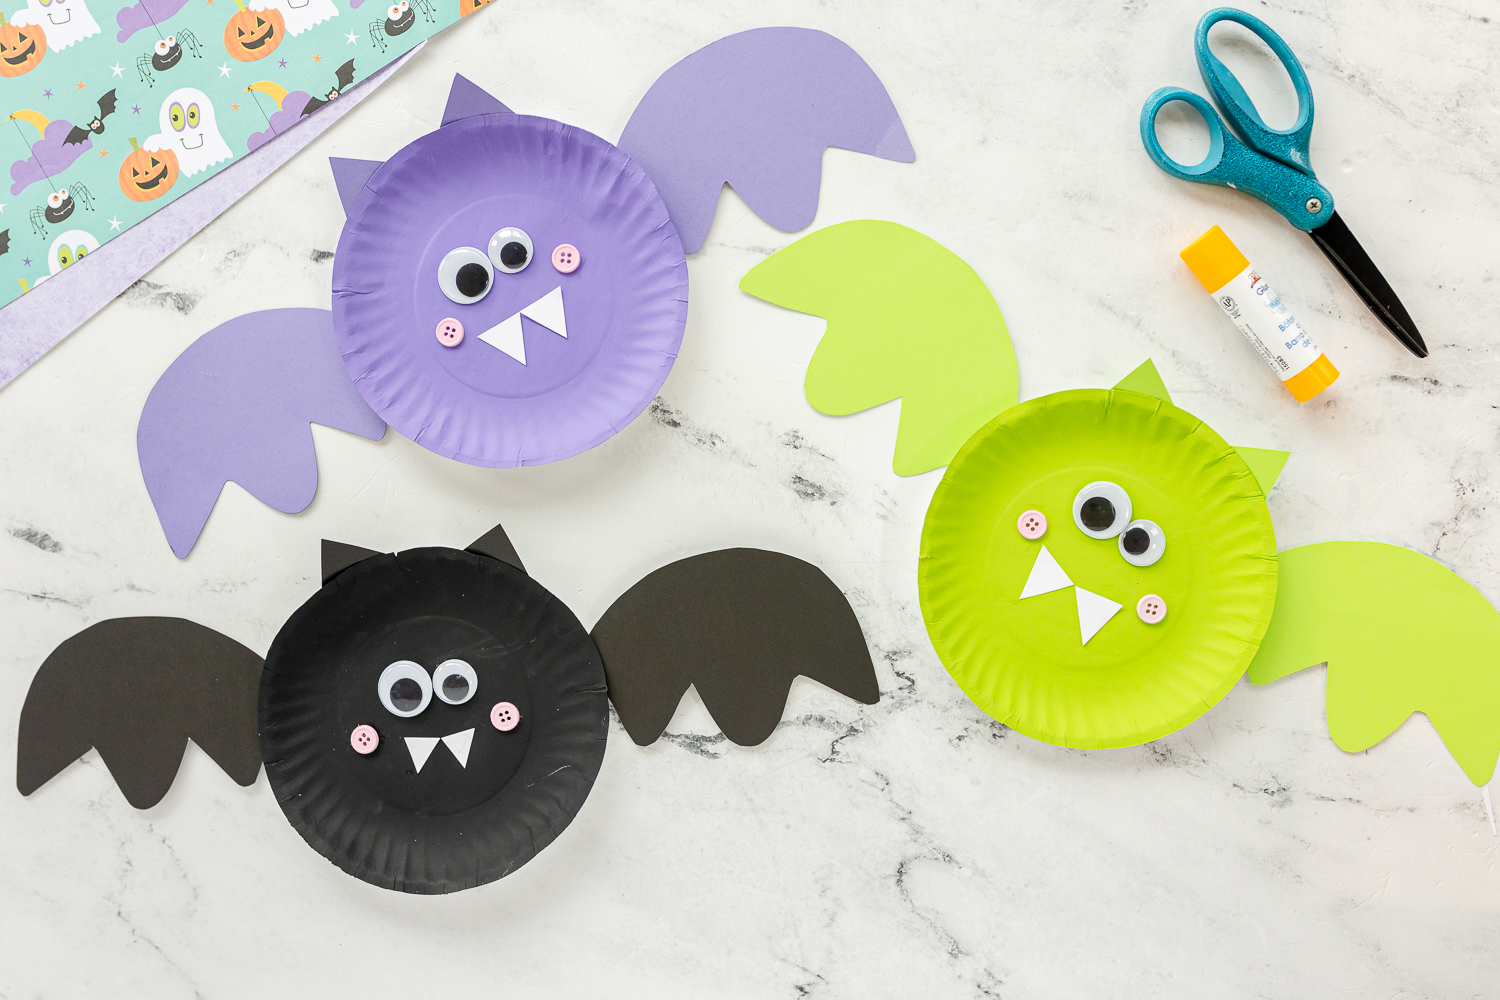
Paper Plate Bat
Get ready to unleash your creativity with this spooktacular Halloween craft! Using simple materials like paper plates, paint, cardstock, googly eyes, and buttons, you’ll transform ordinary dessert-sized plates into adorable and eerie bats. In this blog post, we’ll guide you through the process step by step, resulting in a delightful Halloween decoration that’s perfect for parties or spooky home decor. Let’s get started!
Why You’ll Love Making This Paper Plate Bat
- Easy-to-Find Supplies: This project uses simple materials like paper plates, paint, and cardstock — all things you might already have at home or can grab quickly from the craft aisle.
- Great for All Ages: Whether your kids are little or a bit older, this craft is easy to adapt and fun for everyone. It’s the perfect activity to do together as a family or during an afternoon playdate.
- Playful and Cheerful: Bright colors, googly eyes, and sweet little details like buttons bring this project to life. It’s a fun way to add a touch of creativity and joy to your seasonal crafts.
- Budget-Friendly Fun: You don’t need fancy supplies to make something adorable! This craft keeps costs low while adding a special homemade touch to your fall season.
Materials Needed To Make Paper Plate Bats
- Paper plates (dessert size)
- Purple, black, and lime green paint
- Purple, black, lime green, and white cardstock
- Googly eyes (small and large)
- Pink buttons

How To Make a Popsicle Stick Arctic Fox
Step 1: Paint your Paper Plates
Begin by painting the paper plates in a vibrant palette of purple, black, and lime green. Let them dry completely, ensuring a vivid and even coat.

Step 2: Craft Bat Wings and Faces
Using the colored cardstock, cut out bat wings in varying shades of purple, black, and lime green. These will serve as the wings for your spooky bats. Additionally, cut out small ear pieces using the same colored cardstock.

Step 3: Attach Wings and Face Piece
Apply glue to the back of the wings and carefully attach them to the sides of the paper plate, creating the bat’s wingspan. Next, attach the small face pieces to the center of the plate. This will give your bat its distinct features.

Step 4: Embellish with Pink Buttons.
For an extra touch of charm, attach pink buttons to the bat’s face as rosy cheeks. This small detail adds a sweet and playful element to your spooky creation.

This craft is not only fun and easy but also allows for endless customization, making each bat uniquely yours. Whether displayed on walls, hung from ceilings, or used as table decor, these bats are sure to bring a touch of Halloween magic to any space. Embrace the spirit of the season and let your imagination take flight with these delightful DIY bat crafts. Happy crafting and Happy Halloween!


ADORABLE!! Is there a link to Amazon supplies needed? Particularly the buttons and eyes? A pattern for wings and ears? Thank you!