As an Amazon Associate I earn from qualifying purchases.
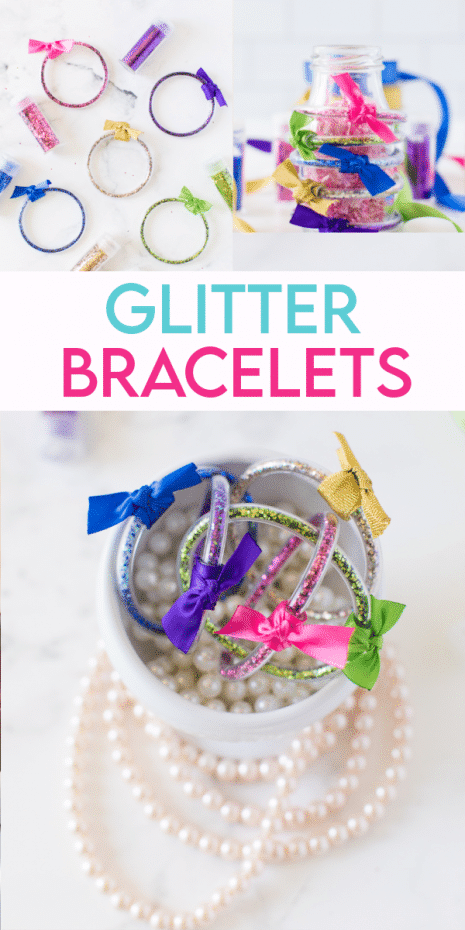

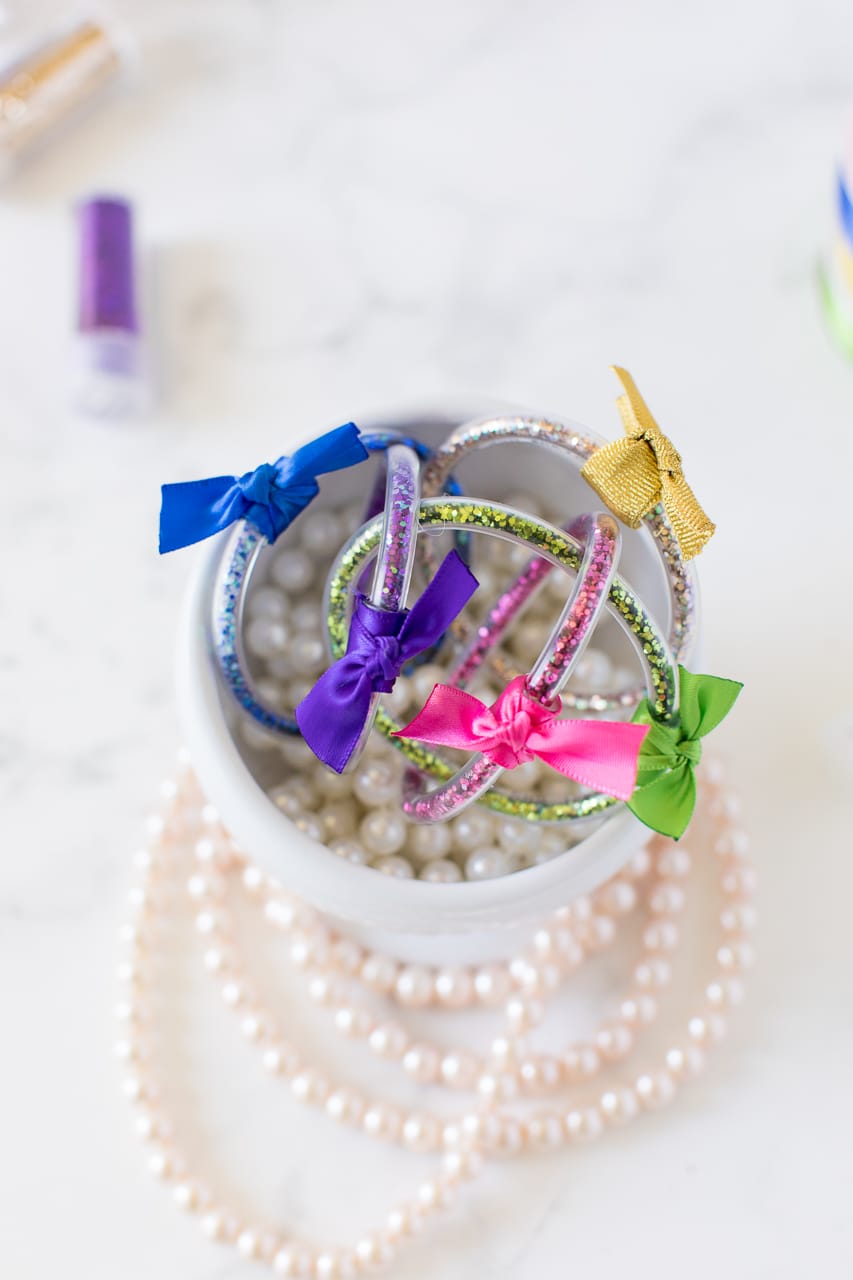
Glitter Bracelets are such a fun and sparkly craft for girls. These are the perfect kid friendly accessory they will love to match with their outfits or use for dress-up play!
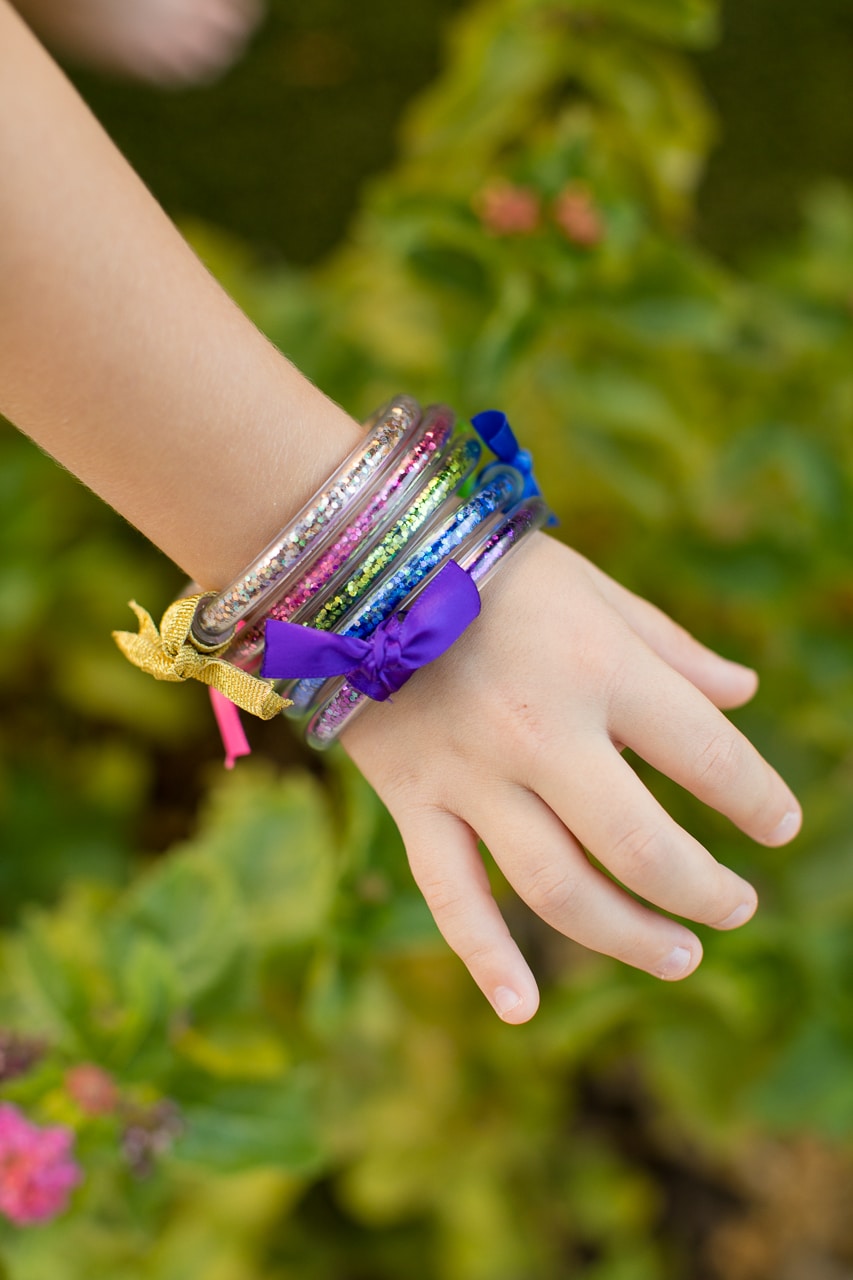
GLITTER BRACELETS
These glitter tube bracelets are not necessarily new in the crafting world. Glitter water bracelets have been around for years and after researching and testing a few different versions we found the one that is less mess, minimal supplies, and the perfect colorful accessory for girls of all ages.
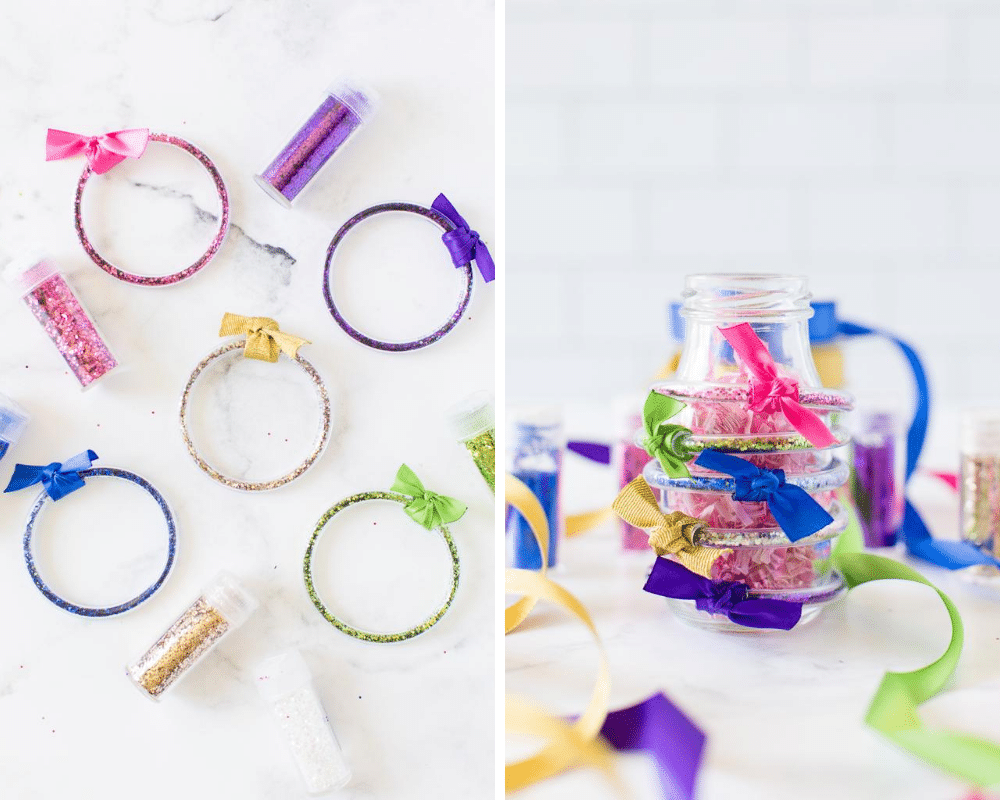
ALL THE GLITTER. LESS MESS.
Many tutorials use a mixture of glitter, water, and a touch of baby oil. While this method allowed slightly more movement in the bracelet and mimicked the feel of a water bracelet more it created a much bigger mess and in my opinion wasn’t worth it. Especially when trying to craft with my young daughter. 🙂 For this particular tutorial you only need FOUR supplies:
- Plastic vinyl tubing – I used 1/4 inch for the bracelet and 3/8 inch for the connector piece. You can find this vinyl at your local hardware store or Amazon
- Glitter – I prefer chunky, in any of your favorite colors
- Ribbon – I used 3/4 inch ribbon
- Hot Glue
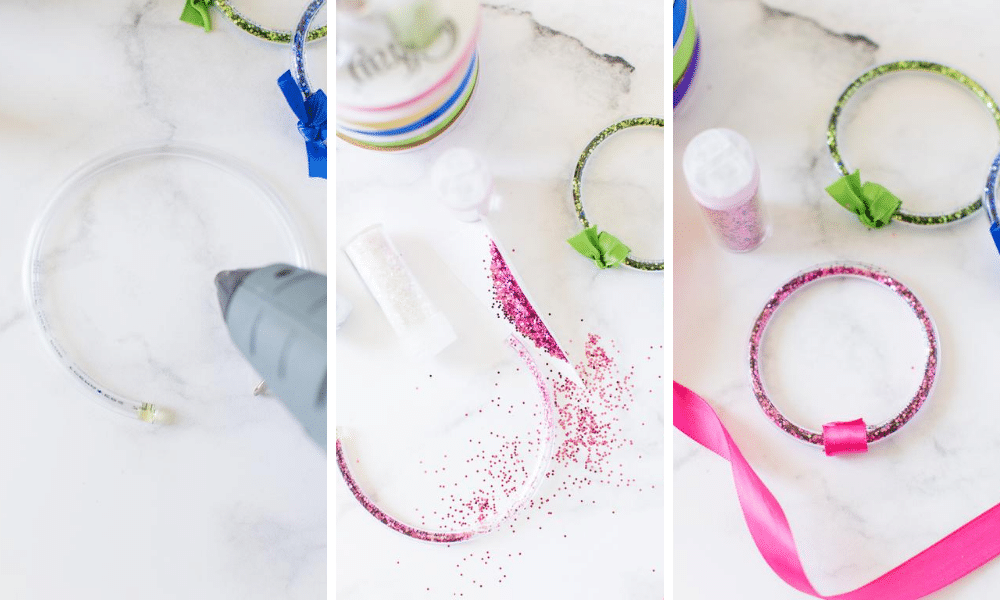
HOW TO MAKE GLITTER TUBE BRACELETS
- Begin by measuring the ¼ inch (smaller) tubing around your childs wrist to make sure it will fit (these go on like bangles so you want to make them a tad bigger than their wrist to get them over their fingers) CUT.
- Cut a ¾ inch piece out of your larger tubing (⅜ inch piece).
- Hold your large tubing piece and insert hot glue into one end and fill that side . Quickly add one end of your smaller tubing in it. Hold in place until set and glue has hardened. This will act as a plug so your glitter doesn’t fall out.
- Make a small funnel with a piece of paper. Add small amounts of glitter in the tubing. Fill the tube a tad more than 3/4 of the way full, if you want some movement in the glitter..
- Add more hot glue into the other side of the larger piece of tubing and insert remaining small end in. Hold in place and allow to cool until it hardens.
- Take your ¾ inch ribbon and wrap a piece around your larger piece of tubing. Secure with hot glue. Tie a matching piece of ribbon around the area you just covered.