As an Amazon Associate I earn from qualifying purchases.
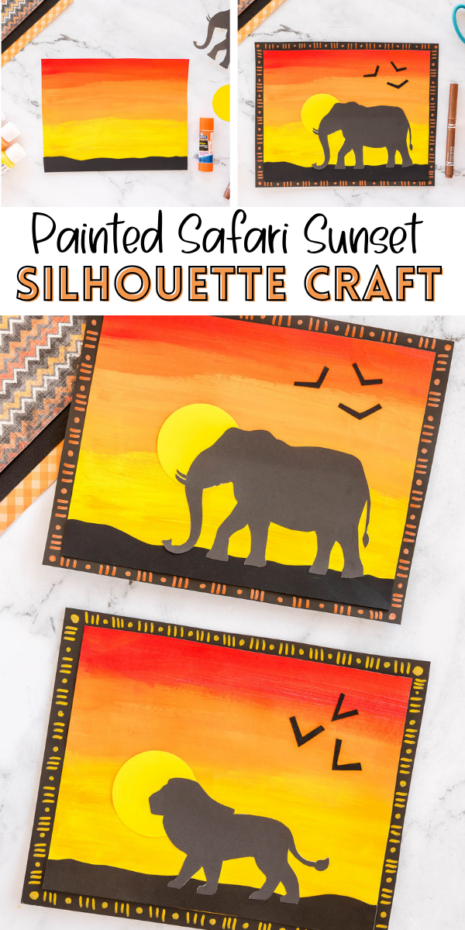
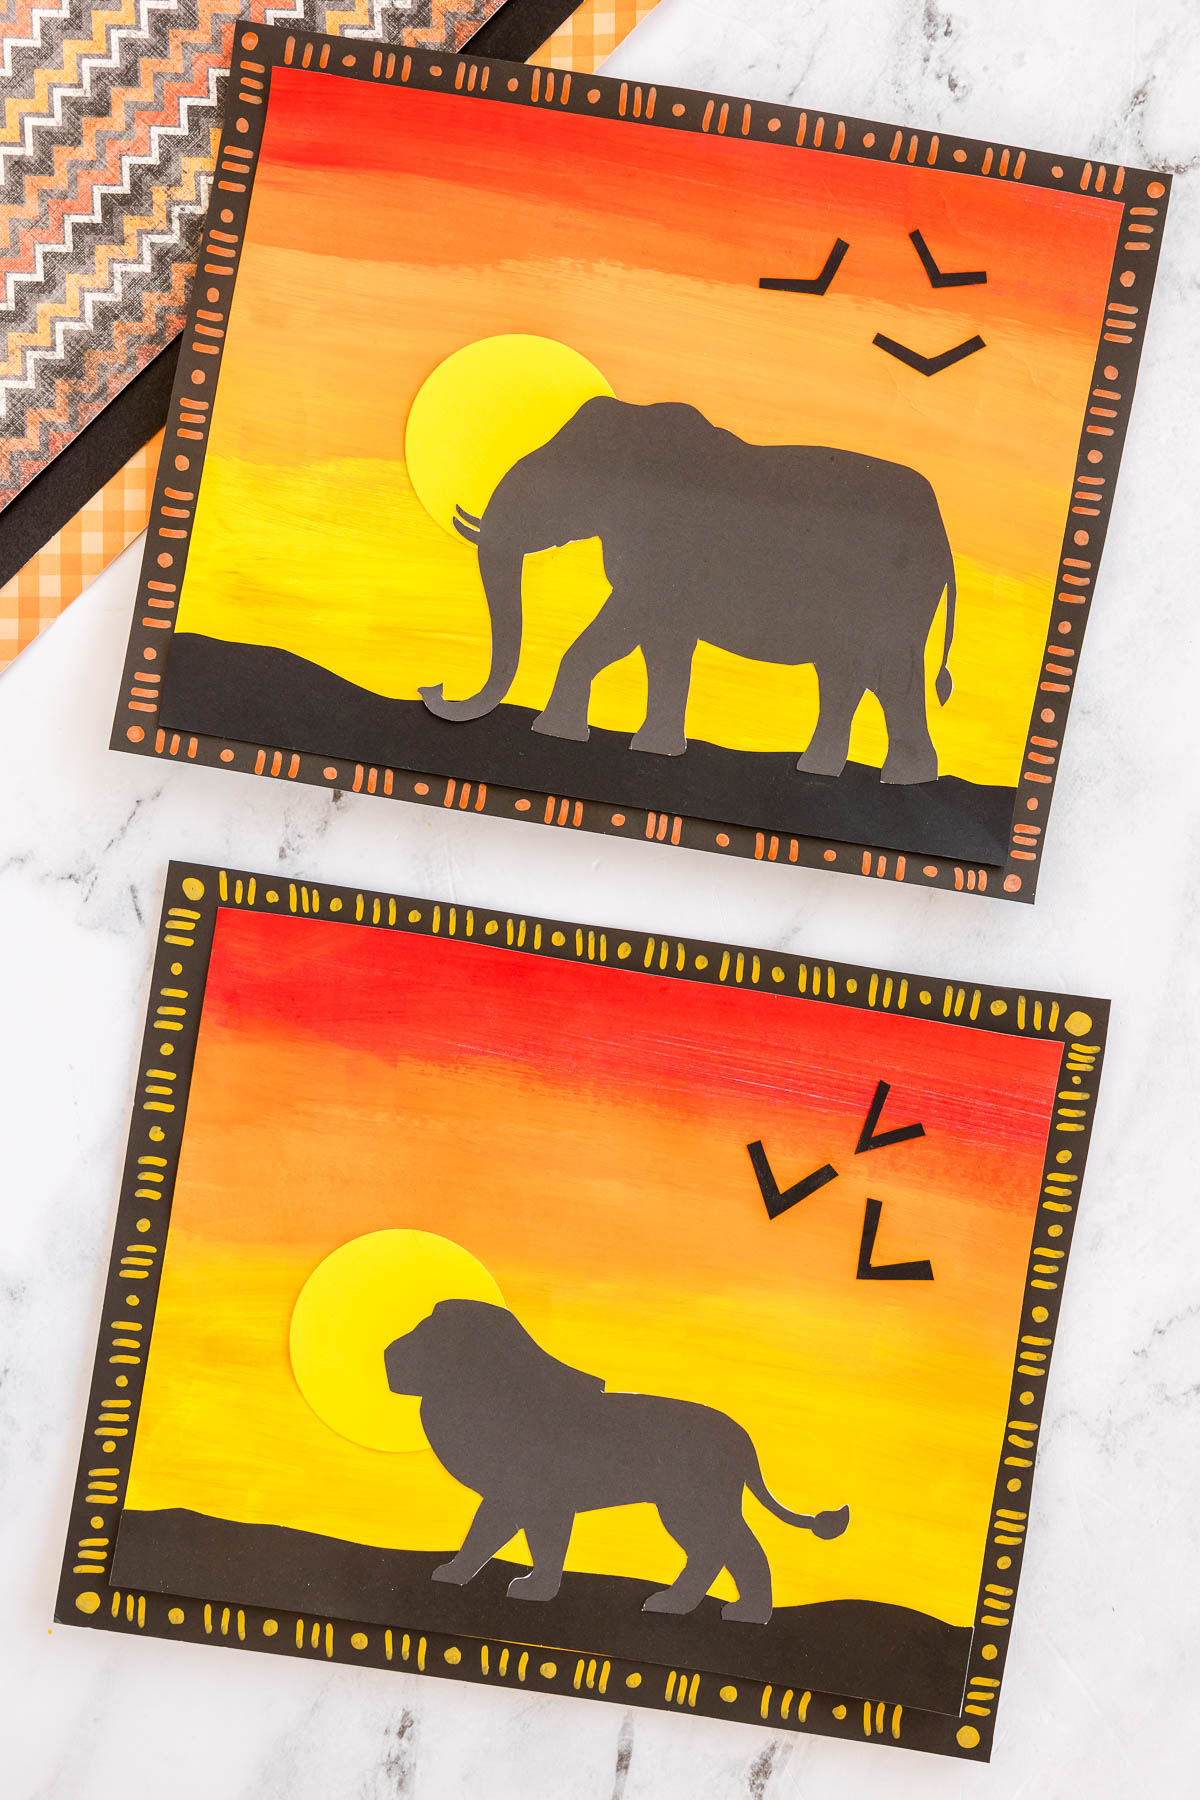
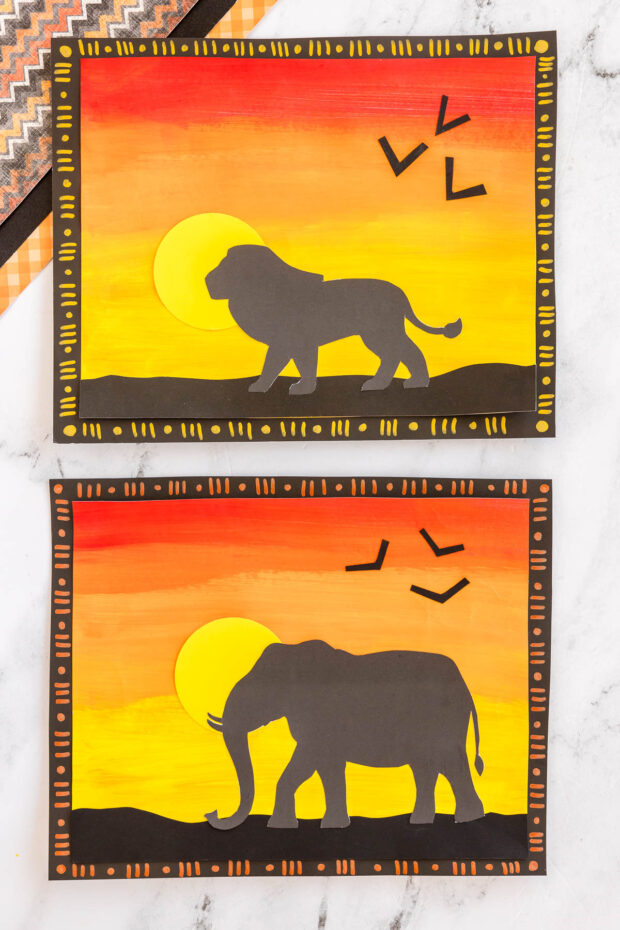
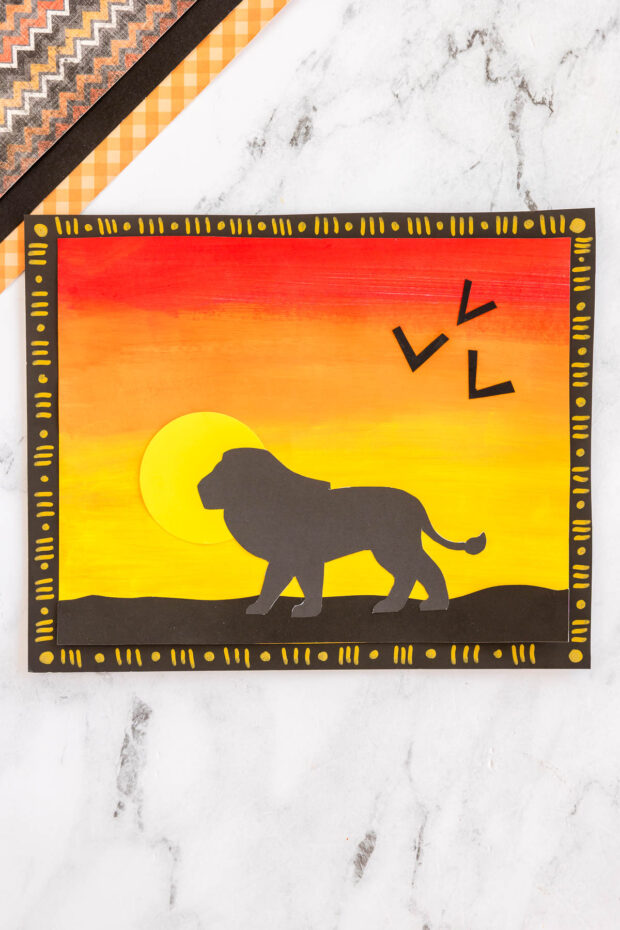
This Painted Safari Sunset Silhouette Craft for kids uses warm sunset colors and animal silhouettes to create a bold, beautiful art project perfect for an animal or safari theme.
Safari Sunset Craft
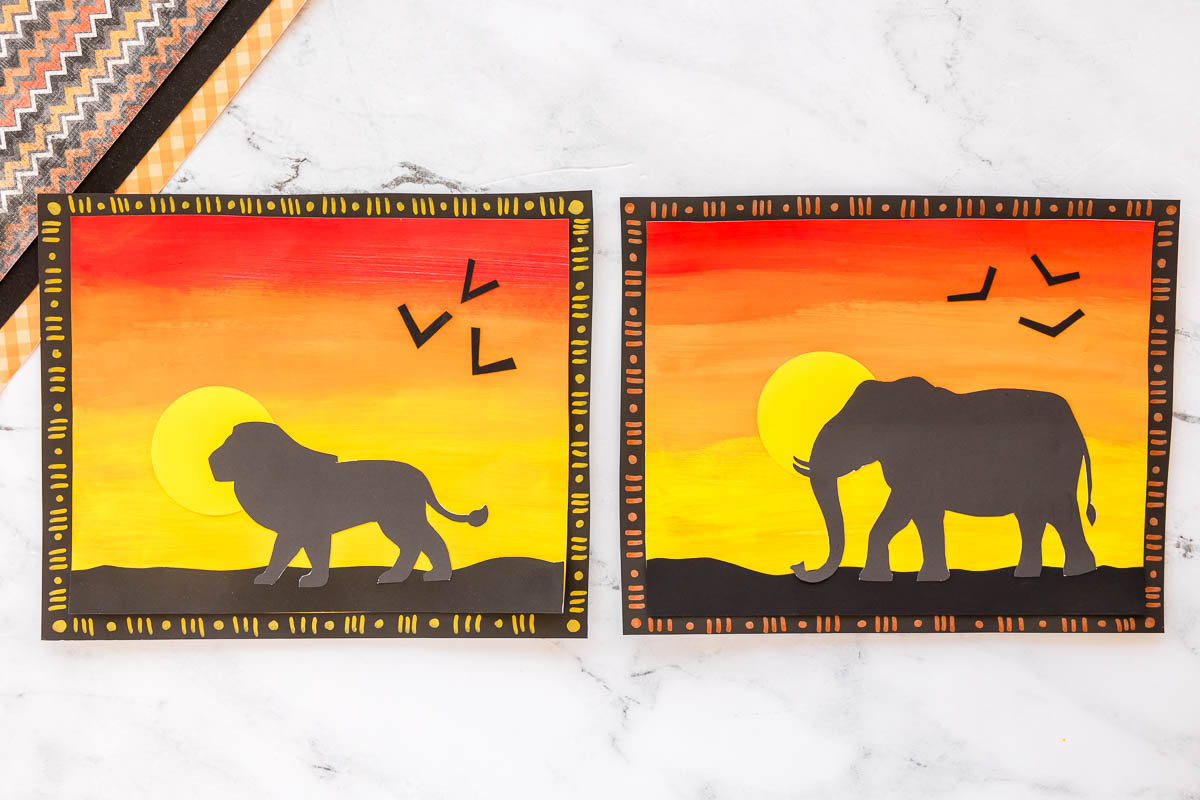
This Safari Sunset craft brings the beauty of the savanna right to your art table! Kids use red, orange, and yellow paint to create a vibrant sunset background with no need to rinse brushes in between colors. Once the background dries, they add black paper silhouettes of safari animals like elephants and lions, giving the project a dramatic and artistic feel. A hand-drawn border finishes off the look with a touch of African-inspired pattern design. With both simple and slightly more detailed templates included, this craft is perfect for a wide range of ages and abilities!
Safari Animal Silhouette Templates
Our safari animal silhouette template includes a mix of simpler and more detailed silhouettes so kids can choose what feels right for them. The lion and elephant shapes, along with one of the trees, are easier to cut and great for lower elementary kids. The giraffe and the more intricate tree offer a fun challenge for older kids who enjoy working with finer details. This makes the craft easy to adapt for different ages and abilities, so everyone can create a beautiful safari scene they’re proud of.
Materials Needed To Make A Sunset Safari Craft
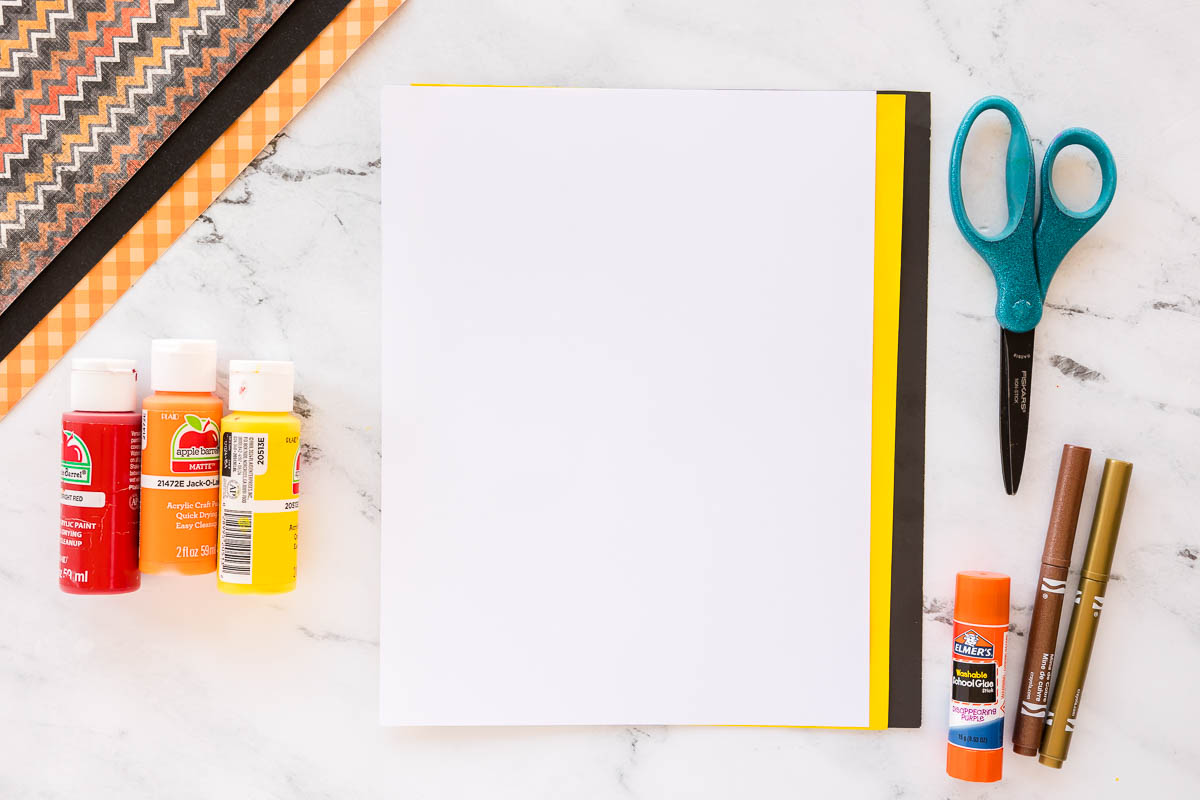
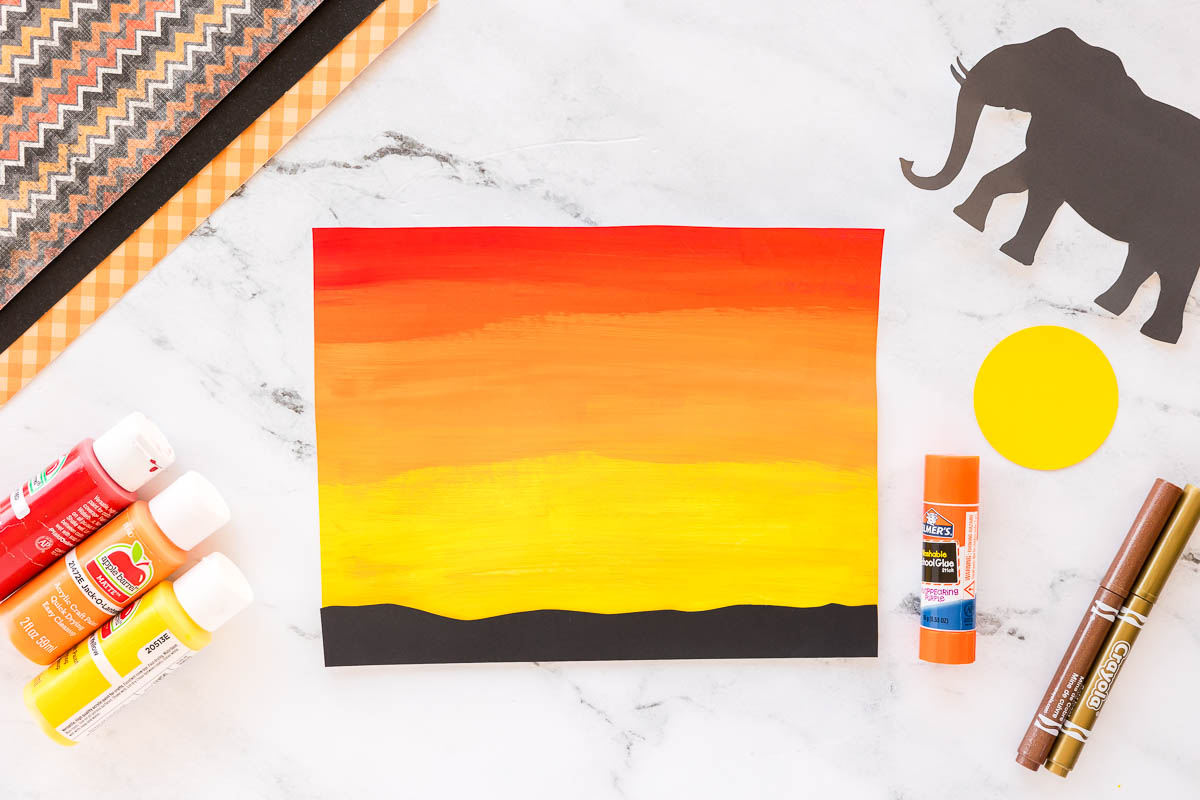
- Red, orange, and yellow craft paint
- Paintbrushes
- White Cardstock or thick paper – we cut ours to be about 6-7 inches tall by 8.5 inches wide.
- Black construction paper or Cardstock
- Safari animal silhouette templates (easy and challenging versions)
- Scissors
- Glue sticks
- Metallic markers
- Optional: circle punch or yellow paper for sun shapes
How to Make a Safari Sunset Craft
STEP ONE:
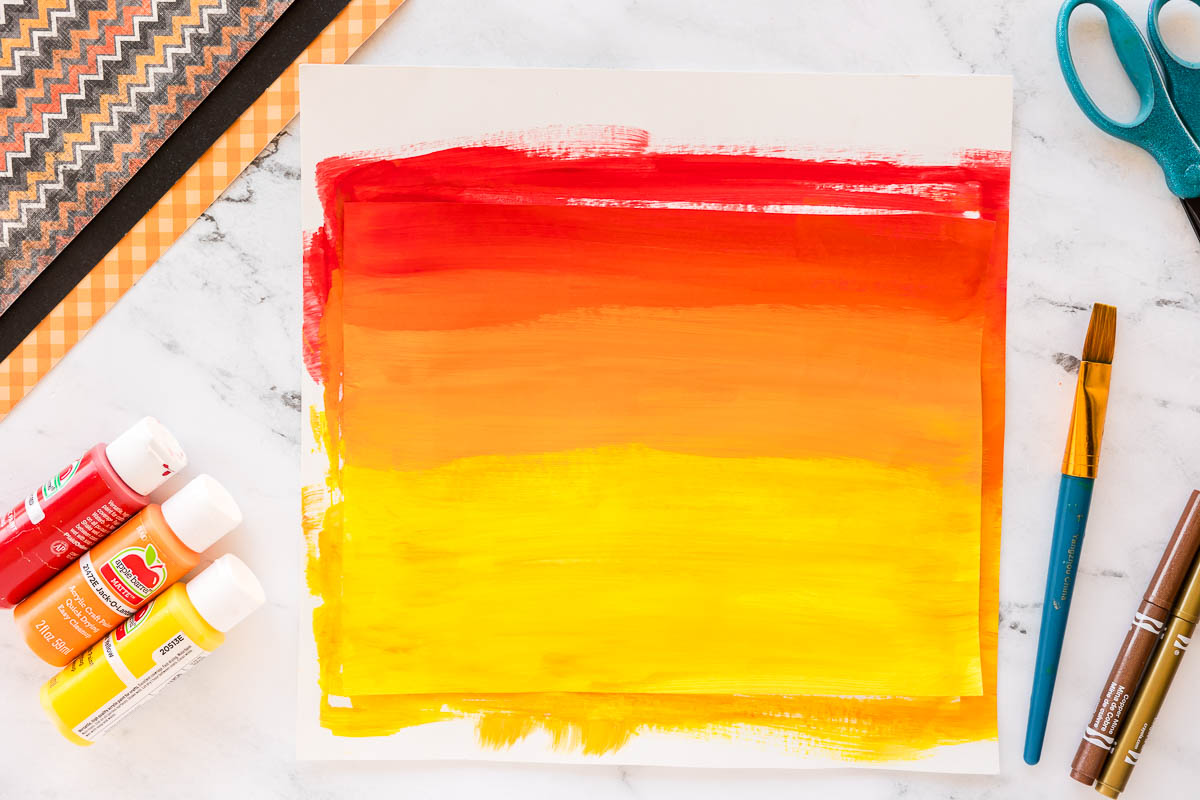
- Using red, orange, and yellow paint, create a sunset by brushing the colors across the page in horizontal strokes. No need to rinse brushes between colors Let kids enjoy the blending! You will want to start with red and work your way down, then move onto to orange and finally yellow.
- Set aside to dry before adding paper elements.
STEP TWO:
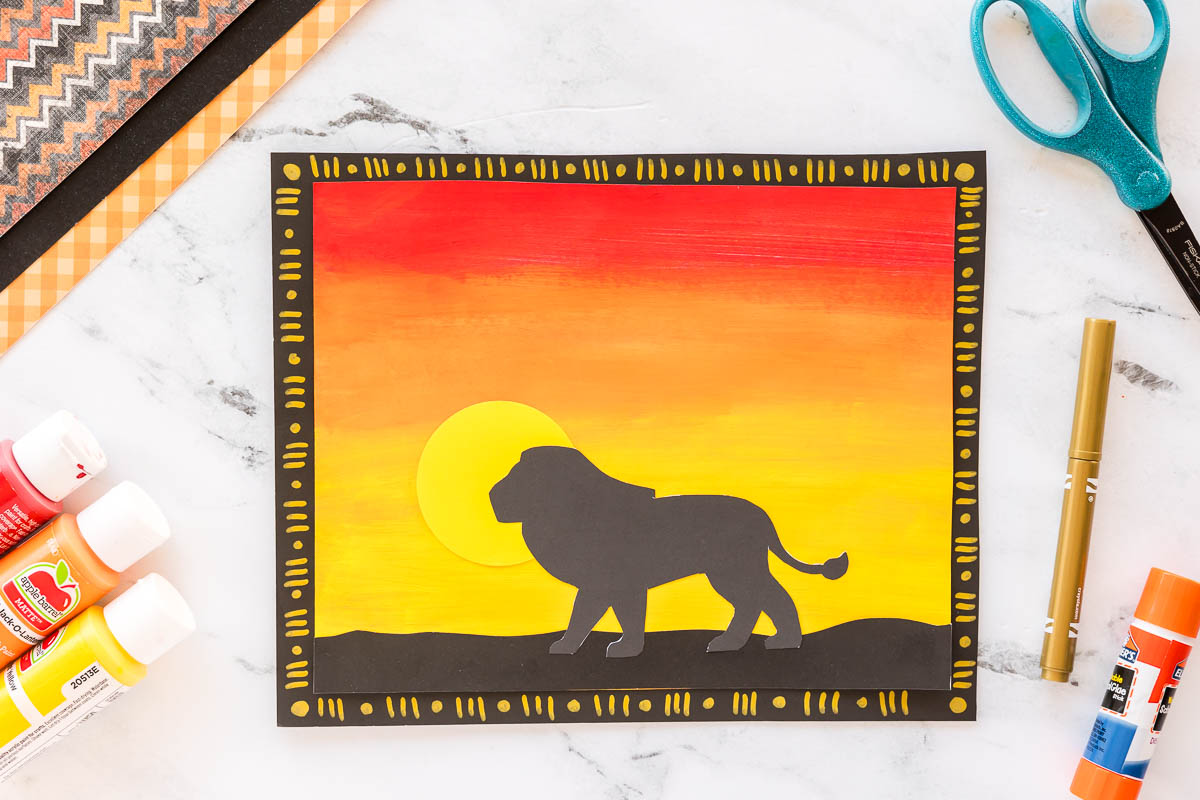
- Choose your animal silhouette – Pick from the provided templates—some are simple for younger kids, others offer more detail for older crafters.
- Cut out the silhouette – carefully cut along the outline and set it aside.
- Cut a strip of black paper – tear or cut a curved black strip to represent the horizon/ground and glue it to the bottom of the painted background.
- Glue the animal silhouette – Place the animal on top of the horizon and glue it down firmly.
STEP THREE:
- Place the animal silhouette on top of the horizon and glue it down firmly.
- Cut a yellow circle (or use a large circle punch) and glue it behind or near the animal for a glowing sun effect.

STEP FOUR:
- Glue the finished sunset scene onto a larger sheet of black paper. Then, use scissors to trim around the edges, leaving a border. This creates a bold frame effect. If you’d like, use metallic markers to create a pattern design around the edges.
STEP FIVE:
- Use small strips of black paper or draw “V” shapes in the sky to represent flying birds.

For more Safari Crafts Try These: