As an Amazon Associate I earn from qualifying purchases.
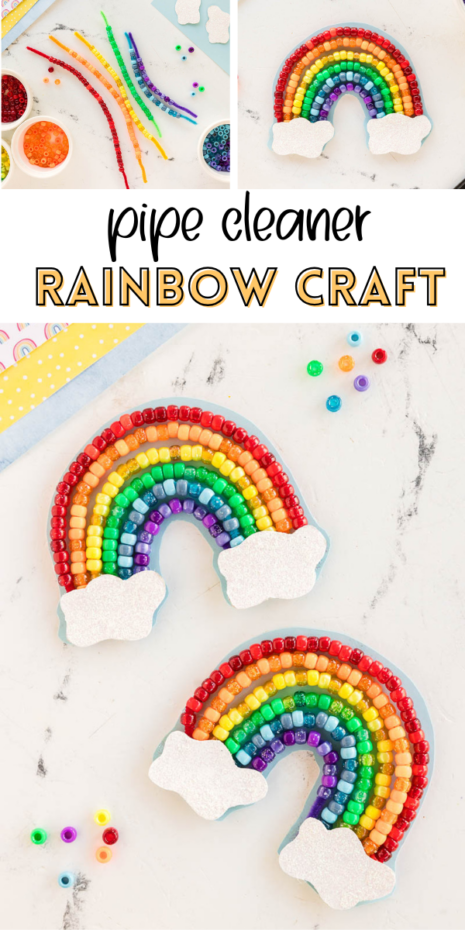
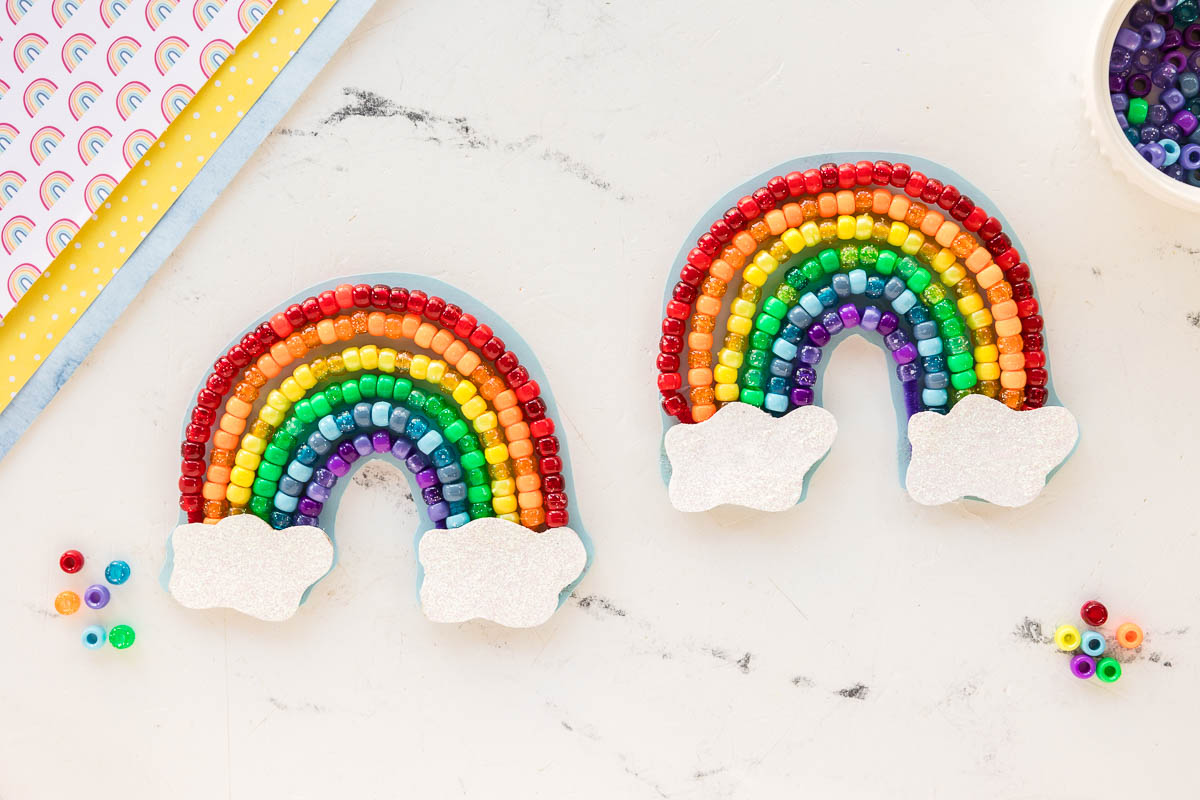
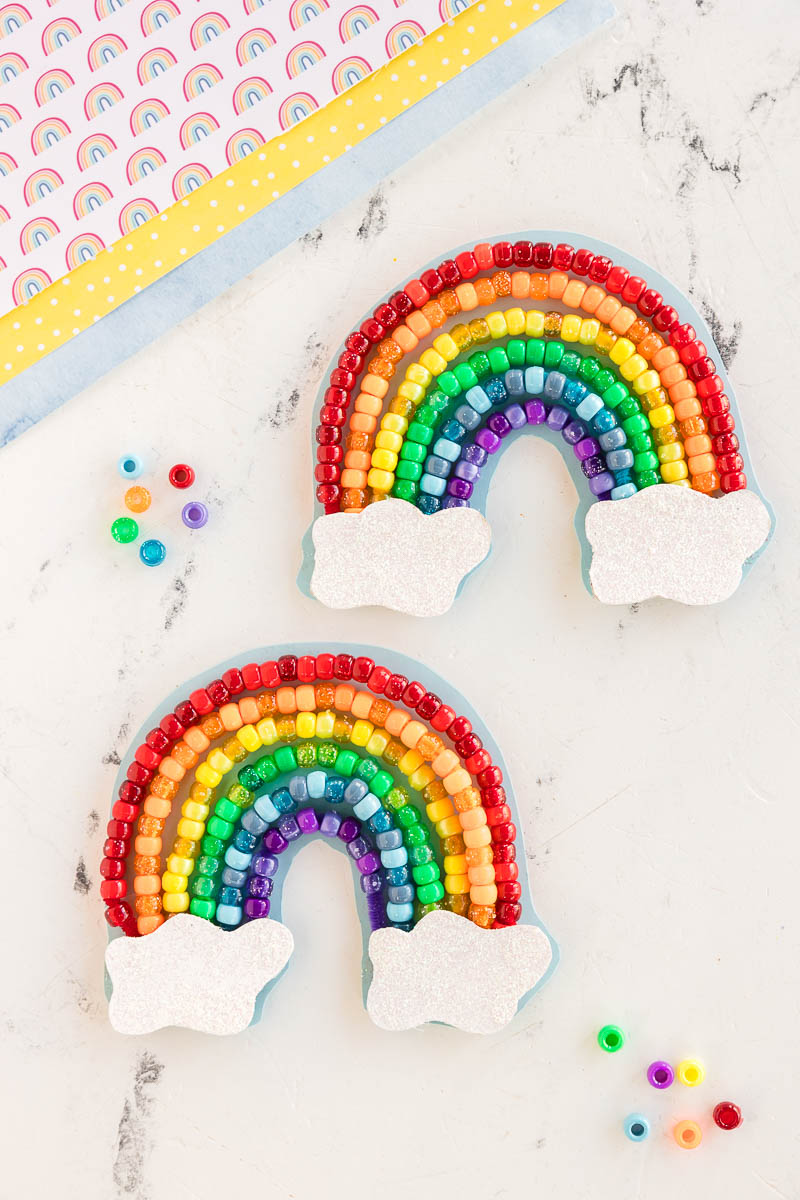
This beaded pipe cleaner rainbow craft is a bright and fun project kids will love making with colorful pony beads. It’s low-prep and perfect for weather crafts or creative play.

Beaded Pipe Cleaner Rainbow Craft
This Beaded Pipe Cleaner Rainbow Craft is a fun, hands-on project that keeps kids engaged while creating something bright and cheerful. Sliding beads onto pipe cleaners and shaping them into a rainbow gives kids plenty of time to focus and create patterns. For the littlest of crafters it explores color recognition and further develops fine motor skills.
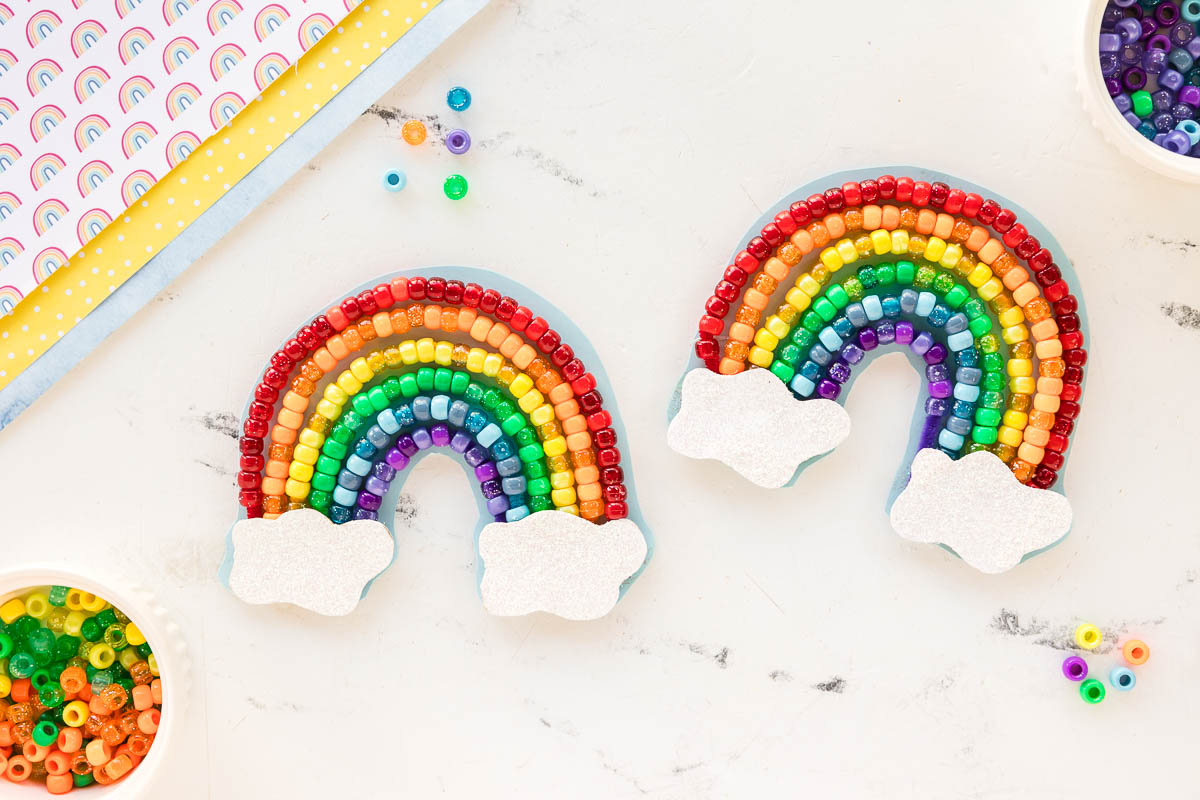
We added these cute little rainbows to our craft bulletin board at home but you can also add a small magnet to the back of them and use them as refrigerator decor.
Materials Needed To Make A Pipe Cleaner Rainbow
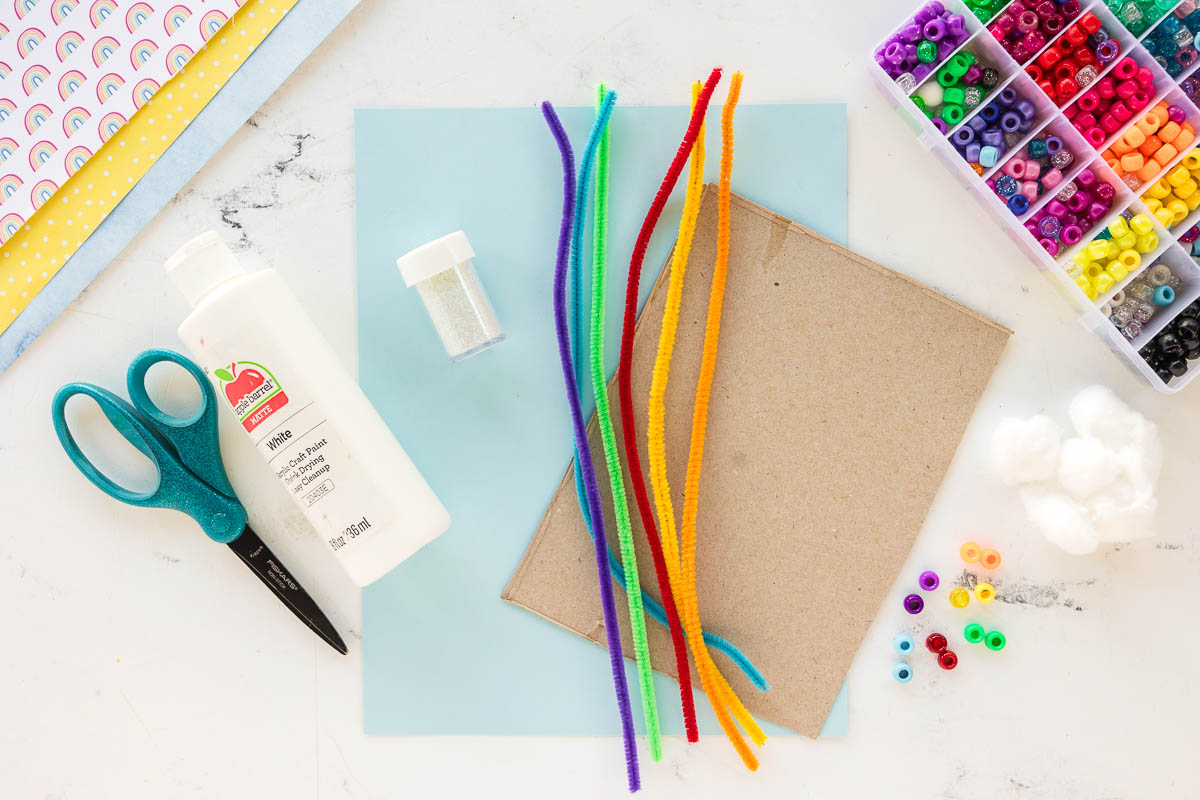
- Pipe cleaners (red, orange, yellow, green, blue, purple)
- Cloud Template
- Pony beads in rainbow colors
- Thin Cardboard, such as from a cereal box
- Light blue cardstock paper
- White craft paint
- White glitter or glitter glue
- Cotton balls
- Double sided tape, optional but helpful!
- Scissors
- Glue
How to Make a Pipe Cleaner Rainbow
Step 1
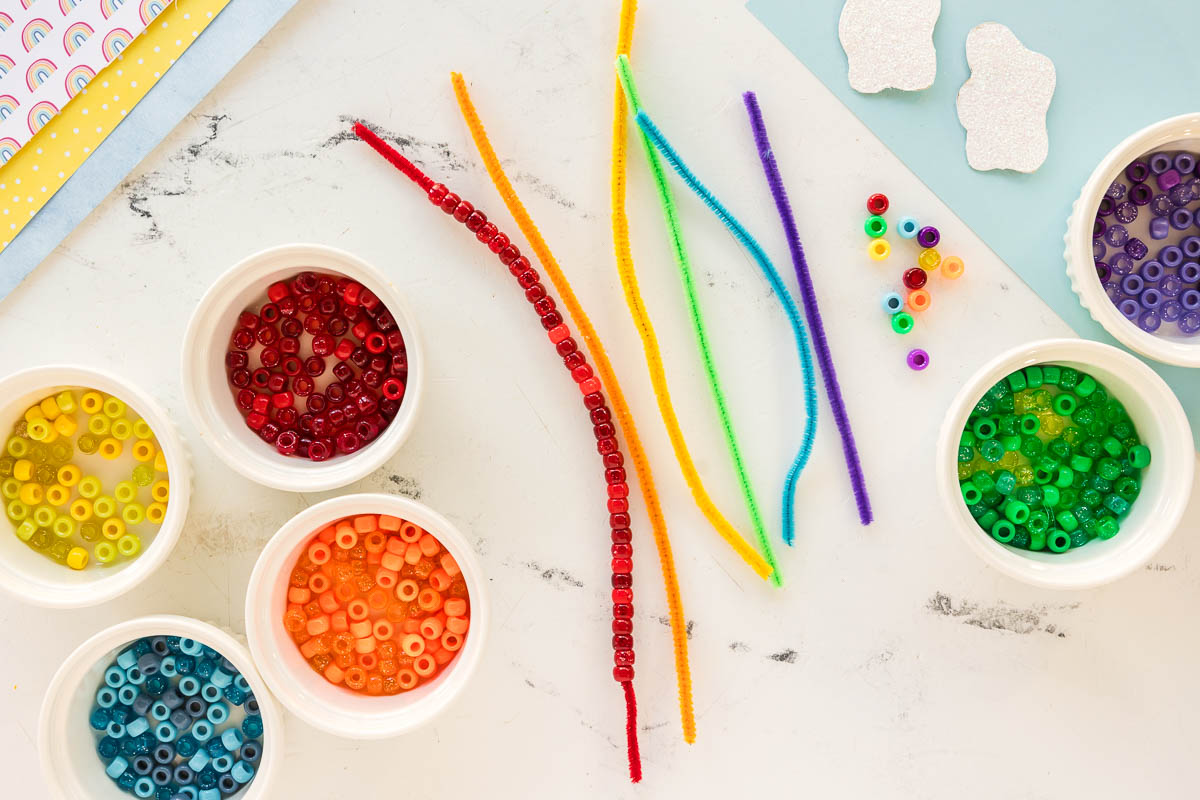
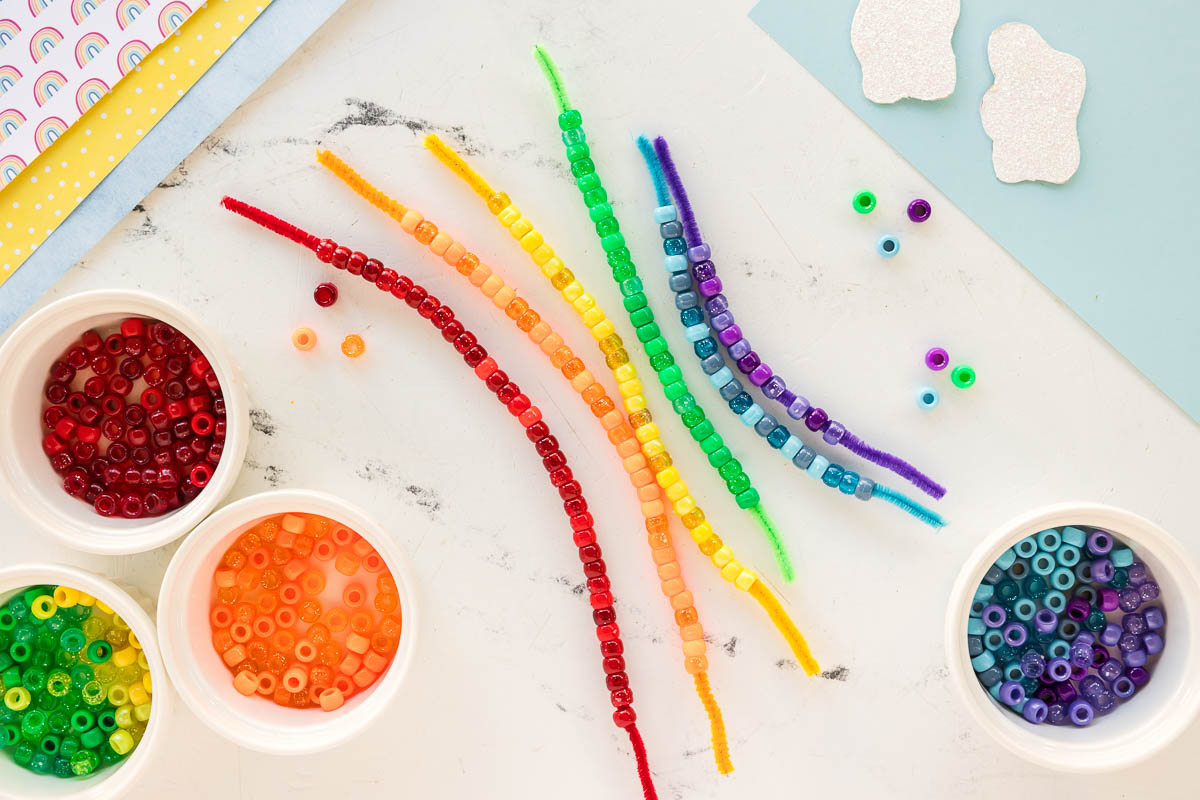
- Start off by trimming each of your pipe cleaner by one inch so that they gradually get smaller. Start with red and work in rainbow order. Red will be untouched, orange you will cut off an inch, yellow two inches, green 3 inches and so forth. Thread the same colored beads onto your colored pipe cleaners, leaving a space of about 1 inch on either side of your pipe cleaner empty.
Step 2
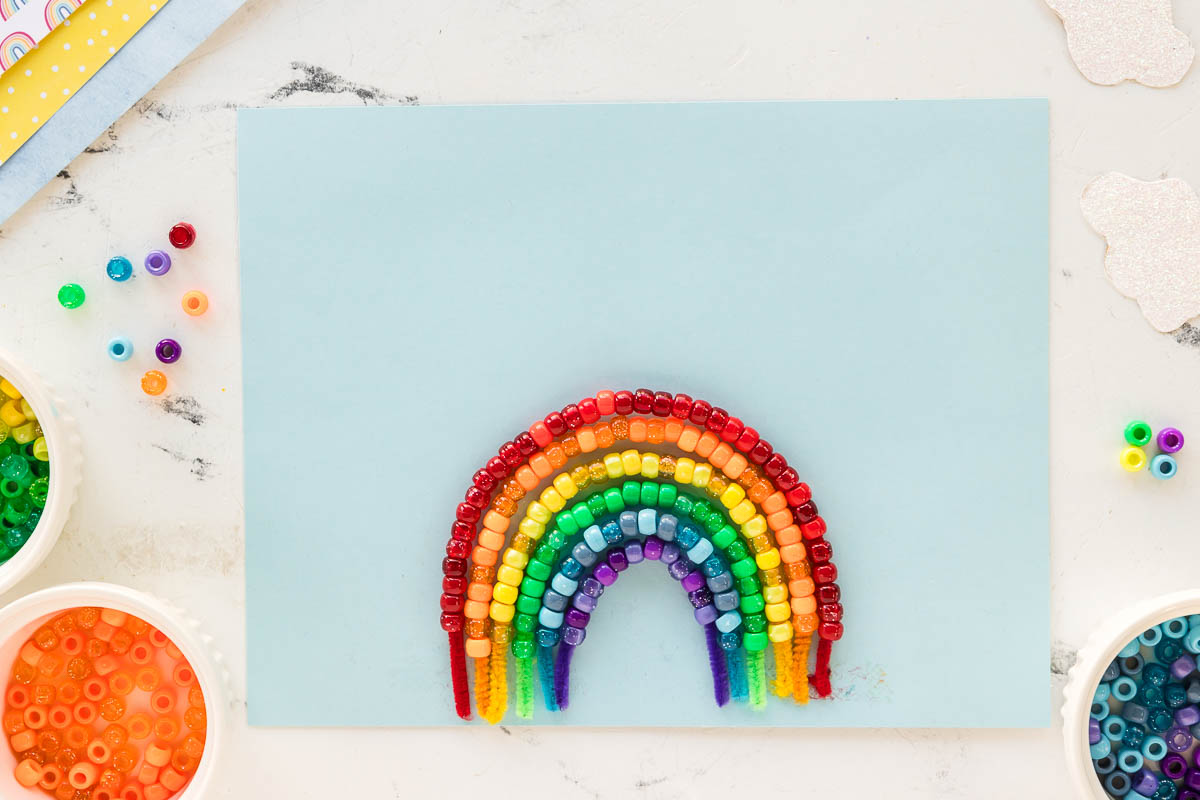
- Lay (2) two inch long strips of double sided tape onto your blue paper. Leaving a small 2 inch gap between the two pieces. Starting with your purple piece, press ends onto the double sided tape to help hold in place. Repeat with your remaining colors.
Step 3
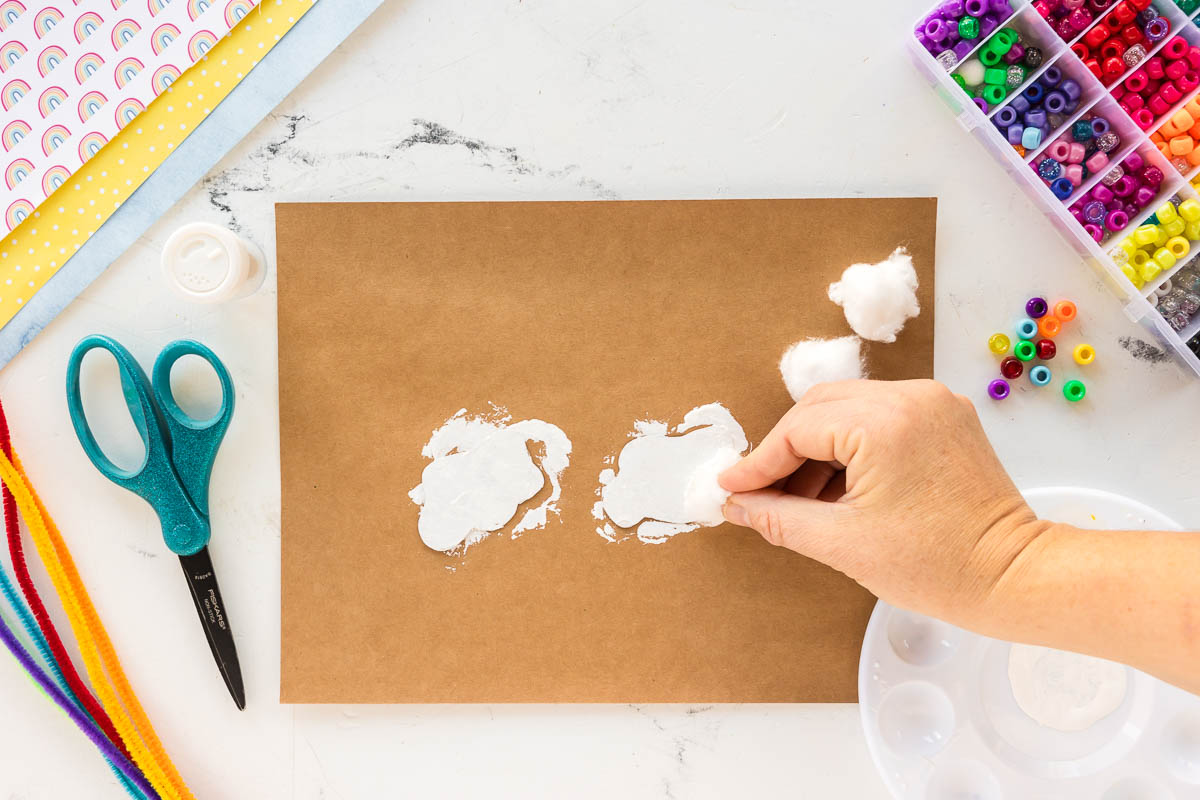
- Using our cloud template, cut out two clouds from your thin cardboard. Using a cotton ball, or a paint brush, dab or paint your cloud white.
Step 4
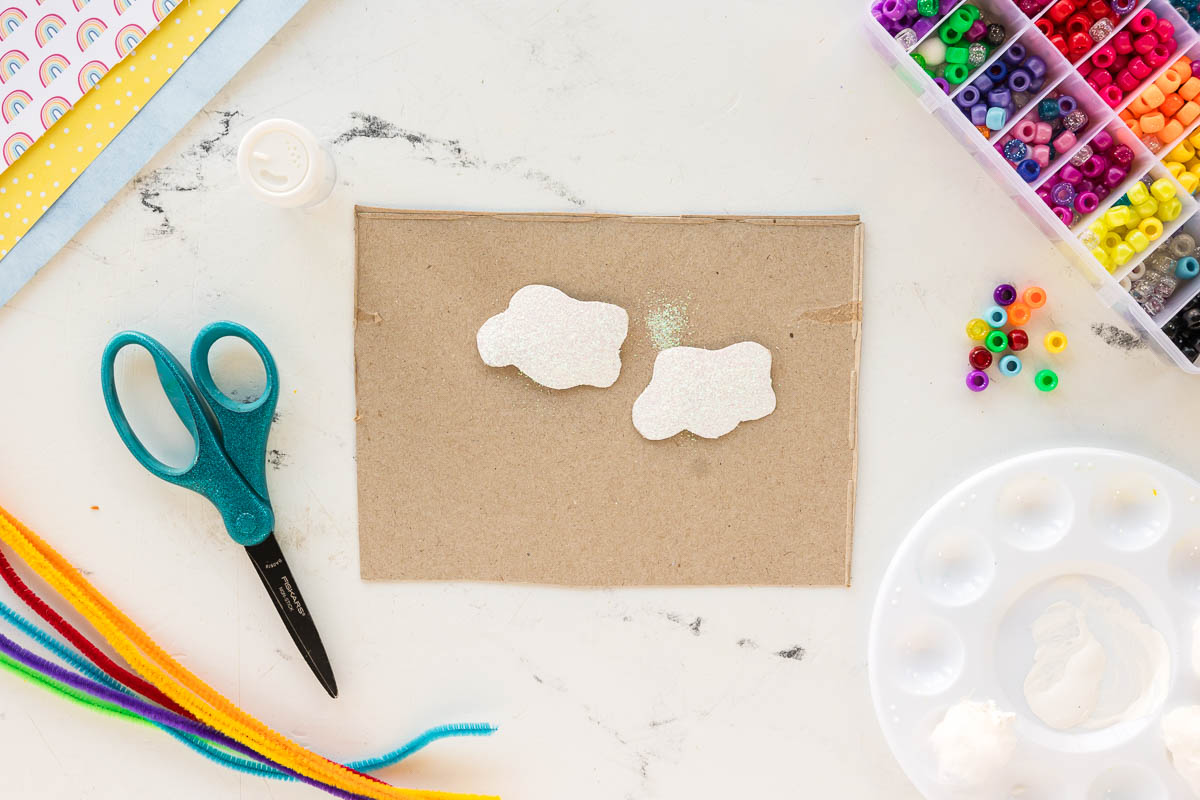
- While the paint on your clouds is still wet, sprinkle with glitter. Shake excess off. This is completely optional and we understand some have a love hate relationship with glitter. 🙂
Step 5
- Glue your clouds to the base of the rainbow. We preferred to use hot glue for this step to ensure everything remained sturdy, but ONLY adults should use a hot glue gun. This worked well for us as we have our rainbow attached to a bulletin board currently. You can also add a magnet to the back for some refrigerator fun!

Step 6
- For extra stability you can add few drops of glue behind the strands of beads. Let dry. Cut around the rainbow shape leaving a small amount of cardstock showing. We call this a “sticker cut”
Crafty Tips:
- Sort beads first: Pour beads into small bowls or muffin tins to make color choices easier and reduce spills.
- Secure the ends: Twist or fold the ends of the pipe cleaners once beads are on so nothing slides off.
- Shape after beading: It’s easier to thread beads first, then bend the pipe cleaners into a rainbow shape.


Good Morning! I am interested in creating this rainbow with my students, however, I don’t see a supply list or directions on this post. I’m just curious what you glued the beads and pipe cleaners to? Thank you so much for your help!