As an Amazon Associate I earn from qualifying purchases.
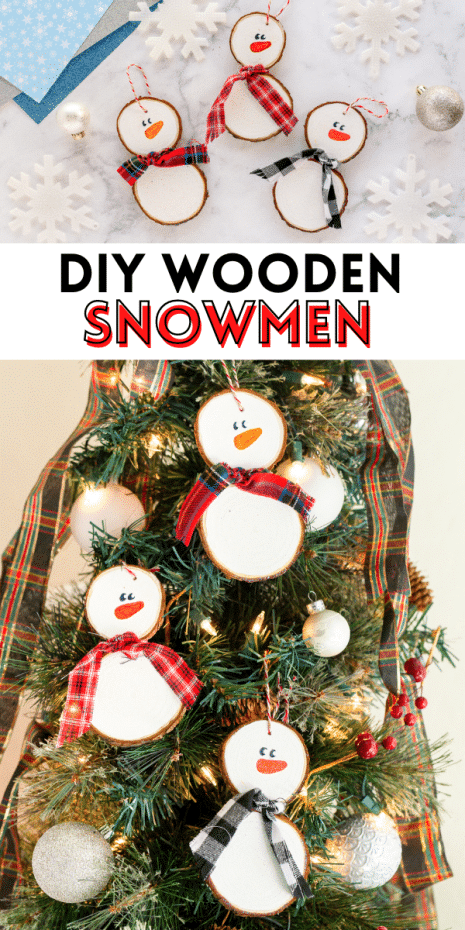
This adorable Wooden Snowman craft is perfect for those wintery, snowy days and makes great gifts or ornaments for your tree!
WOODEN SNOWMEN ORNAMENT
These wooden snowmen are such a simple craft that are great little home decor pieces, ornaments for your trees or even gift tags to give to friends. They are great to make while you watch a Christmas movie or with your friends to celebrate the holiday season. You need minimal supplies that you can find at most any craft stores and about 30 minutes of time.

WOODEN SNOWMEN HOW TO VIDEO:

How to Make a Wooden Snowman
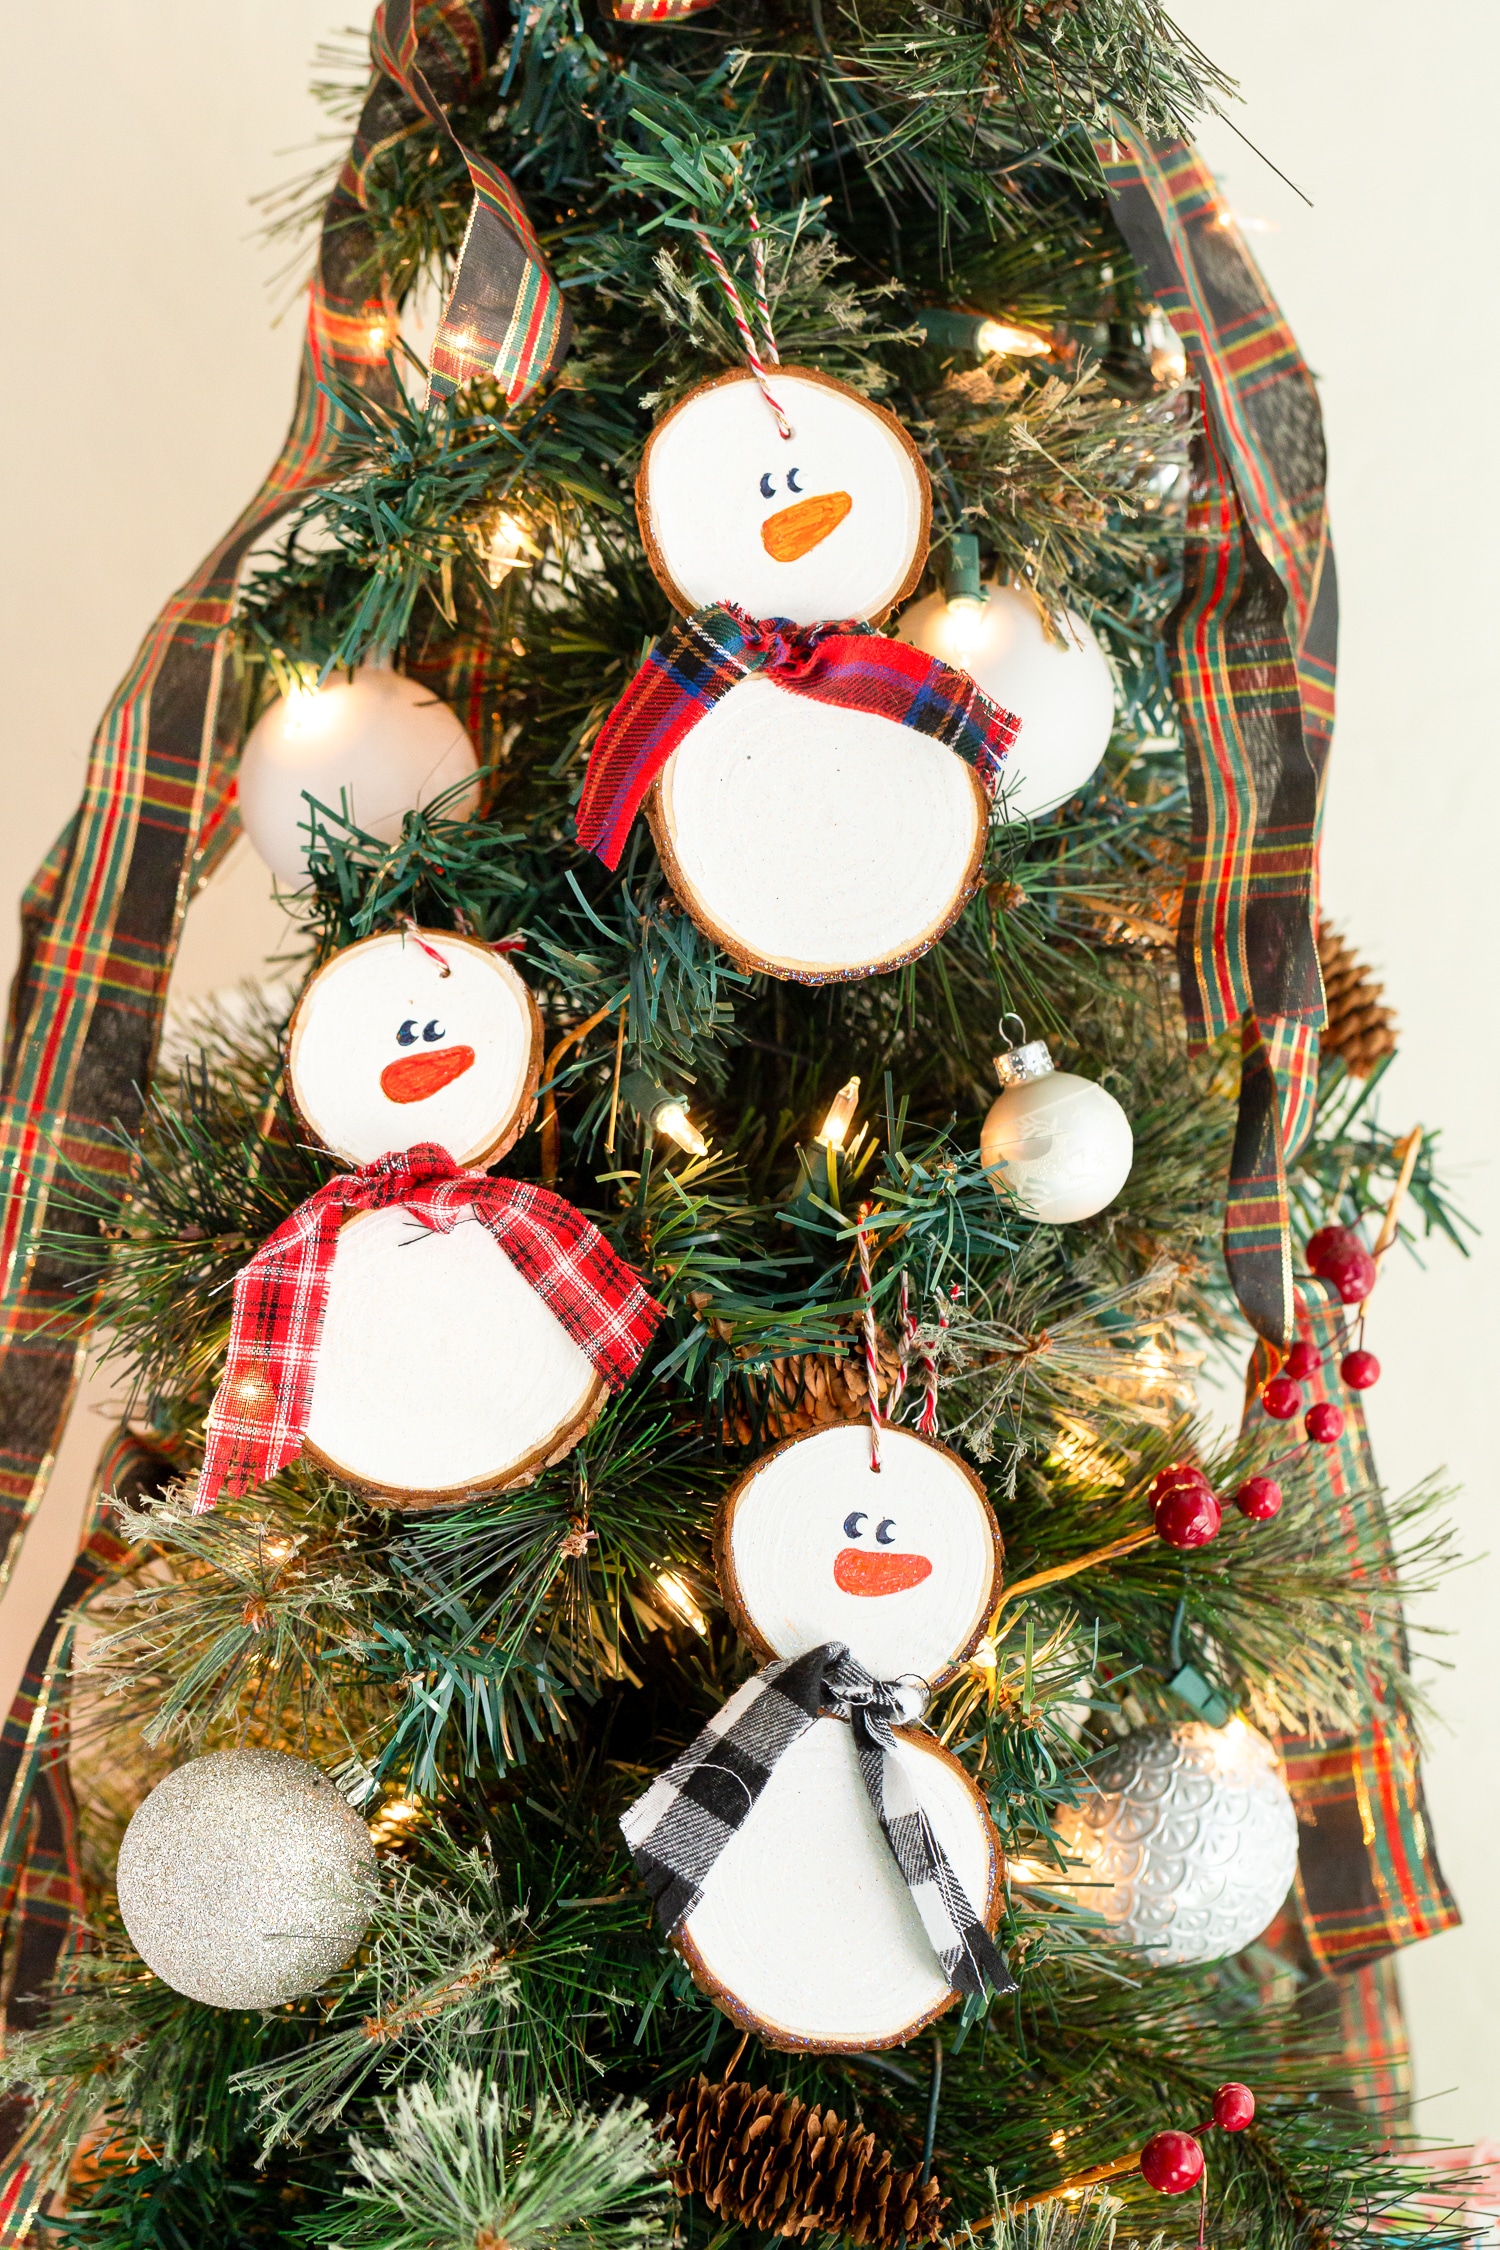
- Gather your wood slices and find two sizes that fit together well
- Using a mini popsicle stick, attach two wood slices together.
- Turn around and paint both the head and the body with white paint.
- Using your black and red/orange Sharpie markers, draw on a nose and two eyes.
- Using the bottom part of your paint brush add two small dots to the center of your draw black eyes.
- Allow to dry.
- Add a layer of Mod Podge around the whole snowman, apply light pressure around the Sharpie marker areas as it could cause it to bleed if it’s not dry.
- Attach a scarf and thread baker’s twine for hanging.

Tips to Make the Perfect Wooden Snowman
- If you dont’ want to use sharpie markers you can also use orange and black paint and paint on your faces. We have done both methods and they both work well.
- When picking wood slices, you want one to be slightly bigger than the other one because the smaller one will be the head of the snowman.
- You can use strips of fabric or ribbon for the scarf of the snowman.

For More Holiday Crafts, Click Here: