As an Amazon Associate I earn from qualifying purchases.

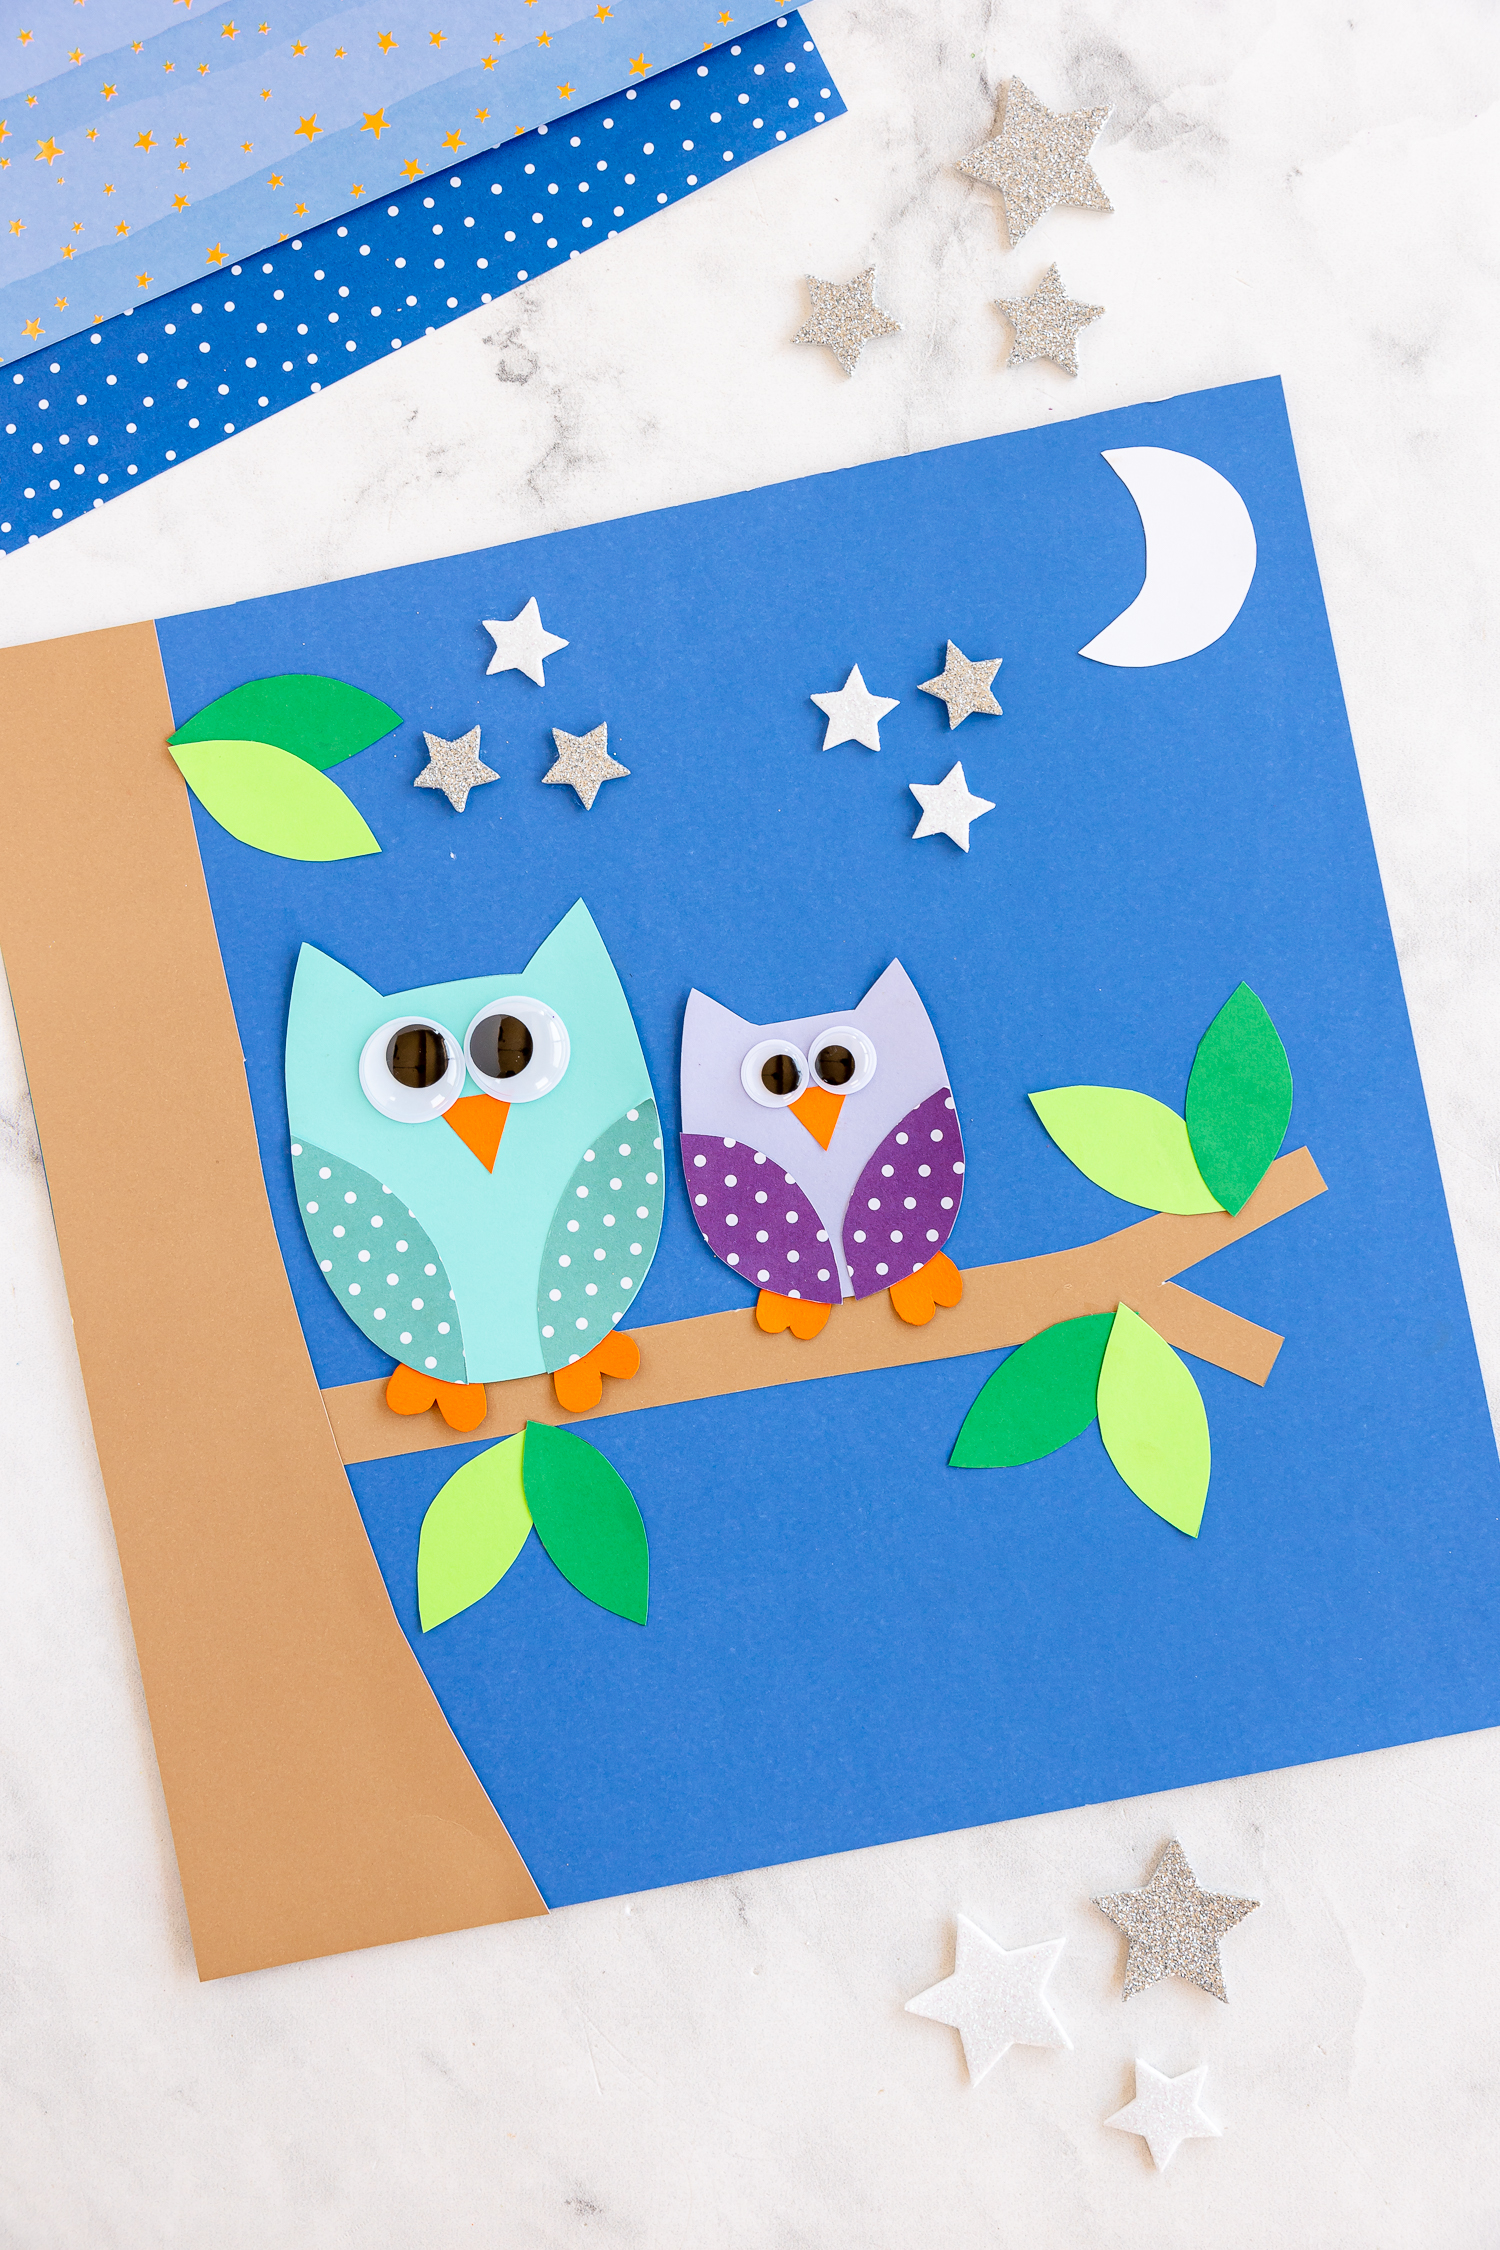
Unleash your creativity as you dive into the enchanting world of paper crafting! With just a few materials and a sprinkle of imagination, you can transform simple cardstock into a night scene featuring two adorable paper owls perched on a tree branch. This easy, charming craft is perfect for seasoned crafters and beginners alike, and it’s a fun activity for all ages.
Owl Paper Craft
As the sun dips below the horizon and the first stars begin to twinkle in the dusk, our pair of paper owls come to life against the canvas of a dark blue sky. This craft captures the serene beauty of a starry night where these wise, wide-eyed creatures of the evening watch the world from their perch upon a sturdy branch.
Each piece, carefully cut and lovingly assembled, adds to the storybook charm of the scene. From the playful googly eyes that bring a spark of joy to the silvery stars that promise a night filled with wonder, this craft is a portal to a peaceful woodland at twilight.

Supplies needed to Make A Paper Owl Craft
- Dark blue cardstock paper (12 x 12 inch)
- Owl template (download it here)
- Cardstock: Brown, two shades of green, colors for the owls’ bodies that match mine, orange, and white
- Googly eyes
- Silver small star stickers

How To Make A Paper Owl Craft
Step 1: Prep
Craft the tree and branch out of brown cardstock. The thickness of the branch should be proportional to the size of your owls, and the tree should extend from the bottom to help ground your scene.
Begin by using the owl template to cut out the body parts for your owls in the colors of your choice.

Step 2: Set The Scene
Glue the tree and branch onto the dark blue cardstock, simulating a serene night sky. Make sure to position them in such a way that there’s enough space for both of your paper owls to sit comfortably on the branch.
Cut leaf shapes from the two shades of green cardstock and attach them randomly along the branches for a natural look.

Step 3: Add Your Hooting Owls!
Assemble your owls by gluing the body parts onto the blue cardstock. Add the googly eyes to give them character and charm.
Embellish the night sky with silver star stickers to mimic a starlit ambiance. For a crescent moon, cut out a shape from the white cardstock and secure it in the sky, completing the nocturnal theme.

There you have it! You just made an adorable owl craft. Have fun using this in the classroom, at home, or just for fun!
Crafty Tips:
- Texture and Dimension: Give your owls some texture by using patterned cardstock for their bodies, or add dimension by layering different parts of the owl body with foam tape.
- Personal Touch: Customize your owls by changing the wing and body colors, or add more personality with extra details like paper beaks or feather textures.
- Starry Night Sky: To make your starry sky twinkle, consider using glitter or foil stars instead of stickers. You could also create a background with watercolors or pastels before adding your paper elements for an even dreamier effect.