As an Amazon Associate I earn from qualifying purchases.

Teach kids symmetry with this easy butterfly symmetry art! Use our free butterfly symmetry template to create a fun and colorful painting activity perfect for kids.

Butterfly Symmetry Art for Kids (Free Template)
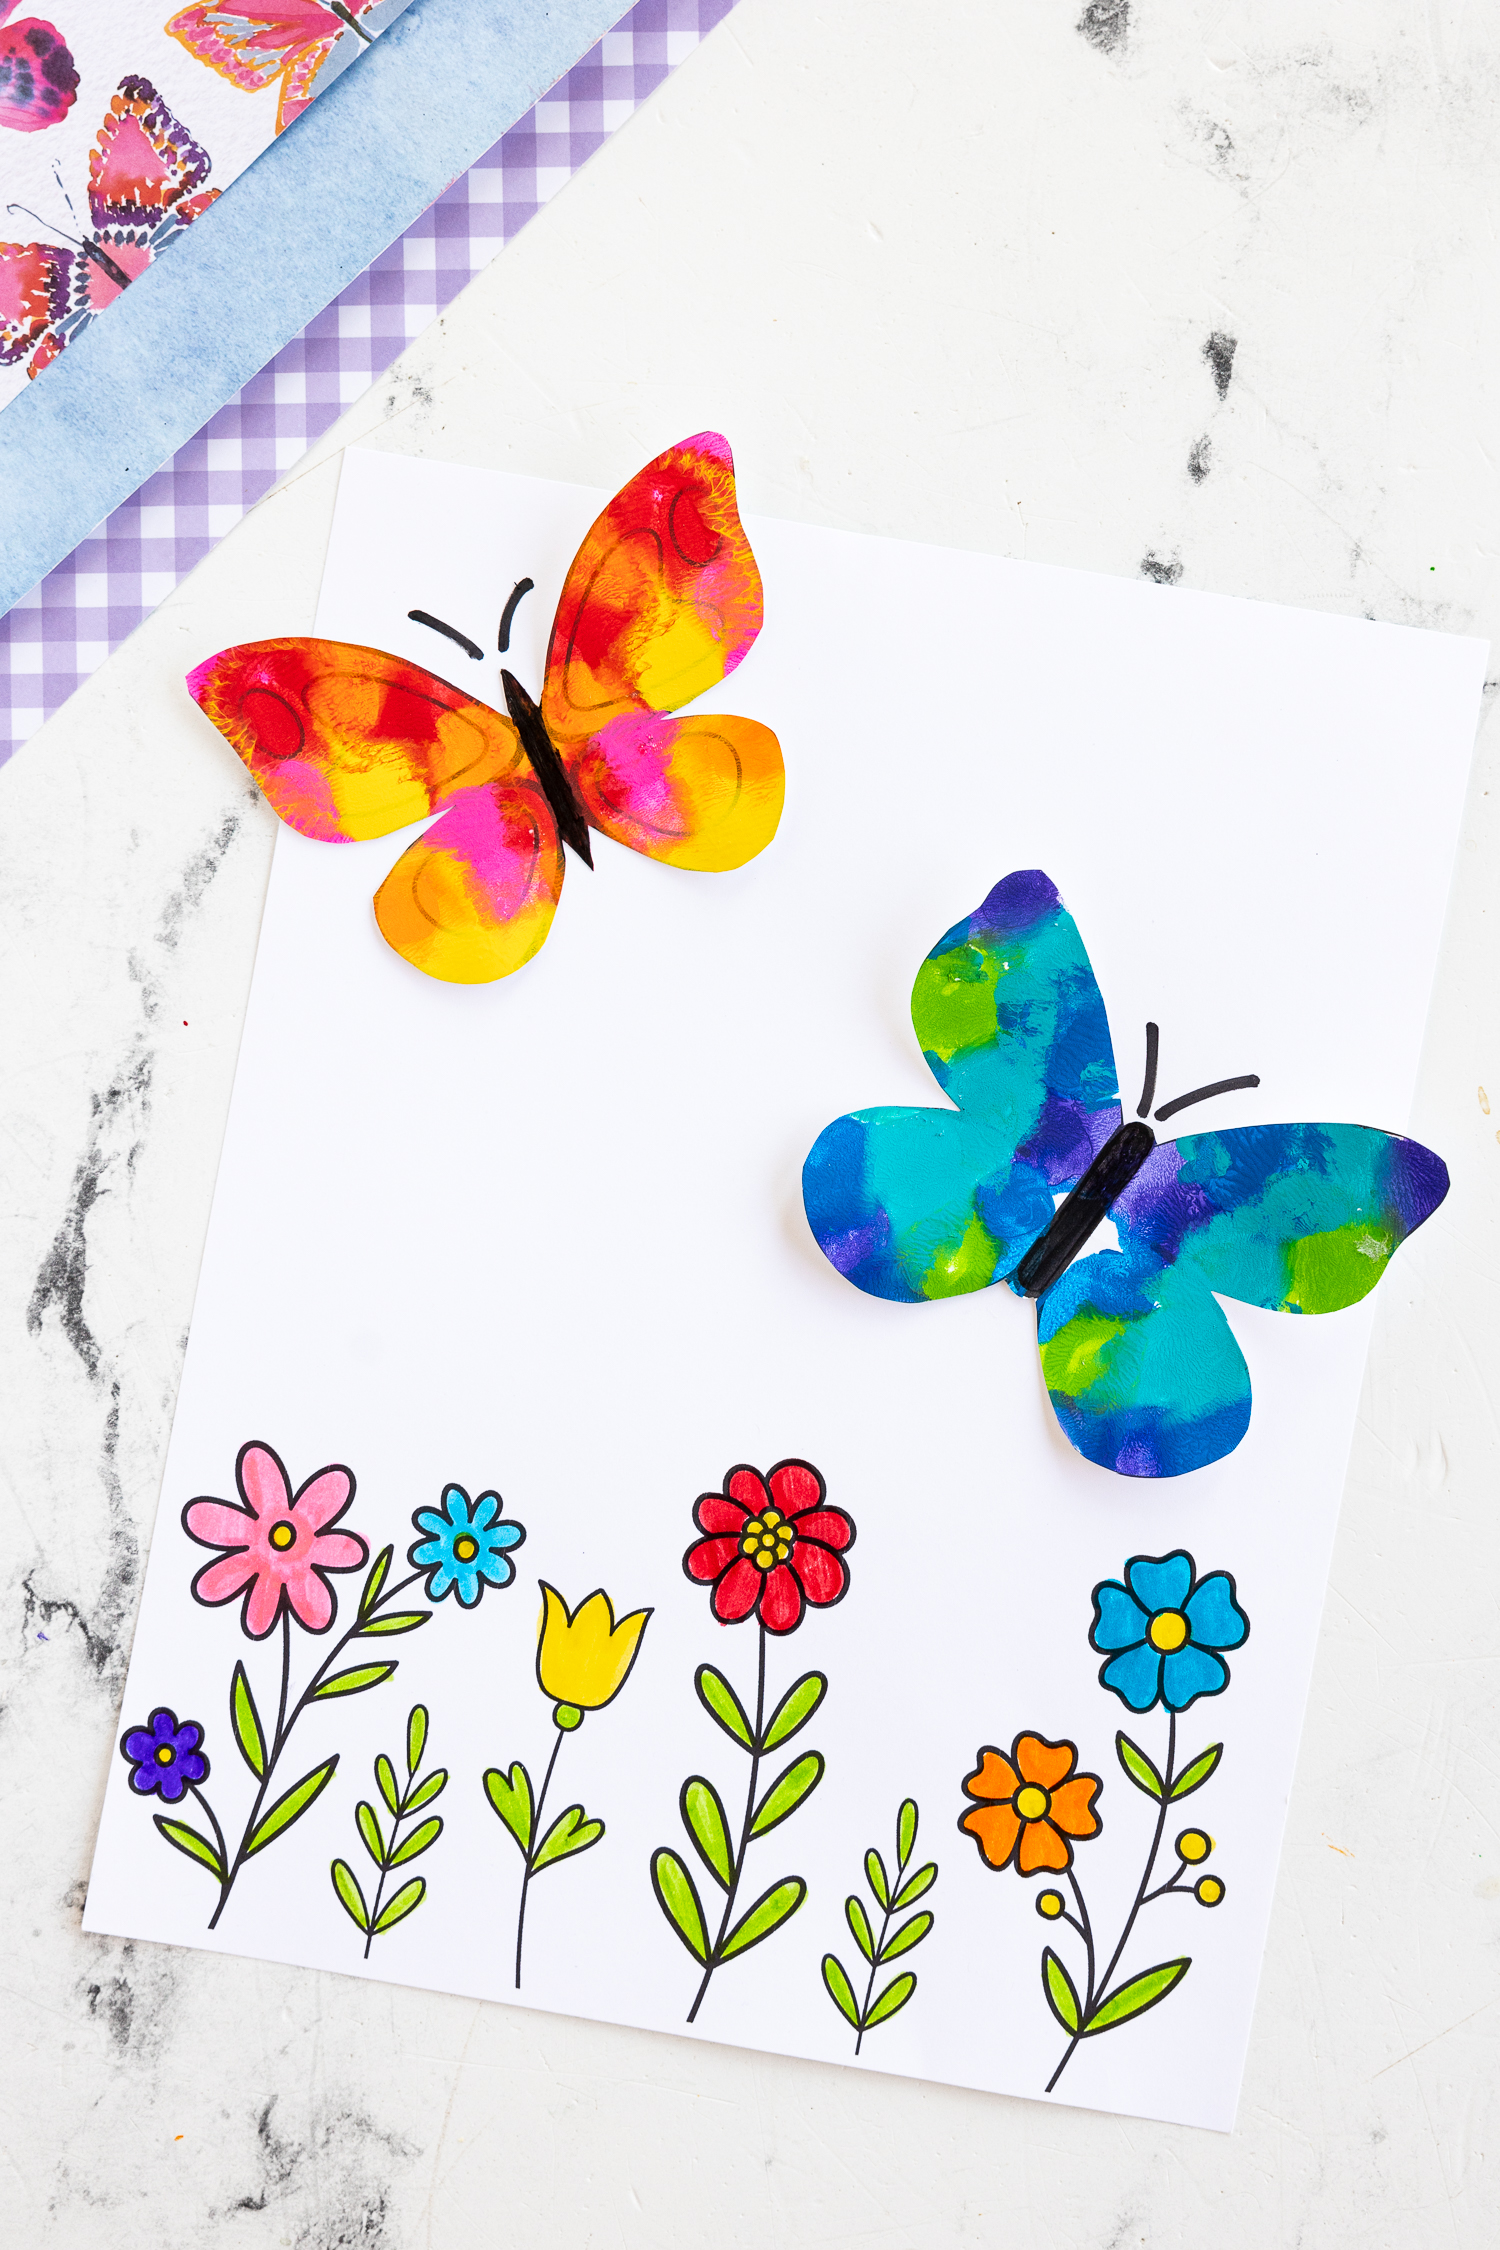
Teach kids a fun and simple lesson on symmetry with this butterfly symmetry art! Using our free butterfly symmetry template, kids can explore painting, color, and creativity while learning how symmetry works in a hands-on way. This easy butterfly symmetry art for kids is perfect for classrooms, homeschool, or a simple afternoon craft at home!
Symmetry is a fascinating concept for little minds, and there’s no better way to introduce it than through a hands-on, creative activity. This craft teaches symmetry using butterflies! Butterflies, with their naturally symmetrical wings, provide a perfect canvas for young children to experiment and learn.
What is Symmetry?
Symmetry means that one side of something is exactly the same as the other side. If you draw a line down the middle, both sides will match, just like a reflection in a mirror! This butterfly symmetry activity helps kids SEE symmetry in action instead of just hearing about it.
This butterfly symmetry art also introduces basic color theory! Try using warm colors on one side and cool colors on the other for a fun learning twist. To learn more about warm and cool colors go here!

Free Butterfly Symmetry Template
To make this activity extra easy, we’ve included a free butterfly symmetry template you can print and use right away.
You can choose:
– A simple butterfly outline for younger kids
– A more detailed butterfly template for older kids
Just print, paint, fold, and reveal your symmetry art! This butterfly symmetry template makes it easy for kids to create beautiful symmetry art with minimal prep.
HOW TO VIDEO:
Materials Needed To Make Butterfly Symmetry
- Free Butterfly Templates
- Paint, whatever colors you desire. We chose to do warm colors on one and cool on the other.
- Markers
- Paint Brush
- Scissors
- Glue
- Sharpie

How To Make a Painted Butterfly Symmetry Art
Step 1: Preparing your Butterfly Templates
Start by cutting your butterfly template in half so it’s easier to work with. Fold your butterfly in half along the body of the butterfly so there is a crease in the middle.


Step 2: Adding Dollops of Paint
Add dollops of paint on one side of your butterfly. We did this with a small brush. You will want to do this part quickly as it dries relatively quickly.


Step 3: Fold to Create Symmetry!
Refold your painted butterfly back in half. Carefully use your fingers to push lightly around the whole butterfly to transfer the paint to the opposite side. Carefully open and reveal your symmetry butterfly wings!


Step 4: Color your Meadow
Cut out your butterflies. We cut of the antenna so that we could draw our own. Take your markers and color your flower meadow.

Step 5: Add your Butterflies
Add some glue to the back side of the body of your butterfly and glue on your meadow paper. Once the glue is dry you can carefully bend your butterfly wings up so they have a 3D affect. Add antenna’s with your black Sharpie.

Looking for More Easy Kids Art Projects?


where do I get the butterfly template