As an Amazon Associate I earn from qualifying purchases.

Are you ready for a fun and creative project that you can do at home with simple materials? Today, we’re going to make a charming paper plate armadillo that’s perfect for crafters of all ages. This adorable craft uses basic supplies and offers a fantastic way to engage children in arts and crafts. Let’s dive into the steps to create your own armadillo!
DIY Paper Plate Armadillo Craft Tutorial
This easy and engaging project is perfect for crafters of all ages and skill levels but was created with lower elementary kids in mind! Using simple materials you likely already have at home, you can create a cute and quirky armadillo.

Supplies needed to Make A DIY Paper Plate Armadillo
- 1 dessert-sized paper plate
- Two shades of brown paper: We recommend using Kraft paper and another brown shade close to your paint color.
- Brown paint: Opt for a true chocolate brown – not too dark but definitely not too light. Avoid browns with reddish undertones to keep it authentic.
- Black paint pen or Sharpie
- One googly eye
- Ultra-fine black sharpie
- Template (download it here)
HOW TO VIDEO:
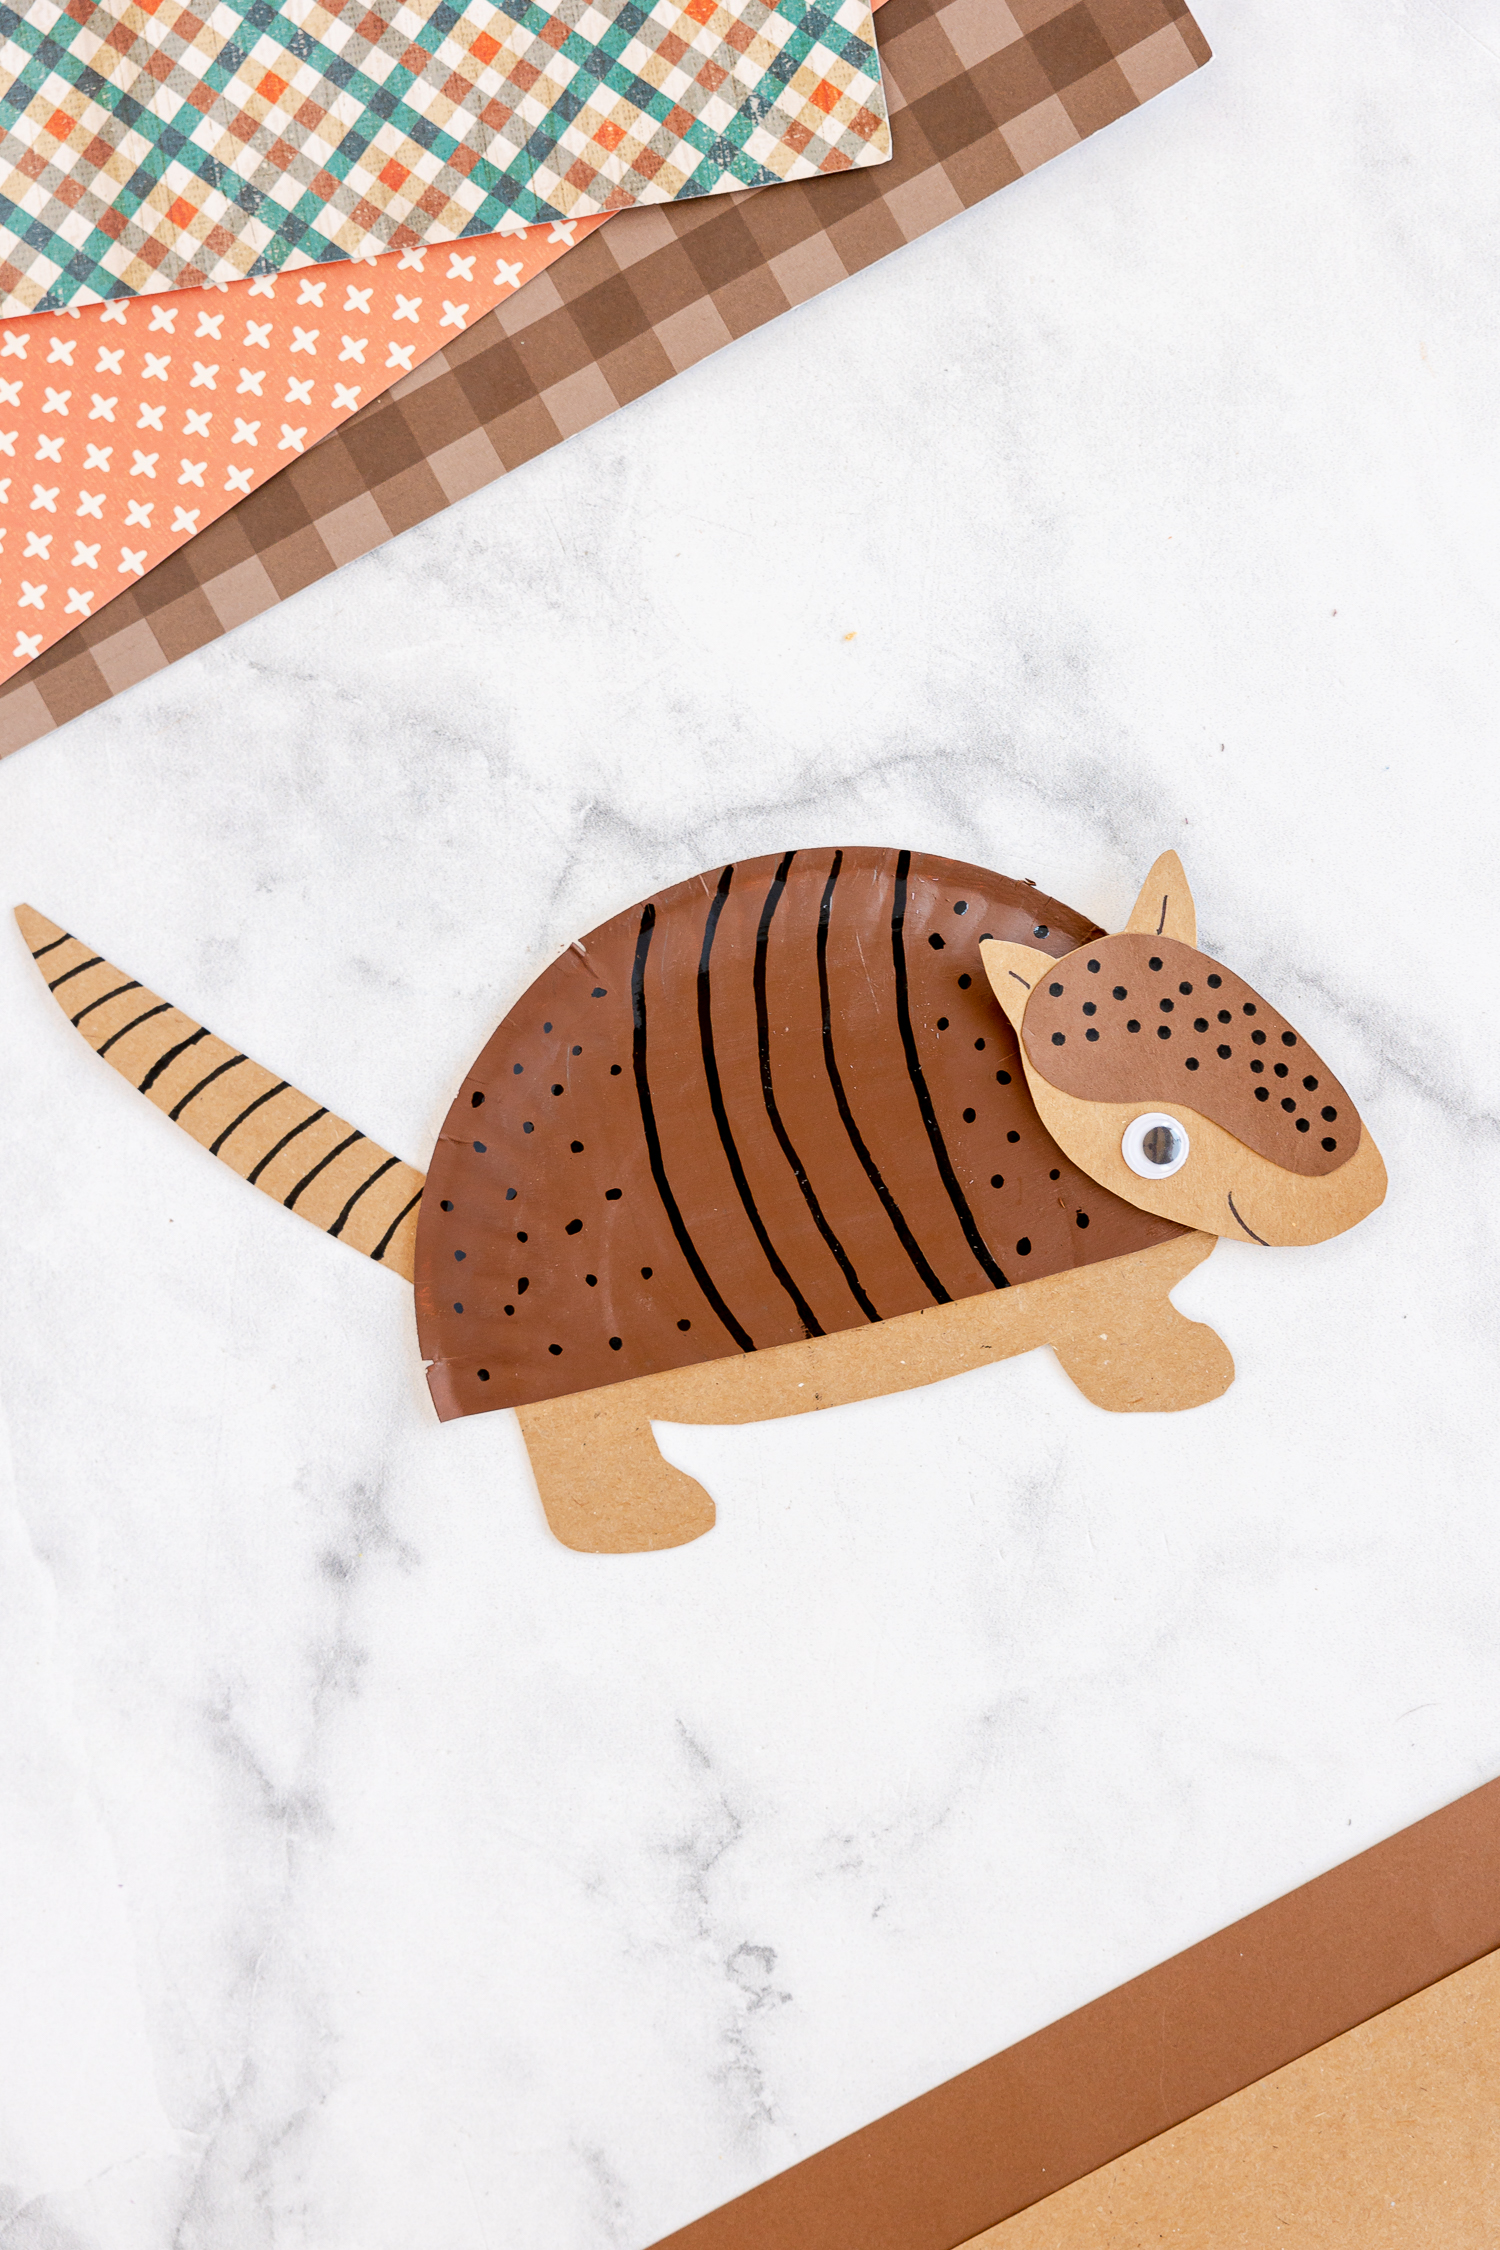
How To Make A DIY Paper Plate Armadillo
Step 1: Cut Your Plate
Cut the paper plate in half. This will form the body of your armadillo. Paint the cut half of your paper plate with the brown paint. Make sure to cover it evenly. Allow it to dry completely before moving on to the next step.


Step 2: Add Details
Once the paint has dried, take your black paint pen and draw five slightly curved lines in the middle of the plate to mimic the armadillo’s armor.
Add some black dots along each side of these lines to enhance the texture.
Use the brown papers to cut out the additional body parts from our free armadillo template like the head, tail, and legs. Refer to a picture or template for guidance on the shapes.

On the tail, draw more lines with the black paint pen for realism.

Add black dots to part of the head – be sure to look at a reference picture to get it right.

Step 3: Add Eyes and Bring It to Life!
Attach the googly eye to the head piece.
Use the ultra-fine sharpie to draw a smile and ear markings. These small details will bring your armadillo to life!

Creating this paper plate armadillo is not just a fun afternoon activity, but it’s also a great way to recycle and use materials you likely already have at home. Whether you’re doing this project with your kids, for your classroom, or just for fun, it’s sure to bring smiles and a sense of accomplishment.
Crafty Tips:
- Texturing Techniques: To give your armadillo a more realistic texture, consider crumpling up the brown paper before cutting out the body parts. This adds a rugged, natural look to the armadillo’s armor plates. Flatten it back out gently before cutting and gluing.
- Layering for Depth: Instead of using flat pieces for the body, add multiple layers of paper in different shades of brown. This layering can mimic the overlapping armor plates of an armadillo and give your craft more dimension.
- Customizing Colors: While traditional brown shades are great for realism, don’t shy away from using unconventional colors to make your armadillo unique. Bright colors or patterns can turn it into a whimsical creature, perfect for kids’ rooms or as a fun gift.