As an Amazon Associate I earn from qualifying purchases.
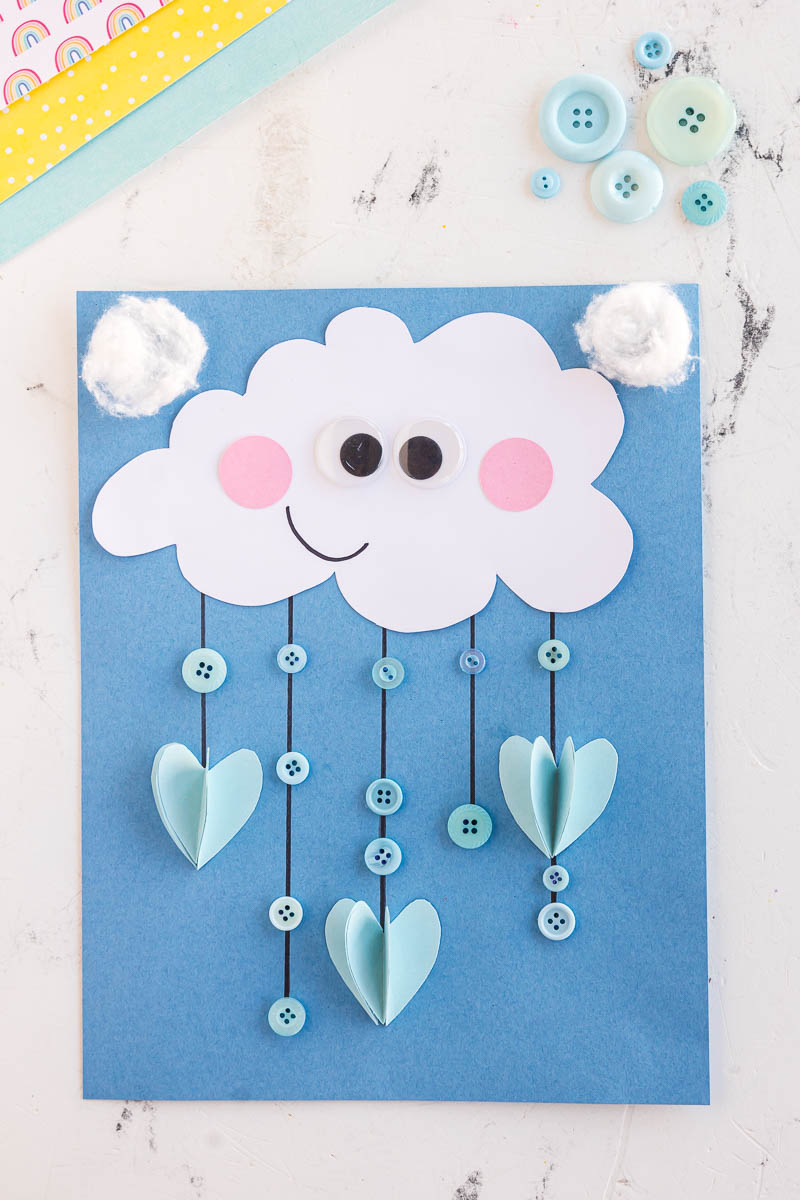
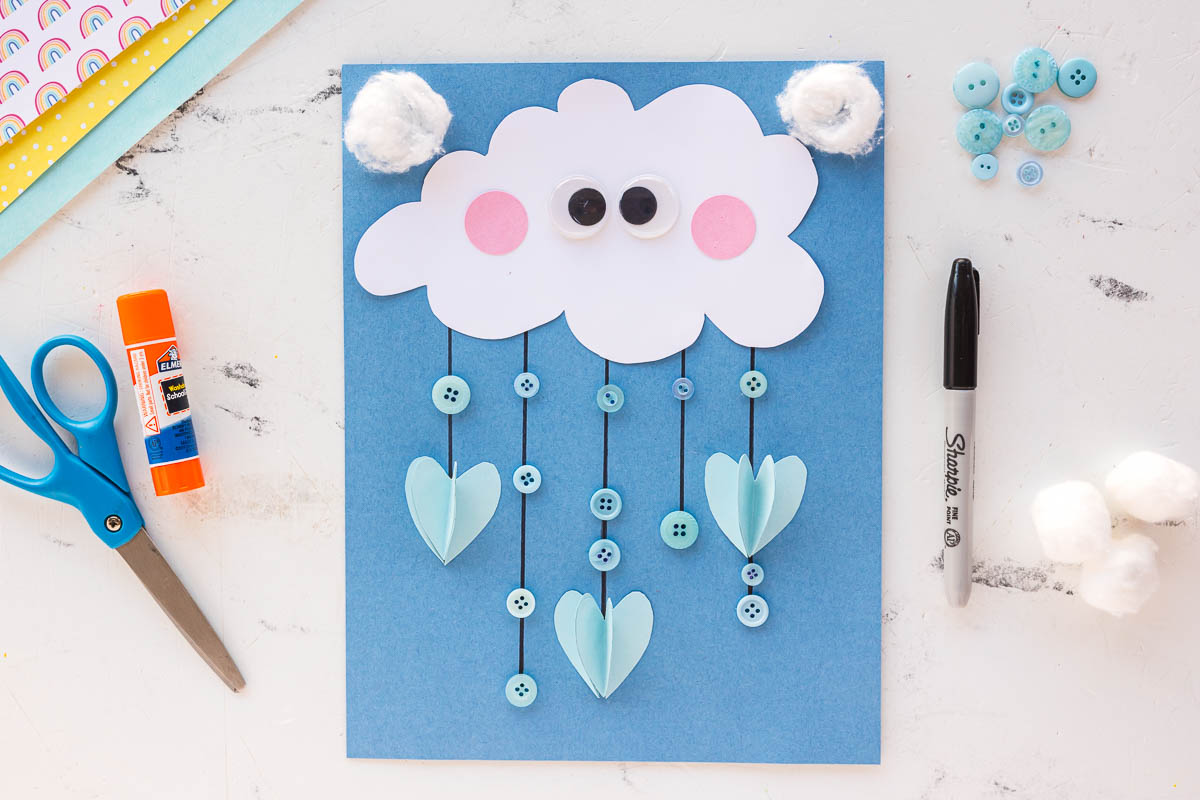
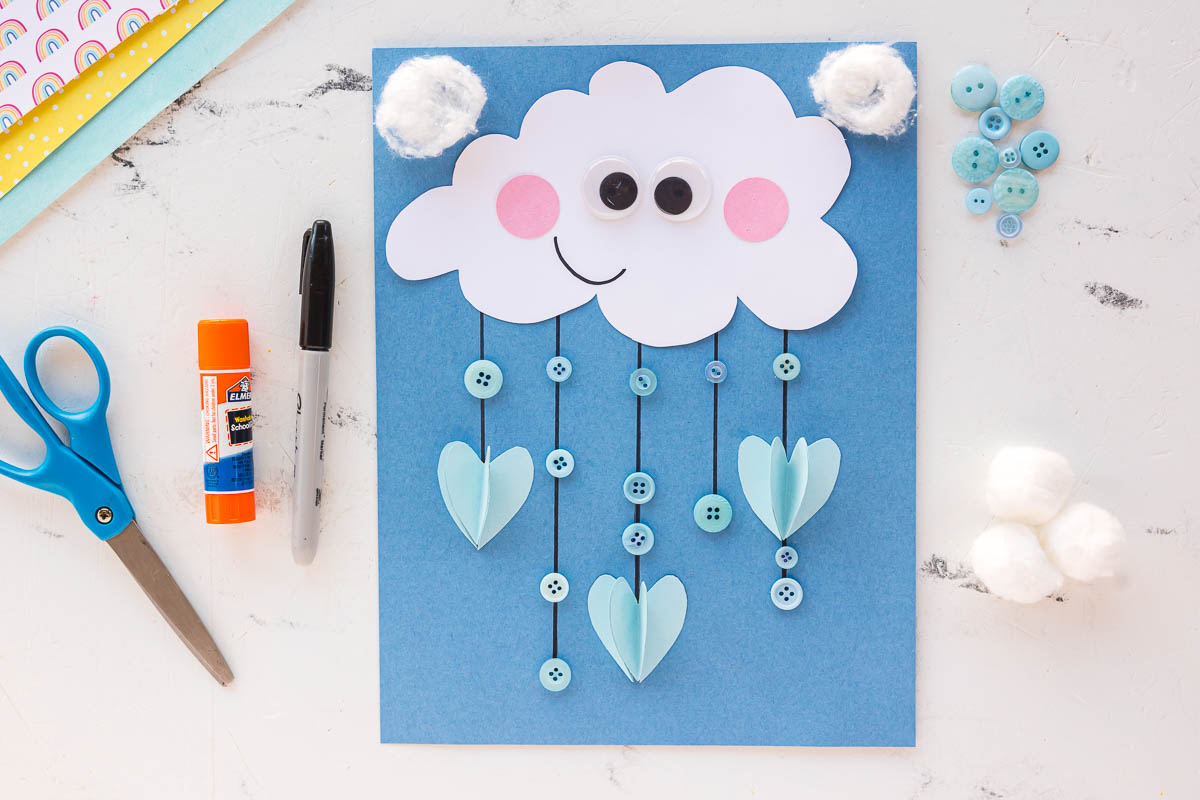
Create an adorable Rain Cloud Craft with your kids using a free printable template and simple supplies like buttons and cotton balls!
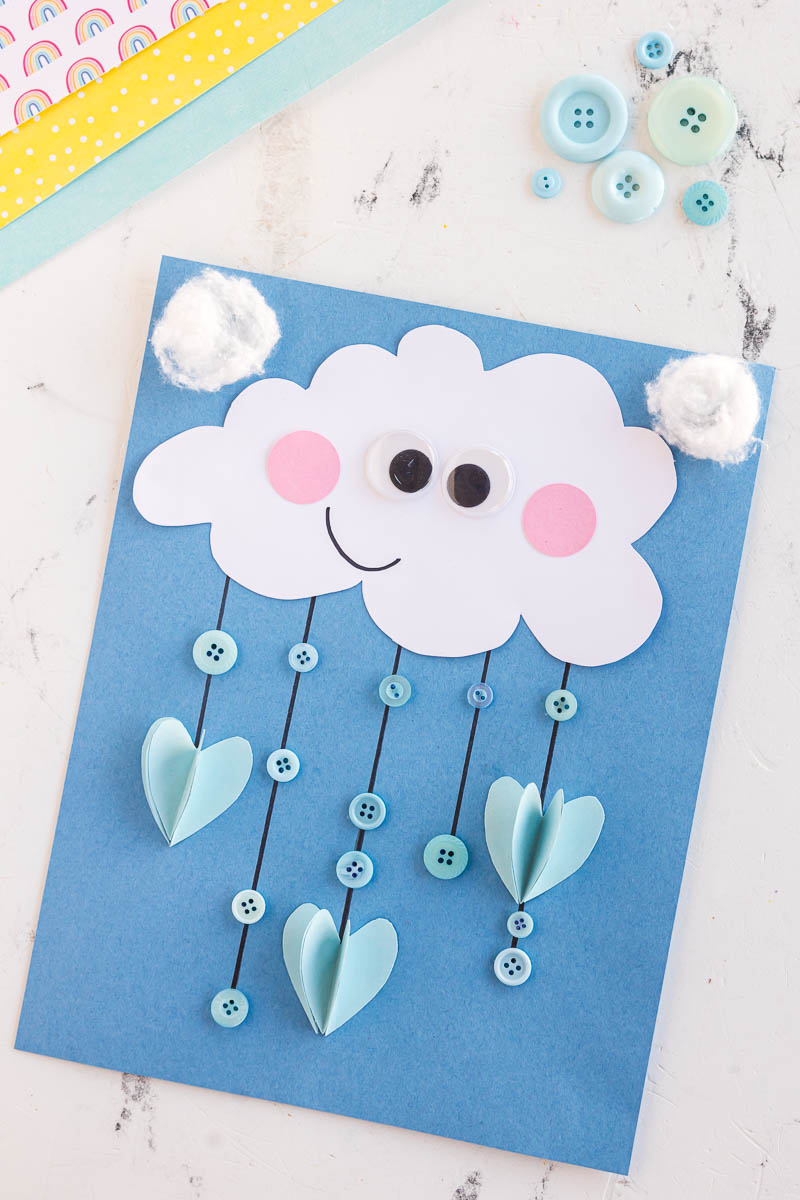
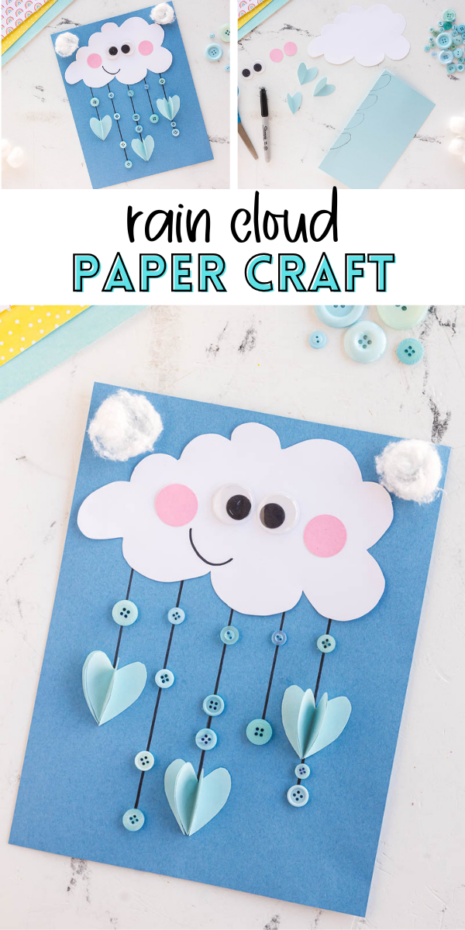
Rain Cloud Craft – A Great Weather Activity for Kids!
This Rain Cloud Craft is a sweet mix of creativity and hands-on fun, making it perfect for a rainy afternoon or an easy craft day at home. Kids will love cutting, gluing, and putting together their smiling cloud and dangling raindrops while creating something bright and cheerful. The steps are simple enough for young crafters, but still engaging, giving little hands plenty to do without feeling overwhelming. With a happy design and playful details, this is one of those crafts that feels fun first — and just happens to sneak in a little skill-building along the way. A free printable template is included to keep prep quick and stress-free for parents.
Materials Needed To Make A Rain Cloud Craft
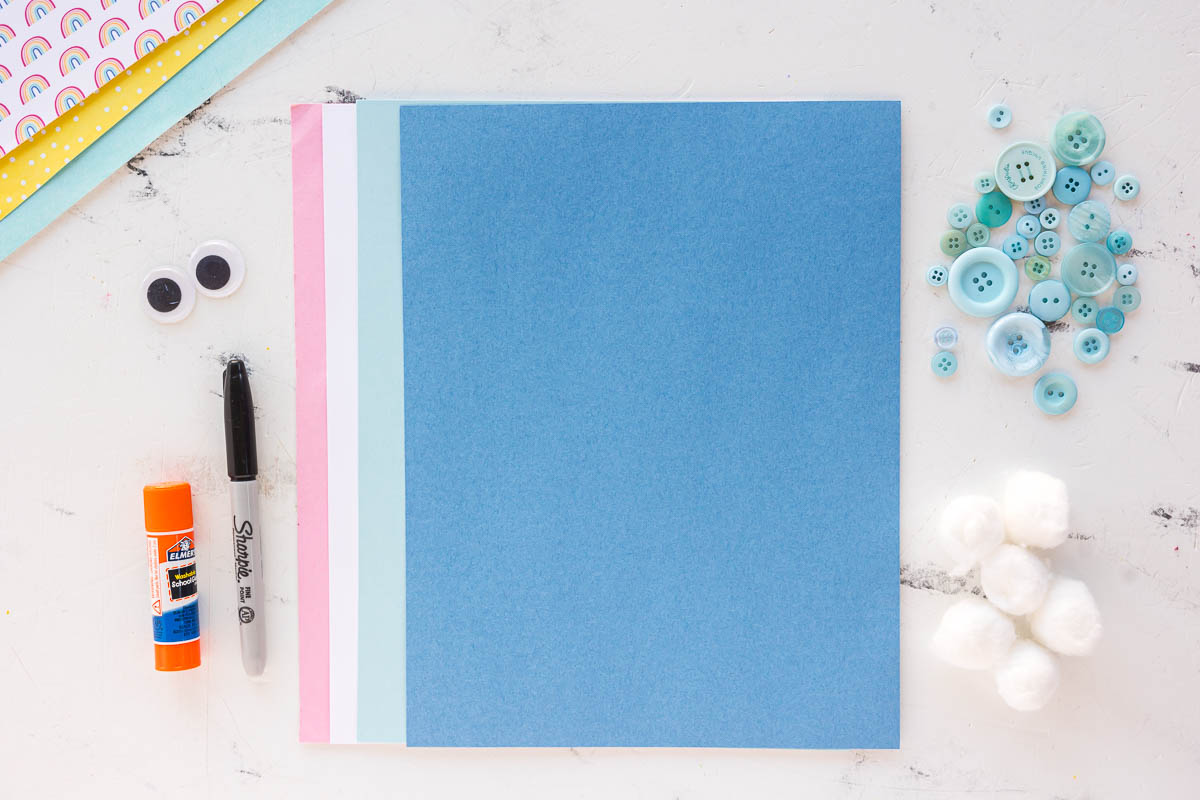
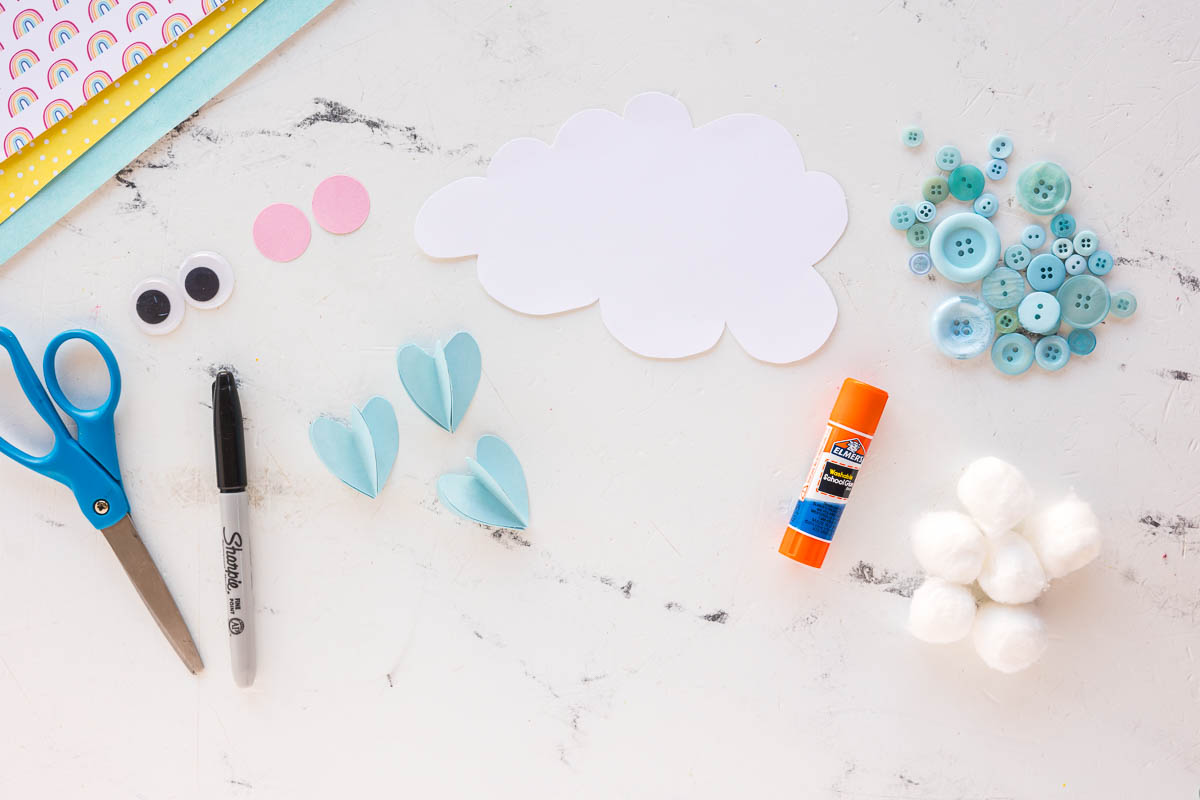
- Colored cardstock (blue, white, pink, and light blue)
- Cloud and Heart Template
- Scissors
- Glue stick
- Black marker
- Googly eyes
- Cotton balls
- Assorted blue buttons
- Pencil and Ruler, optional
How To Make a Rain Cloud Craft
Step 1:
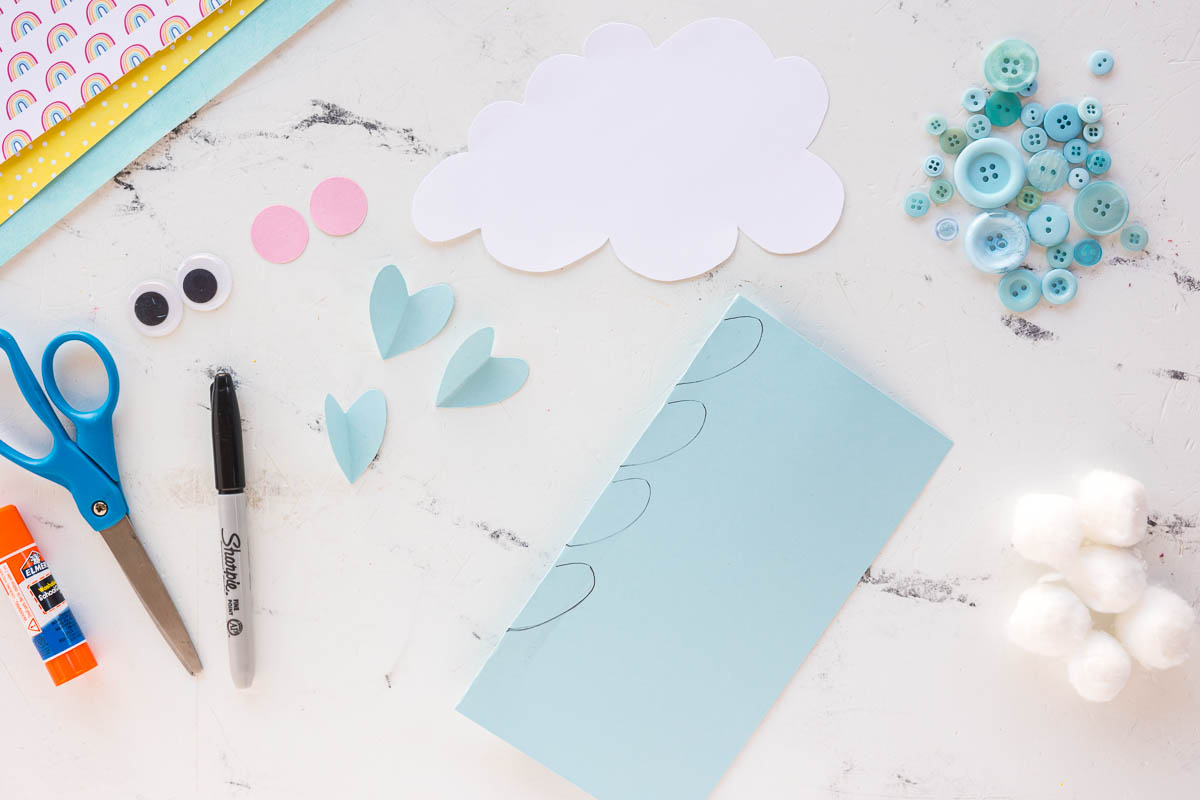
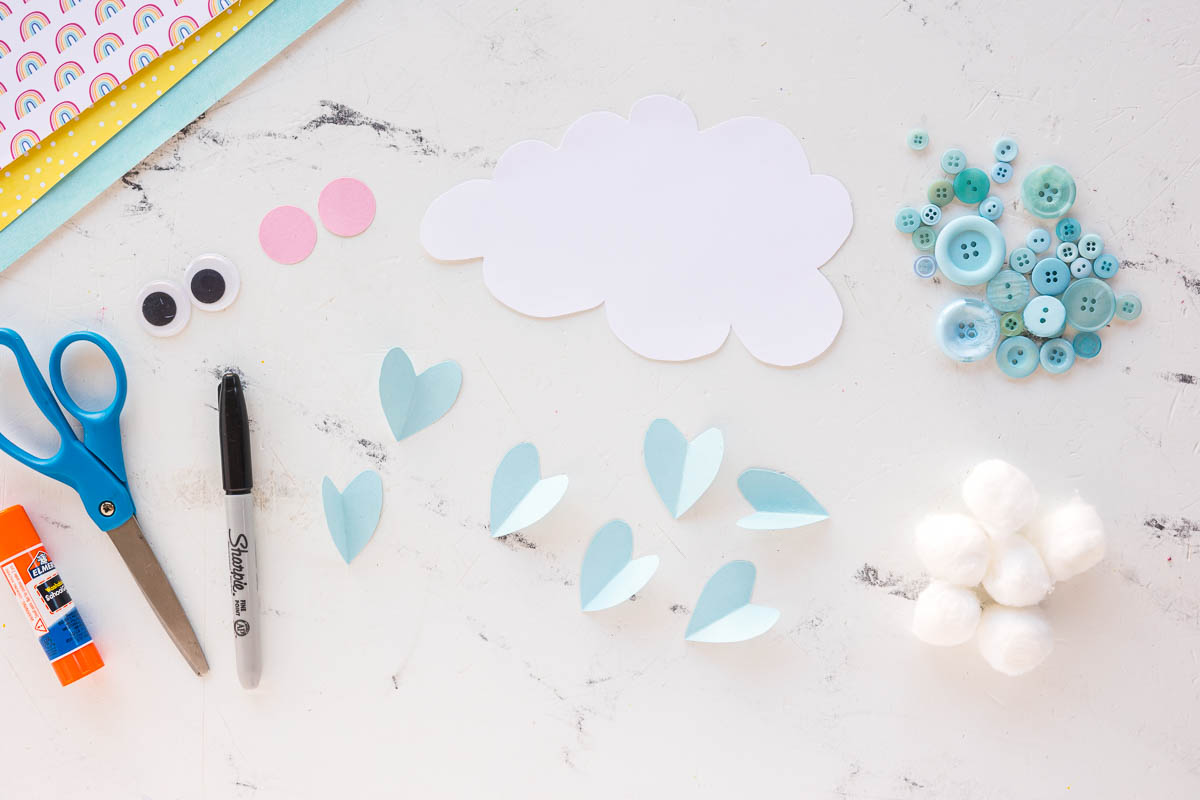
- Using our template, cut a cloud shape from the white cardstock.
- Cut raindrop shapes (hearts) from the light blue cardstock.
- Cut two small circles from pink cardstock for the cloud’s cheeks.
Step 2:
- Fold the light blue heart shapes in half.
- Add glue to one side of your folded heart. Press another folded heart on top.
- Repeat this step one more time to create a 3D heart.
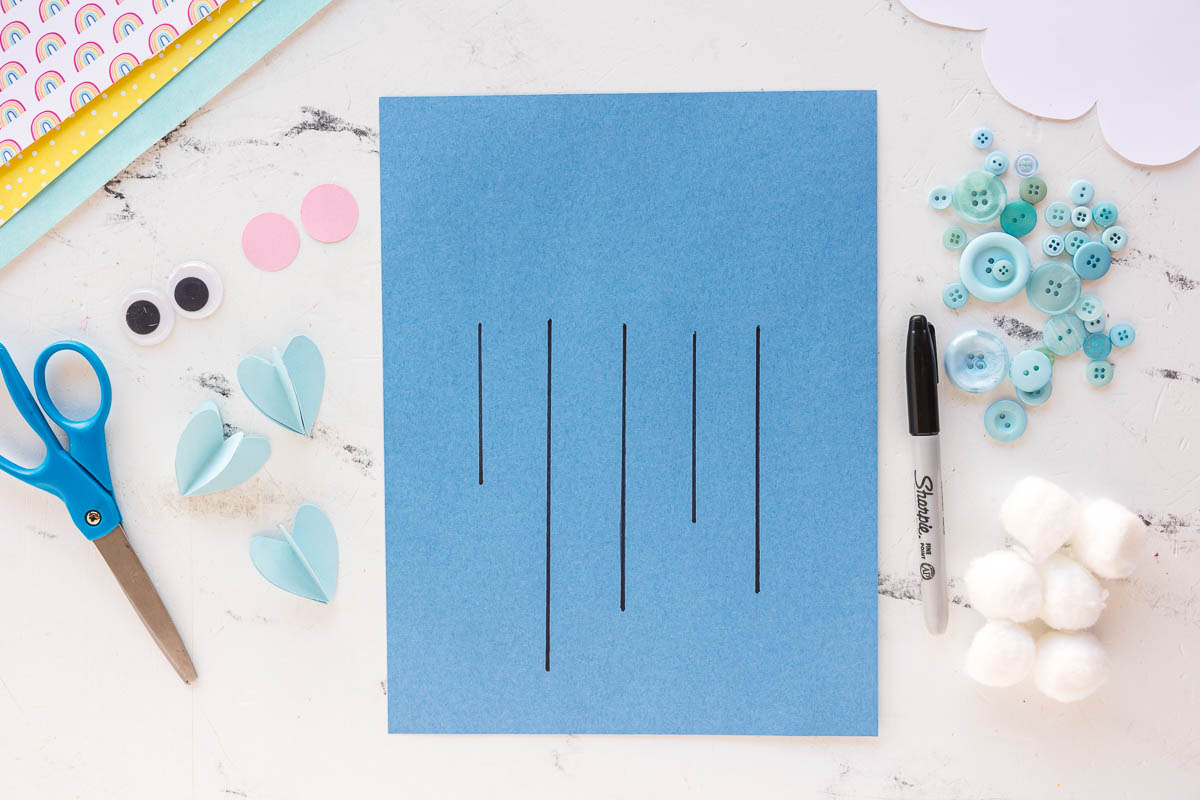
Step 3:
- Take a blue cardstock sheet and use a black marker and a ruler to draw several vertical lines. Alternatively, you can print our template onto a piece a blue cardstock.
- These lines will serve as the placement for raindrops and buttons so feel free to draw various lengths.
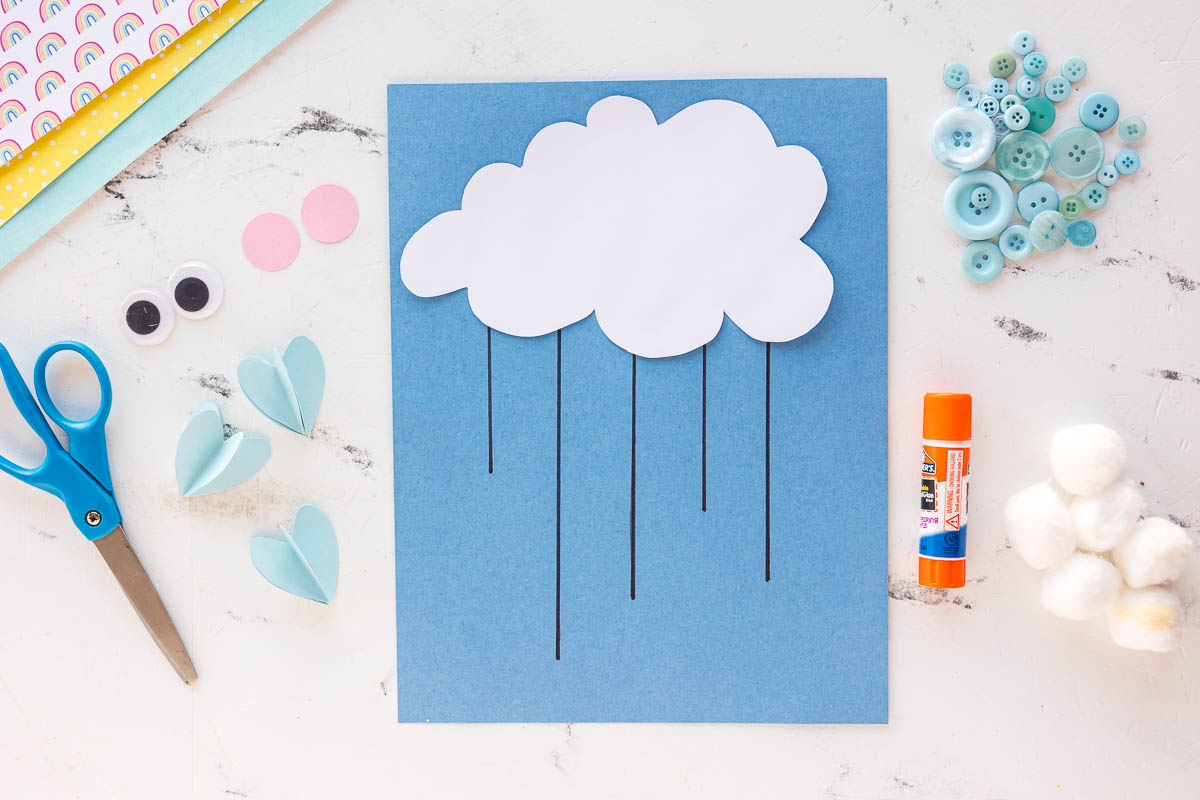
Step 4:
- Glue the white cloud shape onto the top of the blue cardstock.
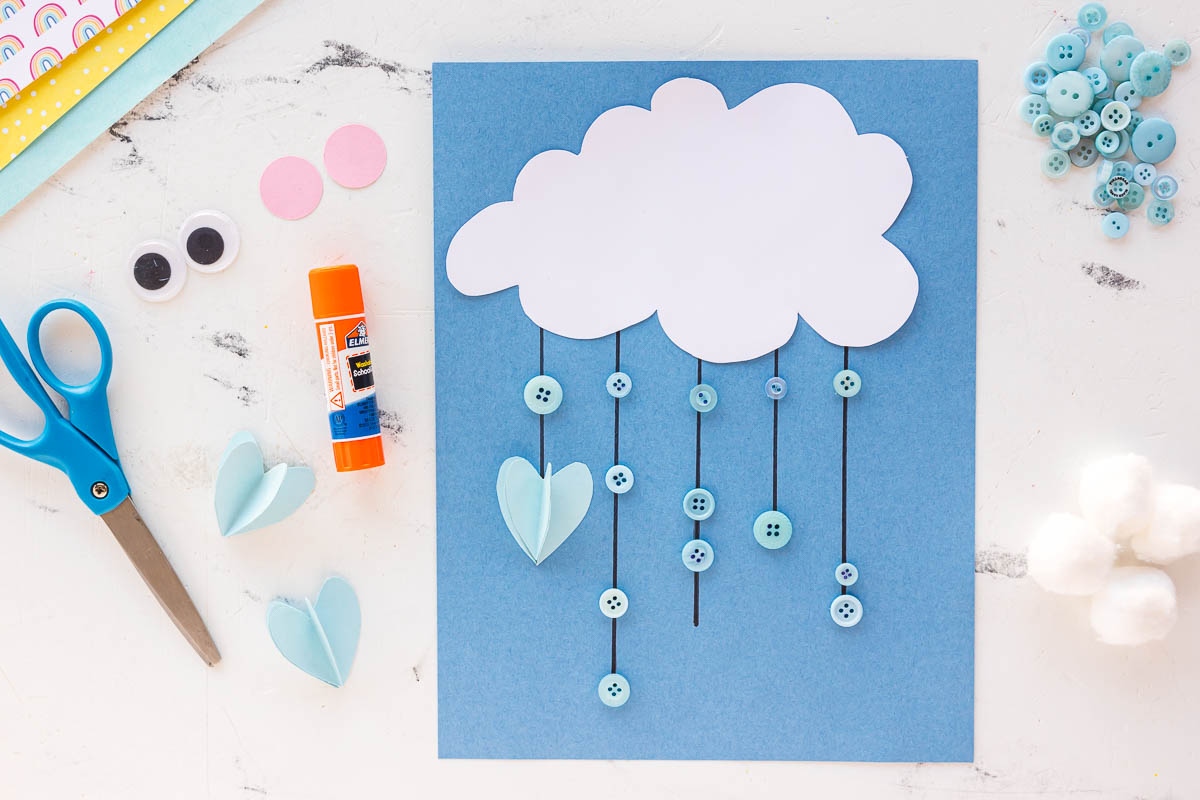
Step 5:
- Glue blue buttons along the black lines to resemble falling raindrops.
- Attach 3D heart raindrops at the bottom of some lines or in whatever spots you like best!
Step 6:
- Glue the googly eyes onto the cloud.
- Attach the pink circles as rosy cheeks.
Step 7:
- Draw a smiley face on the cloud with a black marker.
- Glue cotton balls on both sides of the cloud to make it fluffy.
Crafty Tips
- Pre-cut for younger kids: If crafting with toddlers or preschoolers, cutting out the cloud and raindrops ahead of time keeps things frustration-free.
- Buttons, sequins, or even paper dots all work great for raindrops!
- A glue stick works well for paper pieces, while school glue is best for the buttons and cotton balls.
- Let kids assemble everything first, then add the cloud’s face so it’s centered and just how they want it.