
Rustic Arrow
As an Amazon Associate I earn from qualifying purchases.
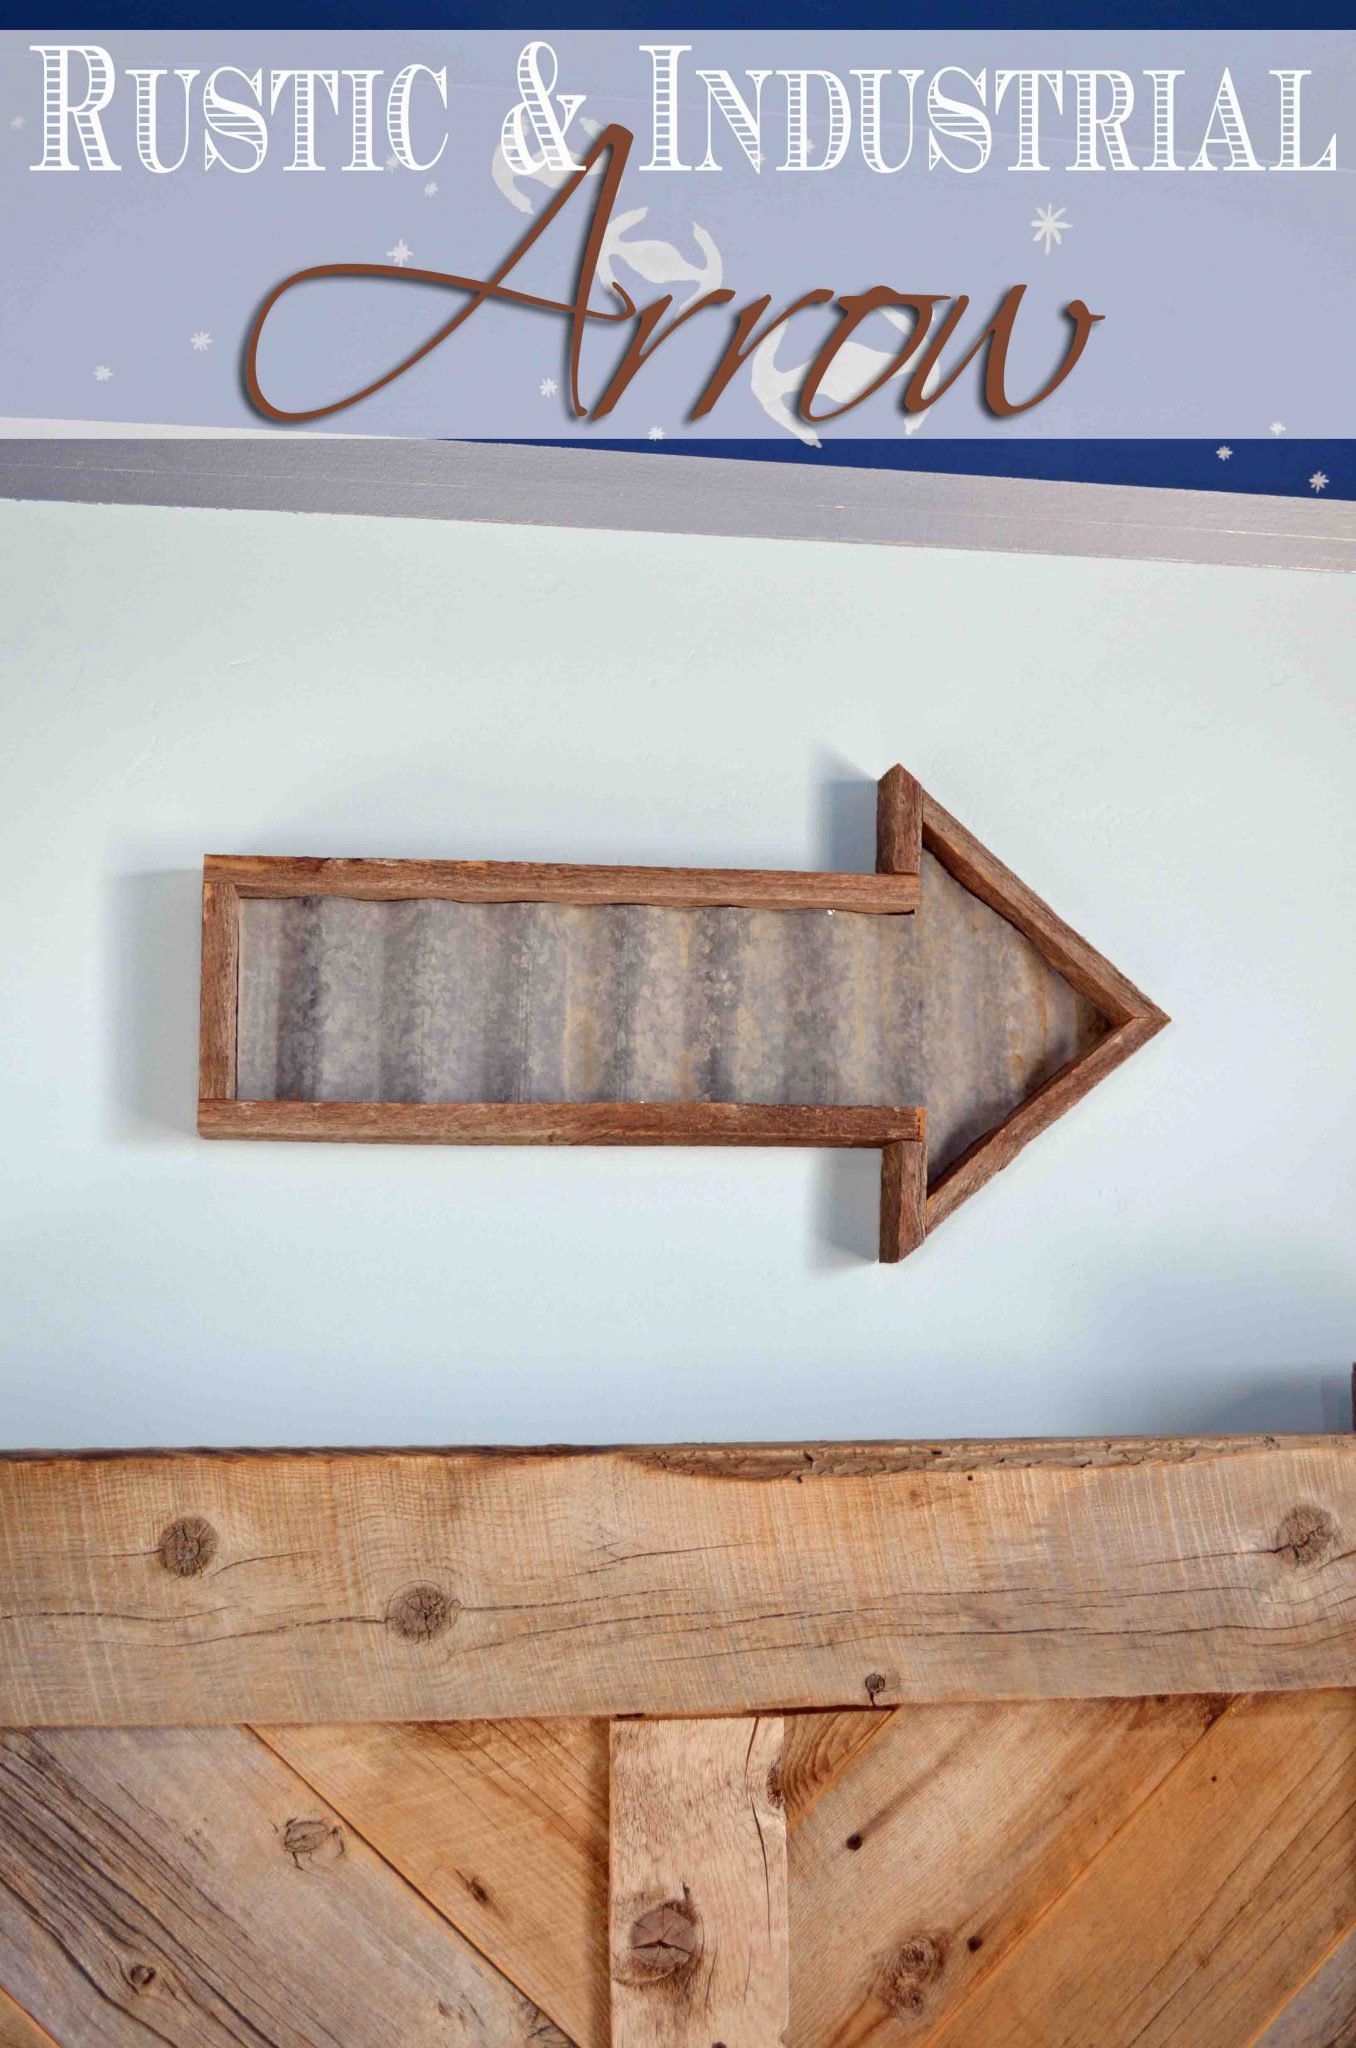
Hi All! It’s Amy from Hertoolbelt back with another DIY project. I’ve been working on my son’s room. He has been begging me to paint his walls and do a Star Wars room. However I had already made him a barn wood bed, which doesn’t really go with space age decor. So I’ve been trying to add elements that are kind of rustic and industrial to hopefully tie the two together. Arrows have been quite the decorating rage for a couple of years. It’s an easy item to make rustic and industrial. This arrow can be made with the center open like a shadow box, or fill it with tin, wood slats, wire mesh, material, or anything you want.
![]()
How to Build a Rustic Arrow
Materials
- 1 – 1″ x 3″ x 70″ (actual 3/4″ x 2 1/2″)
- 1 1/4″ brad nails
- wood glue
- tin – optional
Cut List
- 2 – 18 3/4″ long
- 1 – 5 1/2″ long
- 2 – 3″ long with a 40 deg miter on one the end
- 2 – 9 1/8″ with a 40 deg miter on one end and 50 deg miter on the other.
![]()
Step 1
Add wood glue to the flat end of the 3″ piece, nail to the 18 3/4″ piece, flush with the end. Repeat for other 3″ piece.
![]()
Step 2
Add wood glue to the ends of the 5 1/2″ pieces and glue between the other end of the 18 3/4″ pieces. Secure with nails.
![]()
Step 3
Glue and nail the 9 1/8″ pieces together, and onto the 3″ pieces.
![]()
![]()
Let the glue dry. Here’s the look of the open arrow.
![]()
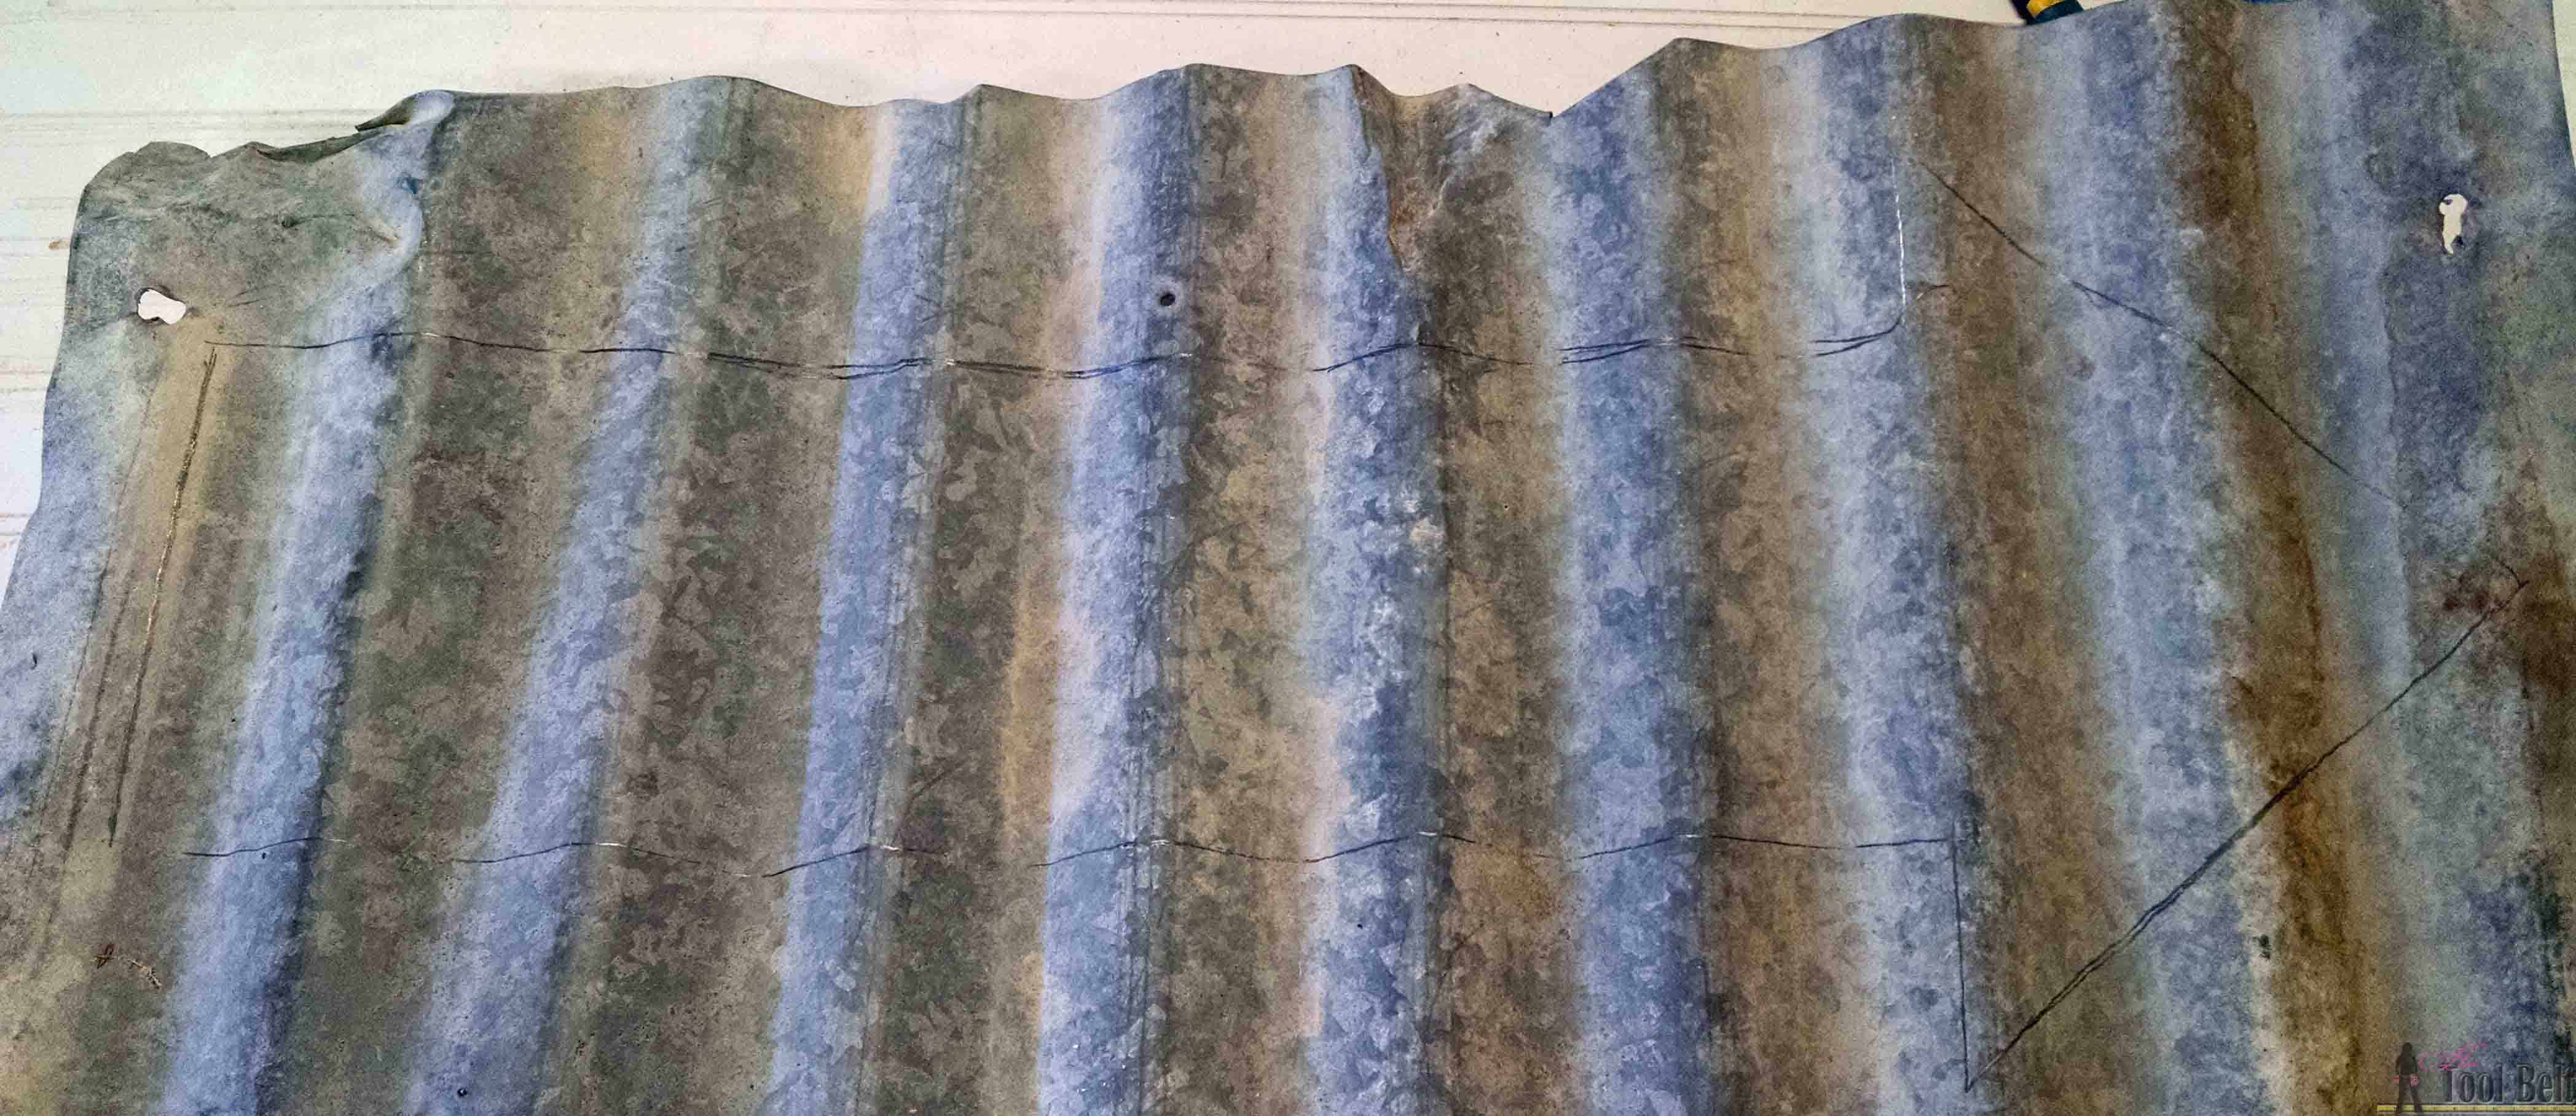
I decided to see what it would look like with old corrugated tin in the middle. I traced the inside of the arrow onto the tin.
![]()
Then I attempted to cut the tin with tin snips. My snips are shaped a little funny, so I gave up and used an angle grinder with a cut off wheel…much faster. I had to trim the tin here and there, but got it to fit.
![]() What’s your preference, tin or no tin? Thanks for letting me hang out with you today. Pin it!
What’s your preference, tin or no tin? Thanks for letting me hang out with you today. Pin it!![]()
For more rustic projects, check out:


Love your rustic arrow, this would be great to share on my Wordless Wednesday this week!!!
My son makes things with pallets, he has made several kinds clocks, including one that he painted the slats as the American Flag..
Happy St Patricks Day
Karren