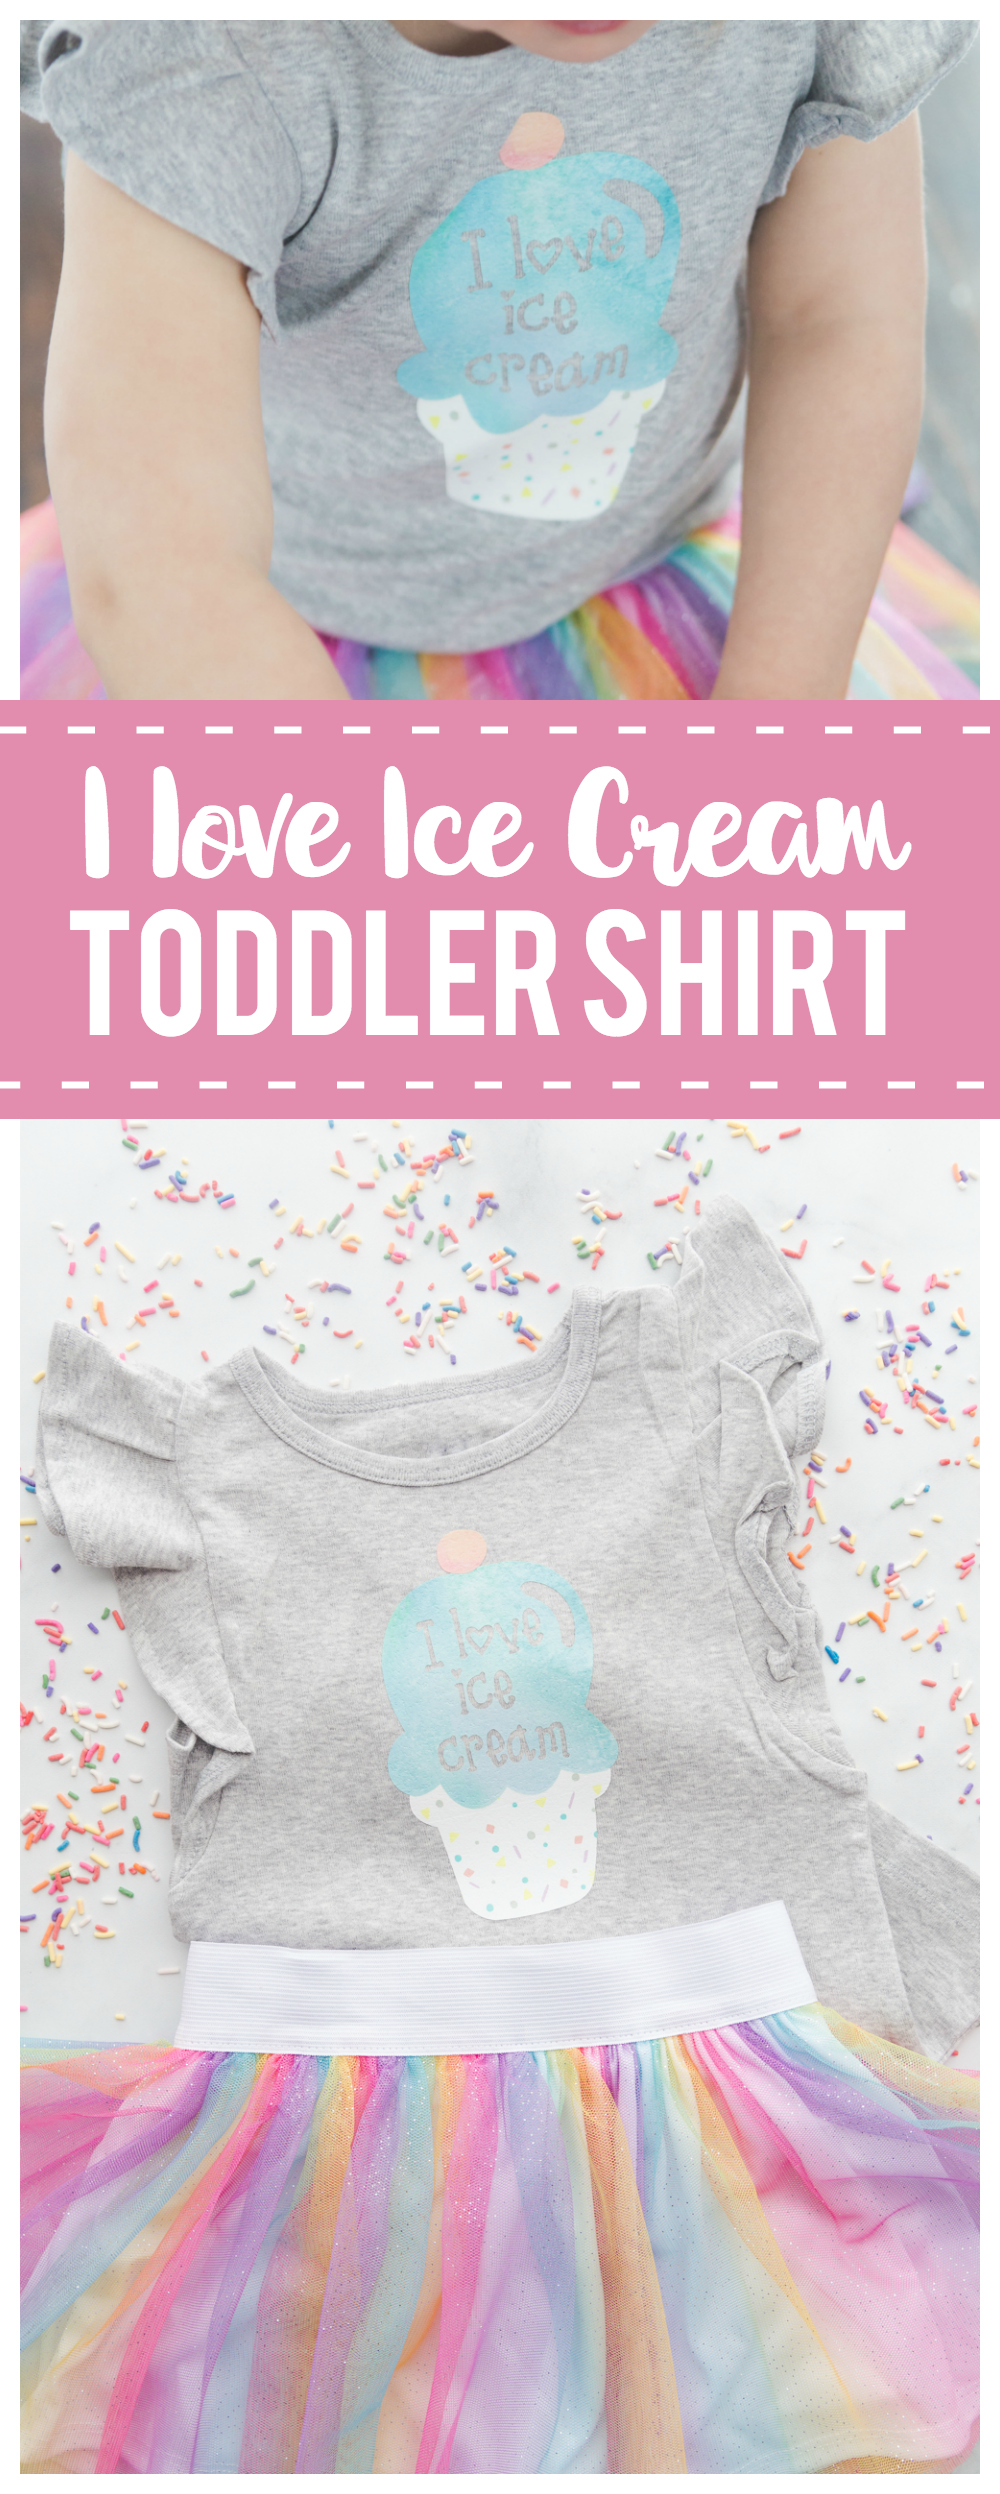
I Love Ice Cream Toddler Shirt with Cricut Patterned Iron On
As an Amazon Associate I earn from qualifying purchases.
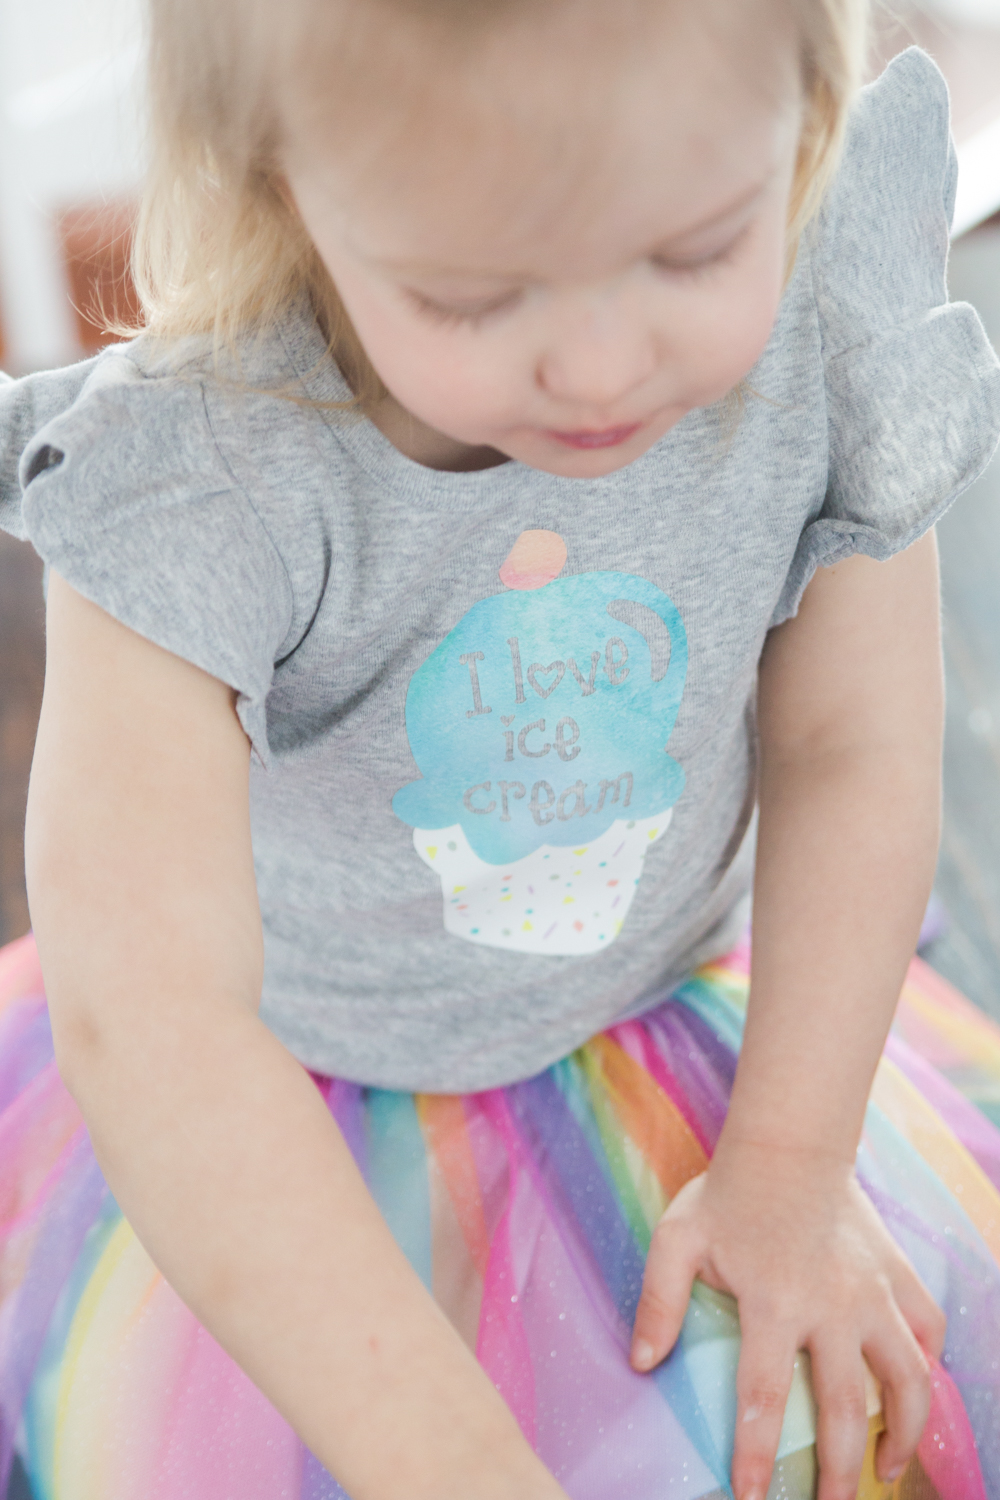
“I Love Ice Cream Toddler” Shirt is the perfect summery shirt for any ice cream loving toddler.
This is a sponsored conversation written by me on behalf of Cricut. The opinions and text are all mine.
Ever since my daughter was old enough for ice cream it has been her favorite special treat. She takes after her daddy with her sweet loving taste buds. When I had the chance to work with Cricut and their new product, Patterned Iron On , I just knew I wanted to make her a little ice cream shirt to match her rainbow colored tutu and this fun outfit is one of her new favorites.
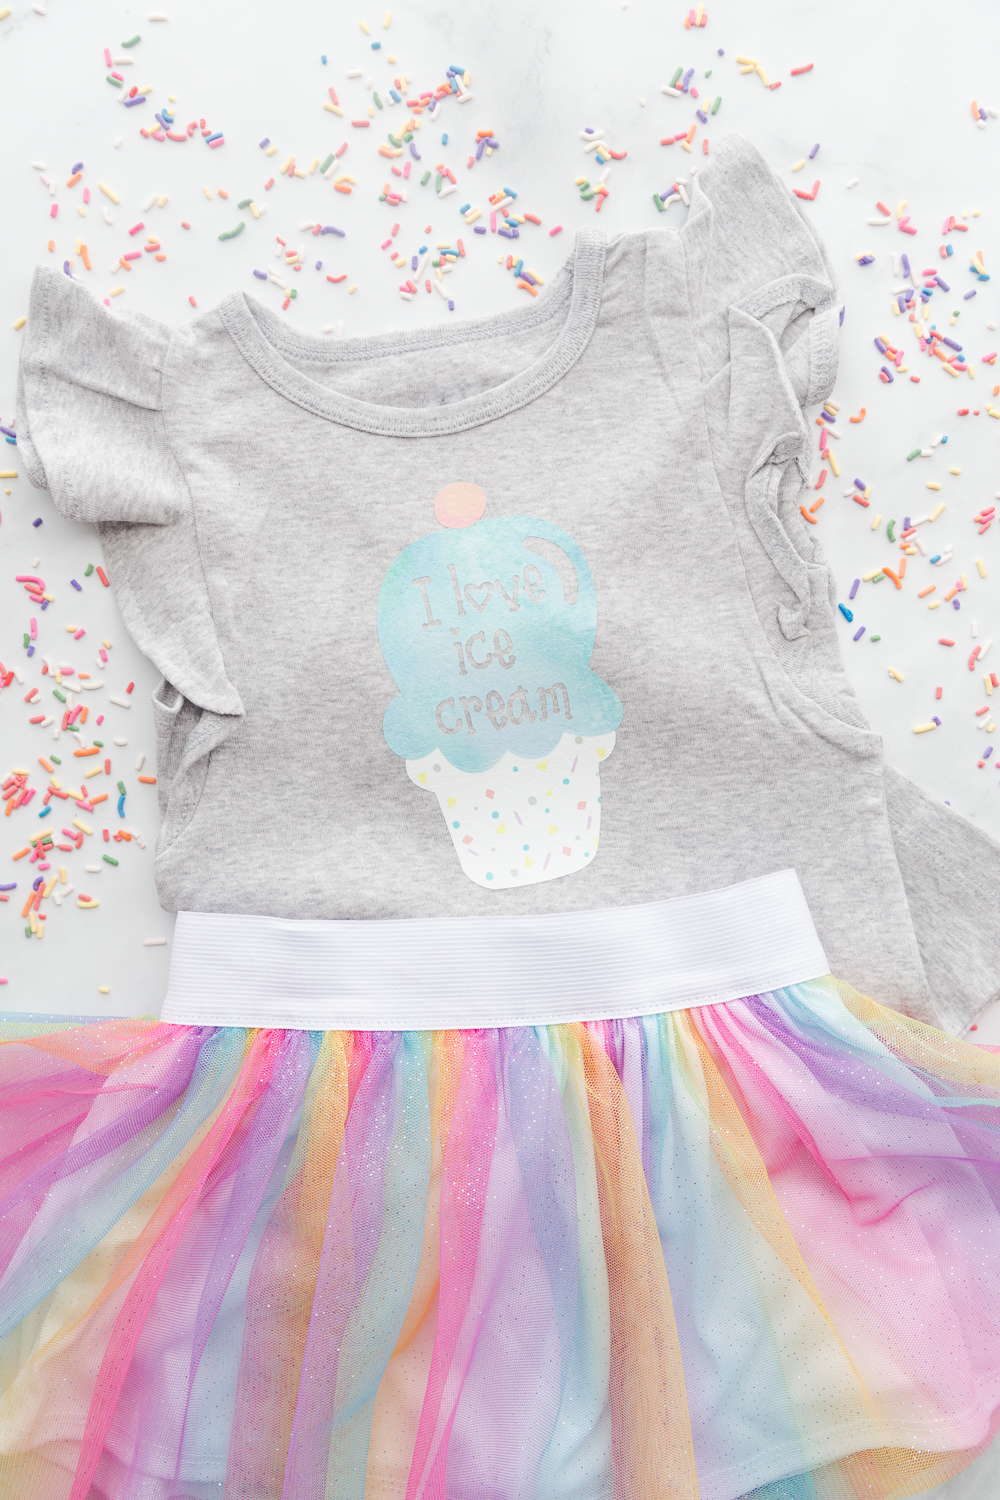
Before we get started let me tell you about this new Patterned Iron On…friends, it is amazing and definitely going to change the way you craft with your Cricut. There are currently 9 different sampler packs, the packs come with 3 -12” x 17” sheets, available on the Cricut website. Patterned Iron On is perfect to use for t-shirts, baby bodysuits, decorative throw pillows, tote bags and more. They come in samplers with 3 different designs that are perfect to mix and match for all your crafty needs.
SUPPLIES:
- Toddler Size T-shirt, Cotton works best
- Patterned Iron On, I used a mix of Party Time Pastels, Aquamarine, and Sunset Blossoms
- EasyPress or Iron
- EasyPress Mat
- Cricut Explore Air 2
- Weeder
Instructions for “I Love Ice Cream” Toddler Shirt:
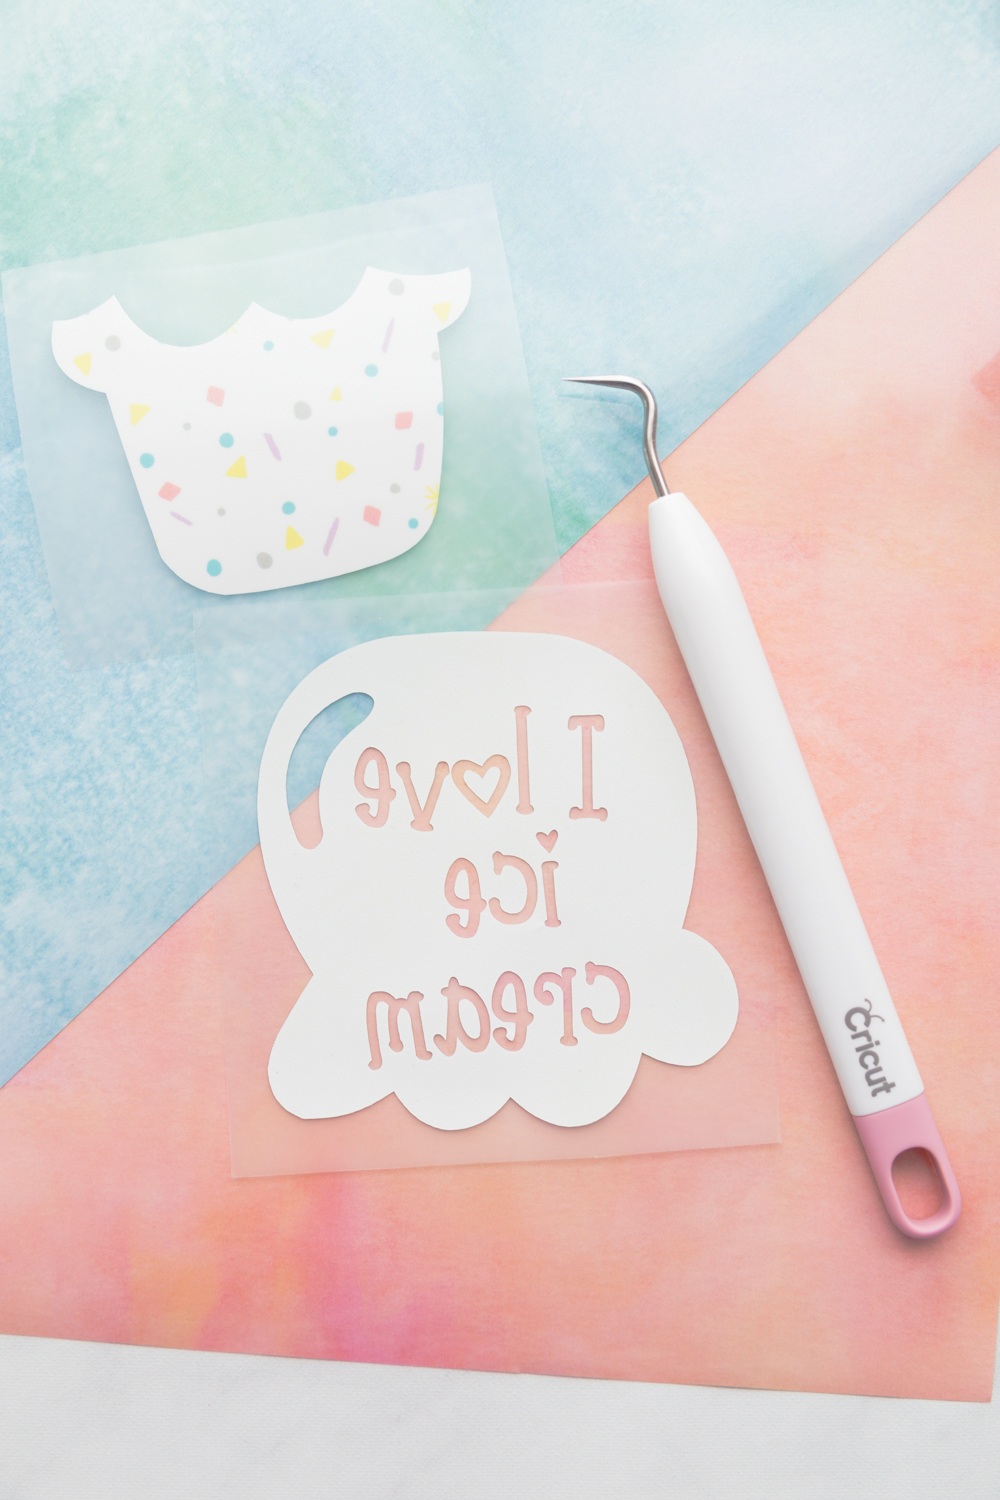
First, you will need to grab the FREE “I Love Ice Cream” Design that you can find right HERE. It will look like what you see below. Hit the button that says “Make It” to be able to cut out your design. Don’t forget to Mirror your image before cutting!
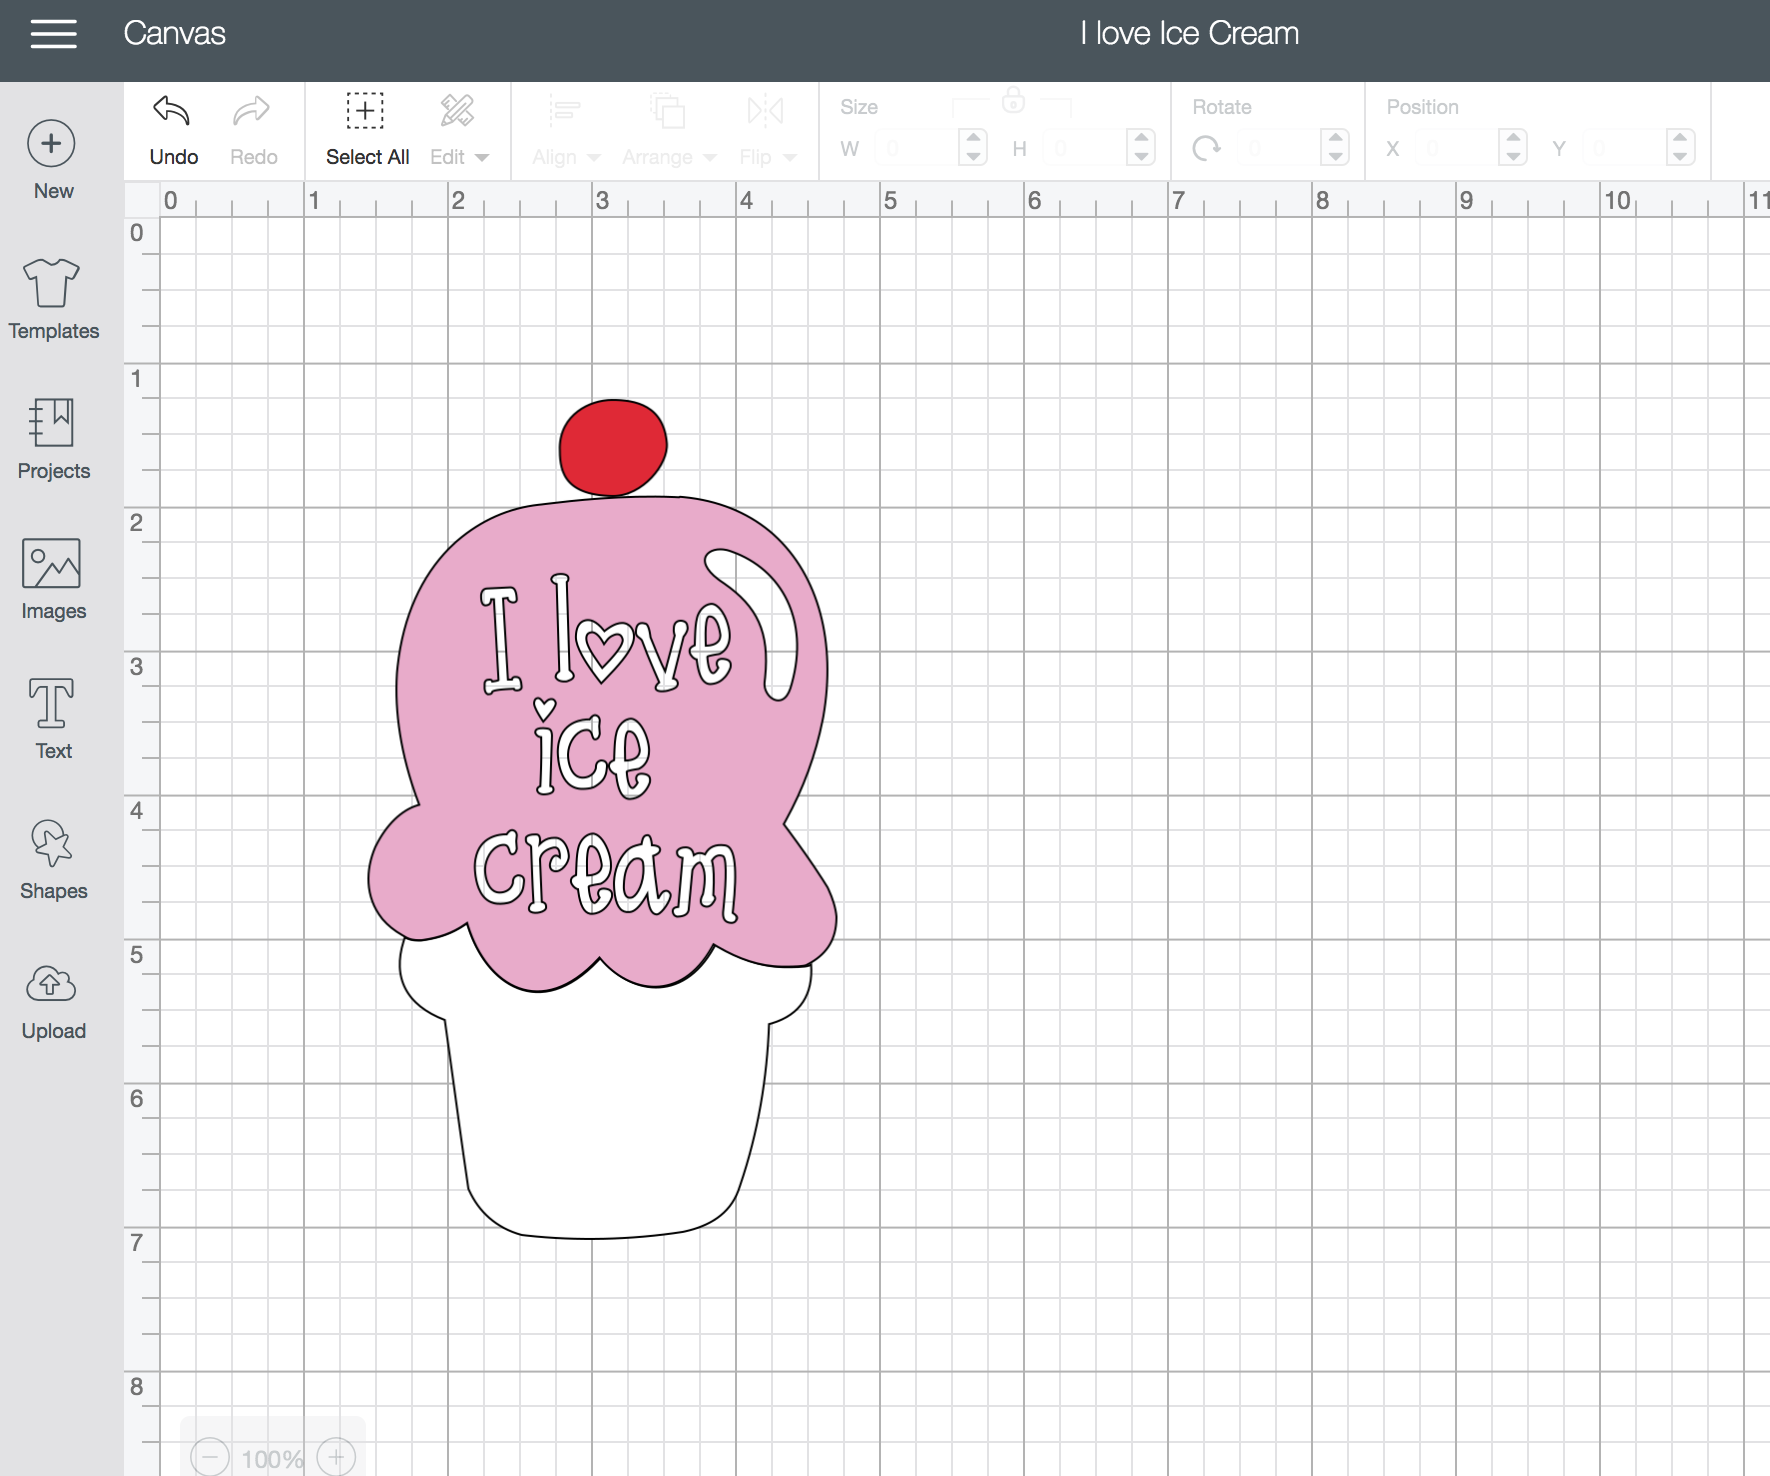
When placing your Patterned Iron On onto your mat be sure to place the “pretty side” down. Select cut and place your corresponding Patterned Iron On to the pieces that are being cut. This design has three different cuts; the cone, ice cream, and lastly the cherry on top 🙂
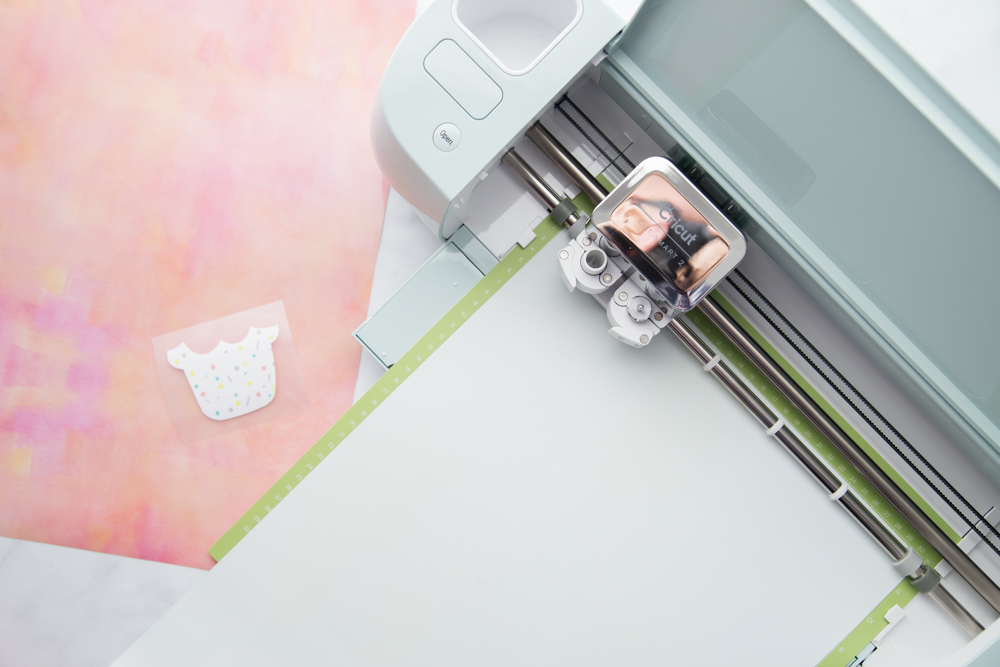
When the ice cream has been cut make sure you weed out the letters.
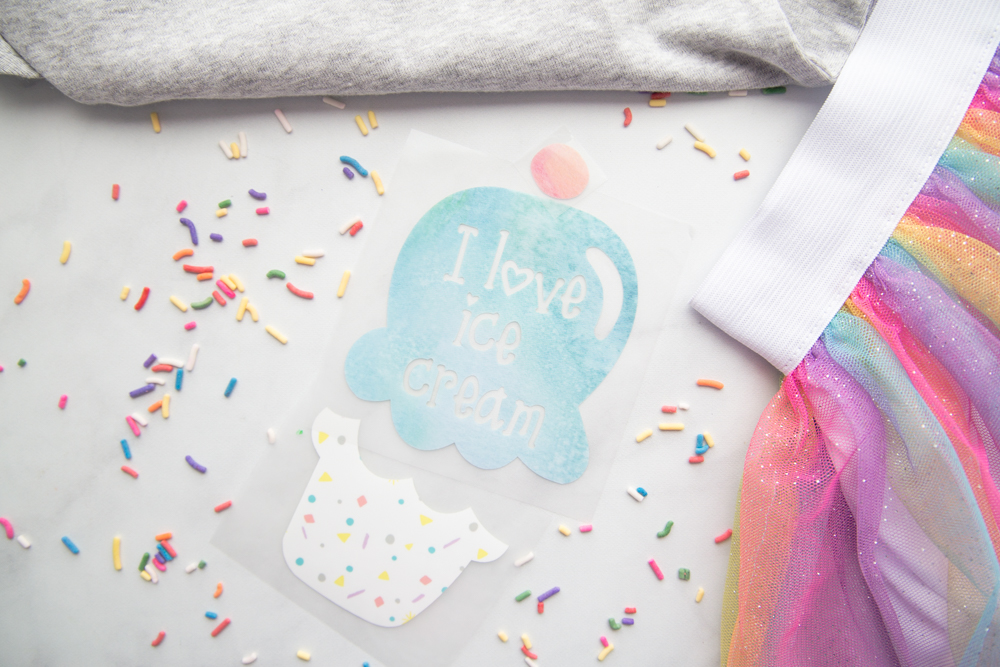
Once all of your pieces have been cut and weeded it’s time to assemble them onto the toddler shirt.
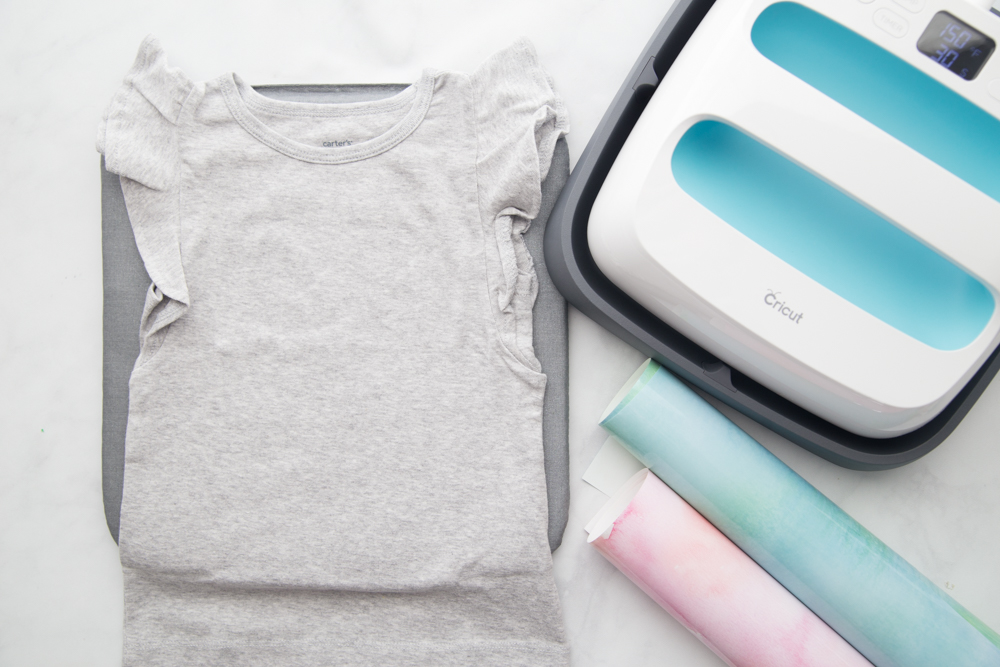
I used my EasyPress and EasyPress Mat to finish off my project.
- Set your EasyPress at 340 degrees.
- Preheat your cotton toddler shirt for 5 seconds.
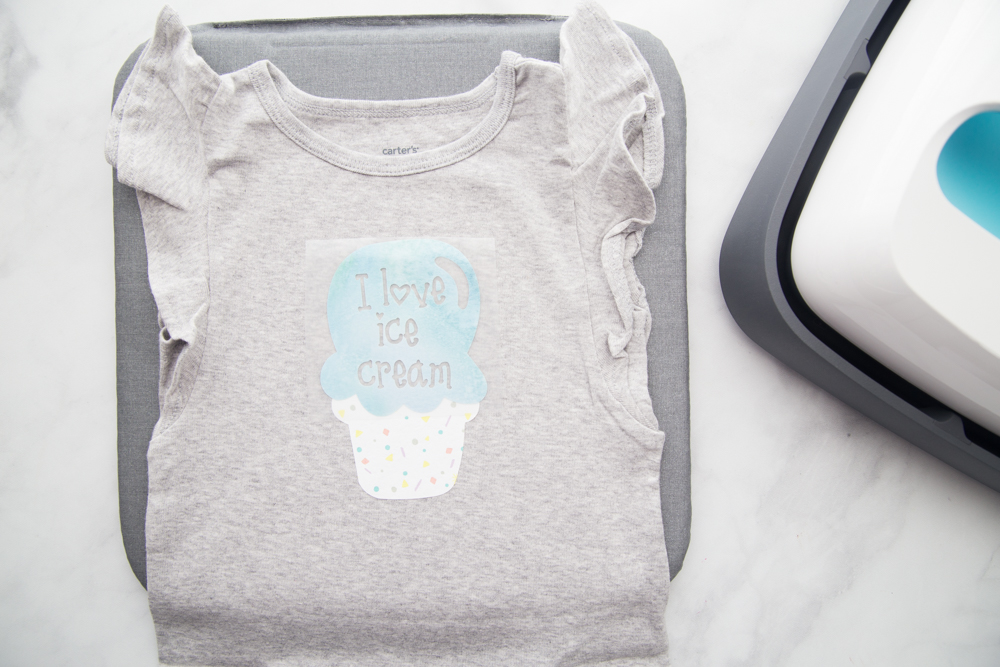
- Lay your first Patterned Iron On design, for this project I started with the ice cream cone. Press for 20-30 seconds, let completely cool and remove clear liner.
- Place your ice cream piece on the shirt and press for 50 seconds, let completely cool and remove the clear liner.
- Repeat with the cherry piece.
- Once all pieces have been pressed, cover the design with your leftover liner pieces and turn the shirt around so the back side of the shirt is facing you, press one last time for 15 seconds. Let cool completely.
My daughter loves this shirt and there was no better way to enjoy a new outfit than with a special treat complete with rainbow sprinkles. 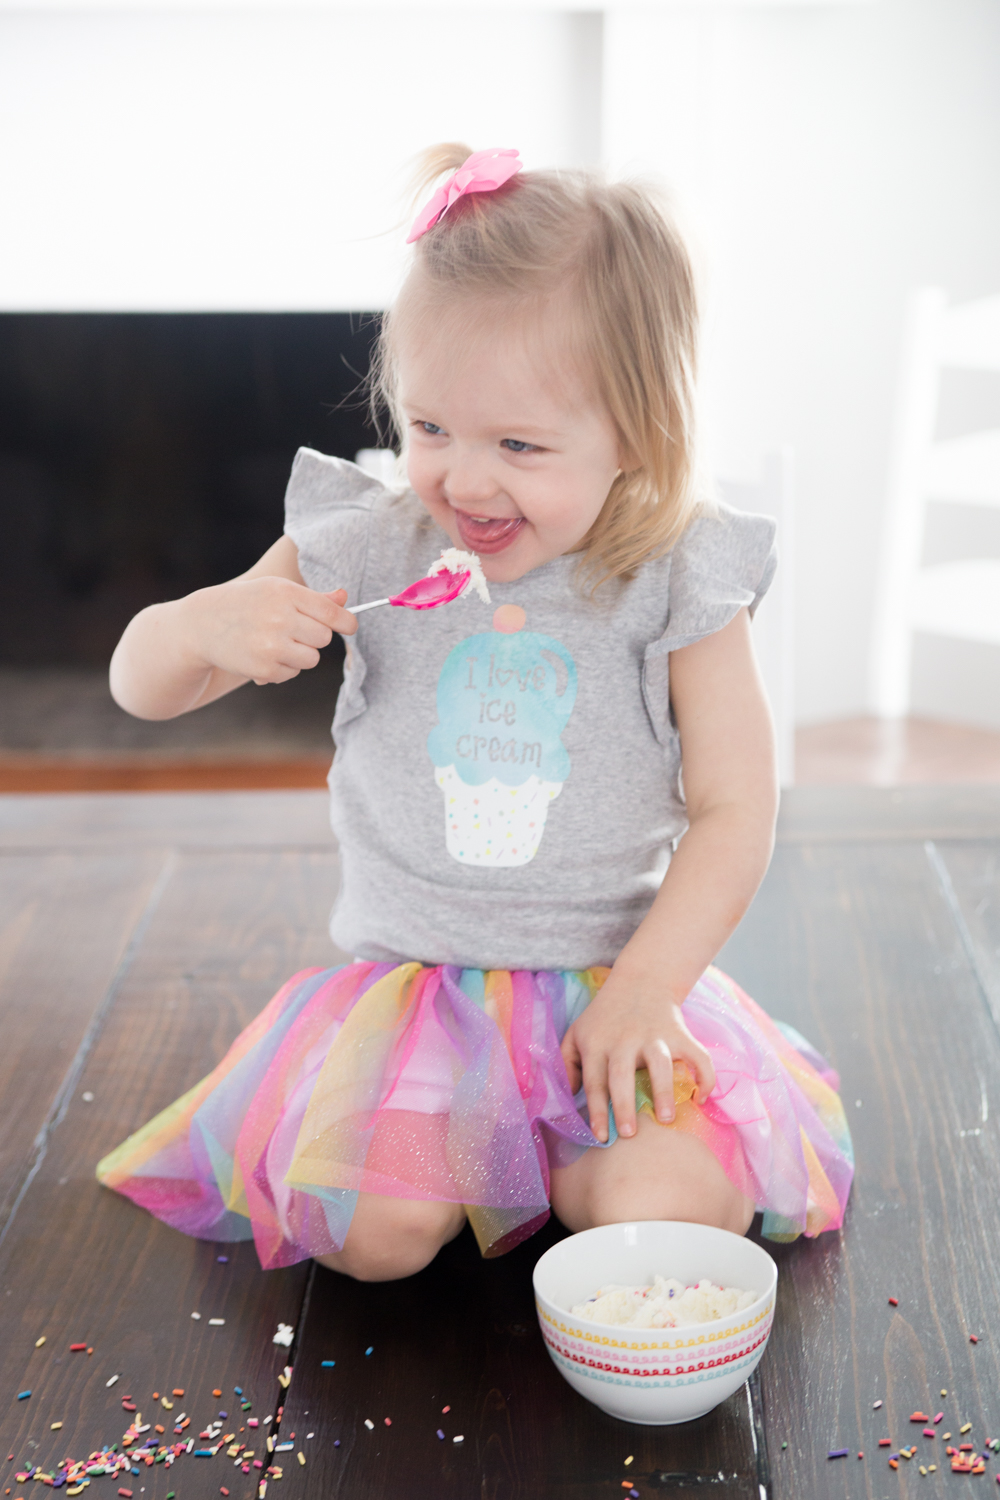
This is a sponsored conversation written by me on behalf of Cricut. The opinions and text are all mine.