
DIY Stacked Picture Frame
As an Amazon Associate I earn from qualifying purchases.
Hi, it’s Amy from Hertoolbelt back again with another DIY project. If you are like me, you take tons of pictures. Sadly most of my pictures stay on the memory card and don’t get displayed. I’m determined to change that, however picture frames can be pricey. The great thing is that we can DIY picture frames for a fraction of the store price. Today I’m going to share with you a simple chunky stacked picture frame that holds a 4″ x 6″ photo. These frames look awesome on a gallery wall with varying sizes and can be customized and painted however you like.

Materials for this Frame
- 12″ x 12″ x 3/4″ MDF (medium density fiberboard)
- 32″ molding
- 1 scrapbook paper
- mod podge
- paint
- glitter paint
- wood glue
- 4″ x 6″ acrylic sheet or glass (I usually purchase a large sheet and cut it the sizes I need with a table saw.)
- glazing points
Step 1
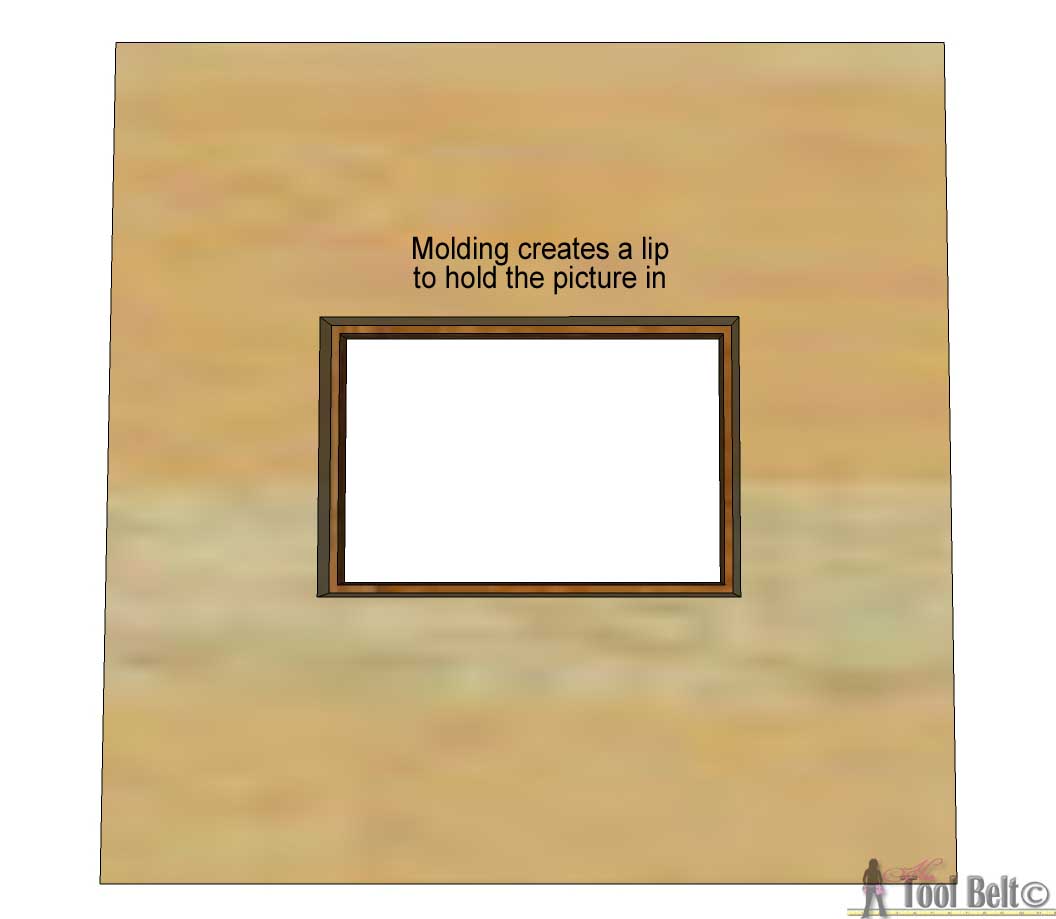
Cut a piece of 3/4″ MDF into a square 12″ x 12″. Mark the inner rectangle to be cut out for the photo, according to the dimensions below.
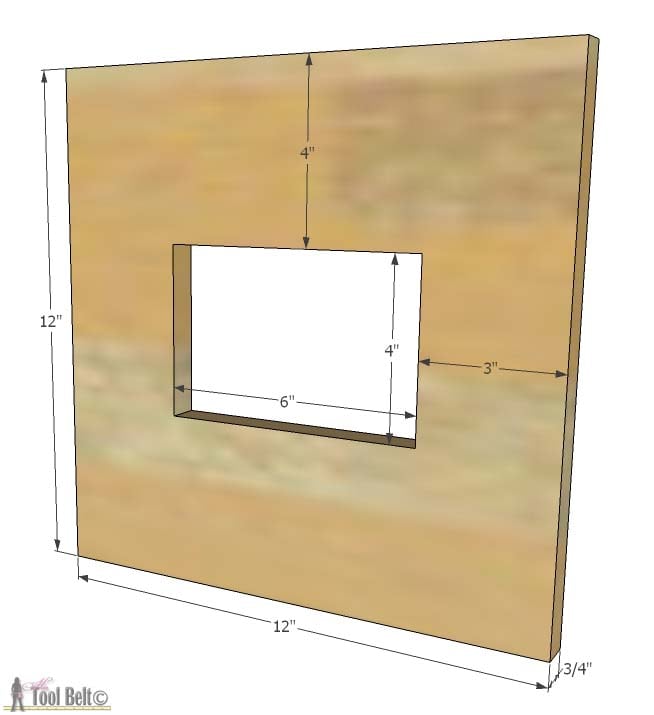
Drill holes in the corners and use a jig saw or scroll saw to cut out the inner rectangle. (If you use a jig saw, it may not cut totally straight and that’s ok just make sure a 4″ x 6″ photo will fit in the hole.)

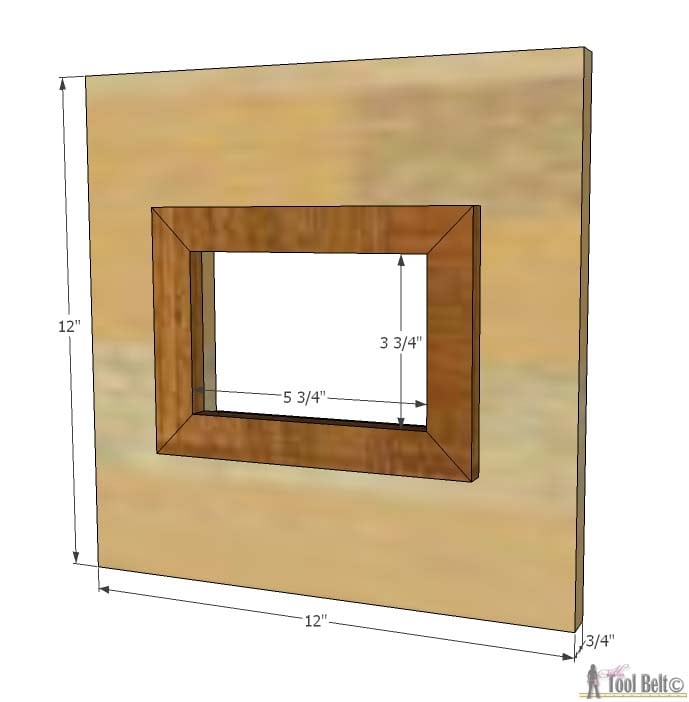
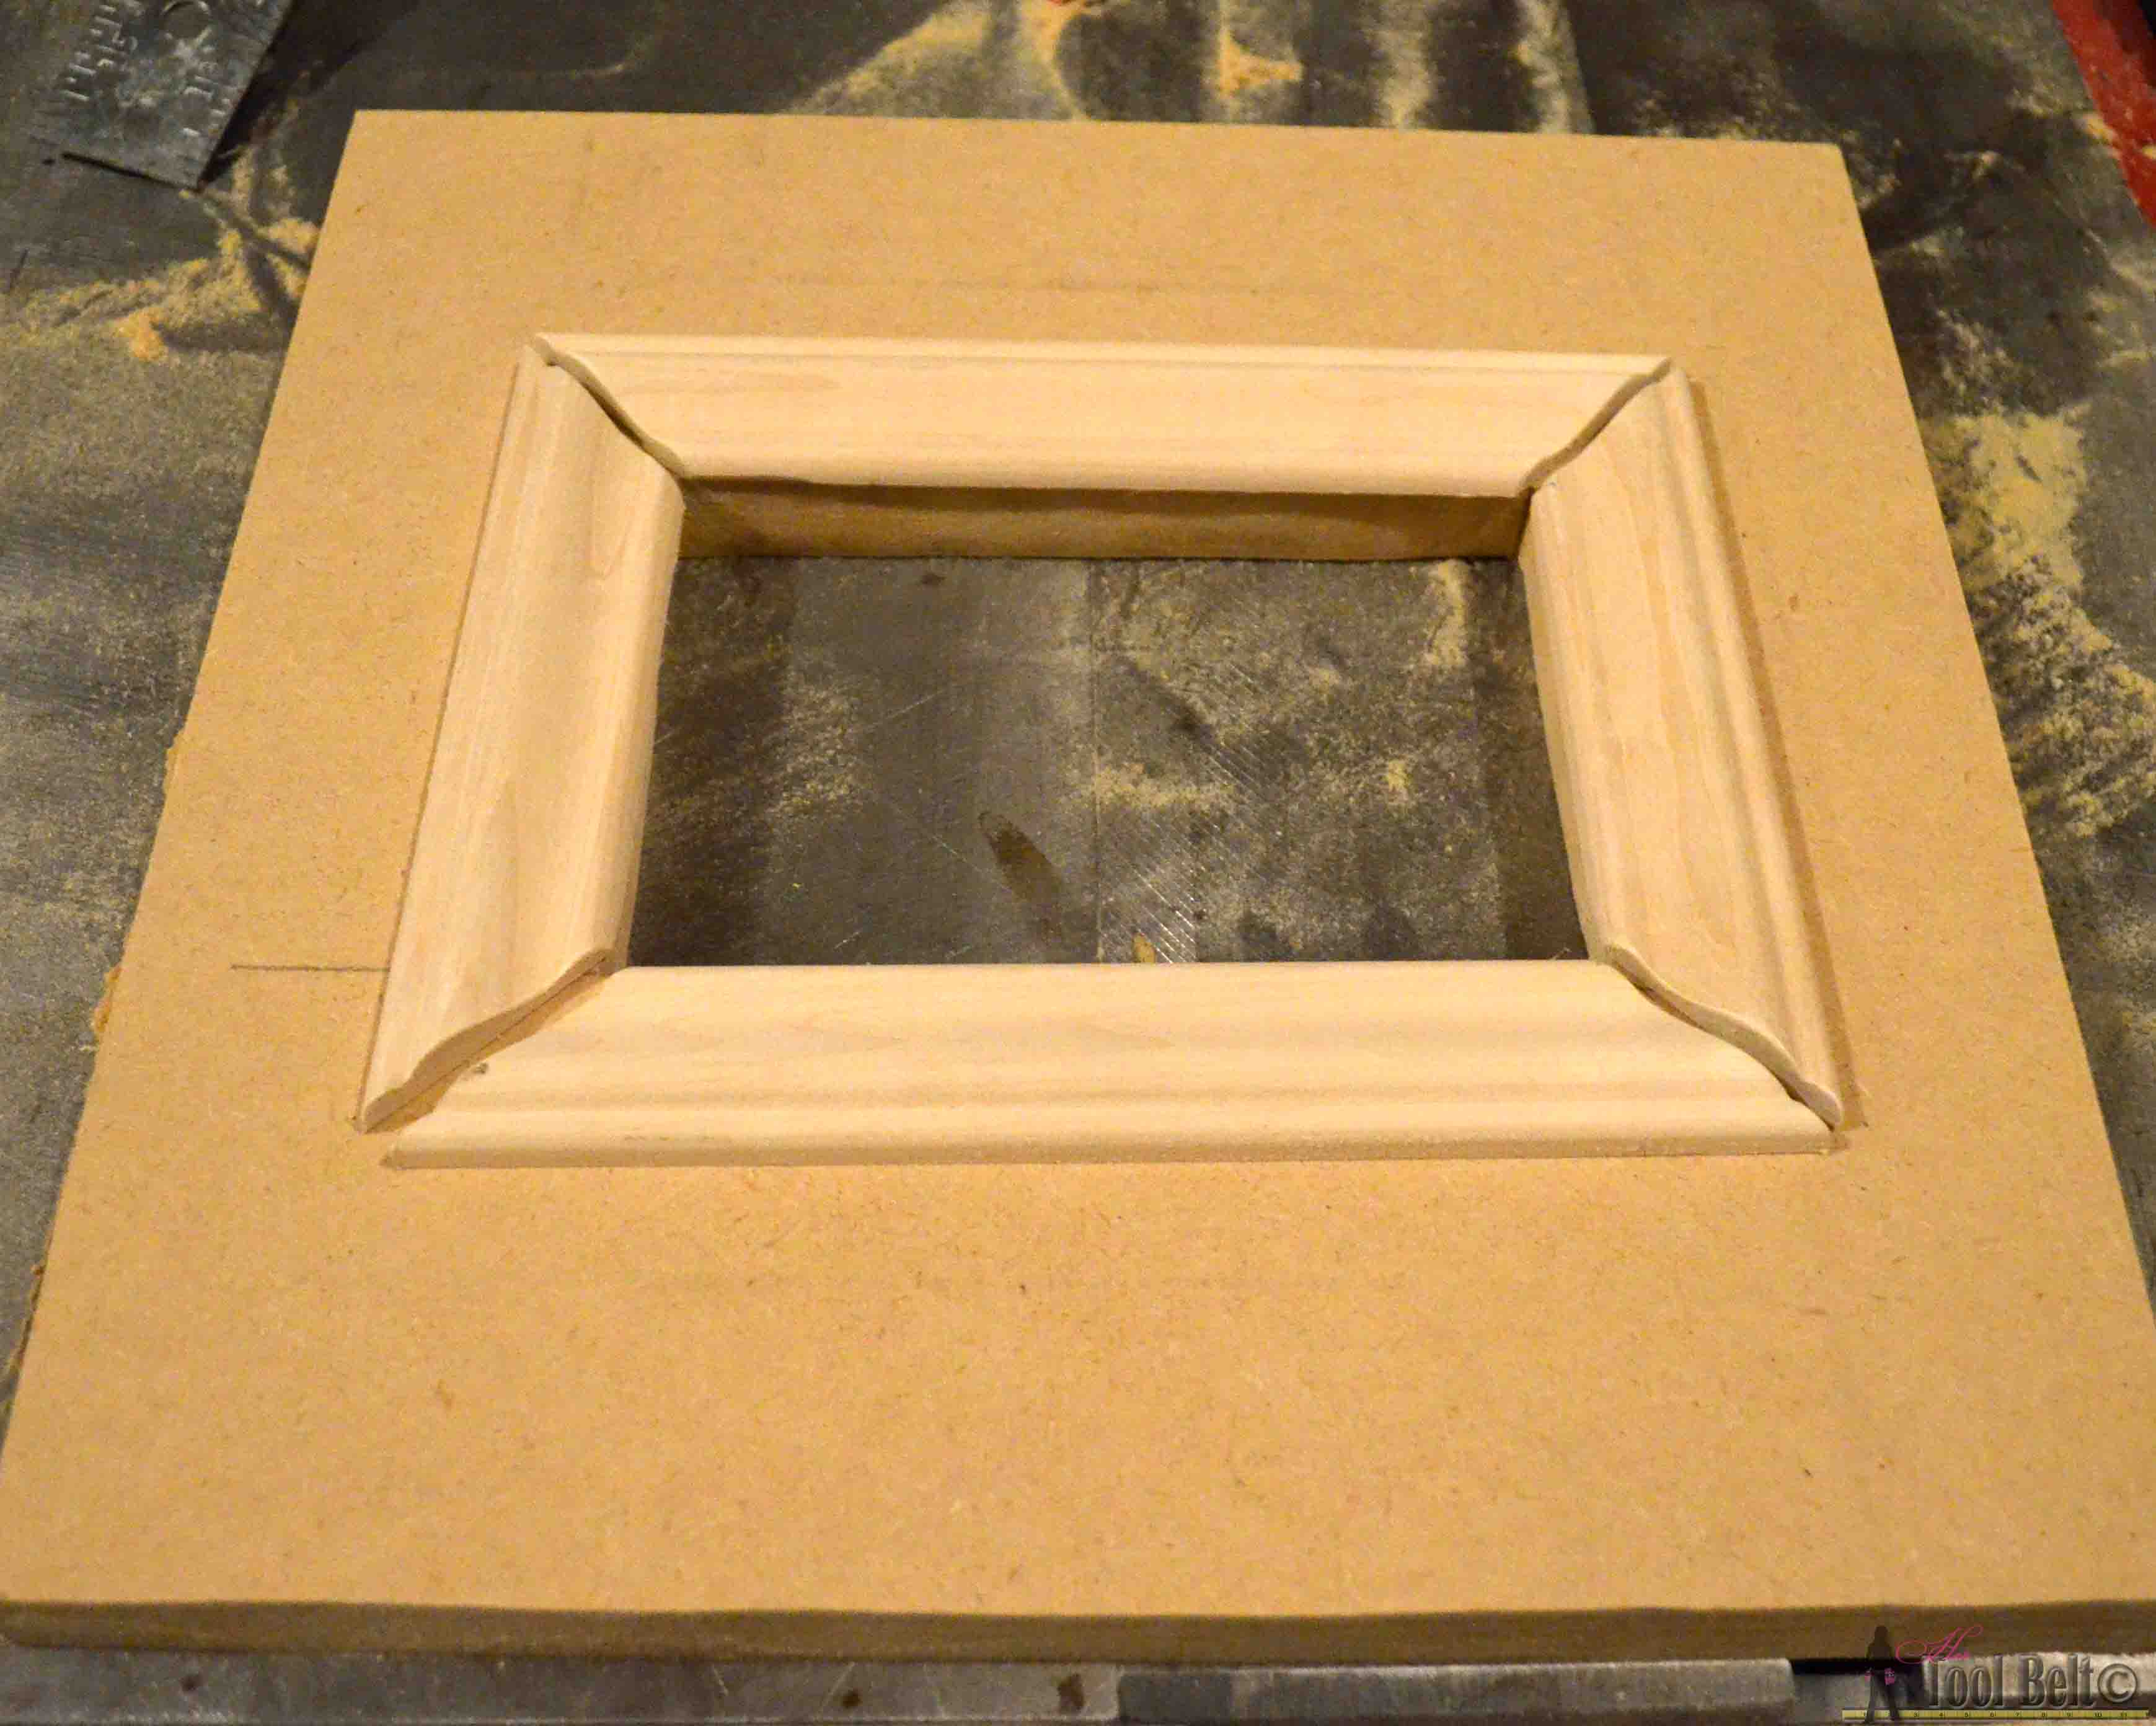
Cut molding on 45 degree angles 2 that have an inside dimension of 5 3/4″ and 2 that have an inside dimension of 3 3/4″. (If you decide to make frames for larger photos, cut the molding inside dimension 1/4″ smaller than the opening.)
Step 2
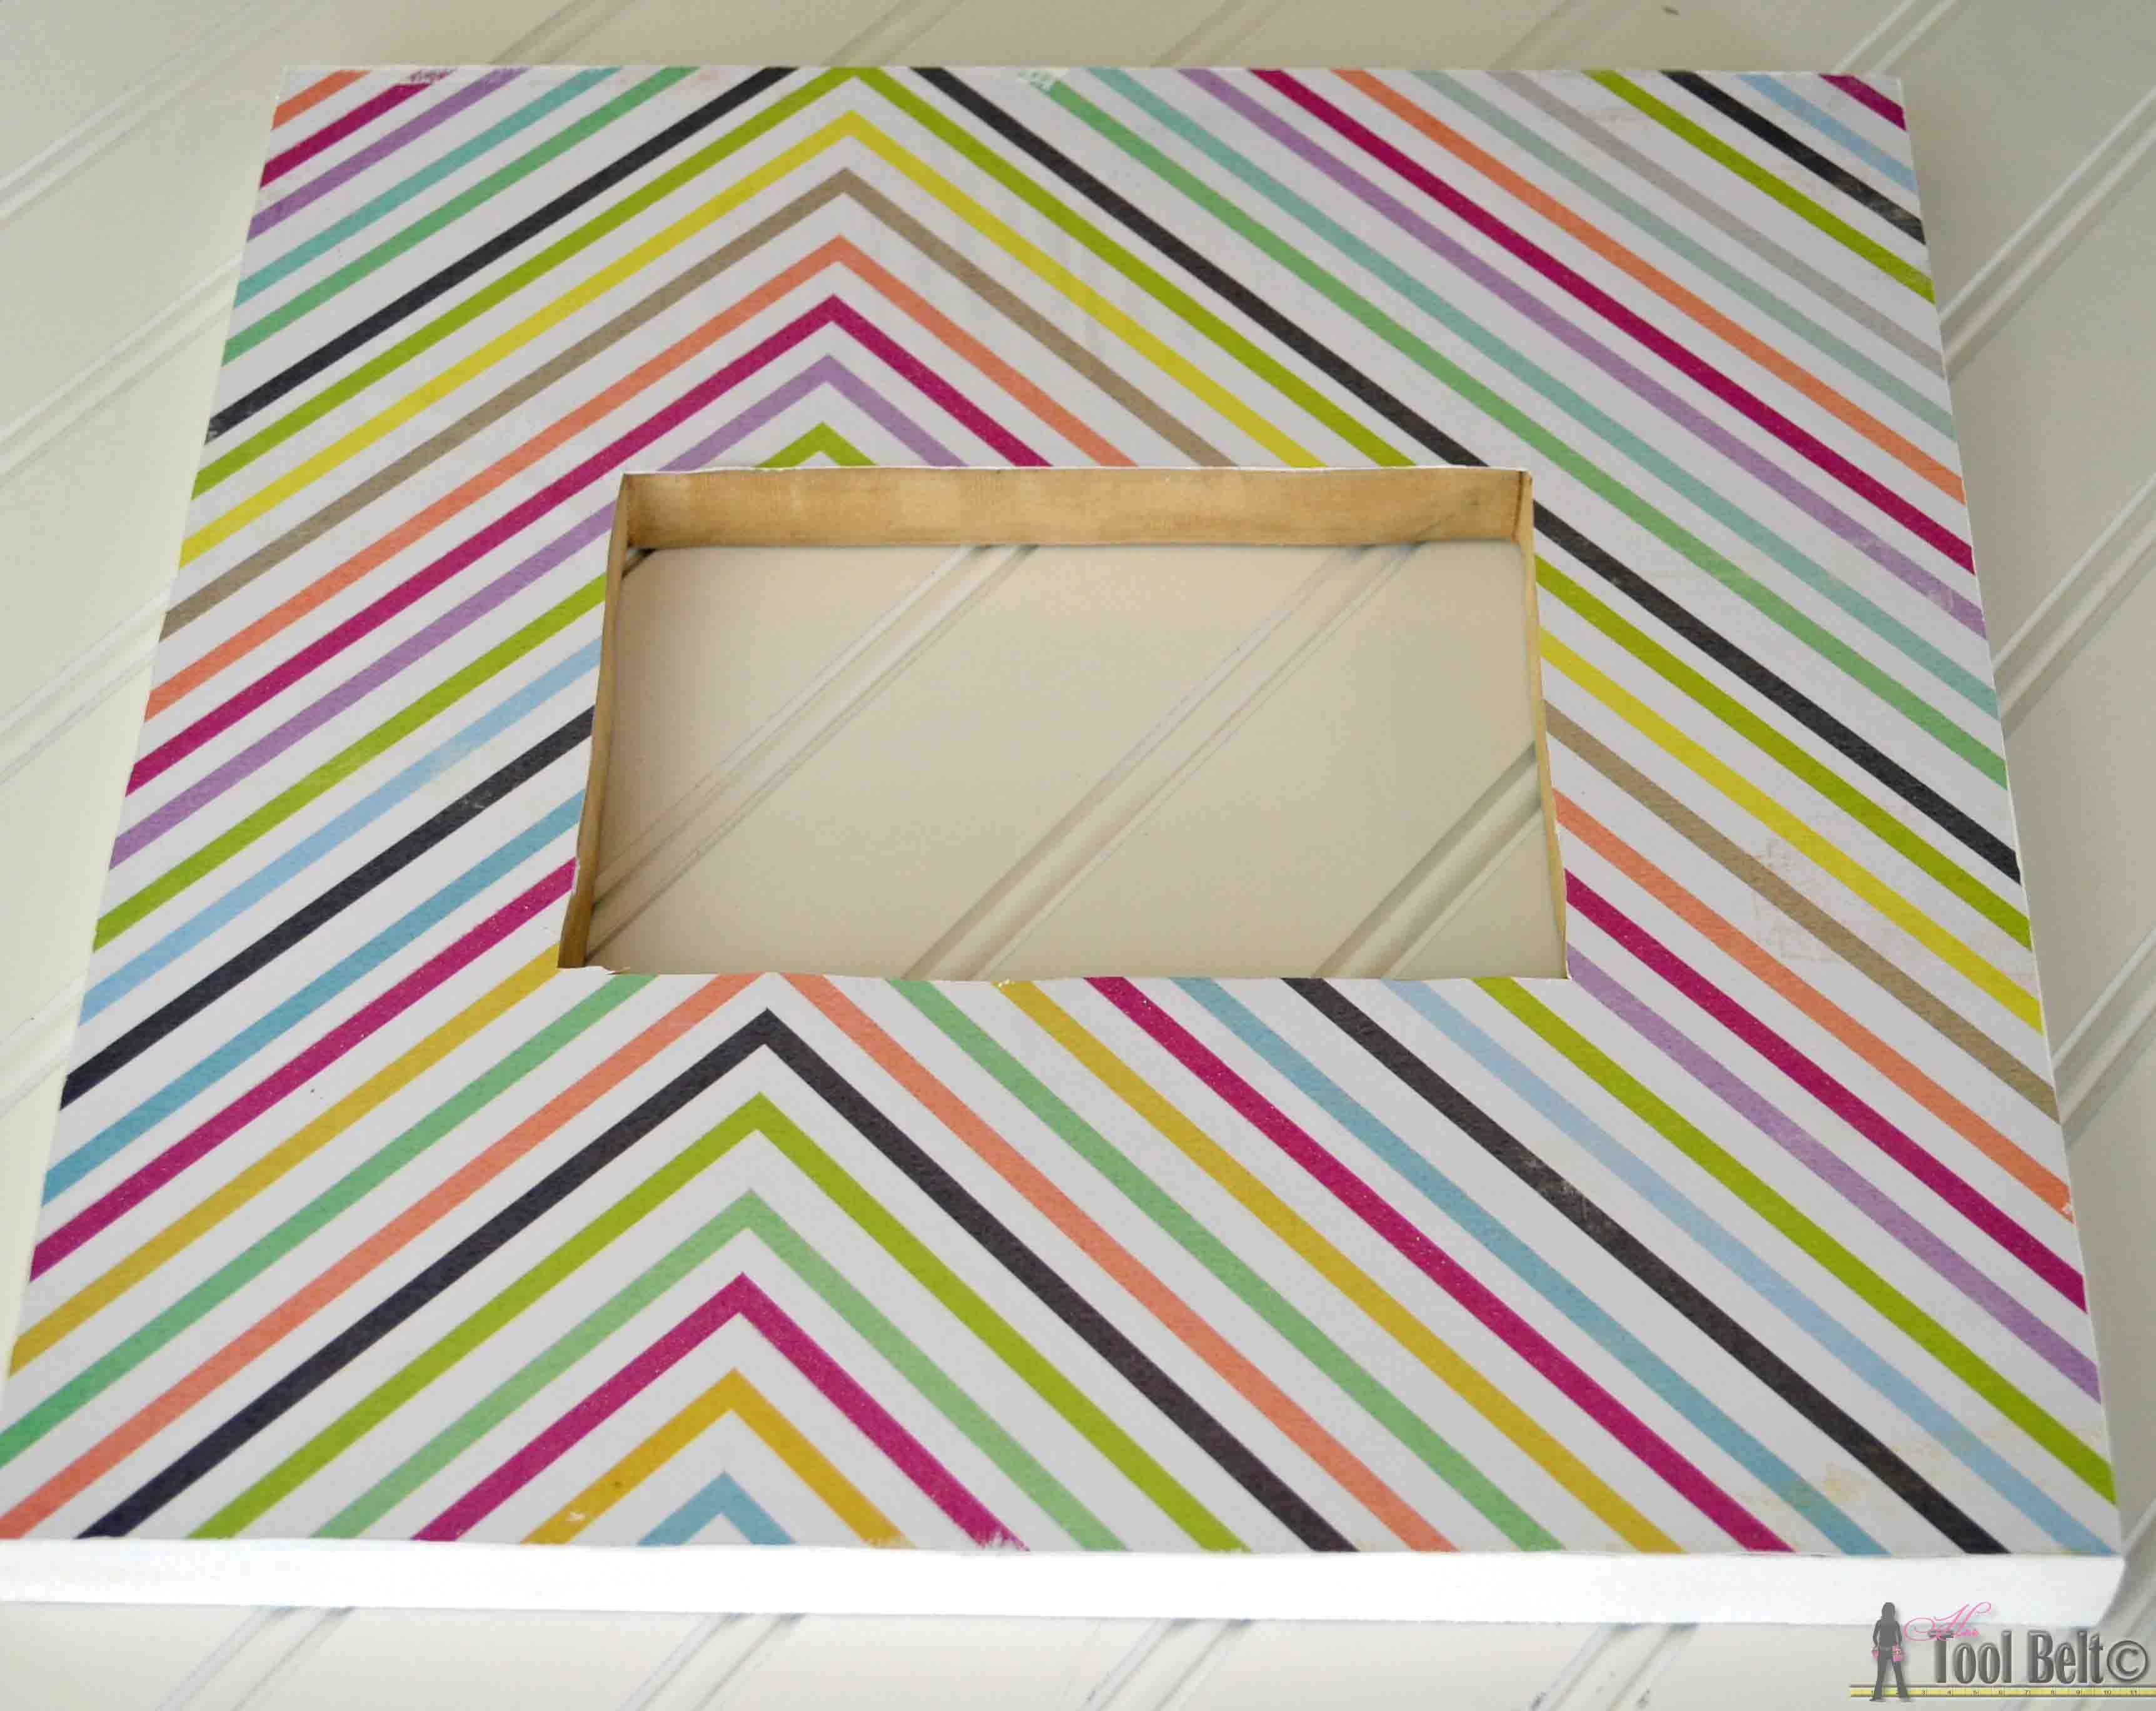
To decorate the frame I decided to glue cute scrapbook paper onto the frame with Mod Podge. You can paint and stencil however you like to customize your frames.
Apply a coat of Mod Podge to the face of the MDF, and backside of the paper. Carefully apply the paper to the frame, smoothing it out as you go.

Allow the Mod Podge to dry. Use a razor blade to trim the excess paper and the inner rectangle.
I painted the molding with Rustoleum Glitter Paint, it’s best to do multiple thin coats. I believe it took 4 coats to cover the molding. Let the paint dry fully.
Step 3
Use wood glue (and brad nails if needed) to secure the molding around the inner rectangle. Once dried, the molding should create a lip that will hold the glass and photo in place.
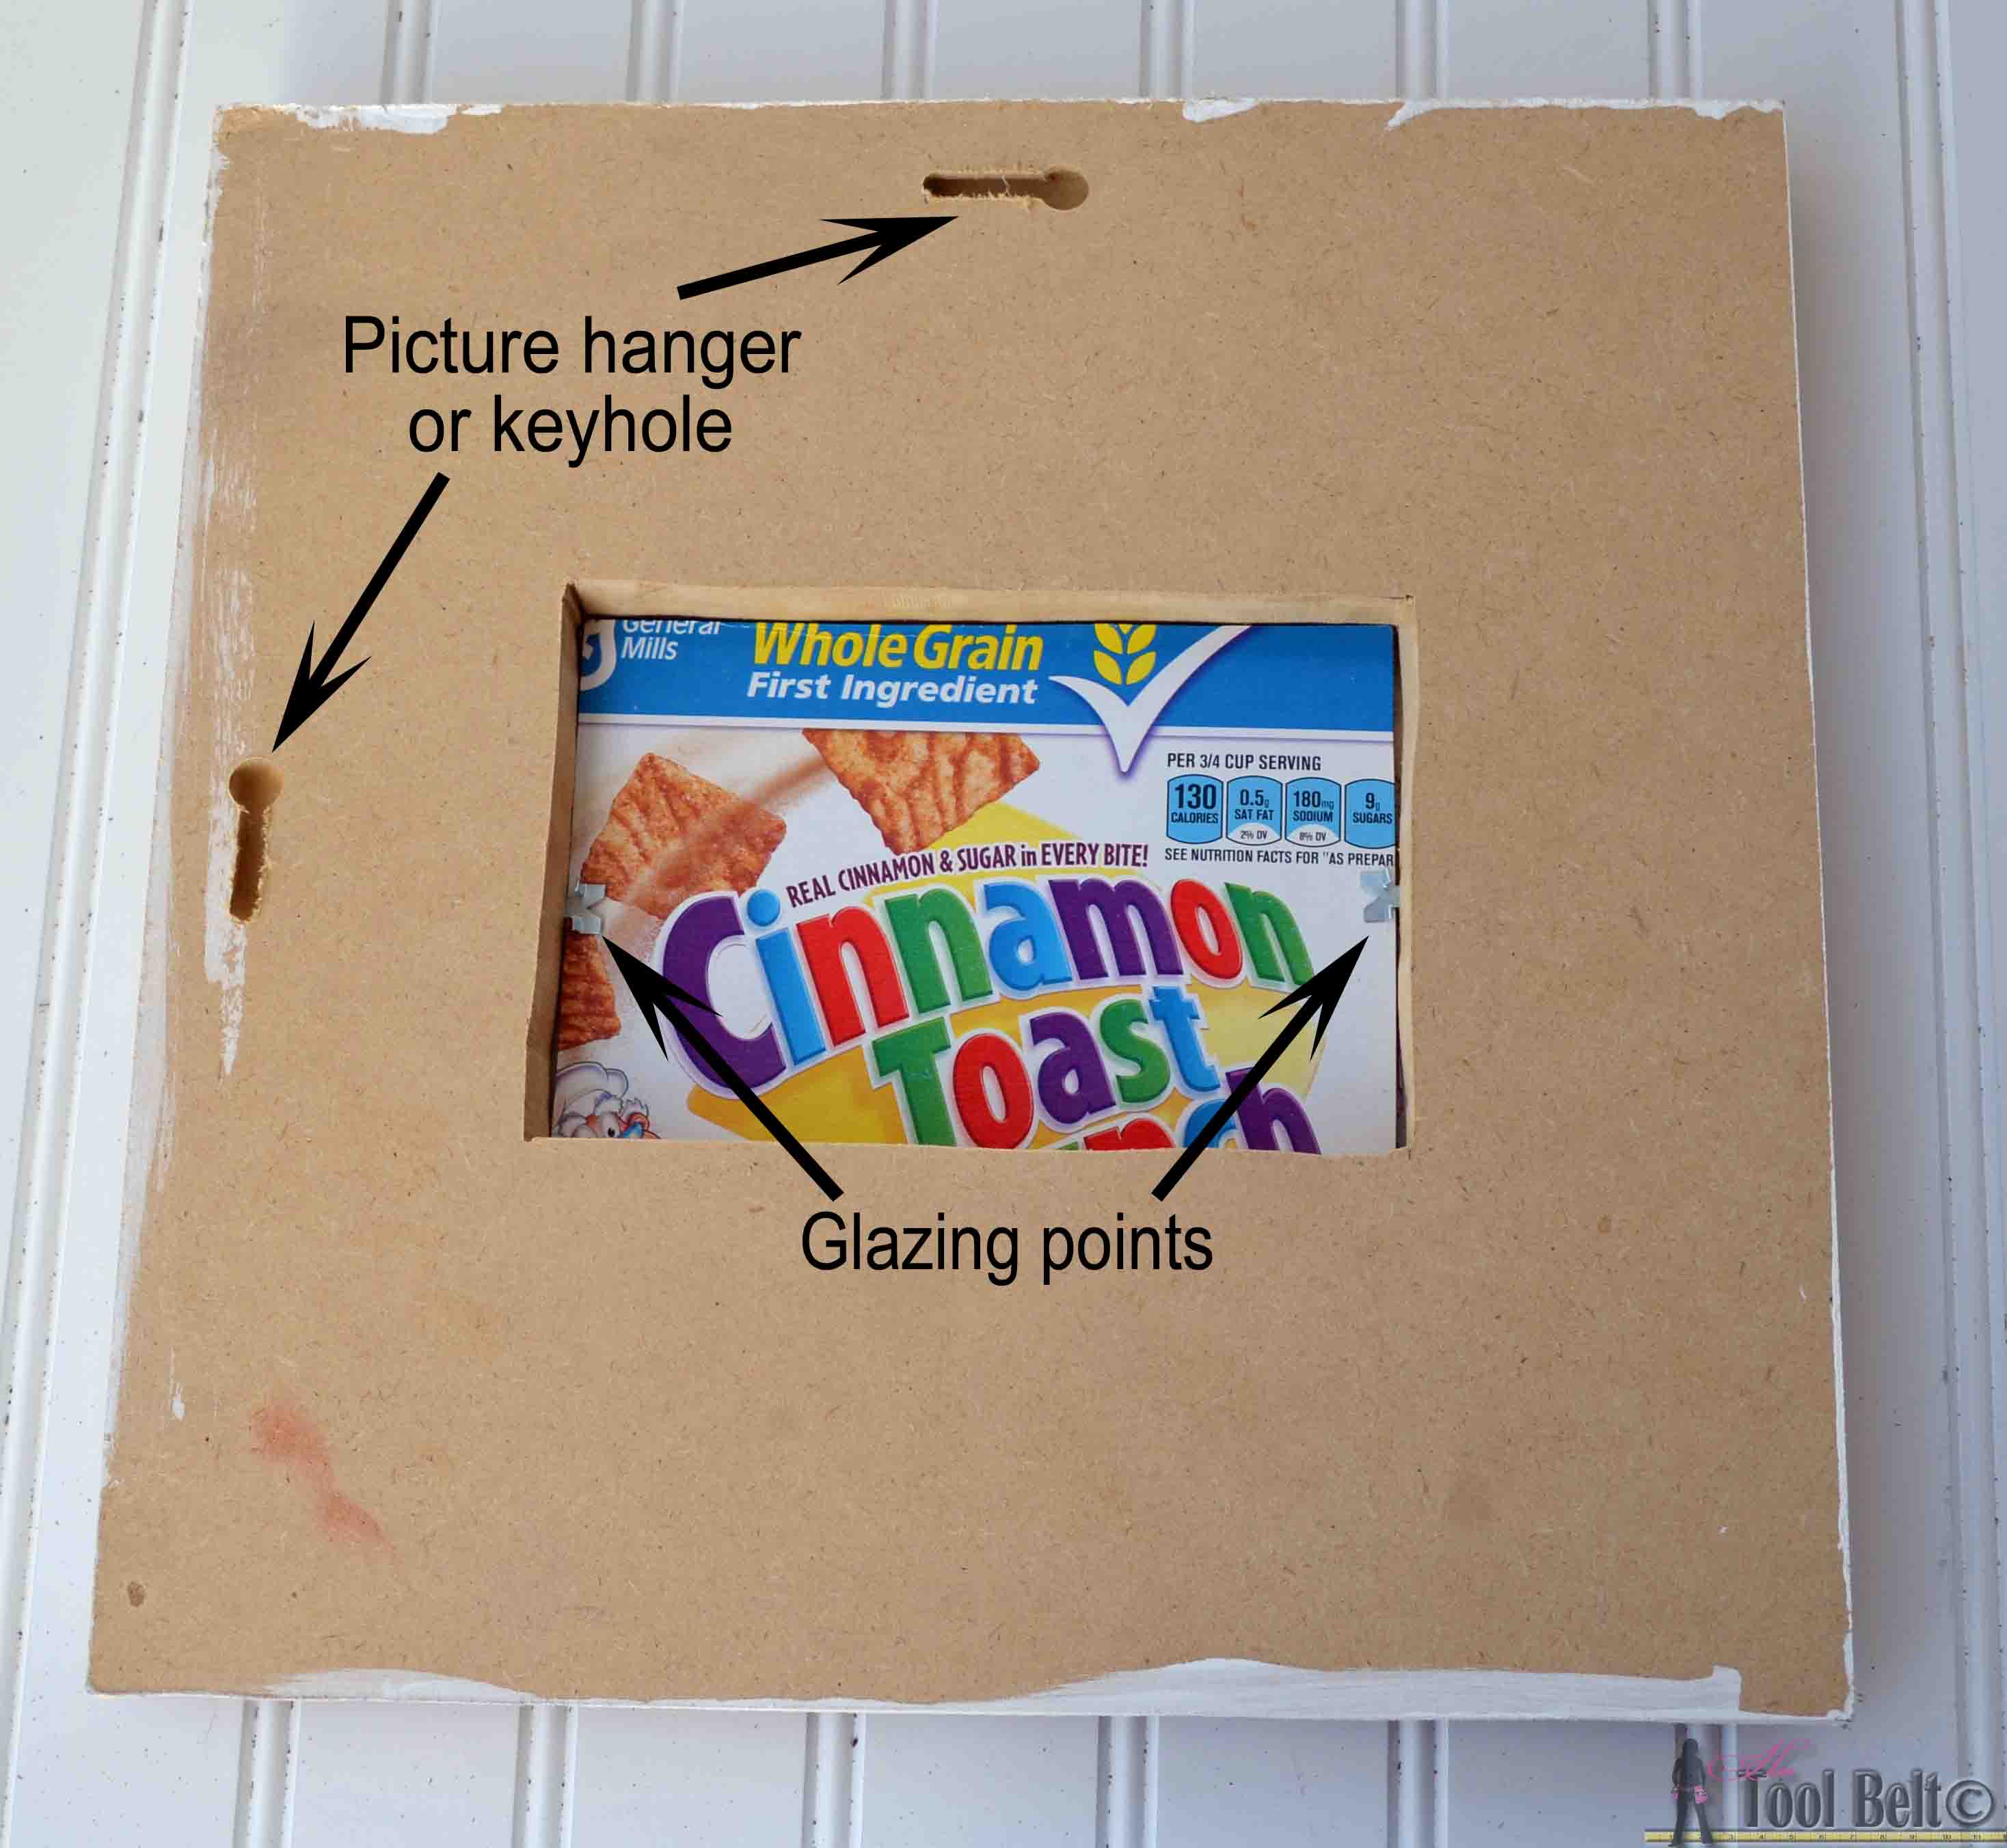
Add picture hangers to the back, or route a keyhole. I like to use a couple of glazing points to hold my pictures in, they are cheap and easy to install/remove when switching pictures.
And there you go, a super cute chunky stacked picture frame.
For more build projects, check out:
 Console Table with Scroll Legs
 DIY Sliding Photo Board
 DIY Bracket Frame

Great idea on making a DIY picture frame! I was looking for something similar for a long time. Thank you for this useful article
Skype has established its website-based buyer beta on the world, soon after introducing it extensively within the United states and U.K.
before this calendar month. Skype for Online also now works with Chromebook and Linux for instant messaging conversation (no voice and video yet, these need a plug-in set up).
The expansion of the beta provides assist for a longer list of spoken languages to help strengthen that global usability
I thought this looked so good! I might do something similar as a gift this Father’s Day for my Dad – thanks for sharing this.
This is really helpful information for people who looking for guide to make a picture frame like me. I love to make them like the presents for my friends on special occasions. Making something by our-self seems to be more meaningful.
Thanks for posting this! I really like your idea to create a stacked picture frame. This seems like a really good way to make a larger frame. I have a few pictures that need to be framed, but they’re so small that the frame that they’ll fit in will look too small on all of the wall space that I have in my living room. It seems like using the smaller frames that I have for my pictures and stacking it on top of a large piece of decorated fiberboard would be a good way to take up some extra wall space in my room.