
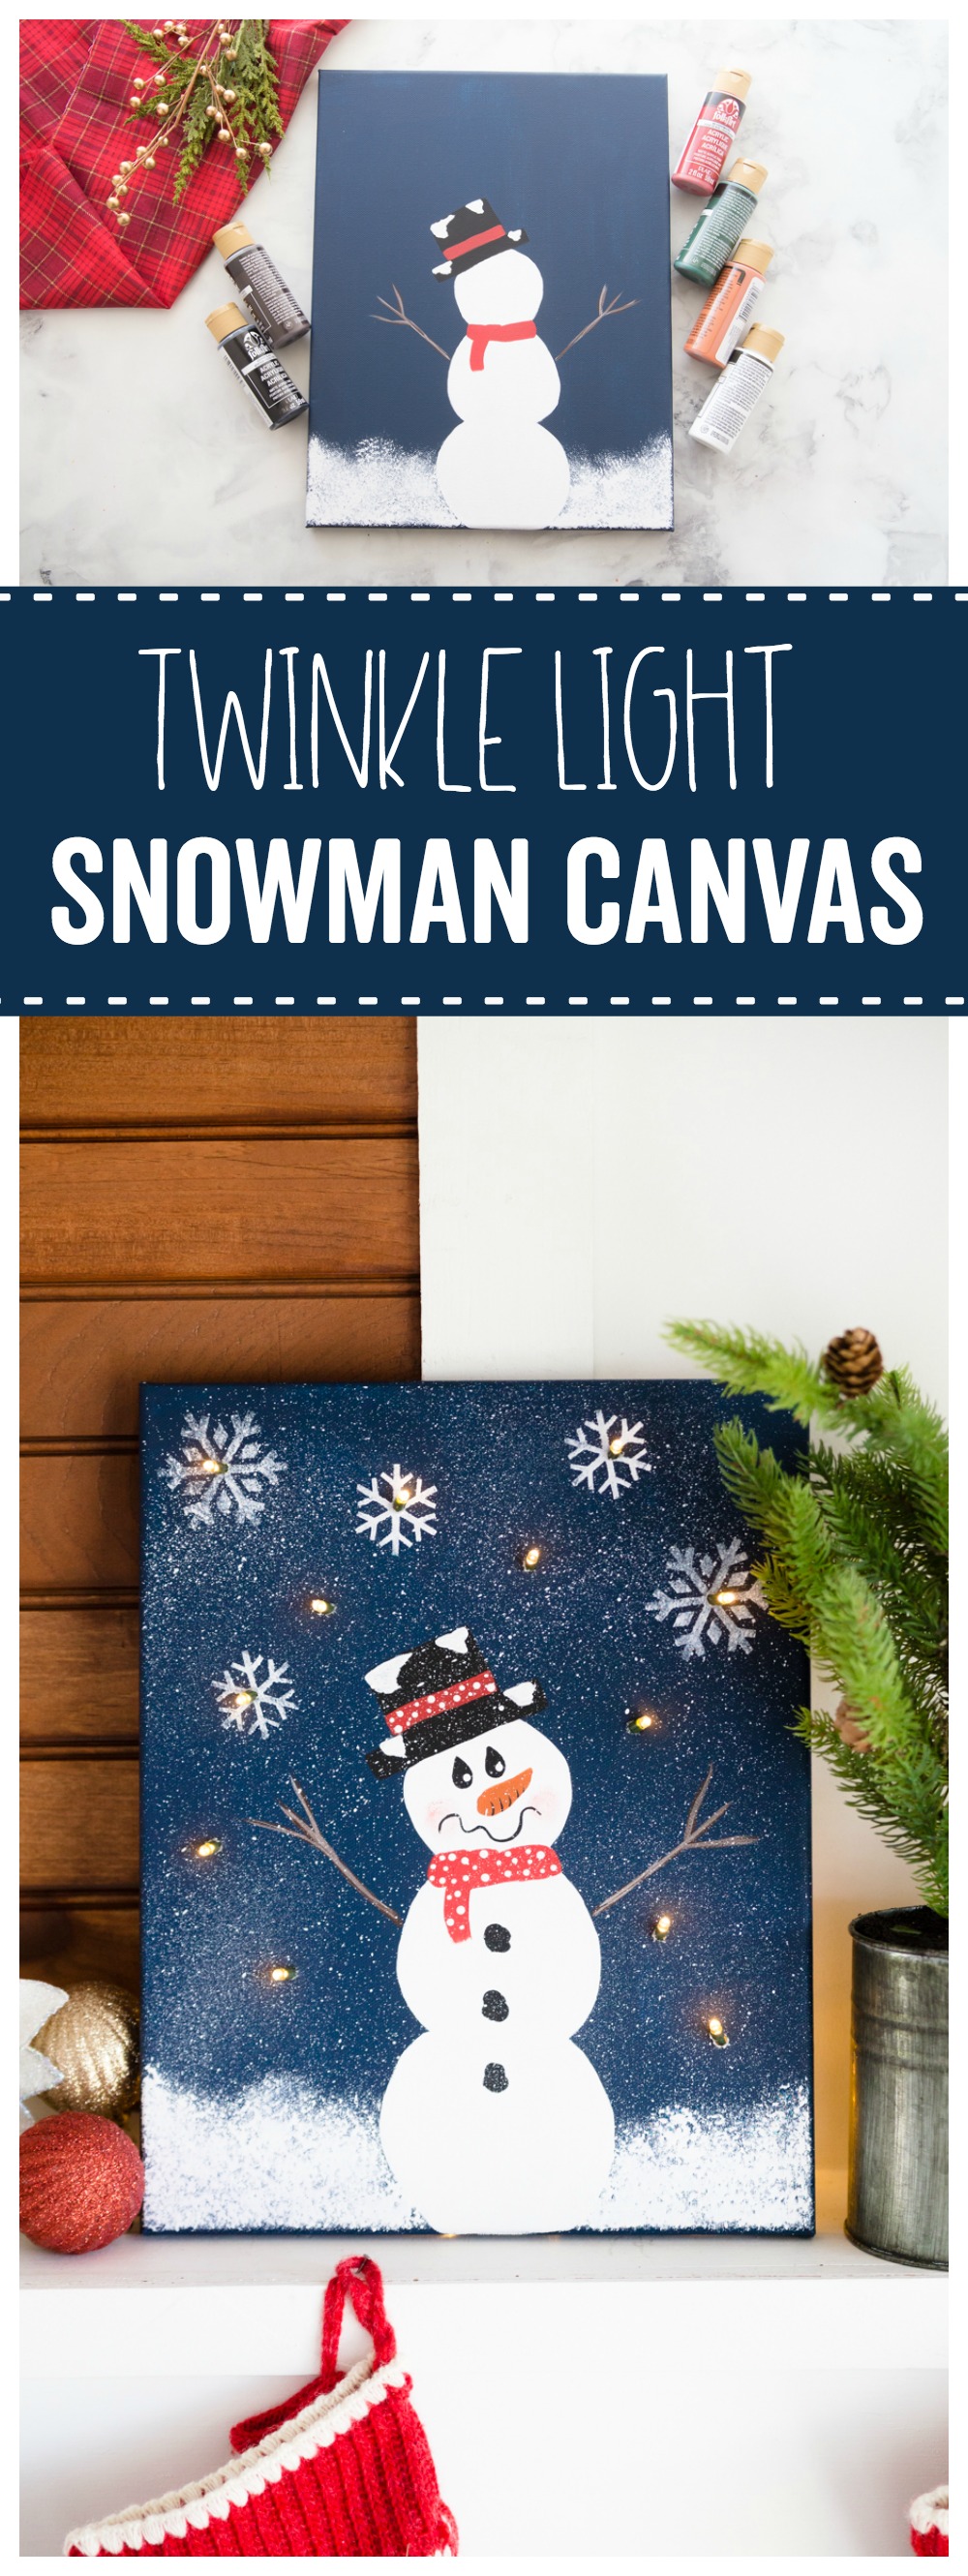
DIY Lighted Snowman Canvas
As an Amazon Associate I earn from qualifying purchases.
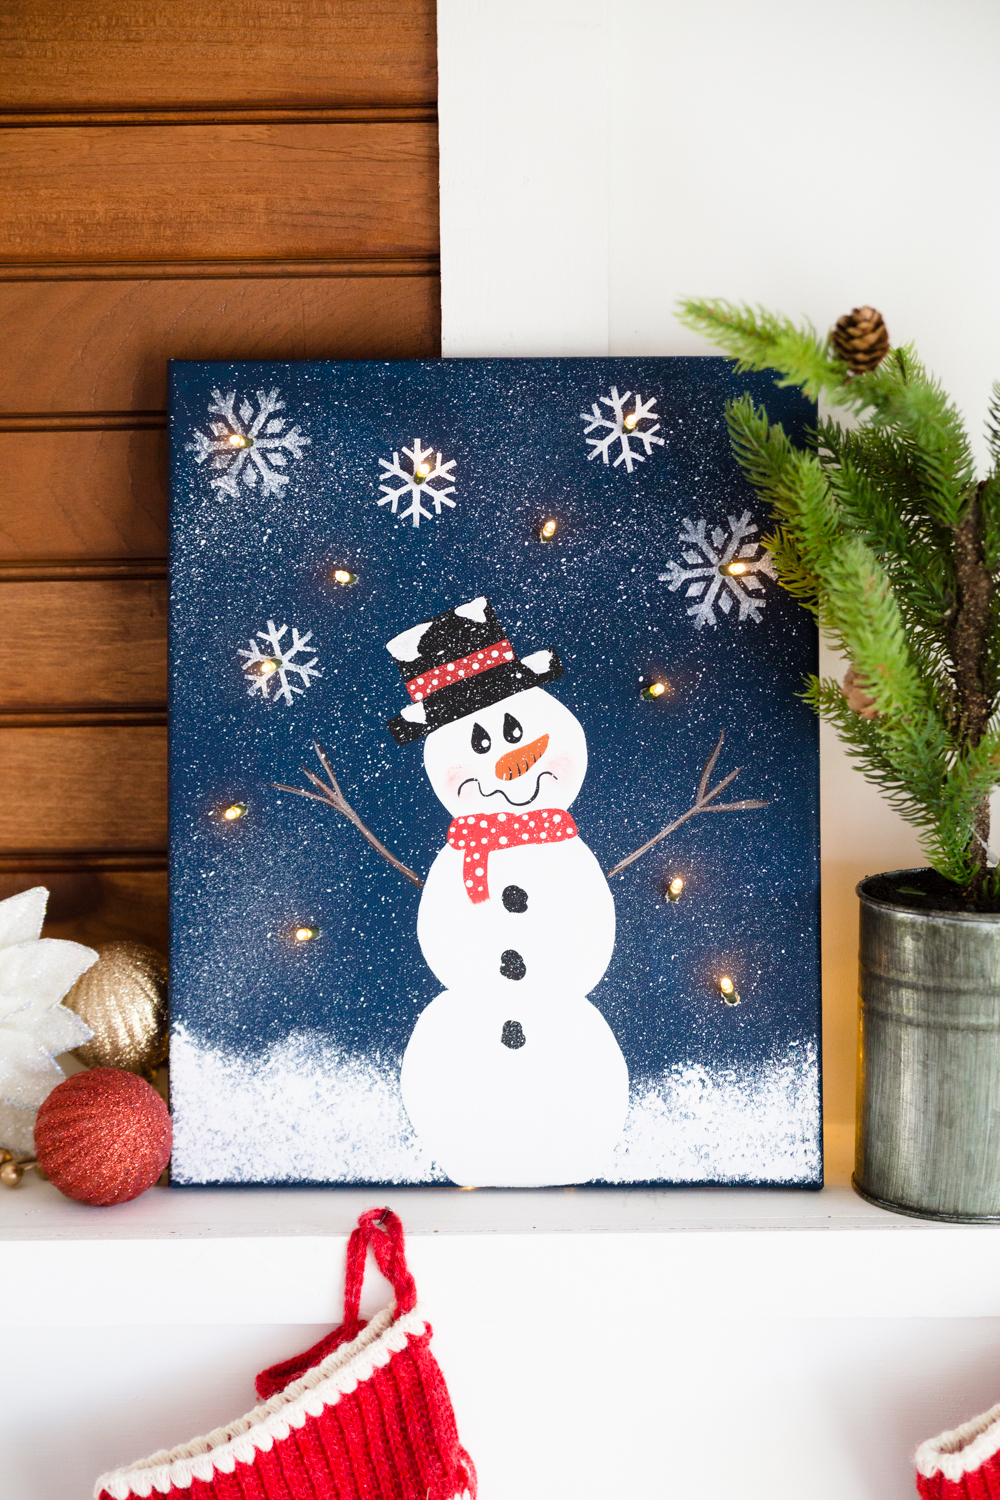
This DIY Lighted Snowman Canvas is the perfect way to add some holiday cheer to your mantel! The twinkle lights adds the perfect touch!
This post is brought to you by Plaid. All opinions are mine.
Friends, I LOVE Christmas. Ever since I was a little girl it has been my favorite holiday. I always looked forward to my mom bringing down the Christmas decorations from the attic the day after Thanksgiving. Christmas music would fill our home as we added ornaments to the trees and as we found places for my moms collection of snowmen and Christmas figurines. Coming home from school and having the whole house lit up with various Christmas decorations was always so magical. Growing up I also watched my Mom and Grandmother tole paint. They would paint different scenes and characters on various sizes of wood and sell them in our local craft fair. As my siblings and I grew older we even got to help at the craft fairs. When Plaid started putting together this DIY with Holiday with us Plaid Creators I knew just what I wanted to make and even got my mom to help me out!

SUPPLIES NEED FOR DIY LIGHTED SNOWMAN CANVAS:
- White Canvas, I used an 11 x 14 inch canvas
- X-Acto Knife
- Mod Podge Detail Brushes
- Mod Podge, Extreme Glitter
- FolkArt Artist Variety Set Paint Brushes
- Martha Stewart Crafts Stencil, Snowflake
- FolkArt Acrylic Paint, in the colors you desire
- LED Micro Lights, I used a thread of 20.

First you will begin by base coating your canvas. This required two coats. You may choose not to base coat your canvas at all but I feel the Midnight paint color adds a pop to the rest of the snowman. Most of this canvas is simple circles, squares and rectangles but if you feel more confident following a pattern you can print ours out right HERE. You can then use the template as something to look at or you can use transfer paper and graphite paper to draw on the design.
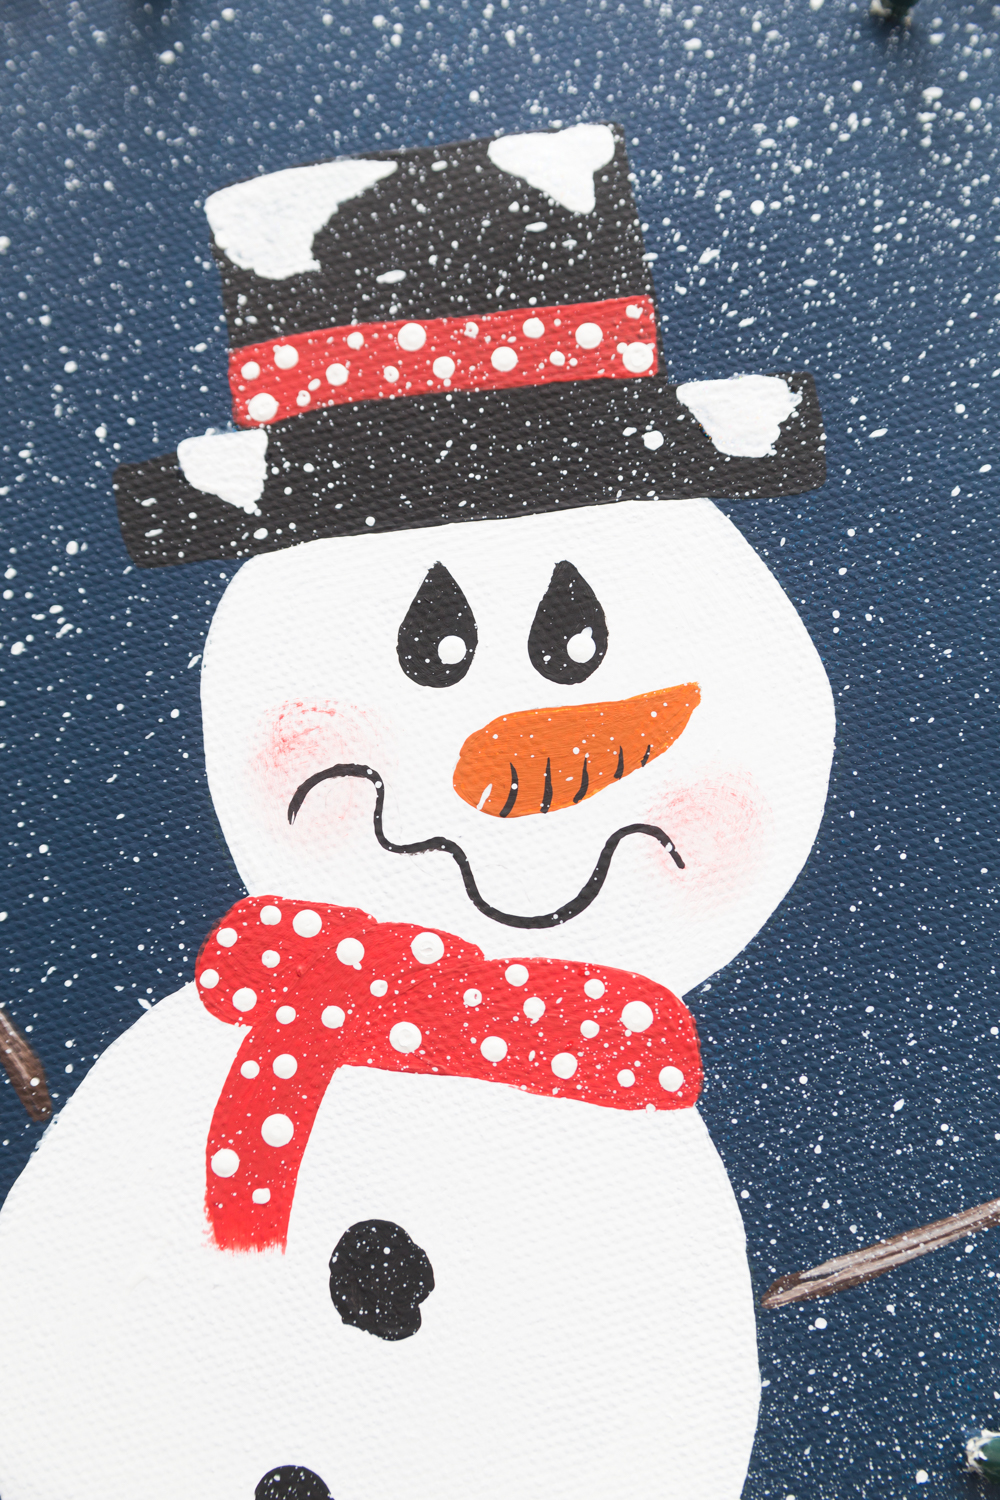
Once your base painting is done you can start adding the fun details to your snowman such as coal buttons, polka dots or stripes on the rim of the hat and scarf and lastly facial features. This is both a beginner and more advanced project. My mothers personally is more advanced than me…okay..a lot more advanced than me 🙂 She prefers to add shading to the scarf and even trees in the background. You can make this as simple or as detailed as you want! Once you are finished adding your details and they have dried you can now stencil on your snowflakes. While my snowflakes were drying I used a small wet toothbrush and splatter “snow” around the canvas to give it a more winter look. I also painted on some Mod Podge, Extreme Glitter on the snow and the snow on the snowmans hat to give it a little extra sparkle. 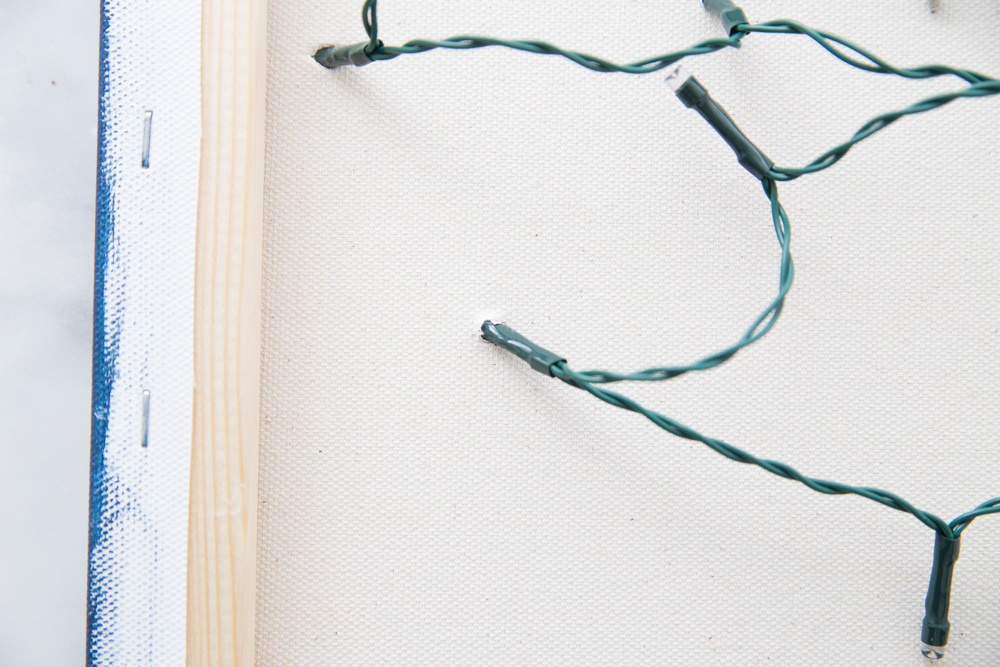
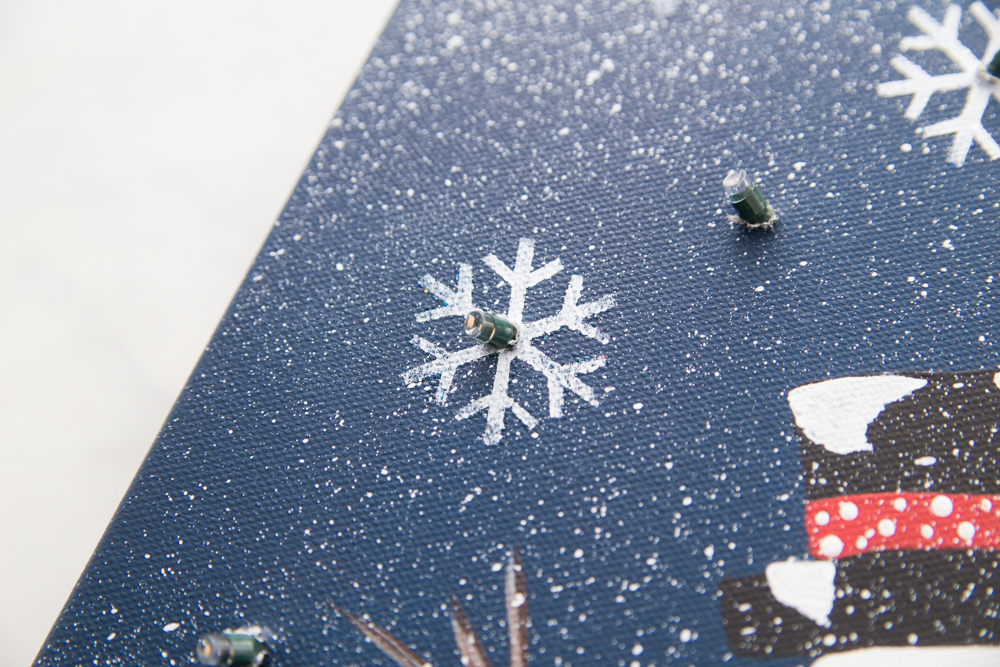
Once your snowflakes have dried it’s time to use your X-Acto knife to cut out the holes for the micro lights. I chose to have a light go in the middle of each of my snowflakes and around the snowman. Poke your lights through the back of your snowman canvas and light it up! I just carefully tucked the extra lights at the bottom of the canvas when I put it on my mantel.
I know this project seems like it has a lot of steps and it does, but it really does go by rather quickly! These would make such fun Christmas gifts or a craft to do with some of your closest friends and family members. I hope you will try to make this canvas and if you do make sure you tag madetobeamomma on all social media platforms so I can check him out!


What are all the colors of the paint? Obviously black and white, but what are the other colors?
Thanks so much,
Brittany
Do you base coat the entire canvas or paint the dark blue around the snowman?
How do you get the lights to stay in the canvas? did you use any adhesives?
Cute idea, might just attempt this with a group of lady friends. Can’t wait!!
I can’t wait to try this one! I’ve just recently become interested in painting and this looks like something easy enough to try for the holidays! I’m not sure what set I’d get!
I love painting and crafting, and I can’t wait to try this with my daughter for a pre-christmas gift for Nana! She collects snowmen, and this is perfect!
This is such a creative and adorable canvas! I especially love the addition of the lights! I would love to buy the supplies to do this!
Such a creative and adorable idea! I would love to buy the supplies to make this project!
I am excited about doing this project myself as well as with my granddaughter.
So cute!
This is so cute!!! My daughter will be making several for Christmas gifts!
Thank you Cindy! It would definitely make a great Christmas gift!
Fantastic snow scene.
Love the use of the lights.
Have to go shopping.
thanks for sharing.
I LOVE THIS CANVAS!!!
I cannot wait to try your tutorial.
Thank you so much!
Thanks Helen! I would love to see it whn you are done!
Happened upon your ‘snowman canvas’ by accident and I am SO GLAD!! I love to paint. I’ve been painting on glass for many years, but as I get older it’s becoming more difficult so I’m working with different items; wood, metal etc. I bought a large piece of canvas (about a year ago) and haven’t done anything with it. Now you have given me ideas. I know this would be so easy to work on. Thank you Katie 🙂
Hi Carol,
Oh I am so glad you stopped by! I hope you have a chance to try this little guy out! <3