
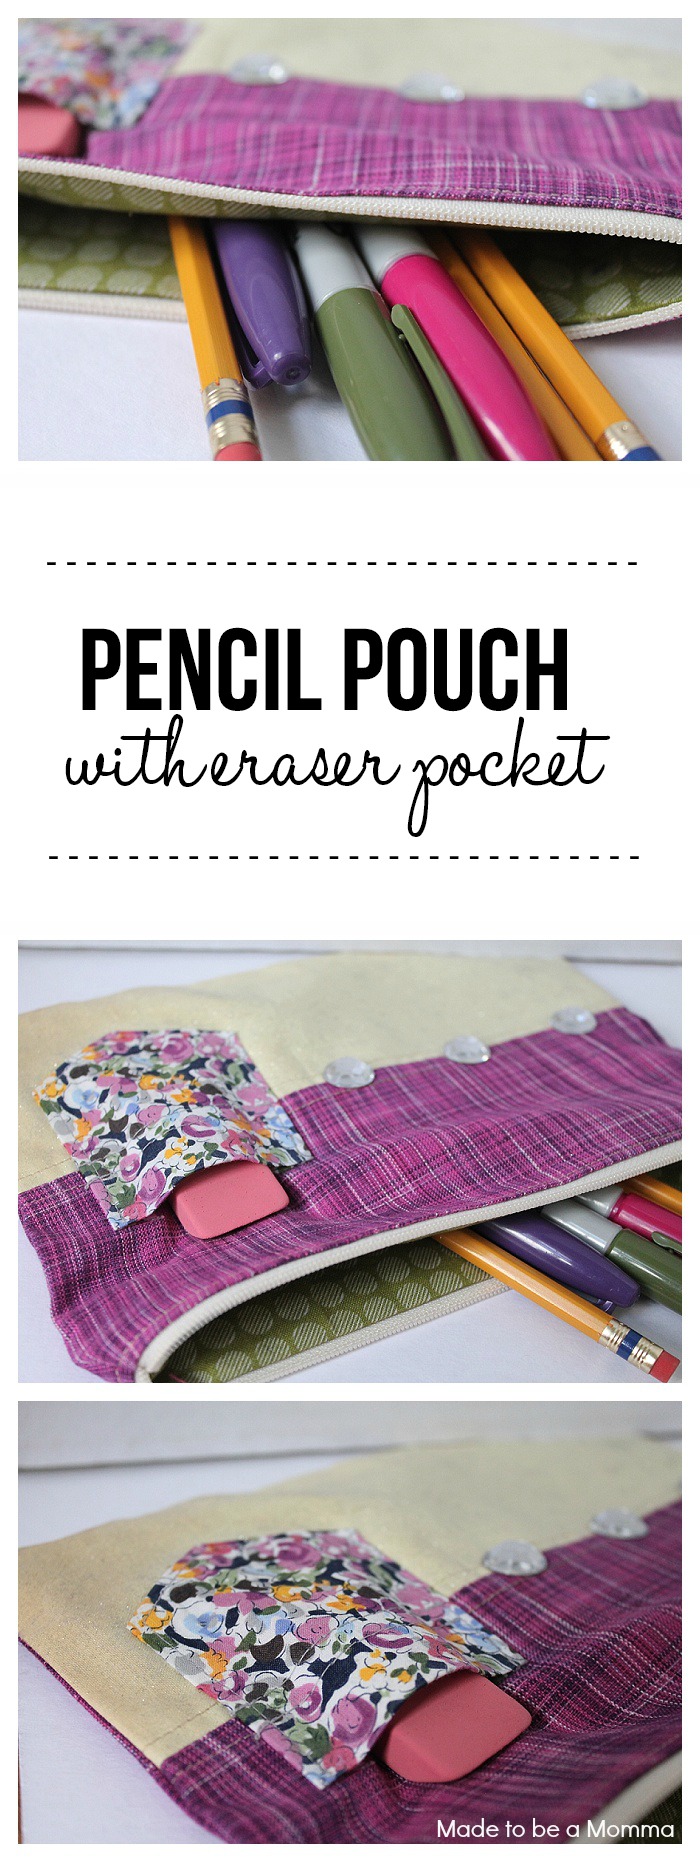
Pencil Pouch with Eraser Pocket
As an Amazon Associate I earn from qualifying purchases.
One of my favorite summer activities to do when I was a kid was to go school shopping-not necessarily because I wanted to go back to school but because I just love school supplies. It was always so fun picking out character folders and colorful notebooks! I was sent a mystery box from Joann.com and was asked to create something to be part of the Back to School Big Bling set! I recieved a fun box with my name on it and three craft supplies– Glitter Fabric Spray, Rhinestones and an iron on pocket. I totally forgot to take a picture before I tore into my box–I was a little excited 🙂 I’m a little obsessed with pouches, purses and makeup bags so I thought making a Pencil Pouch with an Eraser Pocket was just what I needed 🙂
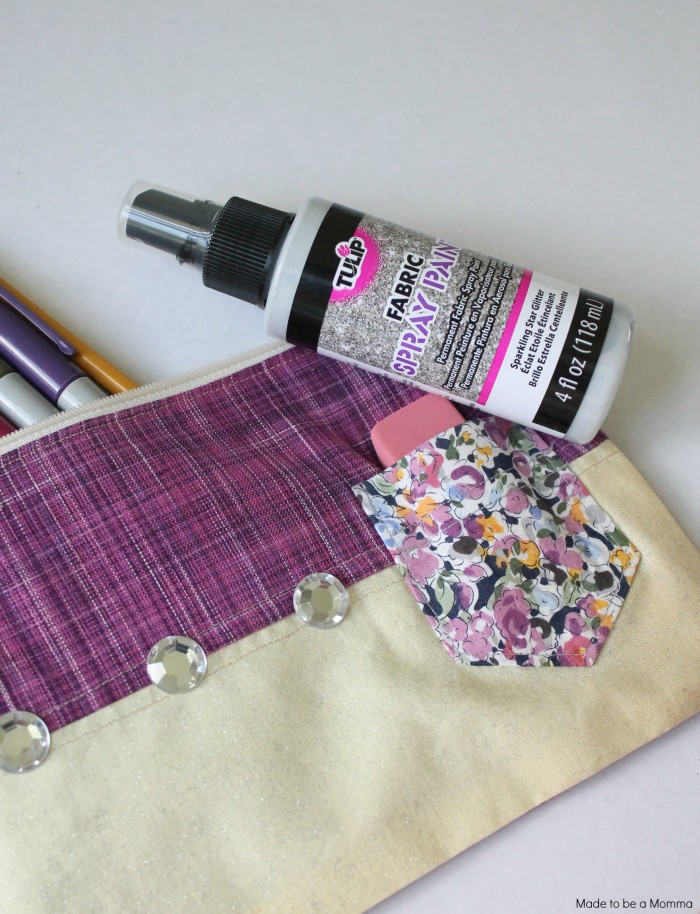
I have never worked with the glitter fabric spray paint so I was excited to see what it could do! I wish the glitter showed up in the pictures better because it’s such a fun touch!
Materials:
For the front piece you will need (2) 3 in. x 10 in. pieces. As you can see I used two different fabrics for my front pieces to add some color to the front. If you want to do just one solid piece just cut out one piece that is 6 in. x 10 in.
For the back piece you will need one cut of 6 in. x 10 in. You will also need (2) lining pieces that are also cut at 6 in x 10 in.
Zipper
Fabric Glitter Spray
Rhinestones
After your cut all of your pieces, decide where you want to spray your fabric glitter. I decided to spray the bottom half of my front piece. You could definitely do the whole thing and it would look awesome! After your spray your fabric, you do need to let it dry for a few hours.
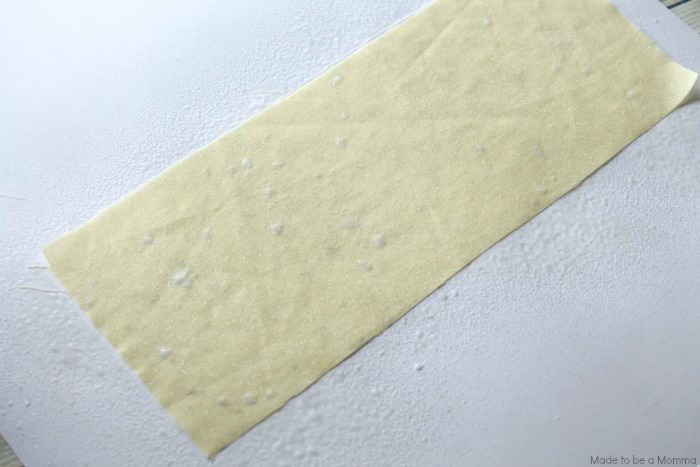
It dried so nicely and adds such a fun touch of sparkle! Perfect for any girl!
Now…let’s assemble our pieces.
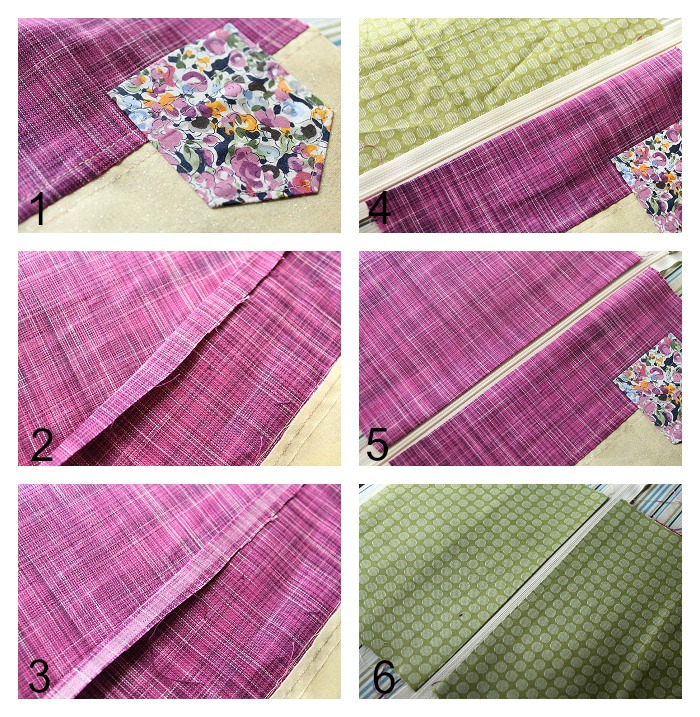
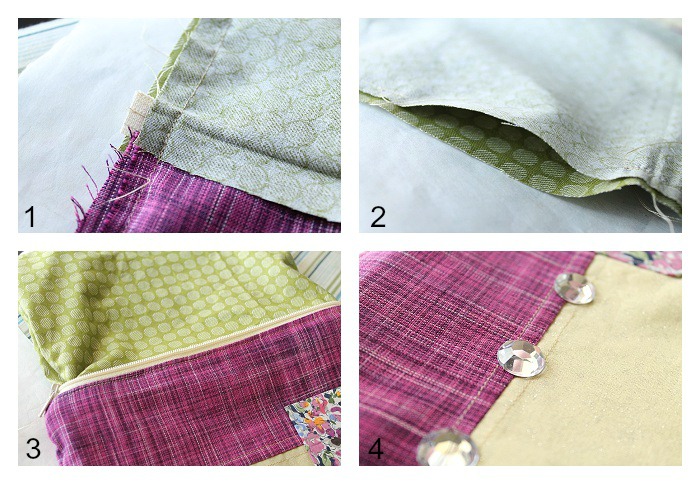
1. If you are make your pencil pouch to have two front pieces like I did, you need to lay the two pieces right sides together and sew down the long side. Open up and top stitch on either side of the two pieces of fabric. Now you should have one front piece. Following the directions of your iron on pocket package you can now iron on your pocket. You could also do this step last 🙂
2. Fold over the top end of your front piece 1/4in – 1/2 in and apply a strip of steam a seam, which is an adhesive tape that you can iron on.
3. This is how the steam a seam looks like after your iron it on. 🙂
4. Lay your folded edge with the steam a seam on top of your zipper( being careful to not cover the zipper teeth) and press with a hot iron until the fabric adheres to the zipper.
5. Repeat step 4 for the back pencil pouch piece.
6. Turn your zipper so the zipper pull is facing down and repeat step 4 with your two lining pieces. Top stitch ( or sew near the zipper) on both sides of the zipper. You don’t necessarily have to sew on either size but I like the extra security.
1. & 2 -Take your four pieces and match them right sides together ( your two lining pieces should be laying together and your two outside pieces should be together) Sew all the way around, making sure you leave a 2-4 in. gap at the bottom of your lining piece for turning.
3. – Turn your pencil pouch right side out. Before you push your lining into your bag make sure you sew the opening closed.
4. Add your rhinestones and admire your blingy pencil pouch 🙂
I know the directions can seem a little intimidating but I promise this is so simple! Please leave a comment below if you have any questions!
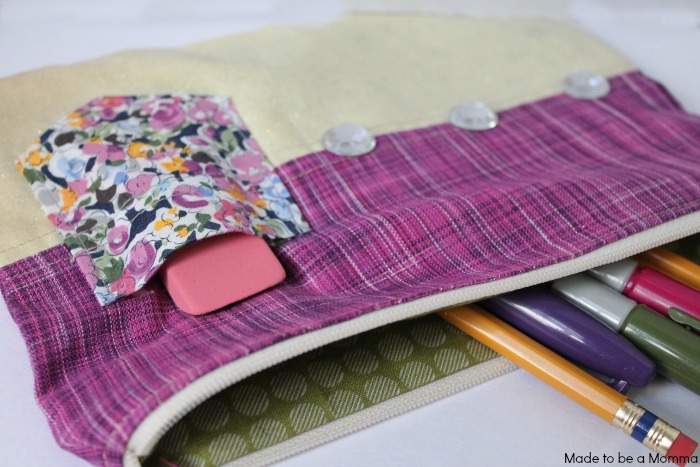
I just LOVE the little pocket! It’s nice and small and holds the eraser snug. The pocket would be great for lipgloss and other small things. This pencil pouch is perfect for little kids, tweens and teens. It can hold crayons, markers, tissues, calculators…whatever they might need to carry around with them. It’s even great for moms to carry things around in your purse. I know I can always use extra organization!
Make sure you check out the hashtag #TheBigBling and all social medias for more fun back to school ideas!
*I recieved compensation to create this project but all opinions are 100% mine own. I only share products I truly love!


Cute!! I love the little pocket! I’ve got a Craft Gossip post scheduled for later this morning that links to your tutorial:
http://sewing.craftgossip.com/tutorial-pencil-pouch-with-eraser-pocket/2014/08/08/
–Anne
I want to make one for myself! Thanks so much for sharing the tutorial!