Diy Painted Mugs
As an Amazon Associate I earn from qualifying purchases.
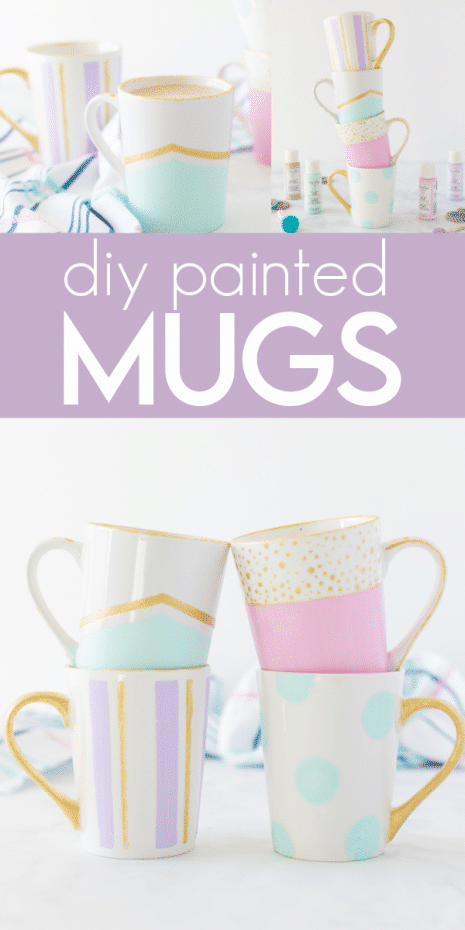
DIY PAINTED MUGS are a fun and simple DIY craft, perfect to make for gifts. You can make these painted mugs to be used to enjoy coffee and tea, or be decorative and fill with candy!
DIY PAINTED MUGS
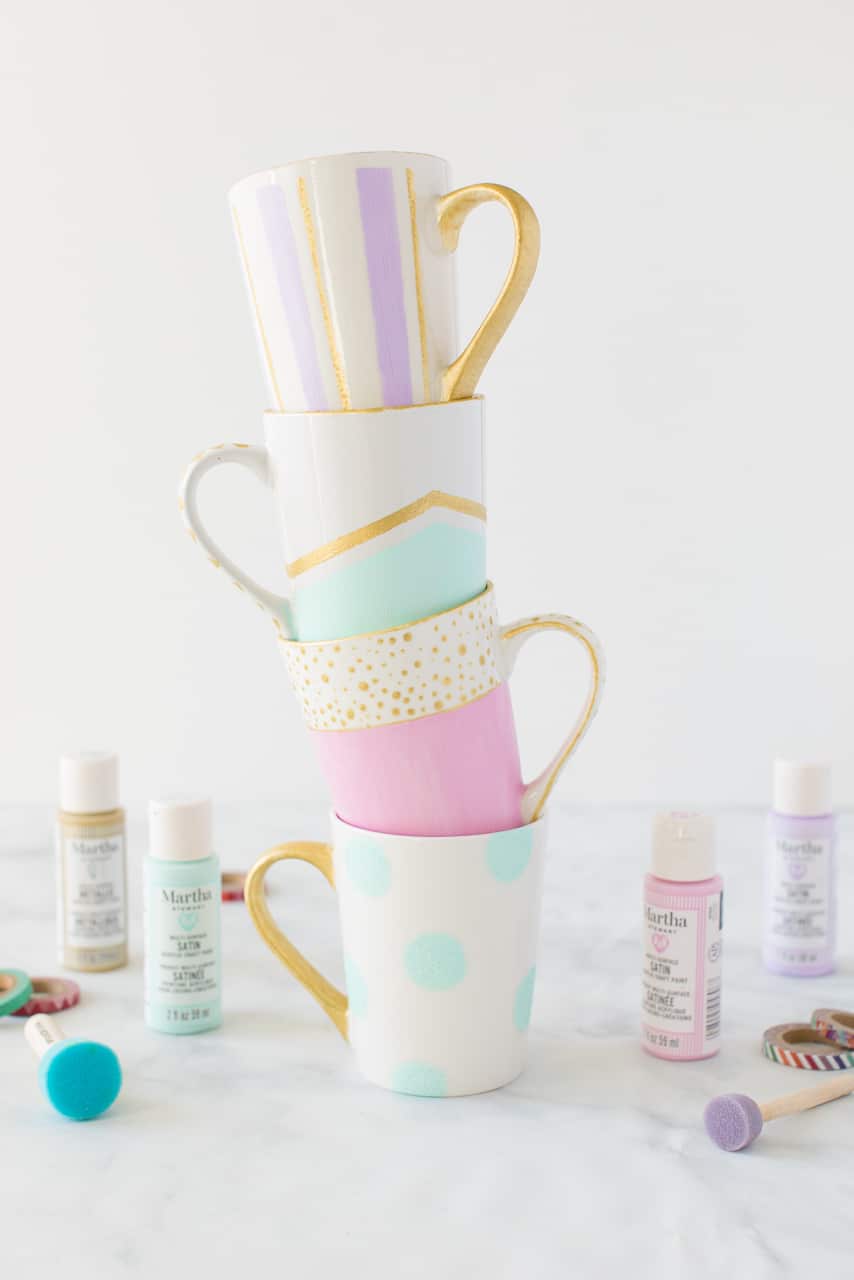
I have been wanting to try my hand at crafting a painted mug and I finally got a chance to do it! I haven’t tried washing these mugs in the dishwasher but they have held up great just being hand washed! The trick to painting mugs that will last while washing is to buy the correct paint and to allow the proper dry time, following what your particular paint directs. I have found the best results with Martha Stewart MULTI PURPOSE PAINT.
SUPPLIES:
- White Coffee Mugs
- Martha Stewart Multi Purpose Paint, or other brands that work on ceramics.
- Washi Tape – I used two thin pieces of washi tape to create my stripe between the two colors.
- Small foam stippler/dopper
FAQ’S FOR PAINTED MUGS
What is the curing time for my painted mugs?
The Paint will be permanent after air-drying for 21 days for most surfaces. For the best possible adhesion to your ceramic mug is to allow the item to cure in the oven. Following the MARTHA STEWART MULTI PURPOSE PAINT DIRECTIONS BELOW:
- Allow painted item to dry for a full 24 hours before curing in the oven.
- Place project in a cool oven, so that it will heat gradually with the oven to avoid it breaking; do not place it directly in a hot oven.
- Set oven temperature to 350ºF.
- Once temperature has reached 350ºF, allow the project to bake for 30 minutes.
- After 30 minutes, turn the oven off and let glass cool down completely before removing from the oven.
- Do not use for 72 hours.
PRO TIP: GLITTER paints must be air cured.
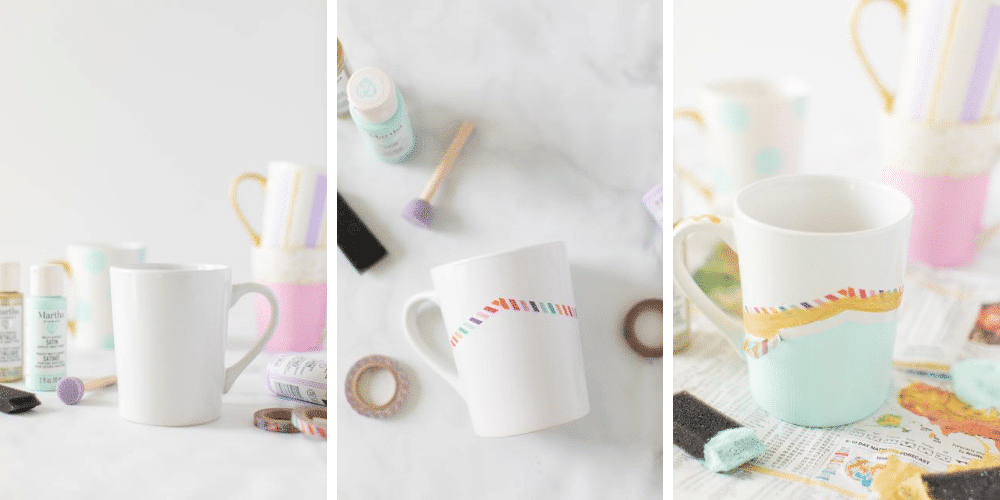
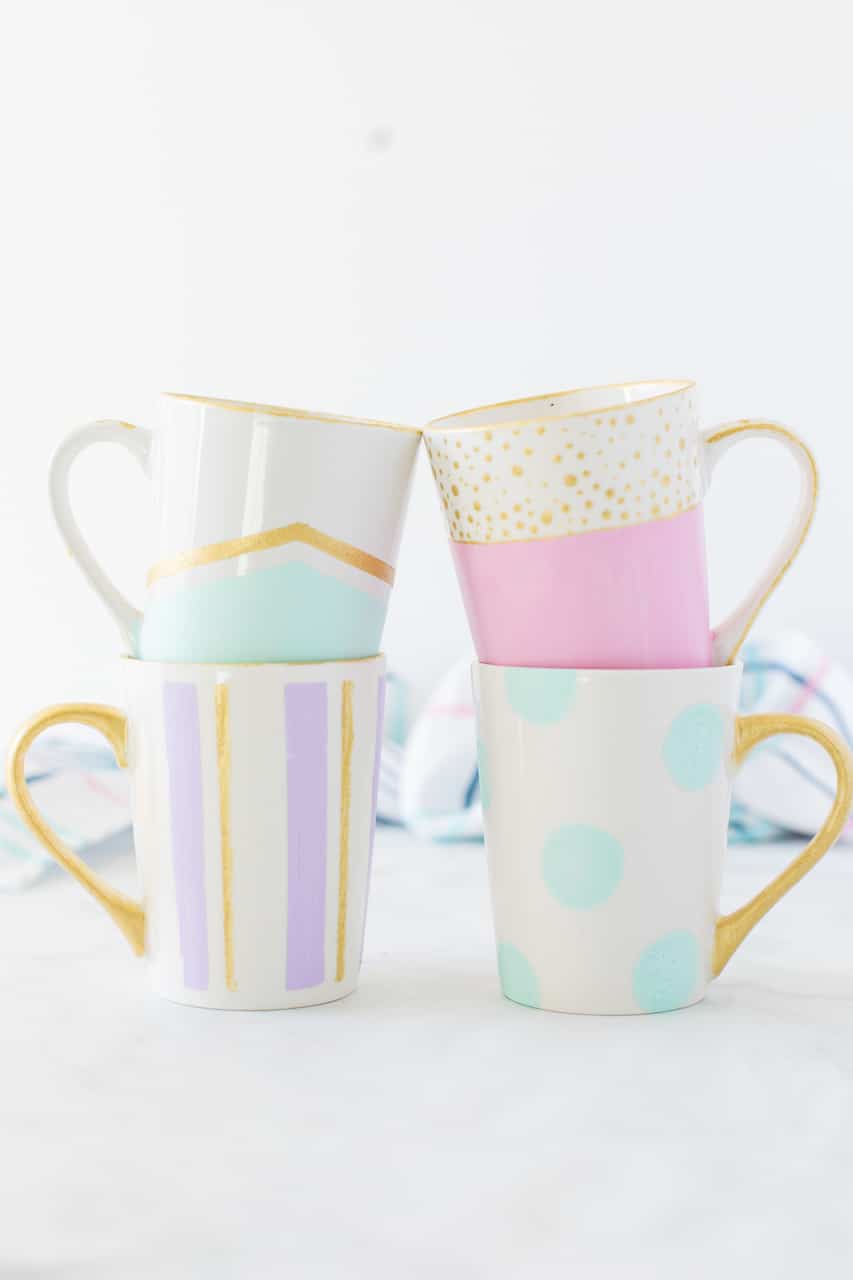
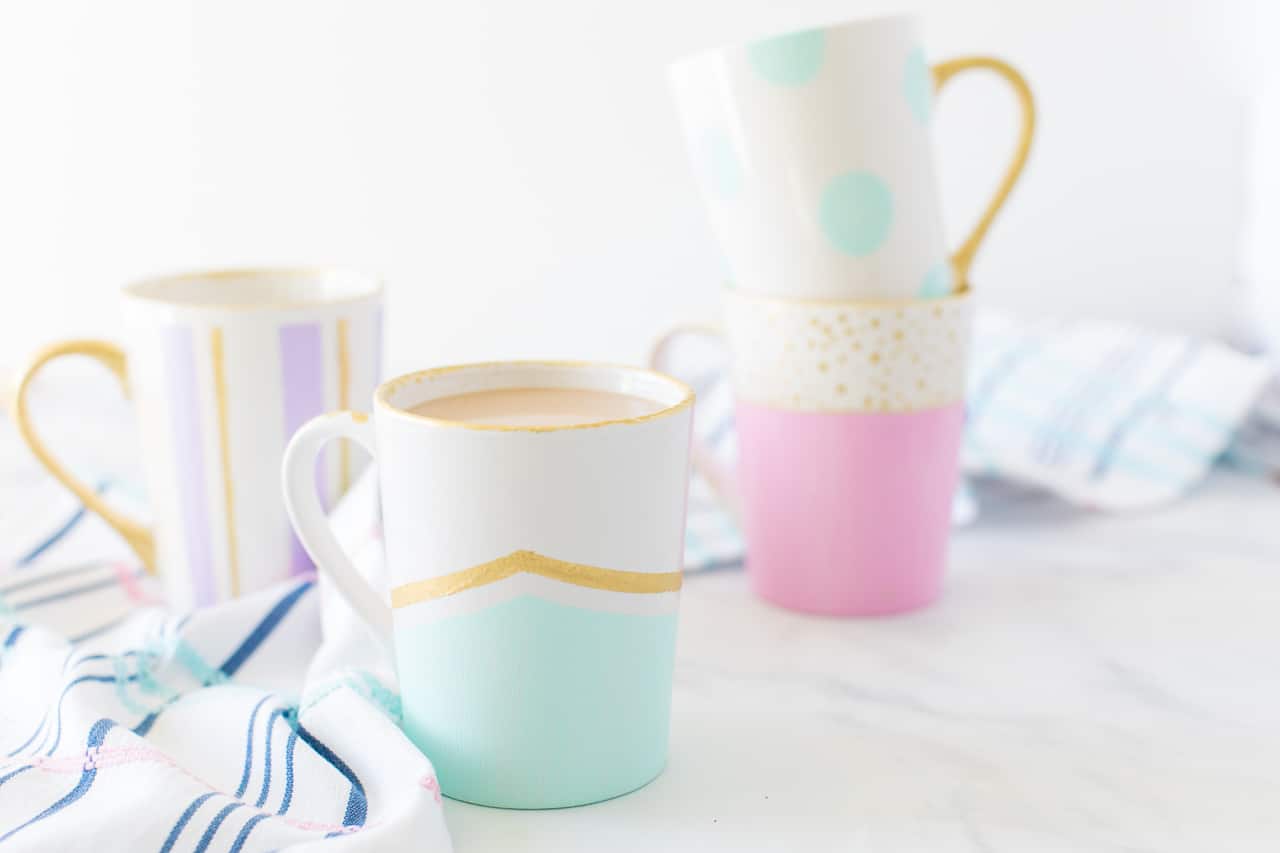
HOW TO MAKE DIY PAINTED MUGS
- Add your washi tape if using to create a “stencil” or an area to mark off where you want to different colors to be.
- Use a small brush to paint your stencil.
- Once finished and the paint is slightly dry, peel off your tape. You don’t want to wait until the paint is dry or it will peel off with the tape.
- Follow the directions of your paint bottle for baking and drying time, or follow the directions above.
- For the polka dot mug I used a circle sponge brush to apply the turquoise dots and painted the handle.
PRO TIP: When making these painted mugs you need to decide if you plan to use these with drink or food or just as decorative. If you plan to use these mugs with food and drink you will want to make sure you only paint towards the bottom of the mugs or leave a space near the rim where food or lips won’t touch. While the Martha Stewart Paint is non toxic you will want to avoid having it near food.
This post has been updated on July 26th, 2020 with new photos and updated and current instructions.

So cute >.<
I know in your original post you said you weren’t sure if they were dishwasher safe. Have you done any test runs yet?
Hi Erika! I have not done many test runs. I would be sure if you have to put it into the dishwasher to only put it on the top rack but just to be sure nothing happens but I I would personally recommend just sticking with hand washing 🙂
I know Im a little late because this is from last month, but I have a few questions. Im wondering if I can do this on plates and bowls and they still be safe to eat from. Can I bake it in my own oven or do I need a kiln? Lastly, are they dishwasher safe?
I have been trying for years to find a dish pattern to match my theme and Im never satisfied with what I find. Thanks for your time!!
Love these cups! I shared this post on my blog’s facebook and twitter page!
https://www.facebook.com/HomeIsWhereIBelong
These mugs are so cute! I love the colors you chose to use. I’m a polka dot lover, so those are my favorites. Might just have to make some of these for myself ASAP.
I’d be thrilled if you’d link up at this week’s Off the Hook!
This looks fantastic! I would love it if you joined and contribute your awesome posts at my link party at City of Creative Dreams on Fridays 😀 Hope to see you there at City of Creative Dreams Link Party .
Hi! These are so cute! Are they able to be washed and actually used or are they just for decoration?
These mugs are so pretty and would make great gifts! I’d LOVE to see you link them up at my Skip The Housework Party! http://www.reasonstoskipthehousework.com/skip-housework-saturday-11/
wow great job Katie, I like the stripe mug a lot, you should probably sell these on your site. Keep up the good work.
These turned out so adorable!! Love the colors, too.
They were so fun to make Amy! Thanks for stopping by!
Cute!!! Such a fun color combo!
Thanks so much Chelsea!
These mugs are so pretty. I love the combo of the gold with the mint!
Aren’t those colors great?! They are my newest obsession!
I LOVE this idea! I have been getting into crafting a lot lately and this is such an easy project for me. I am still a novice and so I need these type of easy projects to boost my confidence to bigger projects. One question, can you use any mug or should it be a certain type? Sorry if it’s a silly question….like I said, I’m new to doing these types of things!
There are no silly questions! How great to hear that you are enjoying getting crafty! Isn’t it such a fun outlet? Anyway…I think any mug will do. I bought mine at Walmart that was a little higher quality –I still only spent $3 on it 🙂 but I was afraid a Dollar one wouldn’t bake well…If you just allow the mug to dry for 21 days then it probably does’t matter at all what you use! I hope that helps!
These are so gorgeous Katie! The aqua and gold go great together, and it looks just like you bought them at some cute shop!
Thanks so much!